
In this recipe, we will configure basic aspects of Orchestrator, such as licensing, network, and SSL certificates. It is highly recommended you work through this recipe before continuing on to add an external LDAP or database.
You need an installed and running Orchestrator. You should also be comfortable with using one of the methods described in the Two ways to configure Orchestrator recipe.
These are some basic configurations that have to be done to Orchestrator to make it production-ready. I will describe the use of the Orchestrator Configuration tool as well as the workflow method.
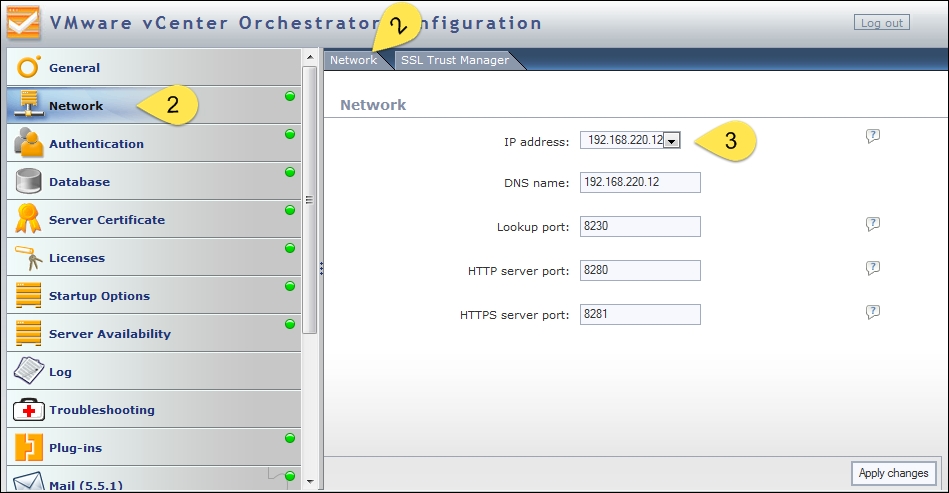
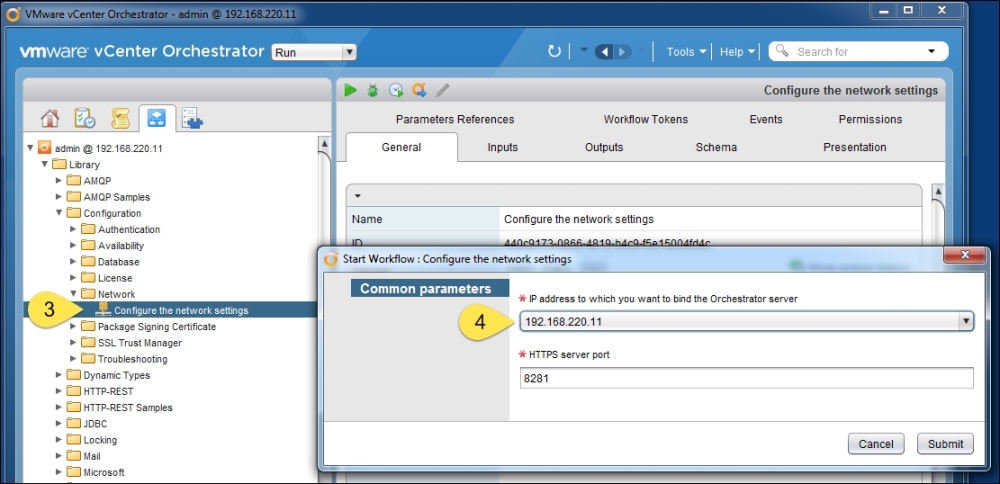
The network setting configures the interface by which Orchestrator communicates and the default is set to 0.0.0.0. You can change it to an IPv4 or IPv6 address. The Windows install has already configured the correct setting and only requires a change if you would like to switch to IPv6.
In order for Orchestrator to connect to any other SSL-based service, the SSL signature of this service has to be added to Orchestrator first. The SSL certificate for the Orchestrator Server itself is discussed in the Configuring the Orchestrator Service SSL certificate recipe in Chapter 2, Optimizing Orchestrator Configuration.

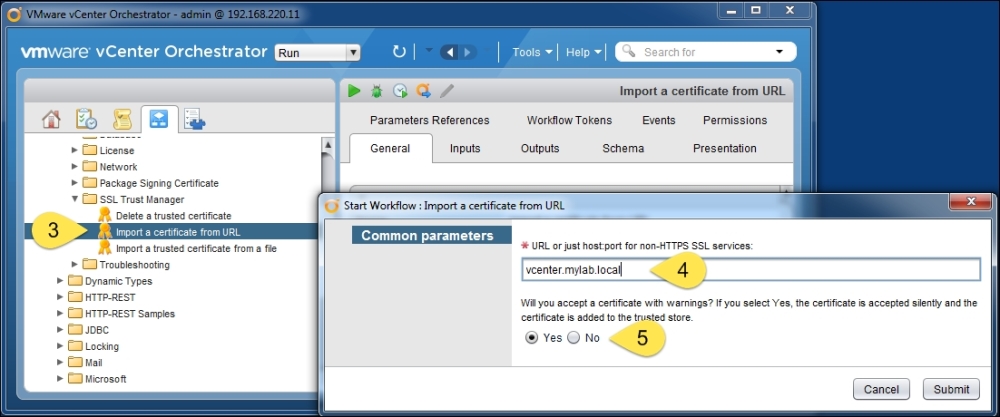
Navigate to Library | Configuration | SSL Trust Manager.
Right-click on the Import a certificate from URL workflow and select Start Workflow.
Enter the URL of the server that you wish to add.
Select Yes to accept the SSL certificate even if there are warnings and click on Submit.
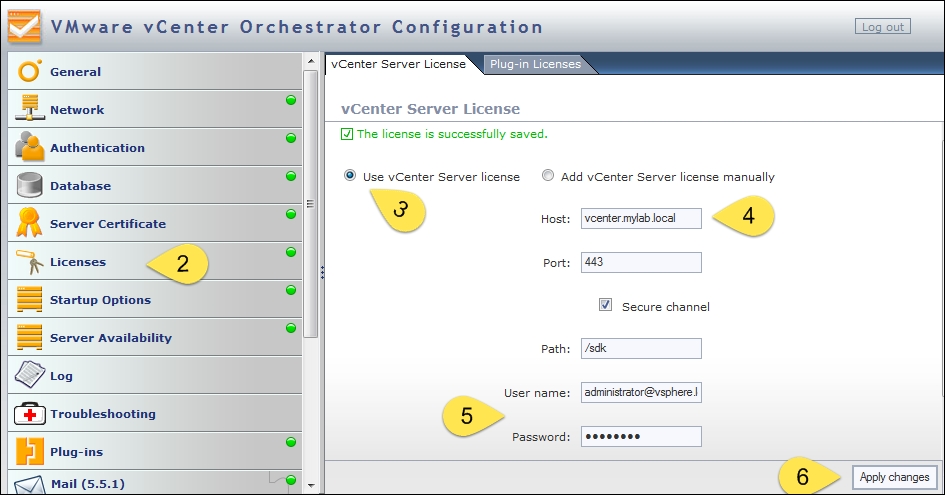
Both the Orchestrator Windows version and the appliance come with a 90-day evaluation license. Orchestrator is licensed with vCenter. The vCenter license key is the Orchestrator license key, and no extra purchase is required. However, if you are using the vCenter Essential license, you can only run workflows; you cannot create or edit them.
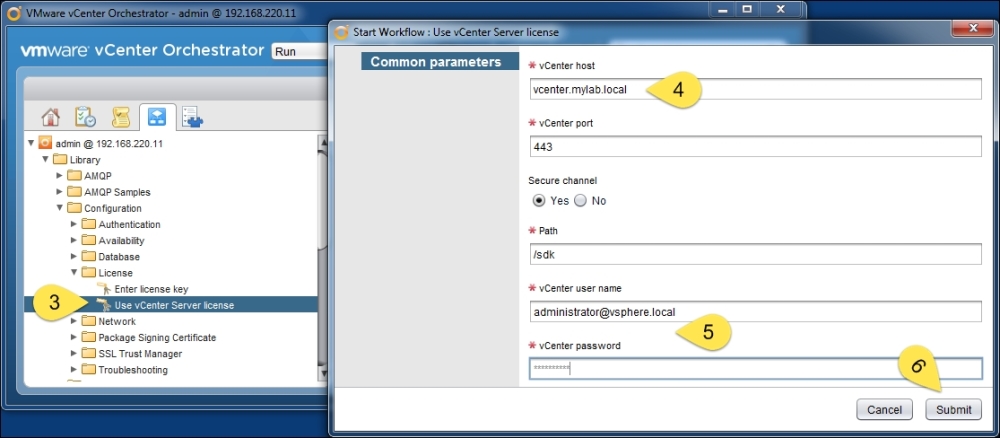
You can either enter a license key manually or connect to the vCenter Server to acquire the license.
Before you begin, add the vCenter SSL Certificate to Orchestrator.
Wait till the workflow has finished successfully.
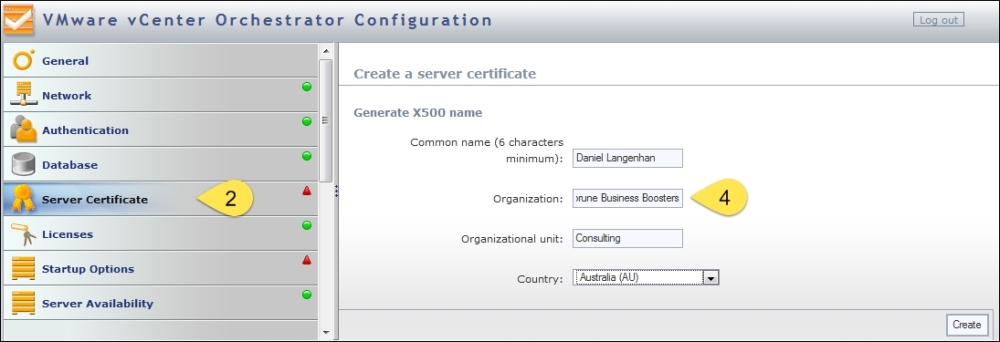
The Server Package Signing certificate is an SSL certificate that is used to encrypt exports from Orchestrator, such as workflows and packages. It makes a lot of sense to at least personalize this with a self-signed certificate but be aware that, once created, it is not so easy to change.
It is not the SSL certificate of Orchestrator Server that is used for communication. The SSL certificate for Orchestrator Server is discussed in the Configuring the Orchestrator Server SSL certificate recipe in Chapter 2, Optimizing Orchestrator Configuration.
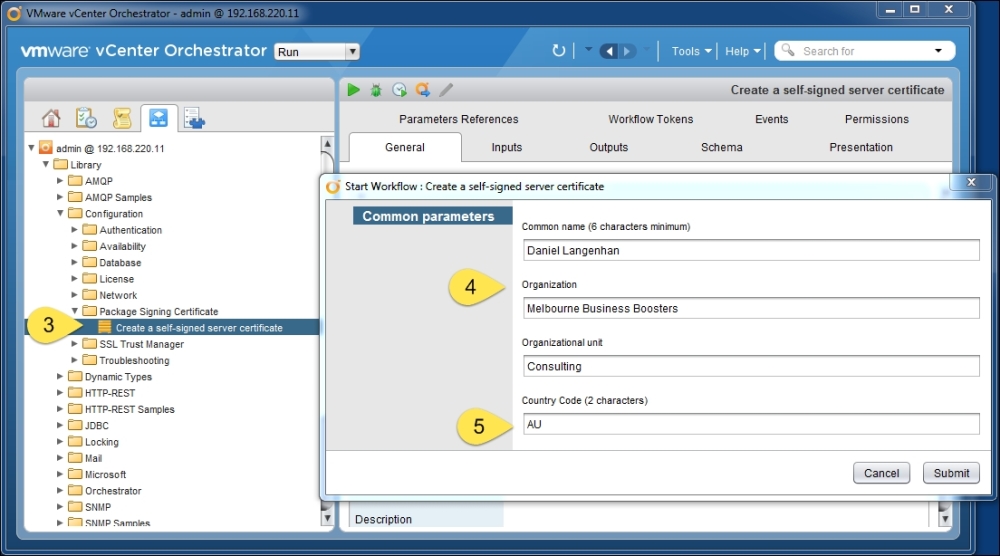
Navigate to Library | Configuration | Package Signing Certificate.
Right-click on the workflow Create a self-signed server certificate and select Start Workflow.
Enter the relevant information.
Choose the two-letter code for your country (search the Web for the SSL certificate's country code) and click on Submit.
Wait till the workflow is successfully finished.
You can see that, for the most part, the workflow method requires the same inputs as the Orchestrator Configuration tool; however, you have probably also noticed that there are not as many options in workflows as with the Configuration tool.
The settings we just applied are important and need to be done in order to make Orchestrator production-ready. The network configuration, the package signing, as well as the licensing need to be done only once. Importing an SSL certificate is an action that we will encounter more often. Every time we want to establish a secure connection (SSL) between Orchestrator and another server, we first have to import this server's SSL certificate.
Please note that, in earlier versions of Orchestrator, you had to restart the Orchestrator Configuration tool or the Orchestrator service after importing the SSL certificate; this is no longer the case.
The SSL certificate we configured here is used to sign exports or packages to be used with other Orchestrator installations. We will work with exports and imports in the Importing and exporting Orchestrator elements recipe in Chapter 5, Basic Orchestrator Operations. In the Working with packages recipe of that chapter, you will find some more detailed information about how to manage and use this SSL certificate.
At the time of writing of this book, there is a small bug that appears from time to time with the network configuration. When using the appliance and changing the network setting to anything else but 0.0.0.0, some things, such as the Orchestrator home page, won't work anymore. To fix the problem, check out this VMware community article available at https://communities.vmware.com/thread/477955.
Have a look at the Backup and recovery recipe in Chapter 2, Optimizing Orchestrator Configuration, to learn how to export and import the configuration.