

In this section, we will show you how to write and execute unit tests for an analyzer project.
You will need to have created and opened an analyzer project, say CSharpAnalyzers in Visual Studio 2017. Refer to the first recipe in this chapter to create this project.
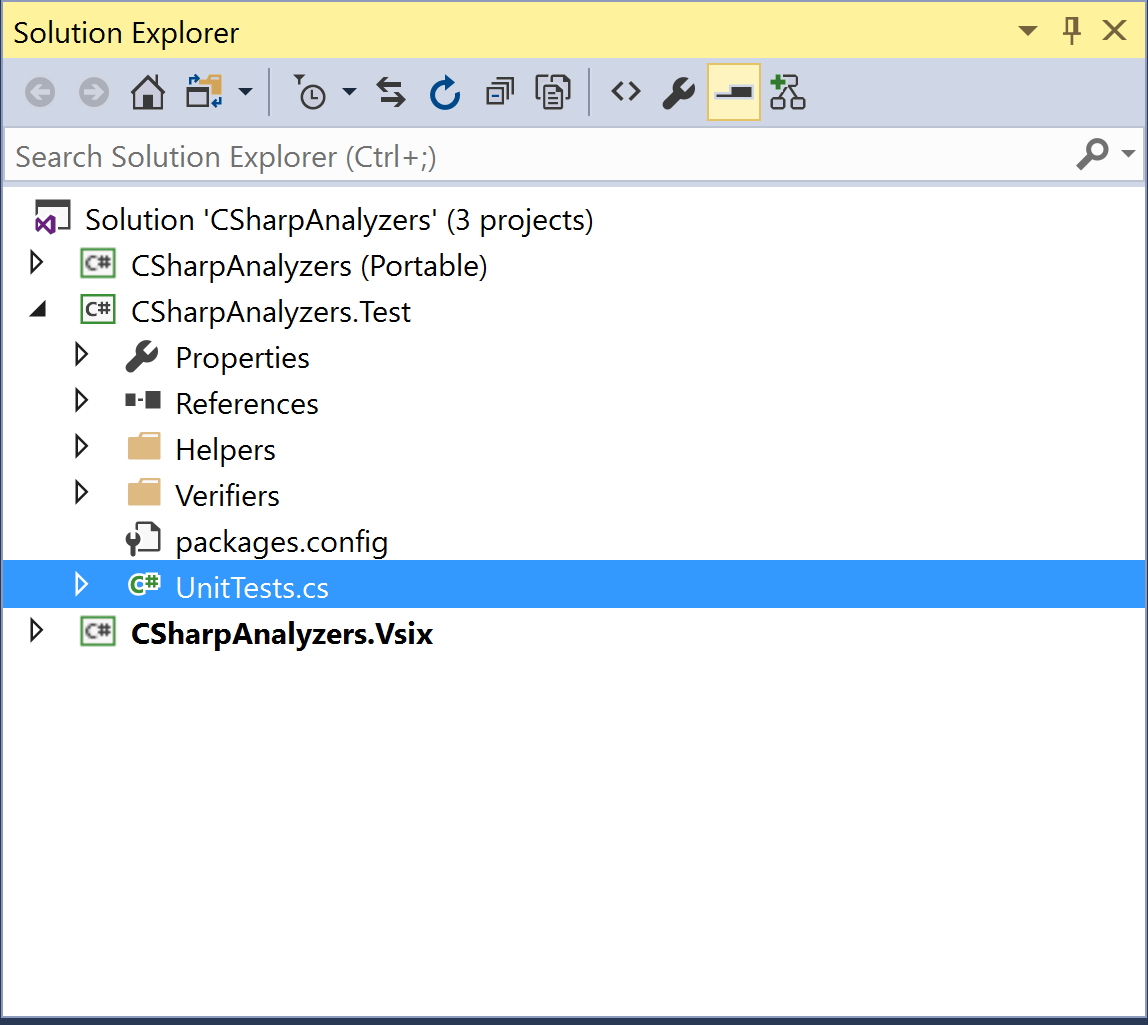
- Open UnitTests.cs in the
CSharpAnalyzers.Testproject in theSolution Explorersolution to view the default unit tests created for the default symbol analyzer (type names should not contain lowercase letters) for the template analyzer project.
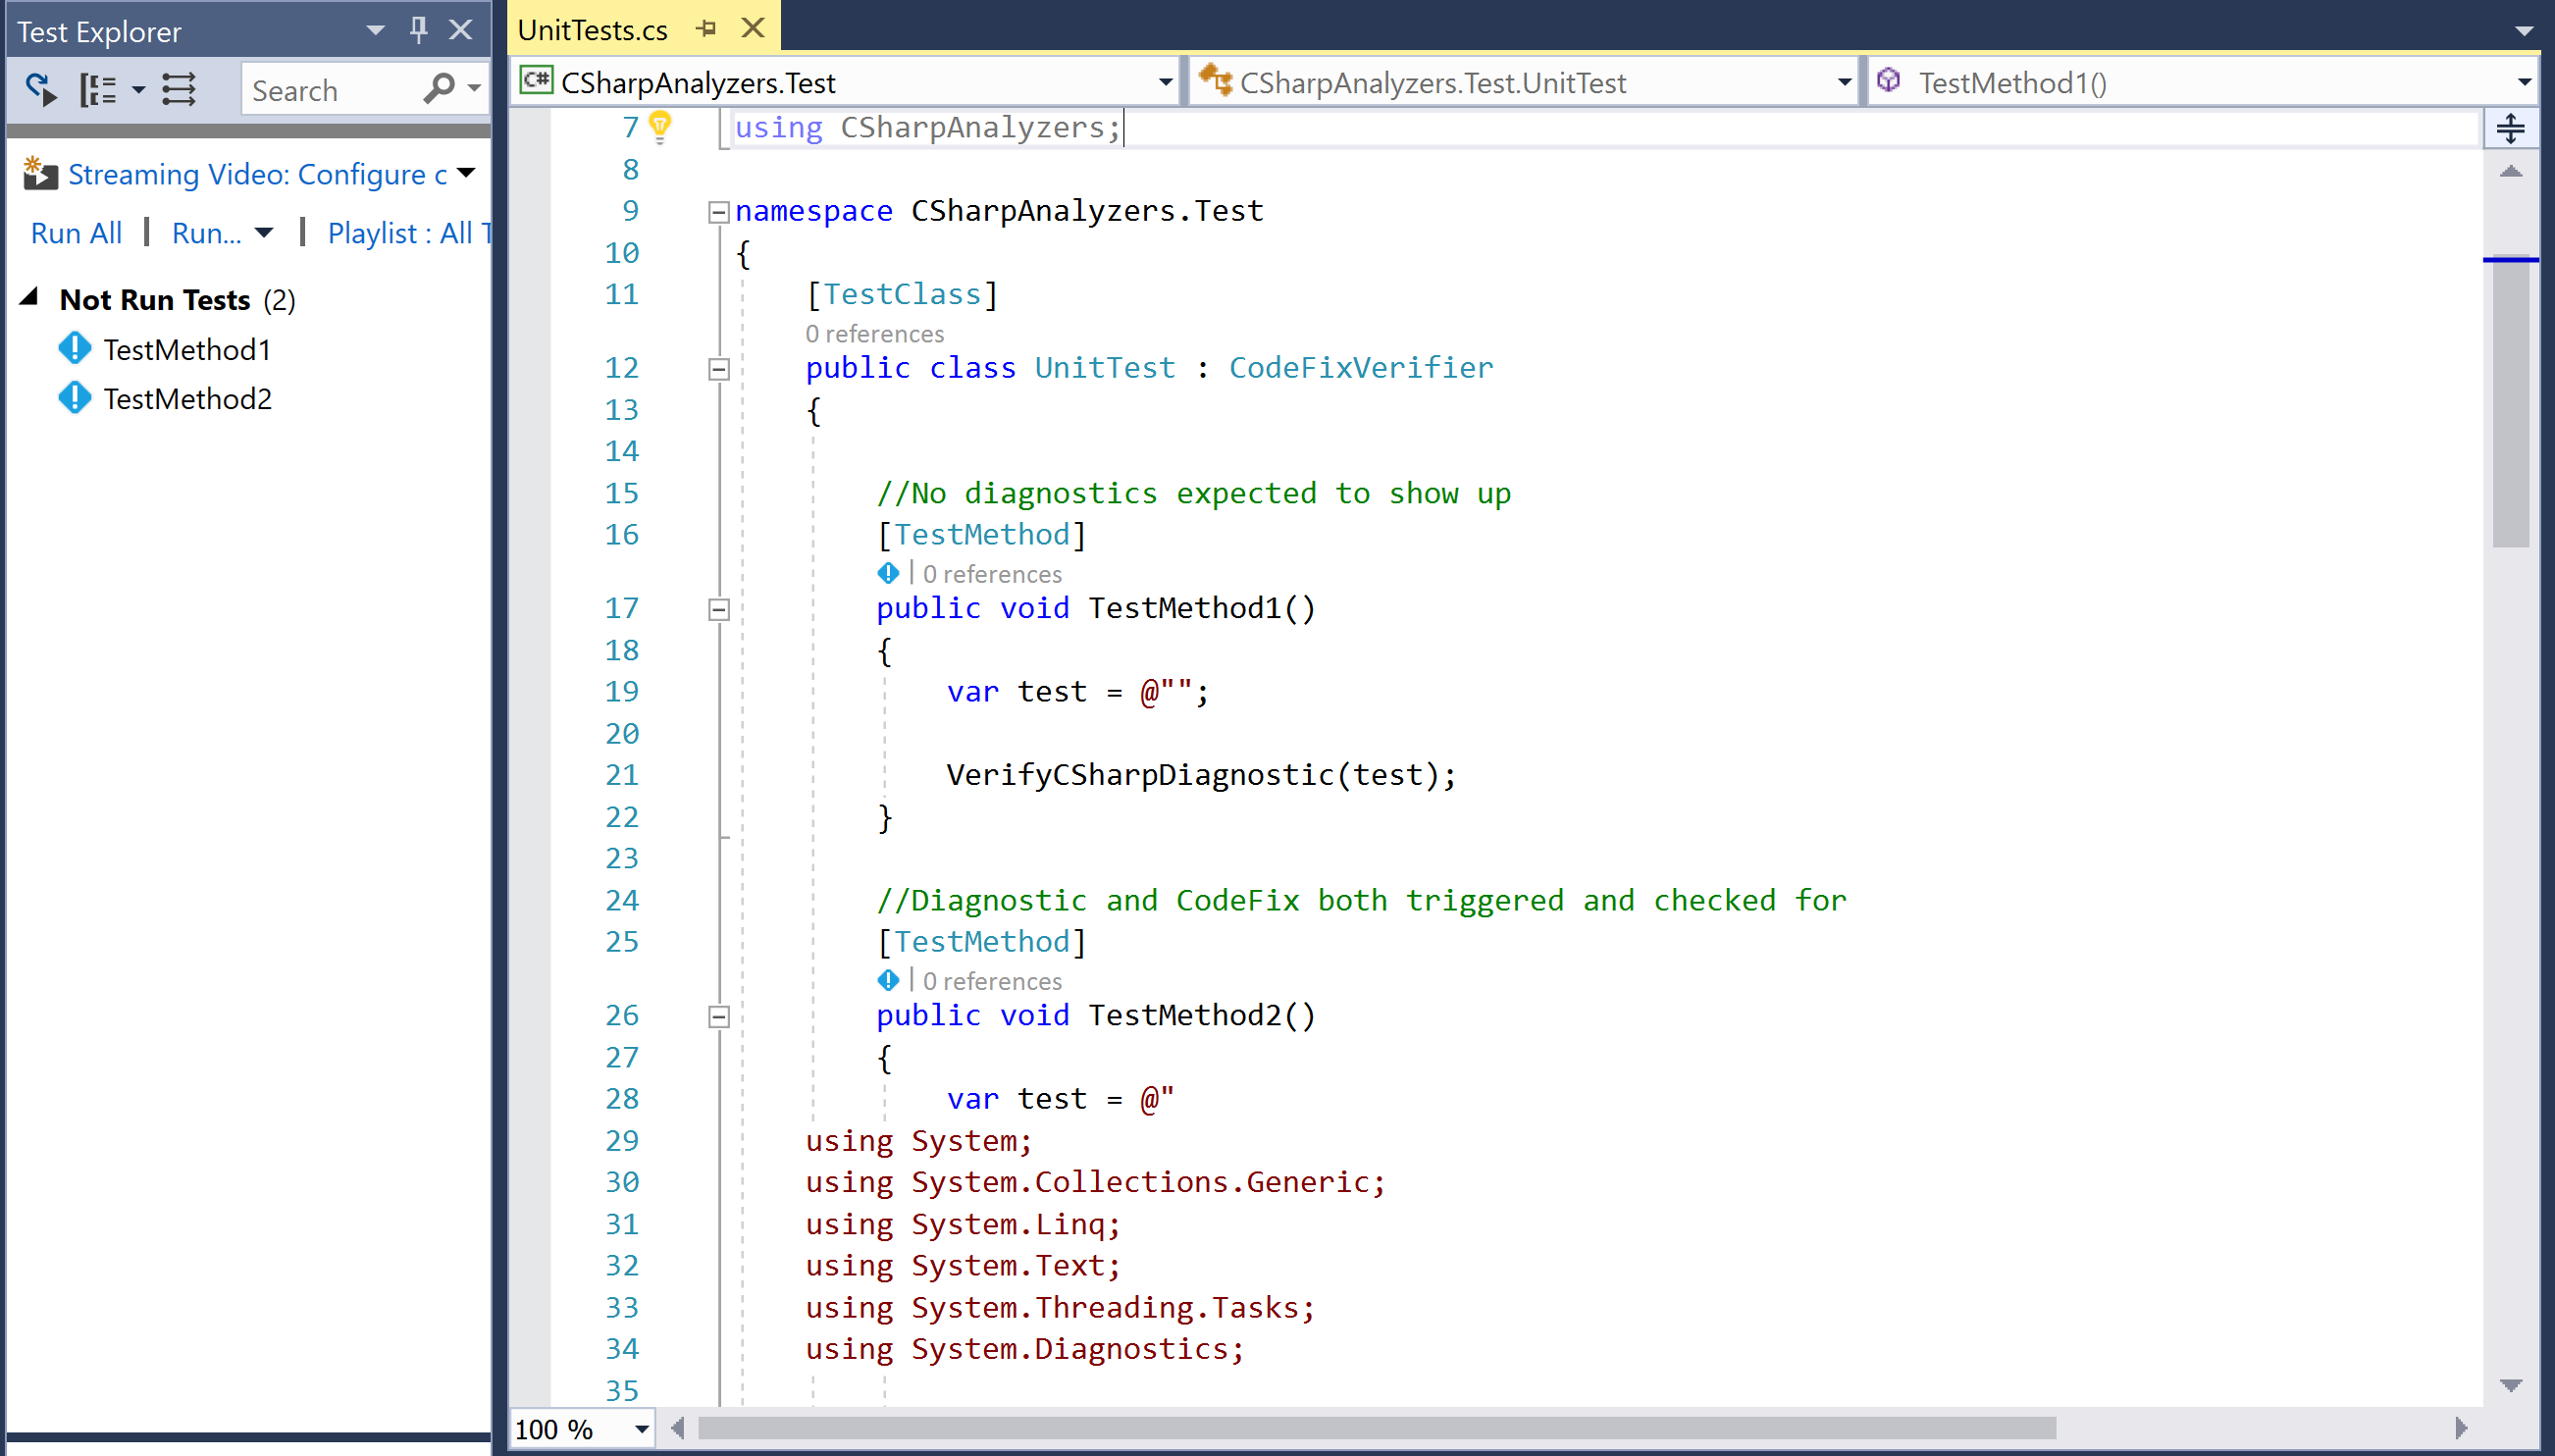
- Navigate to
Test|Windows|Test Windowto open theTest Explorerwindow to view the unit tests in the project. Default analyzer project has two unit tests:TestMethod1: This tests the scenario where analyzer diagnostic does not fire on the test code andTestMethod2: This tests the scenario where analyzer diagnostic does fire on the test code.
Note
Note that the unit test project contains unit tests for both the DiagnosticAnalyzer and CodeFixProvider. This chapter deals with analyzer testing only. We will expand on the unit tests for the CodeFixProvider later in this book.
- Run all the unit tests for the project by right-clicking
Not Run testsnode in theTest Explorer, executing theRun selected testscontext menu command, and verify that the tests pass.
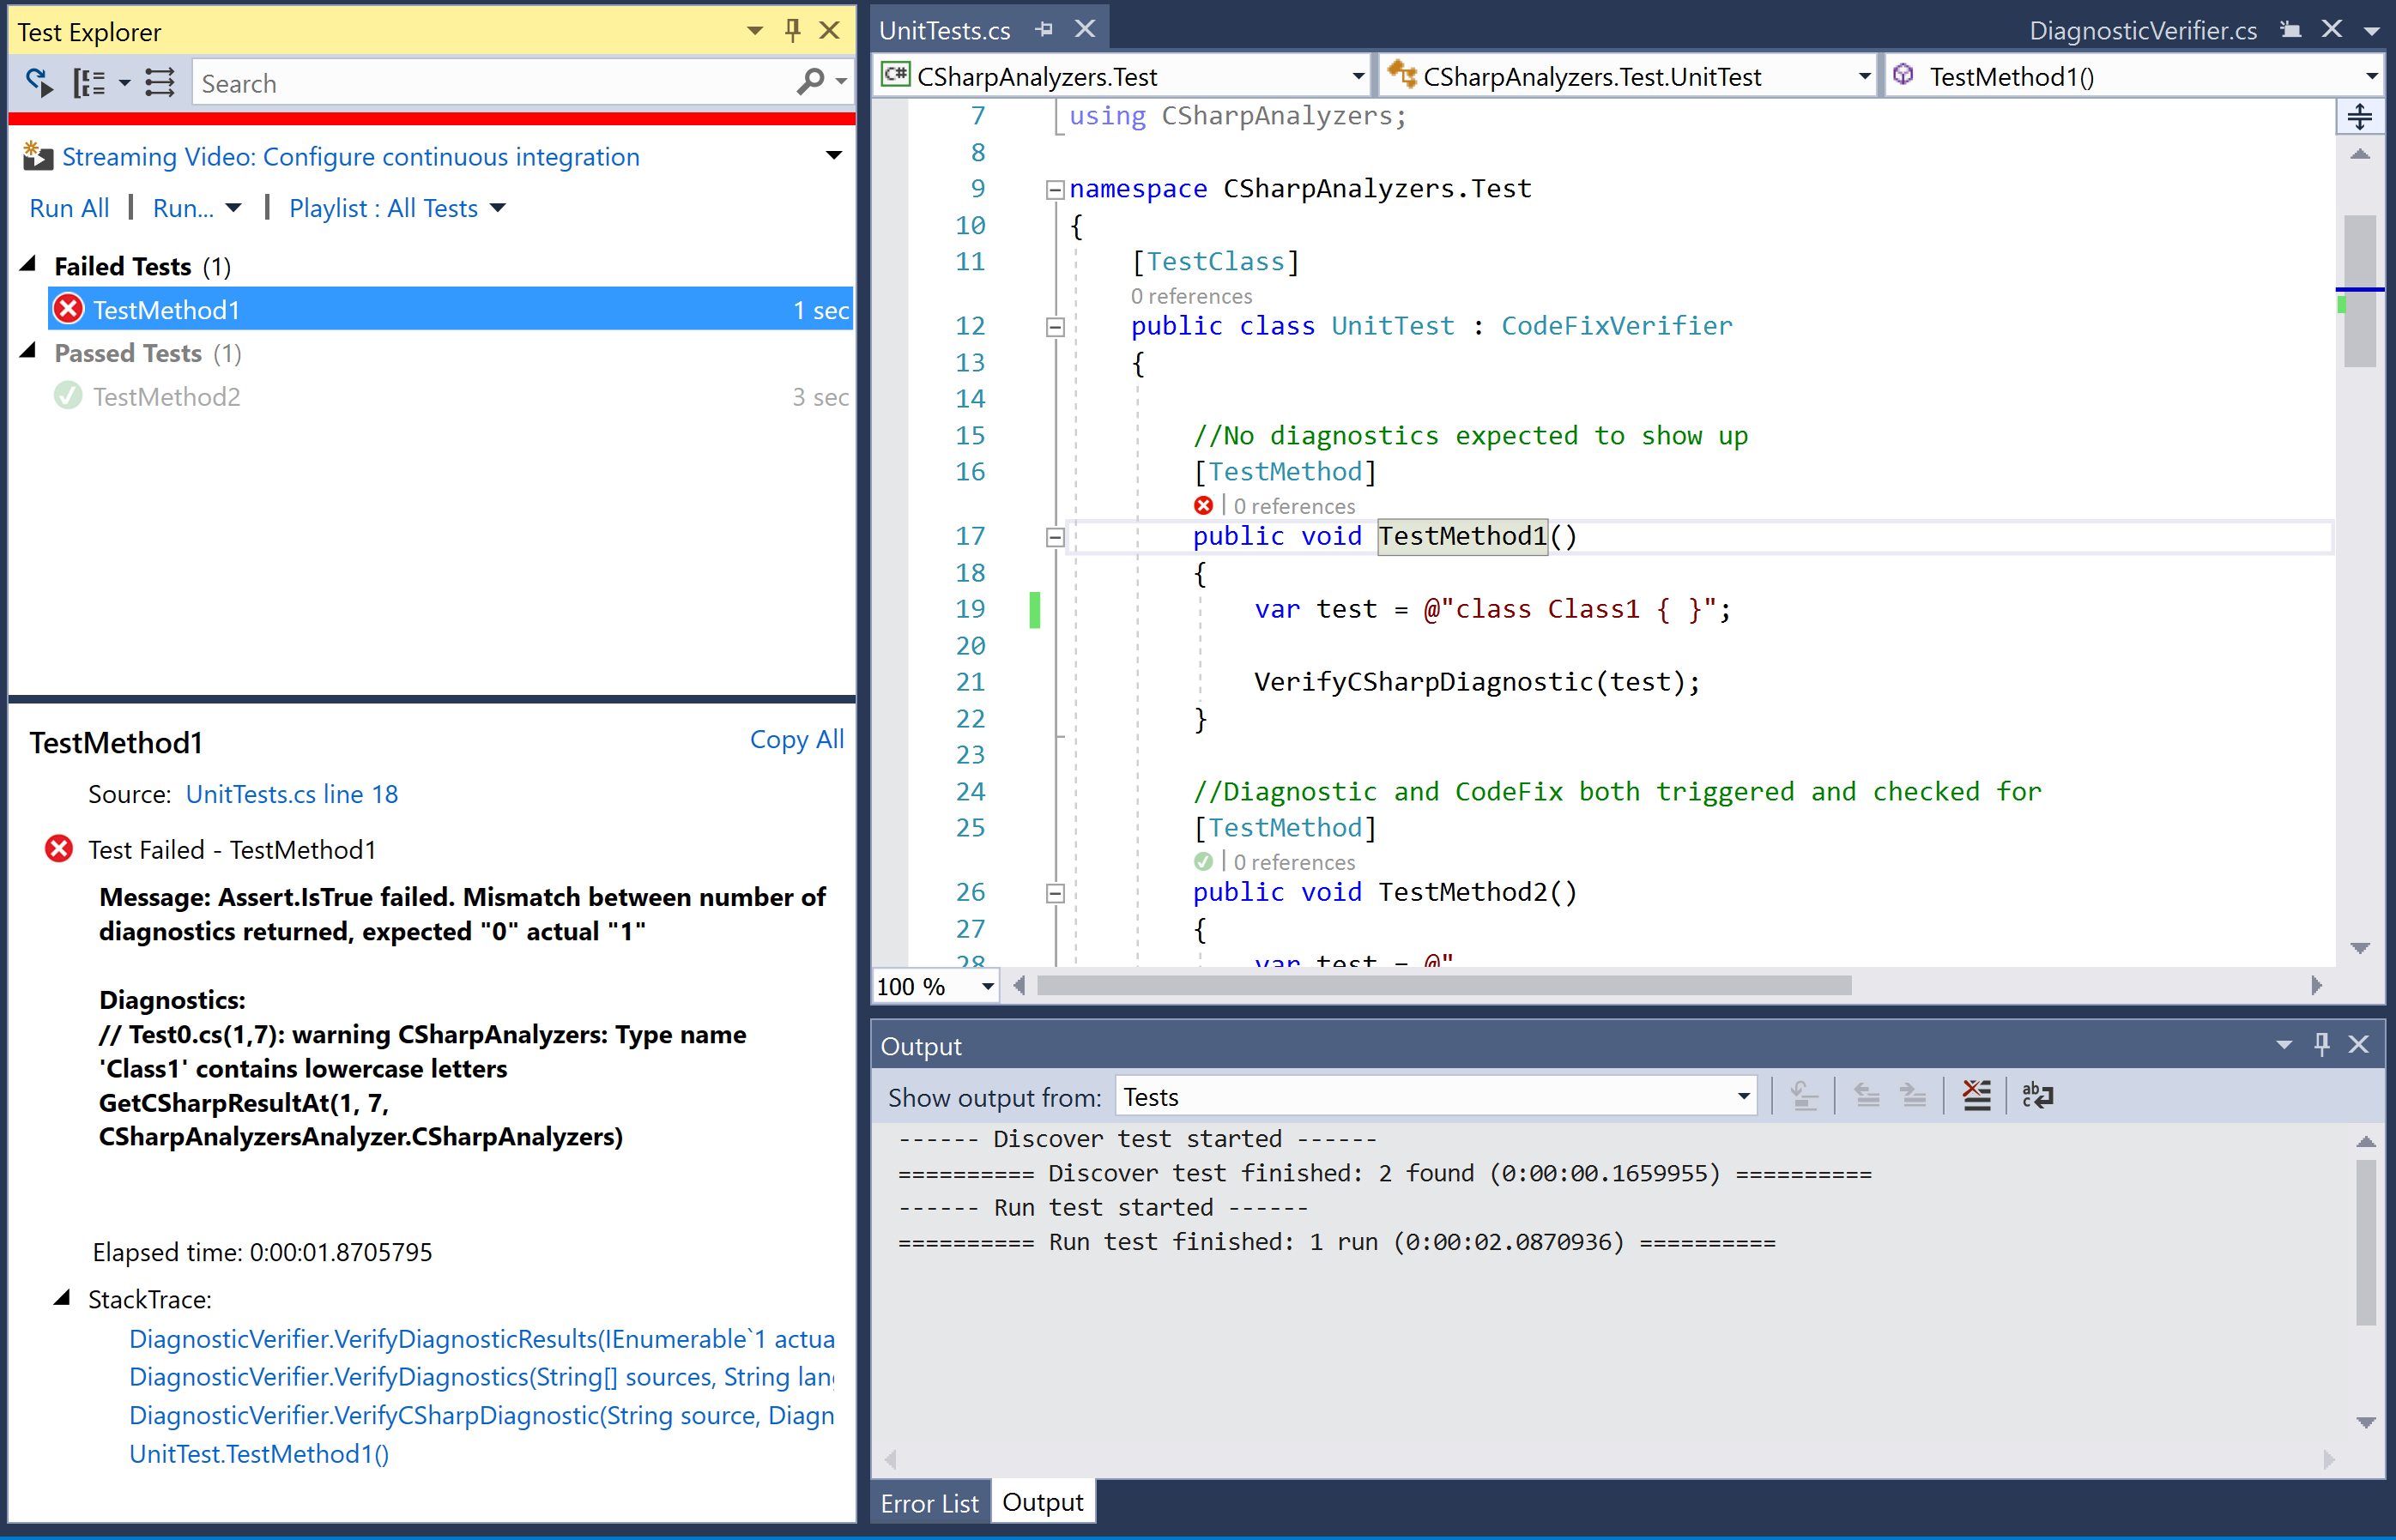
- Edit
TestMethod1so that the test code now has a type with lower-case letters:
[TestMethod]
public void TestMethod1()
{
  var test = @"class Class1 { }";

  VerifyCSharpDiagnostic(test);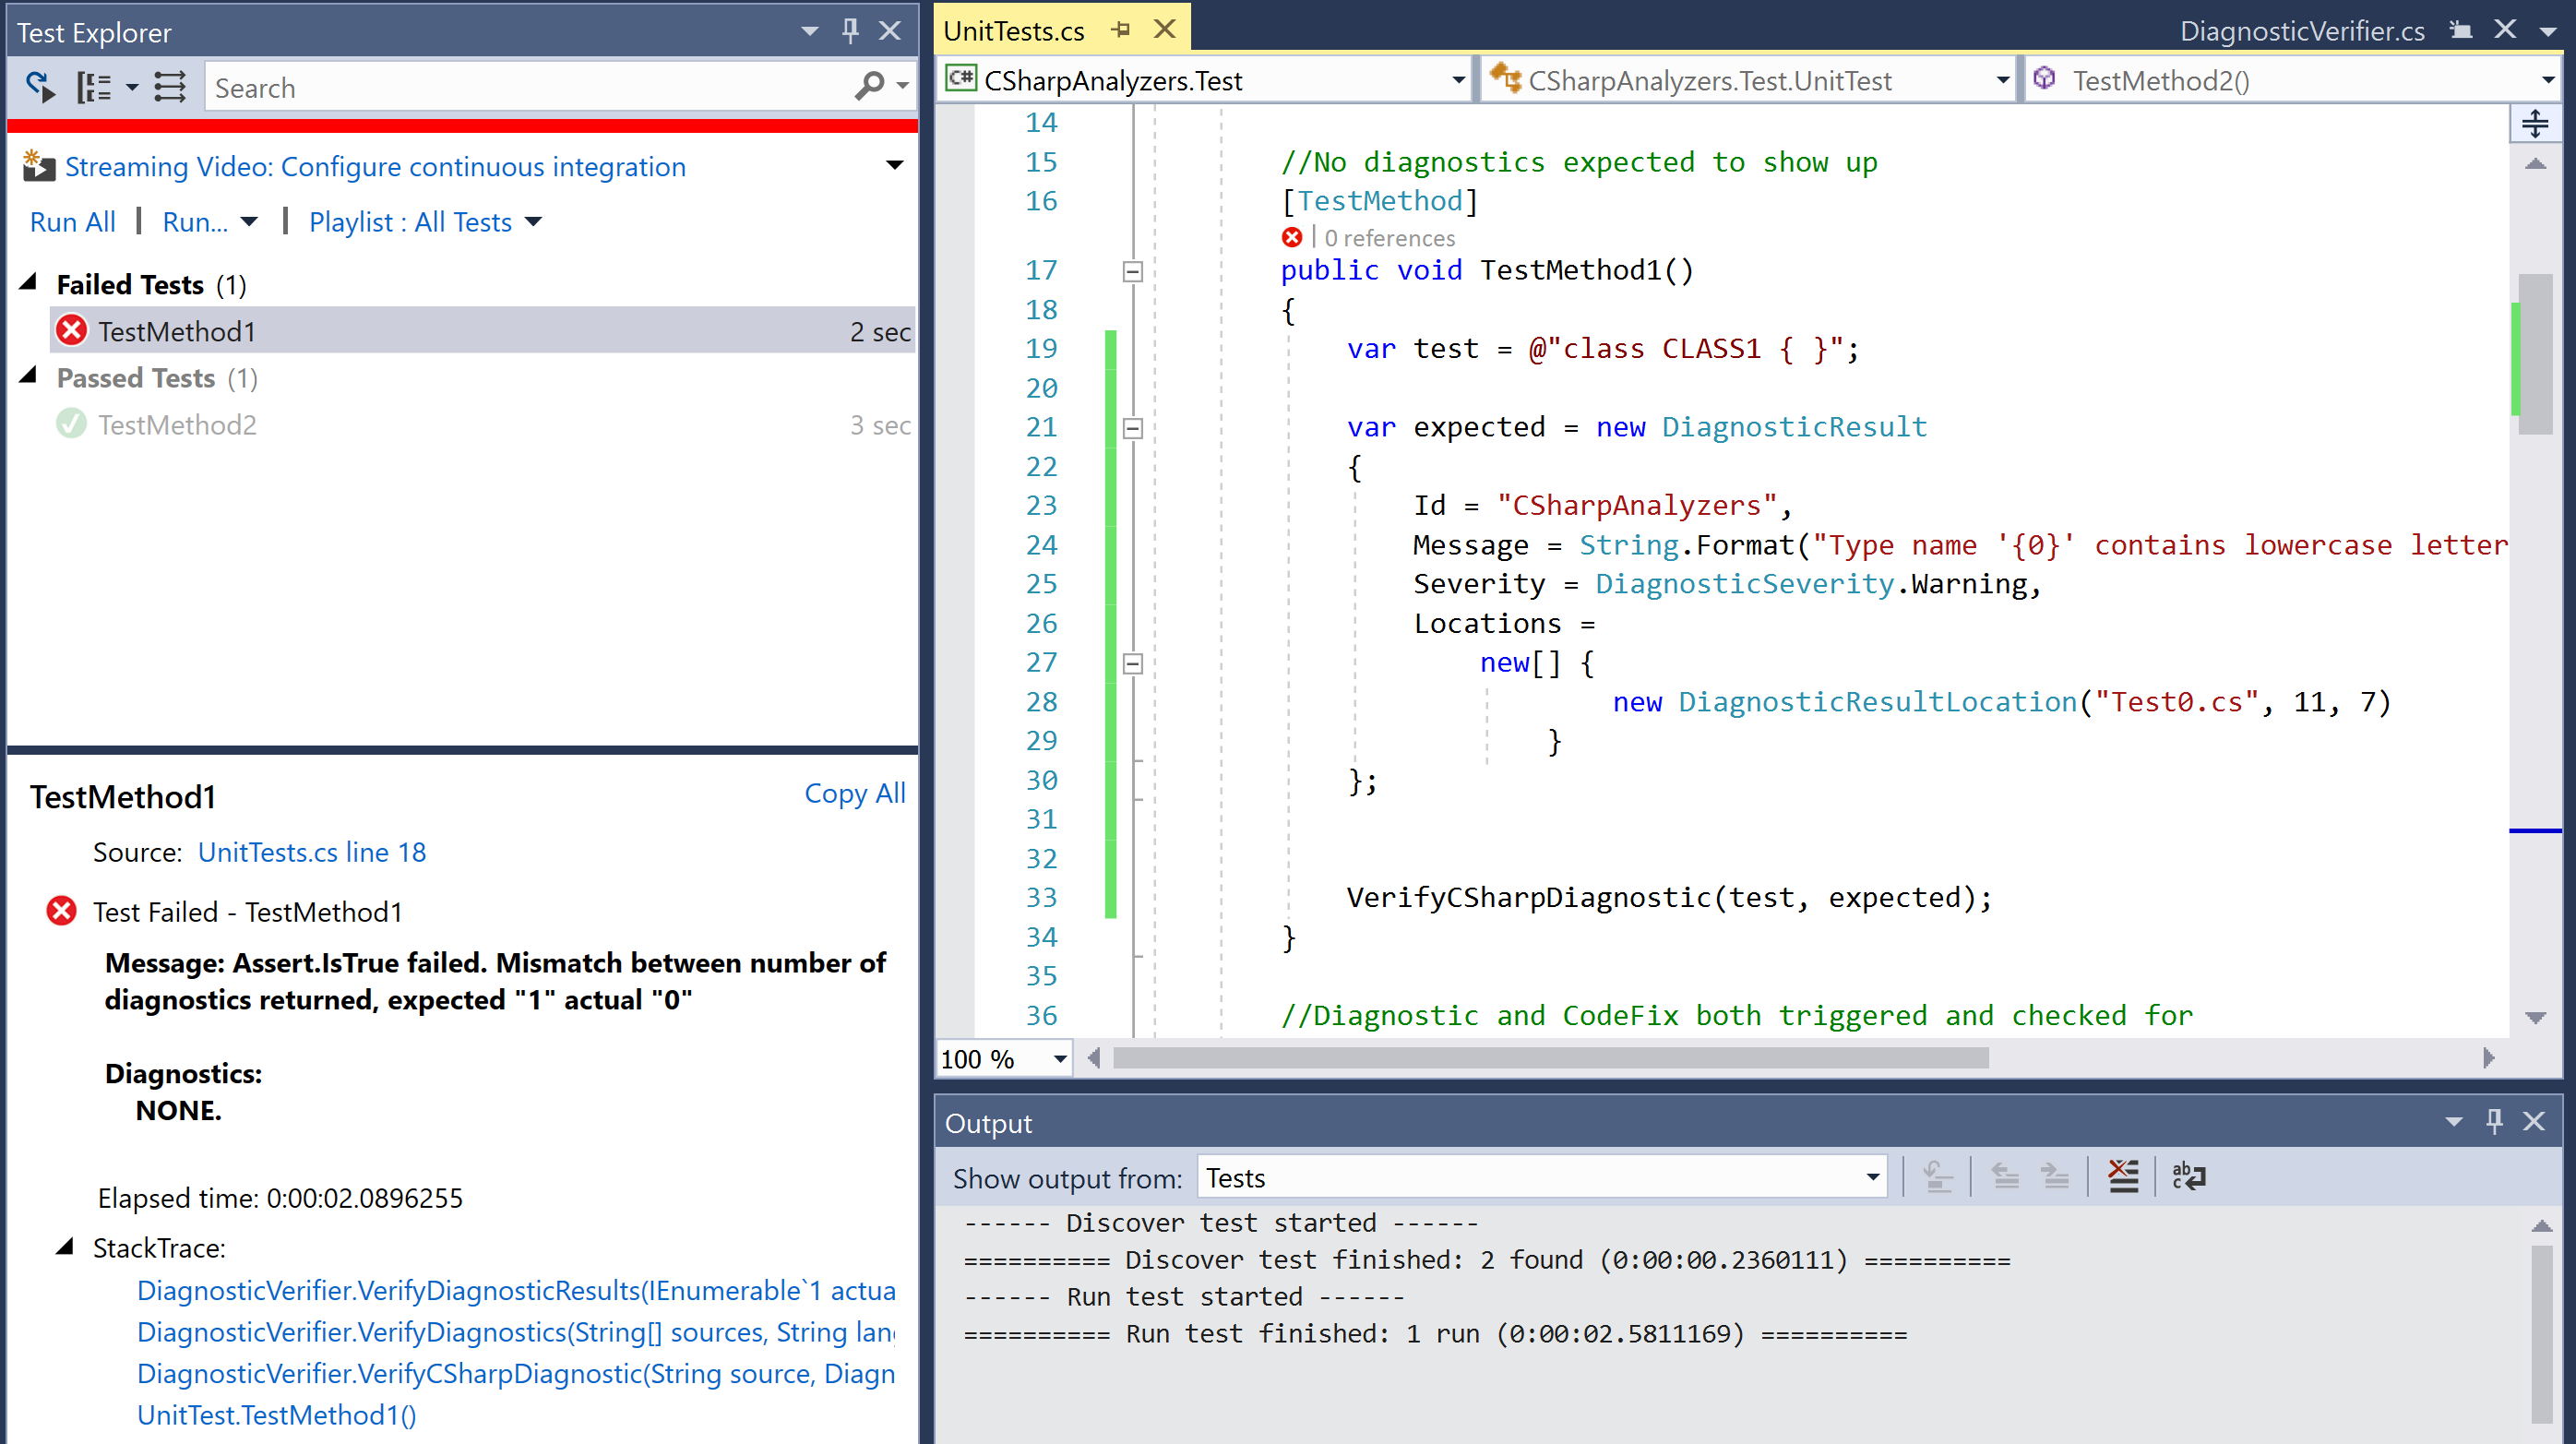
}- Right-click on
TestMethod1in the editor, execute theRun testscontext menu command, and verify that the test now fails with the diagnostic mismatch assert -expected "0" actual "1":
- Edit
TestMethod1to now add an excepted diagnostic for the new test code:
var expected = new DiagnosticResult
{
  Id = "CSharpAnalyzers",
  Message = String.Format("Type name '{0}' contains lowercase letters", "Class1"),
  Severity = DiagnosticSeverity.Warning,
  Locations = new[] {
    new DiagnosticResultLocation("Test0.cs", 11, 15)
  }
};

VerifyCSharpDiagnostic(test, expected);- Run the unit test again and note that the test still fails, but now it fails due to a difference in the location (column number) at which the diagnostic was reported.
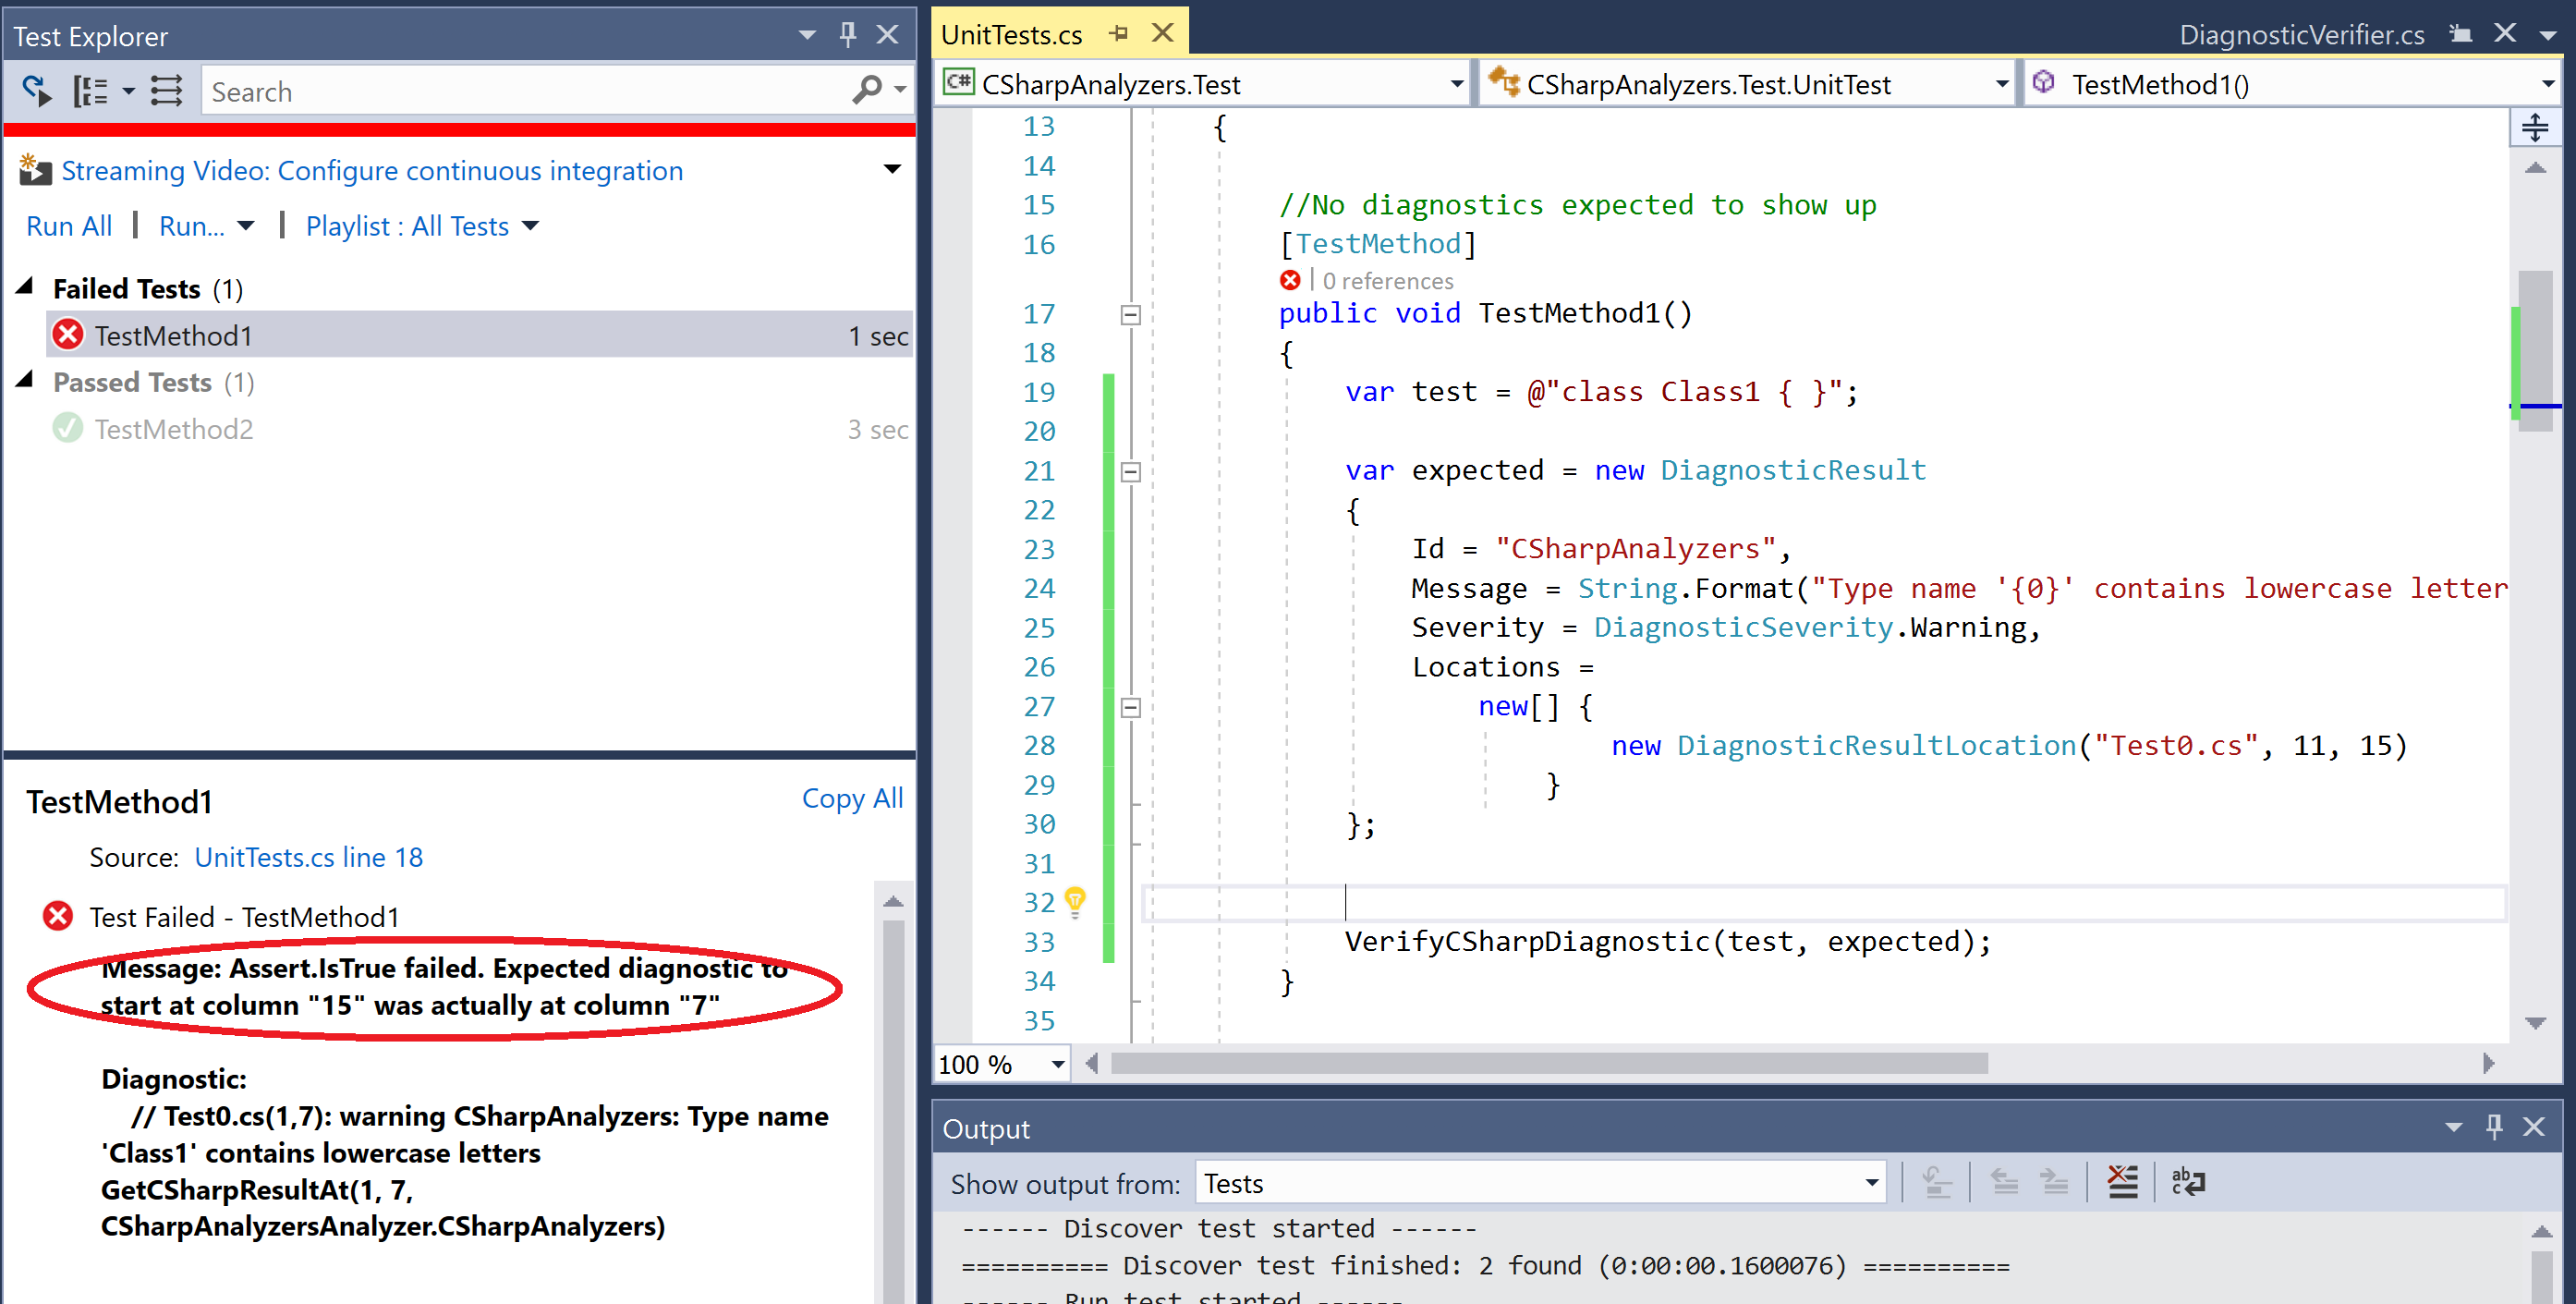
- Edit the diagnostic location to use the correct expected column number and rerun the test - verify that the test passes now.
new DiagnosticResultLocation("Test0.cs", 11, 7)- Edit
TestMethod1and change the test code to renameClass1toCLASS1:
var test = @"class CLASS1 { }";- Run the unit test again and verify that the test fails now due to a diagnostic mismatch assert -
expected "1" actual "0".
- Edit
TestMethod1to remove the expected diagnostic and verify the test passes:
 var test = @"class CLASS1 { }";

VerifyCSharpDiagnostic(test);The analyzer unit test project allows us to write unit tests for the execution of our analyzer on different code samples. Each unit test is marked with a TestMethod attribute and defines sample test code, expected diagnostic(s) reported by the analyzer on that code (if any), and invocation of test helper method(s), here VerifyCSharpDiagnostic, to verify diagnostics.
//No diagnostics expected to show up
[TestMethod]
public void TestMethod1()
{
  var test = @"";

  VerifyCSharpDiagnostic(test);
}
Unit tests can define expected diagnostics using the DiagnosticResult type, which must specify the diagnostic Id, Message, Severity and Locations for the diagnostic:
var expected = new DiagnosticResult
{
  Id = "CSharpAnalyzers",
  Message = String.Format("Type name '{0}' contains lowercase letters", "Class1"),
  Severity = DiagnosticSeverity.Warning,
  Locations = new[] { new DiagnosticResultLocation("Test0.cs", 11, 15) }
};

VerifyCSharpDiagnostic(test, expected);
Note
Computing the correct line number and column number for an expected diagnostic, for example (11, 15), can be a bit tricky. The approach that normally works is to start with a default location of (0, 0), execute the test once, and look at the failure text in the Test Explorer window to get the expected and actual line number. Then, replace the expected line number in the test code with the actual line number. Re-execute the test and repeat the process to get the correct column number.
UnitTest type containing all the unit tests also overrides the following methods to return the DiagnosticAnalyzer (and optionally a CodeFixProvider) to be tested:
 protected override CodeFixProvider GetCSharpCodeFixProvider()
 {
   return new CSharpAnalyzersCodeFixProvider();
 }

protected override DiagnosticAnalyzer GetCSharpDiagnosticAnalyzer()
 {
   return new CSharpAnalyzersAnalyzer();
 }
Now, let us expand a bit more on the test framework helpers for the unit tests. The analyzer unit test project contains two primary helper abstract types to write unit tests for analyzers and code fixes:
DiagnosticVerifier: Contains helper methods to runDiagnosticAnalyzerunit tests that verify the analyzer diagnostics for a given set of test sources.CodeFixVerifier: Contains helper methods to runDiagnosticAnalyzerandCodeFixProviderunit tests that verify the analyzer diagnostics for a given set of test sources before and after applying a code fix. This type derives fromDiagnosticVerifier.
In the default analyzer project, UnitTest type derives from CodeFixVerifier, but could also be changed to derive from DiagnosticVerifier, if you are only interested in writing analyzer unit tests. We will just focus on the DiagnosticVerifier here; CodeFixVerifier is covered later in chapter.
DiagnosticVerifier type is split into 2 source files DiagnosticVerifier.cs and DiagnosticVerifier.Helper.cs.
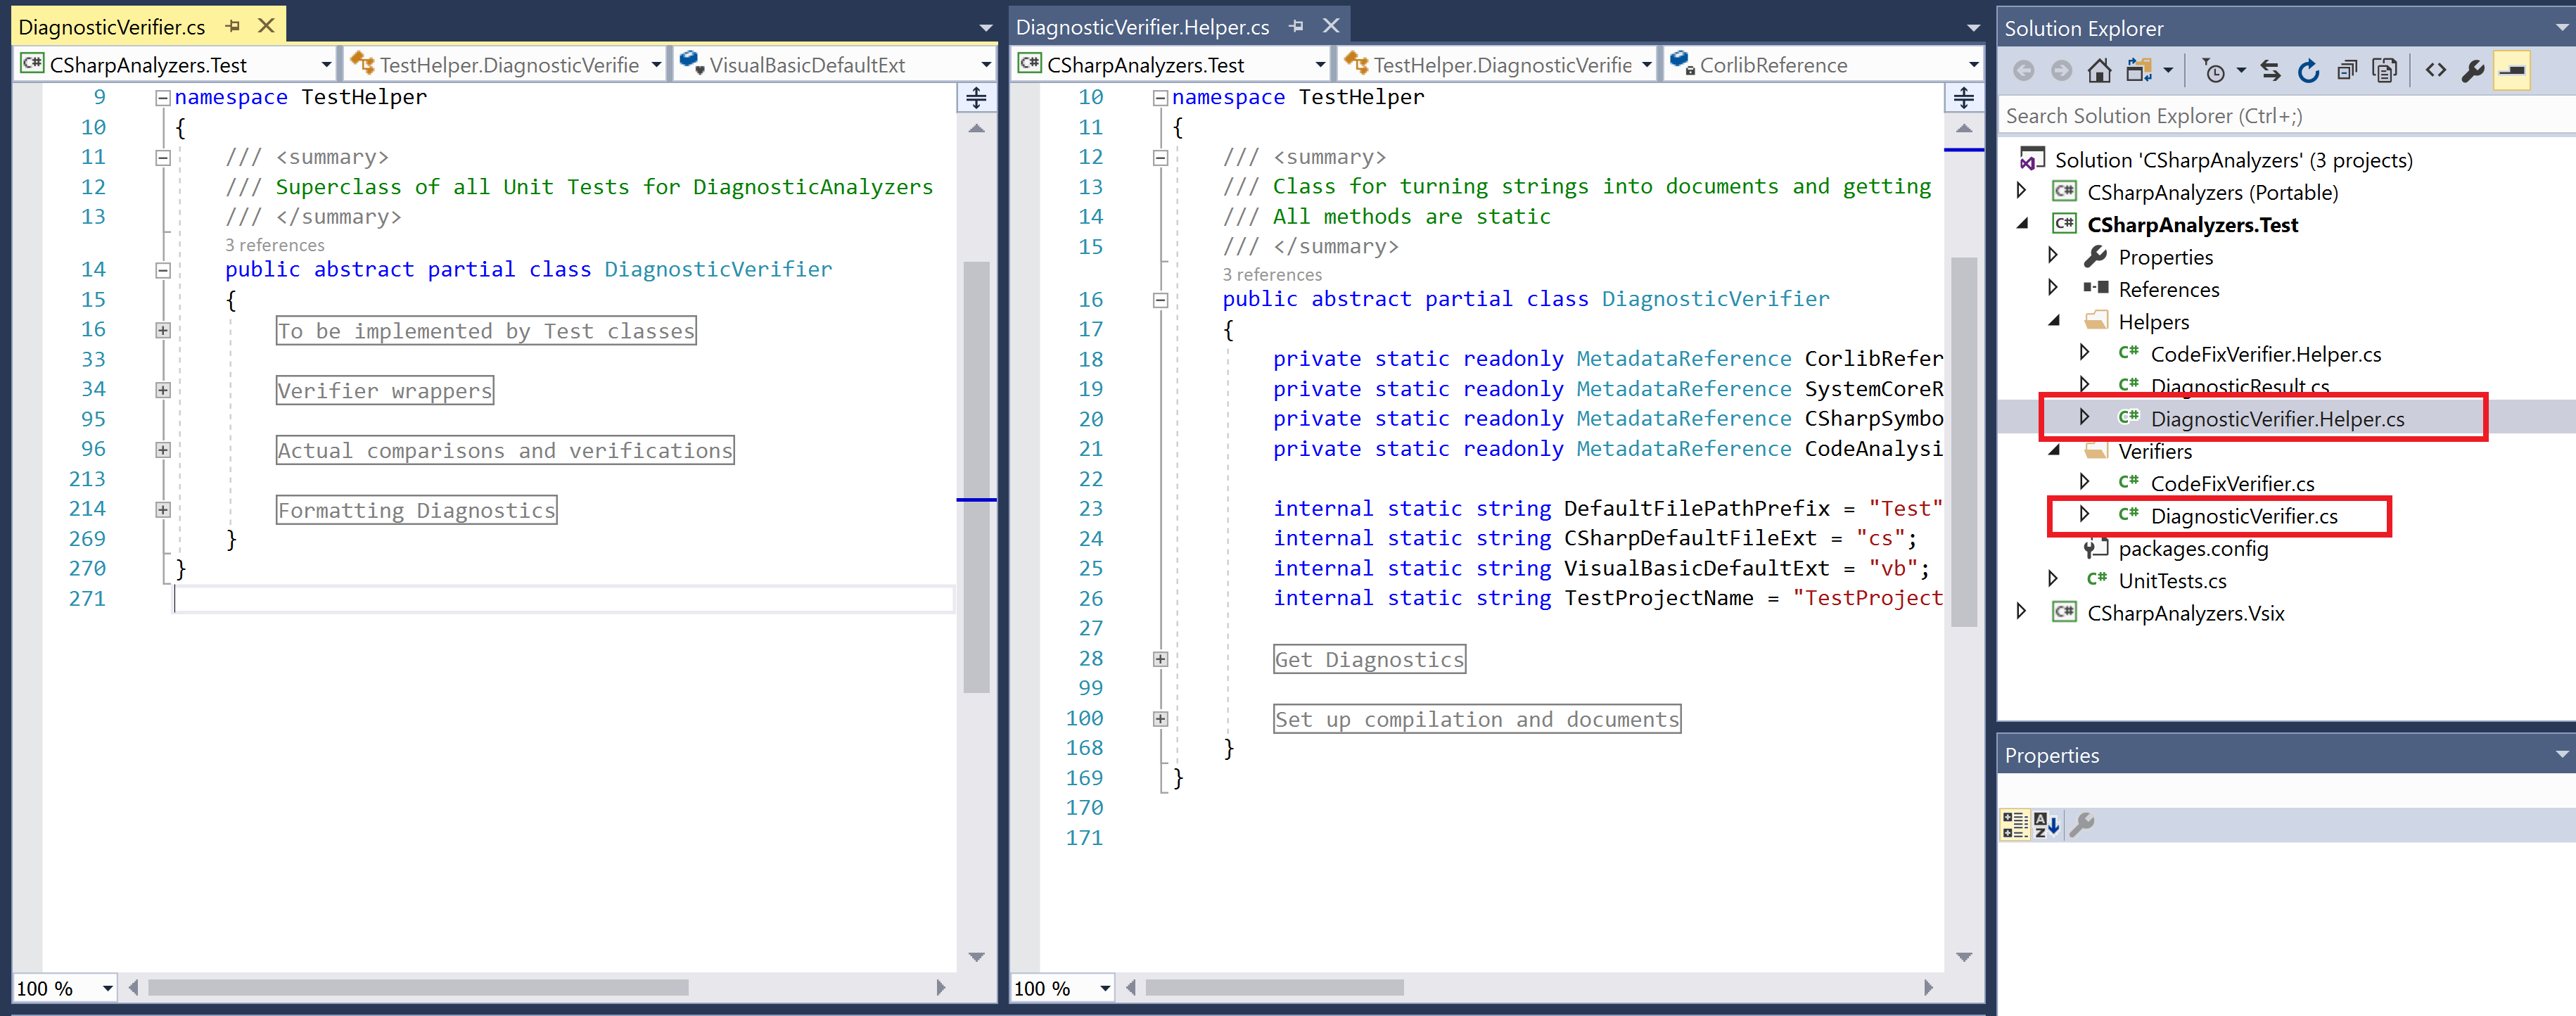
DiagnosticVerifier.Helper.cscontains the following core functionality:- Helper methods to create a compilation with source files based on given C# or VisualBasic source code (
Set up compilation and documentsregion in the preceding screenshot). - Helper methods to invoke the preceding functionality to create a compilation with the given C# or VisualBasic source code, and execute the given
DiagnosticAnalyzeron the compilation to produce analyzer diagnostics and return sorted diagnostics for verification (Get Diagnosticsregion in the preceding screenshot).
- Helper methods to create a compilation with source files based on given C# or VisualBasic source code (
DiagnosticVerifier.cscontains the following core functionality:- Method(s) to get the
DiagnosticAnalyzertype to be tested (To be implemented by Test classesregion in the preceding screenshot). - Private helpers to perform actual diagnostic comparison and verification and formatting of diagnostics to get a string representation of actual/expected diagnostics when a unit test fails (
Actual comparisons and verificationsregion andFormatting Diagnosticsregion in the preceding screenshot). - Diagnostic verification methods
VerifyCSharpDiagnosticandVerifyBasicDiagnosticthat can be invoked by the unit tests to verify analyzer diagnostics generated on the given C# or Visual Basic source code (Verifier wrapperssection in the preceding screenshot). These methods invoke theGet Diagnosticshelpers to create a compilation and get sorted analyzer diagnostics and then invoke the preceding private helpers to compare and verify diagnostics.
- Method(s) to get the
Live Unit testing is a new feature in Visual Studio 2017 Enterprise Edition, which automatically runs the impacted unit tests in the background as you edit code, and visualizes the results and code coverage live, in the editor, in real-time. Refer to Chapter 6, Live Unit Testing in Visual Studio Enterprise, to enable live unit testing for the project and visualize unit tests automatically executing after you edit the code in the steps in this recipe.