

In this recipe, we will look at installing JDK on Windows and how to set up the PATH variable to be able to access the Java executables (such as javac, java, and jar) from anywhere within the command shell.
Installing JDK 18.9 on Windows and setting up the PATH variable
How to do it...
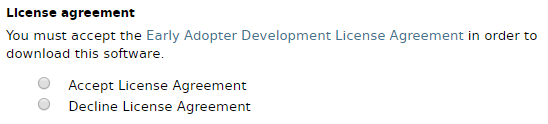
- Visit http://jdk.java.net/11/ and accept the early-adopter license agreement, which looks like this:
- After accepting the license, you will get a grid of the available JDK bundles based on the OS and architecture (32/64-bit). Click to download the relevant JDK executable (.exe) for your Windows platform.
- Run the JDK executable (.exe) and follow the onscreen instructions to install JDK on your system.
- If you have chosen all the defaults during the installation, you will find JDK installed in C:/Program Files/Java for 64 bit and C:/Program Files (x86)/Java for 32 bit.
Now that we have finished installing JDK, let's see how we can set the PATH variable.
The tools provided with JDK, namely javac, java, jconsole, and jlink, are available in the bin directory of your JDK installation. There are two ways you could run these tools from the Command Prompt:
- Navigate to the directory where the tools are installed and run them, as follows:
      cd "C:\Program Files\Java\jdk-11\bin"
      javac -version
- Export the path to the directory so that the tools are available from any directory in the command prompt. To achieve this, we have to add the path to the JDK tools in the PATH environment variable. The command prompt will search for the relevant tool in all the locations declared in the PATH environment variable.
Let's see how you can add the JDK bin directory to the PATH variable:
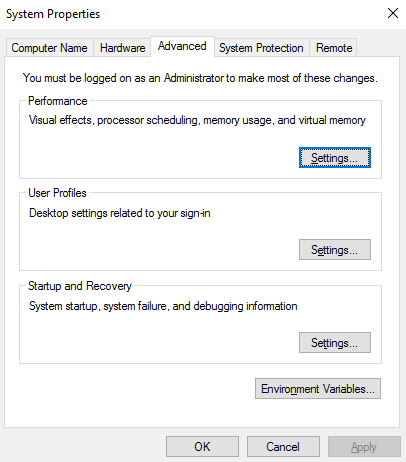
- Right-click on My Computer and then click on Properties. You will see your system information. Search for Advanced system settings and click on it to get a window, as shown in the following screenshot:
- Click on Environment Variables to view the variables defined in your system. You will see that there are quite a few environment variables already defined, as shown in the following screenshot (the variables will differ across systems; in the following screenshot, there are a few predefined variables and a few variables added by me):
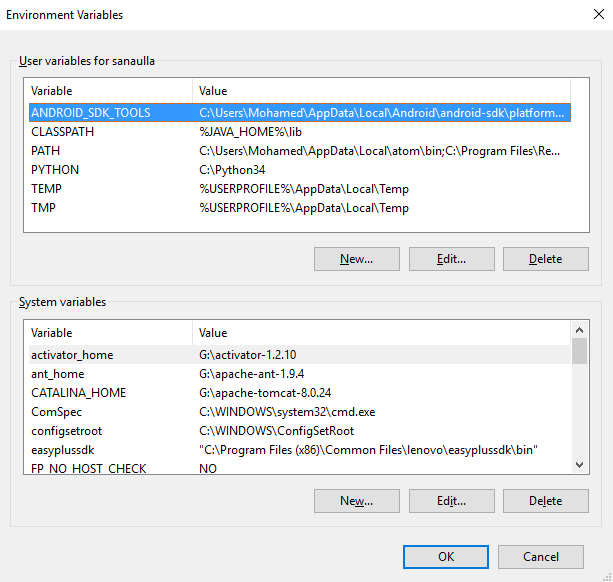
The variables defined under System variables are available across all the users of the system, and those defined under User variables for <user name> are available only to the specific user.
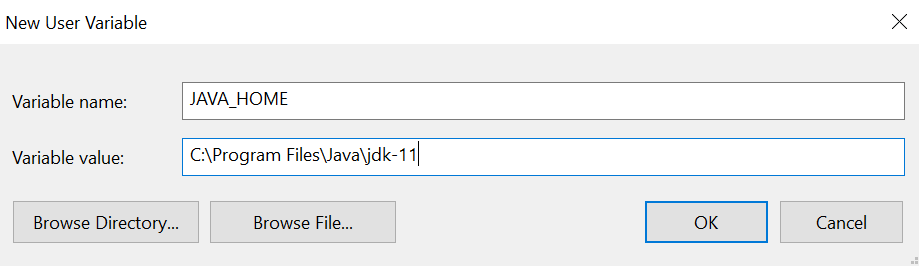
- A new variable, with the name JAVA_HOME, and its value as the location of the JDK 9 installation. For example, it would be C:\Program Files\Java\jdk-11 (for 64 bit) or C:\Program Files (x86)\Java\jdk-11 (for 32 bit):
- Update the PATH environment variable with the location of the bin directory of your JDK installation (defined in the JAVA_HOME environment variable). If you already see the PATH variable defined in the list, then you need to select that variable and click on Edit. If the PATH variable is not seen, click on New.
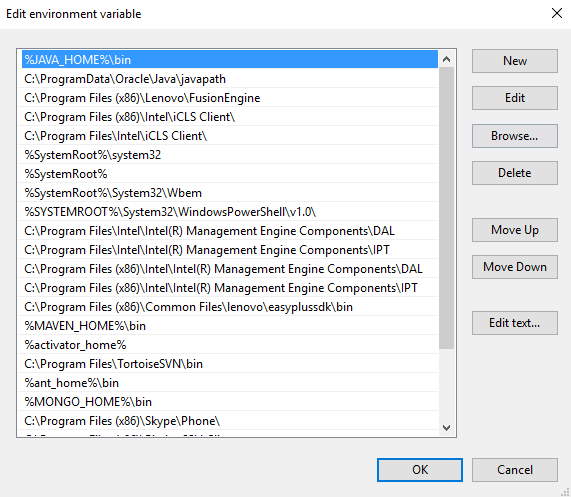
- Any of the actions in the previous step will give you a popup, as shown in the following screenshot (on Windows 10):
The following screenshot shows the other Windows versions:
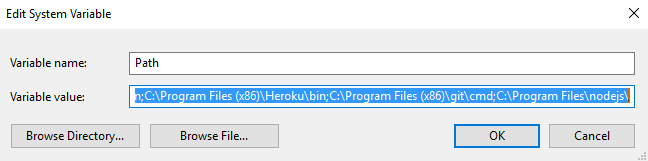
- You can either click on New in the first screenshot and insert the %JAVA_HOME%\bin value, or you can append the value against the Variable value field by adding ; %JAVA_HOME%\bin. The semicolon (;) in Windows is used to separate multiple values for a given variable name.
- After setting the values, open the command prompt and run javac -version. You should be able to see javac 11-ea as the output. If you don't see it, it means that the bin directory of your JDK installation has not been correctly added to the PATH variable.