

Selenium WebDriver is a library that helps you automate browsers. However, much more is needed when using it for testing and building a test framework or automating browsers for non-testing purposes. You will need an Integrated Development Environment (IDE) or a code editor to create a new Java project and add Selenium WebDriver and other dependencies in order to build a testing framework.
In the Java development community, Eclipse is a widely-used IDE, as well as IntelliJ IDEA and NetBeans. Eclipse provides a feature-rich environment for Selenium WebDriver test-development.
Along with Eclipse, Apache Maven provides support for managing the life cycle of a test project. Maven is used to define the project structure, dependencies, build, and test-management.
We can use Eclipse and Maven to build our Selenium WebDriver test framework from a single window. Another important benefit of using Maven is that we can get all the Selenium library files and their dependencies by configuring the pom.xml file. Maven automatically downloads the necessary files from the repository while building the project.
In this section, we will learn how to configure Eclipse and Maven for the Selenium WebDriver test development. Most of the code in this book has been developed in Eclipse and Maven.
You will need Eclipse and Maven to set up the test-development environment. Download and set up Maven from http://maven.apache.org/download.html. Follow the instructions on the Maven download page (see the Installation Instructions section of the page).
Download and set up Eclipse IDE for Java Developers from https://eclipse.org/downloads/
Along with Eclipse and Maven, we will also use TestNG as a testing framework for our project. The TestNG library will help us define test cases, test fixtures, and assertions. We need to install the TestNG plugin for Eclipse via Eclipse Marketplace.
Let's configure Eclipse with Maven to develop Selenium WebDriver tests using the following steps:
- Launch the Eclipse IDE.
- Create a new project by selecting File | New | Other from the Eclipse Main Menu.
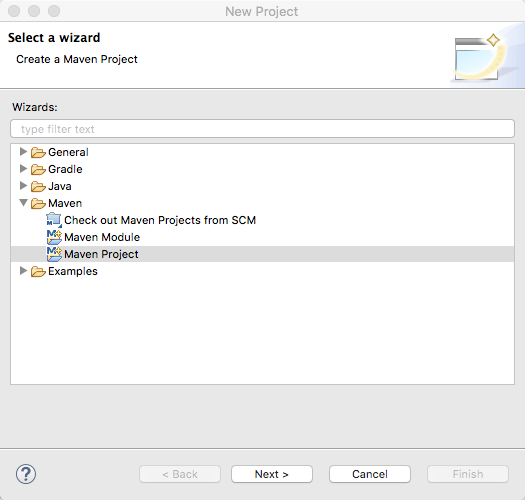
- On the New dialog, select Maven | Maven Project, as shown in the following screenshot, and click Next:
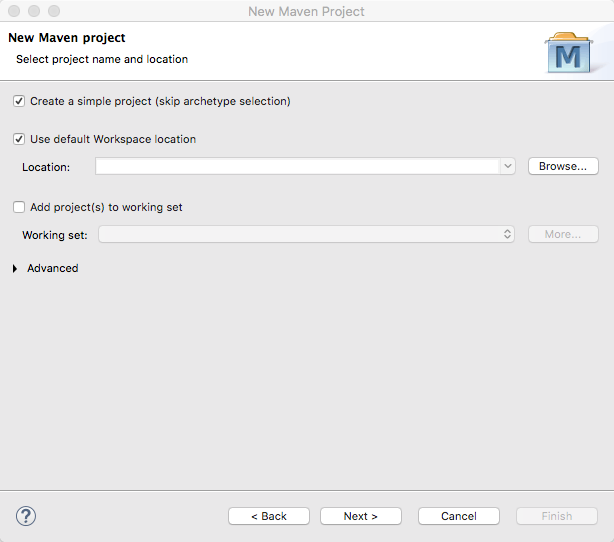
- The New Maven Project dialog will be displayed. Select the Create a simple project (skip archetype selection) checkbox and click on the Next button, as shown in the following screenshot:
- On the New Maven Project dialog box, enter com.example in the Group Id: textbox and chapter1 in the Artifact Id: textbox. You can also add a name and description. Click on the Finish button, as shown in the following screenshot:

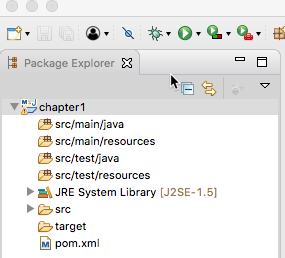
- Eclipse will create the chapter1 project with a structure (in Package Explorer) similar to the one shown in the following screenshot:
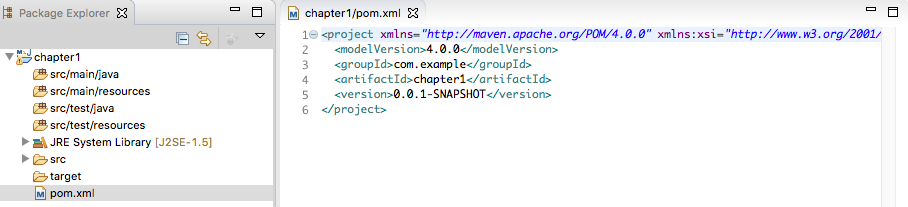
- Select pom.xml from Package Explorer. This will open the pom.xml file in the editor area with the Overview tab open. Select the pom.xml tab next to the Overview tab, as shown in the following screenshot:
- Add the Selenium WebDriver and TestNG dependencies highlighted in the following code snippet to pom.xml in the between project node:
<properties>
 <java.version>1.8</java.version>
 <selenium.version>3.13.0</selenium.version>
 <testng.version>6.13.1</testng.version>
 <maven.compiler.version>3.7.0</maven.compiler.version>
</properties>

<dependencies>
 <dependency>
 <groupId>org.seleniumhq.selenium</groupId>
 <artifactId>selenium-java</artifactId>
 <version>${selenium.version}</version>
 </dependency>
 <dependency>
 <groupId>org.testng</groupId>
 <artifactId>testng</artifactId>
 <version>${testng.version}</version>
 </dependency>
</dependencies>

<build>
 <plugins>
 <plugin>
 <groupId>org.apache.maven.plugins</groupId>
 <artifactId>maven-compiler-plugin</artifactId>
 <version>${maven.compiler.version}</version>
 <configuration>
 <source>${java.version}</source>
 <target>${java.version}</target>
 </configuration>
 </plugin>
 </plugins>
</build>
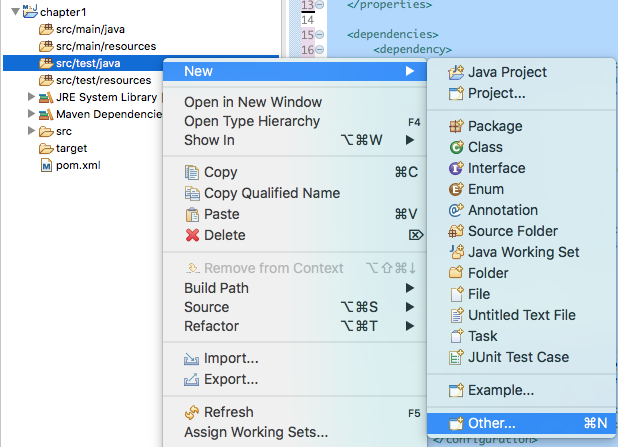
- Select src/test/java in Package Explorer and right-click on it to show the menu. Select New | Other, as shown in the following screenshot:
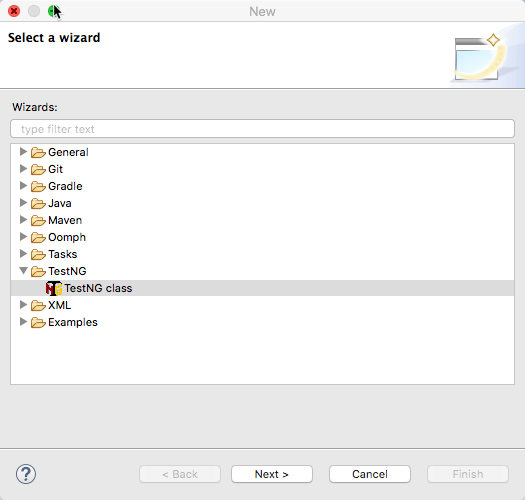
- Select the TestNG | TestNG class from the Select a wizard dialog, as shown in the following screenshot:
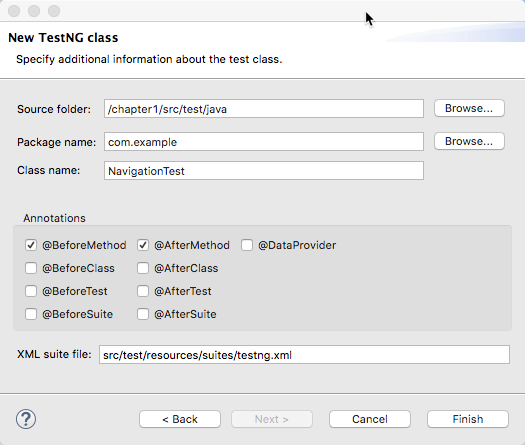
- On the New TestNG class dialog box, enter /chapter1/src/test/java in the Source folder: field. Enter com.example in the Package name: field. Enter NavigationTest in the Class name: field. Select the @BeforeMethod and @AfterMethod checkboxes and add src/test/resources/suites/testng.xml in the XML suite file: field. Click on the Finish button:
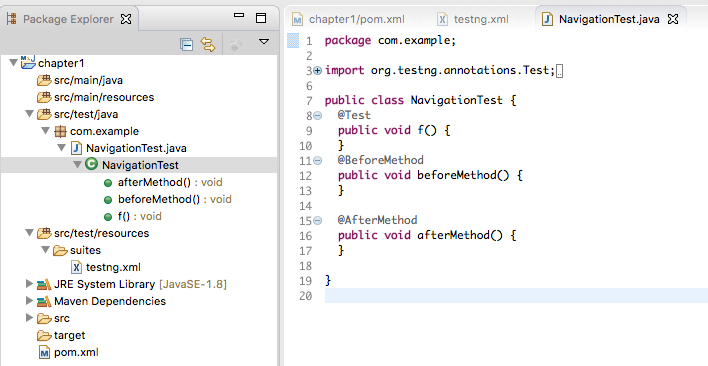
- This will create the NavigationTest.java class in the com.example package with TestNG annotations such as @Test, @BeforeMethod, and @AfterMethod, and the beforeMethod and afterMethod methods:
- Modify the NavigationTest class with following code:
package com.example;
import org.openqa.selenium.WebDriver;
import org.openqa.selenium.chrome.ChromeDriver;
import org.testng.Assert;
import org.testng.annotations.*;

public class NavigationTest {

    WebDriver driver;

    @BeforeMethod
    public void beforeMethod() {

        // set path of Chromedriver executable
        System.setProperty("webdriver.chrome.driver",
                "./src/test/resources/drivers/chromedriver");

        // initialize new WebDriver session
        driver = new ChromeDriver();
    }

    @Test
    public void navigateToAUrl() {
        // navigate to the web site
        driver.get("http://demo-store.seleniumacademy.com/");
        // Validate page title
        Assert.assertEquals(driver.getTitle(), "Madison Island");
    }
    @AfterMethod
    public void afterMethod() {

        // close and quit the browser
        driver.quit();
    }
}
In the preceding code, three methods are added as part of the NavigationTest class. We also declared a WebDriver driver; instance variable, which we will use later in the test to launch a browser and navigate to the site.
beforeMethod(), which is annotated with the @BeforeMethod TestNG annotation, will execute before the test method. It will set the path of the chromedriver executable required by Google Chrome. It will then instantiate the driver variable using the ChromeDriver() class. This will launch a new Google Chrome window on the screen.
The next method, navigateToAUrl(), annotated with the @Test annotation is the test method. We will call the get() method of the WebDriver interface passing the URL of the application. This will navigate to the site in the browser. We will check the title of the page by calling TestNG's Assert.assertEquals method and the getTitle() method of the WebDriver interface.
Lastly, afterMethod() is annotated with the @AfterMethod TestNG annotation will close the browser window.
We need to download and copy the chromedriver executable from https://sites.google.com/a/chromium.org/chromedriver/downloads. Download the appropriate version based on the Google Chrome browser version installed on your computer as well as the operating system. Copy the executable file in the /src/test/resources/ drivers folder.
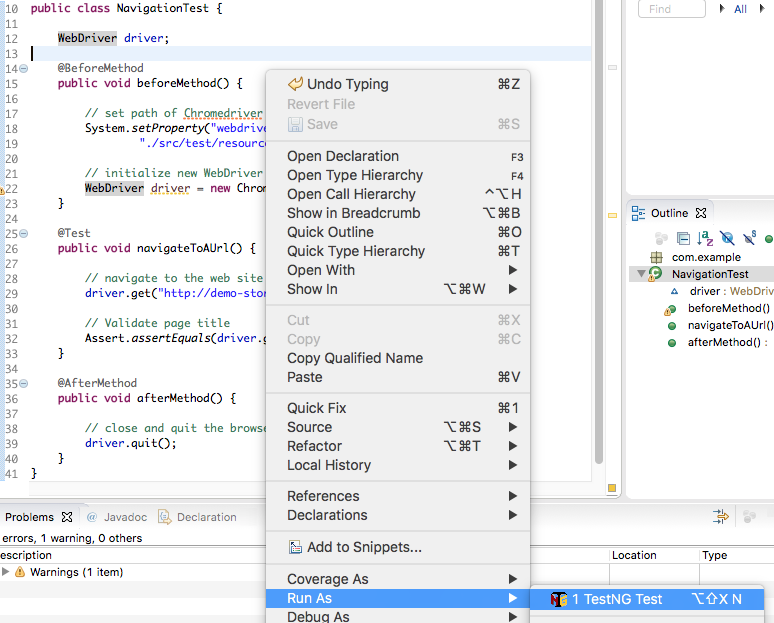
To run the tests, right-click in the code editor and select Run As | TestNG Test, as shown in the following screenshot:
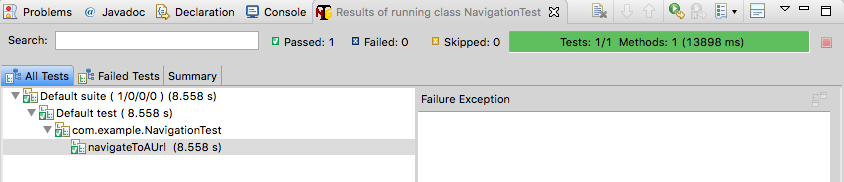
This will launch a new Google Chrome browser window and navigate to the site. The test will validate the page title and the browser window will be closed at the end of the test. The TestNG Plugin will display results in Eclipse:
You can download the example code files for all the Packt books you have purchased from your account at http://www.packtpub.com. If you have purchased this book elsewhere, you can visit http://www.packtpub. com/support and register to have the files emailed directly to you. The example code is also hosted at https://github.com/PacktPublishing/Selenium-WebDriver-3-Practical-Guide-Second-Edition