-
Book Overview & Buying
-
Table Of Contents

Kali Linux Intrusion and Exploitation Cookbook
By :
Kali Linux Intrusion and Exploitation Cookbook
By:
Overview of this book
With the increasing threats of breaches and attacks on critical infrastructure, system administrators and architects can use Kali Linux 2.0 to ensure their infrastructure is secure by finding out known vulnerabilities and safeguarding their infrastructure against unknown vulnerabilities.
This practical cookbook-style guide contains chapters carefully structured in three phases – information gathering, vulnerability assessment, and penetration testing for the web, and wired and wireless networks. It's an ideal reference guide if you’re looking for a solution to a specific problem or learning how to use a tool. We provide hands-on examples of powerful tools/scripts designed for exploitation.
In the final section, we cover various tools you can use during testing, and we help you create in-depth reports to impress management. We provide system engineers with steps to reproduce issues and fix them.
Table of Contents (18 chapters)
Title Page

Credits
About the Authors
About the Reviewers
www.PacktPub.com
Customer Feedback
Preface
 Free Chapter
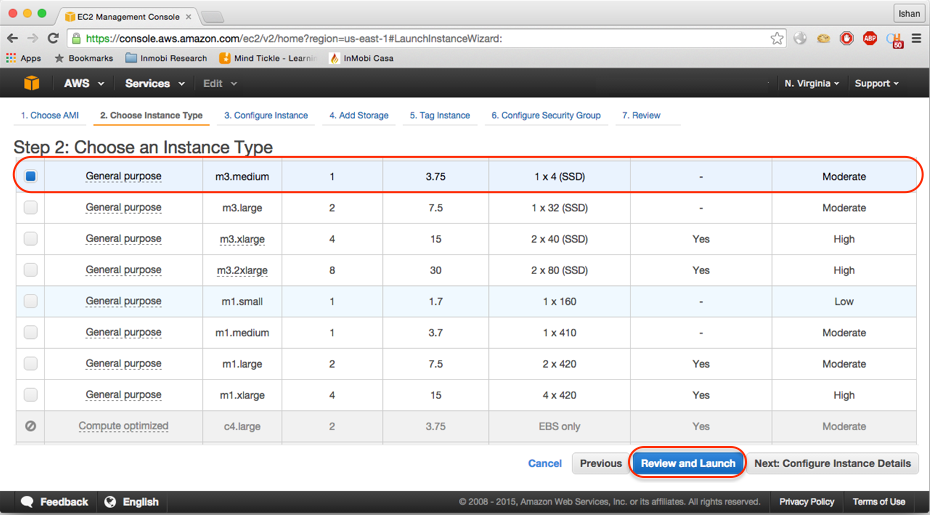
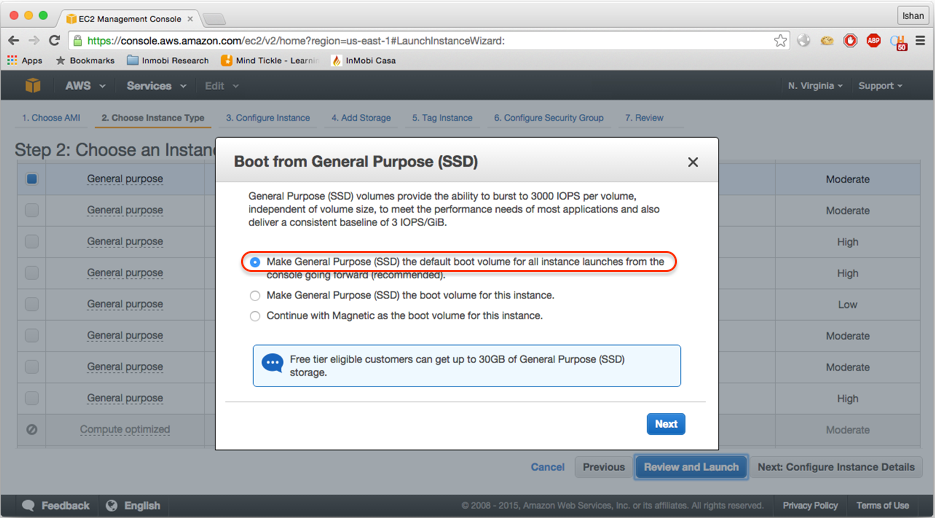
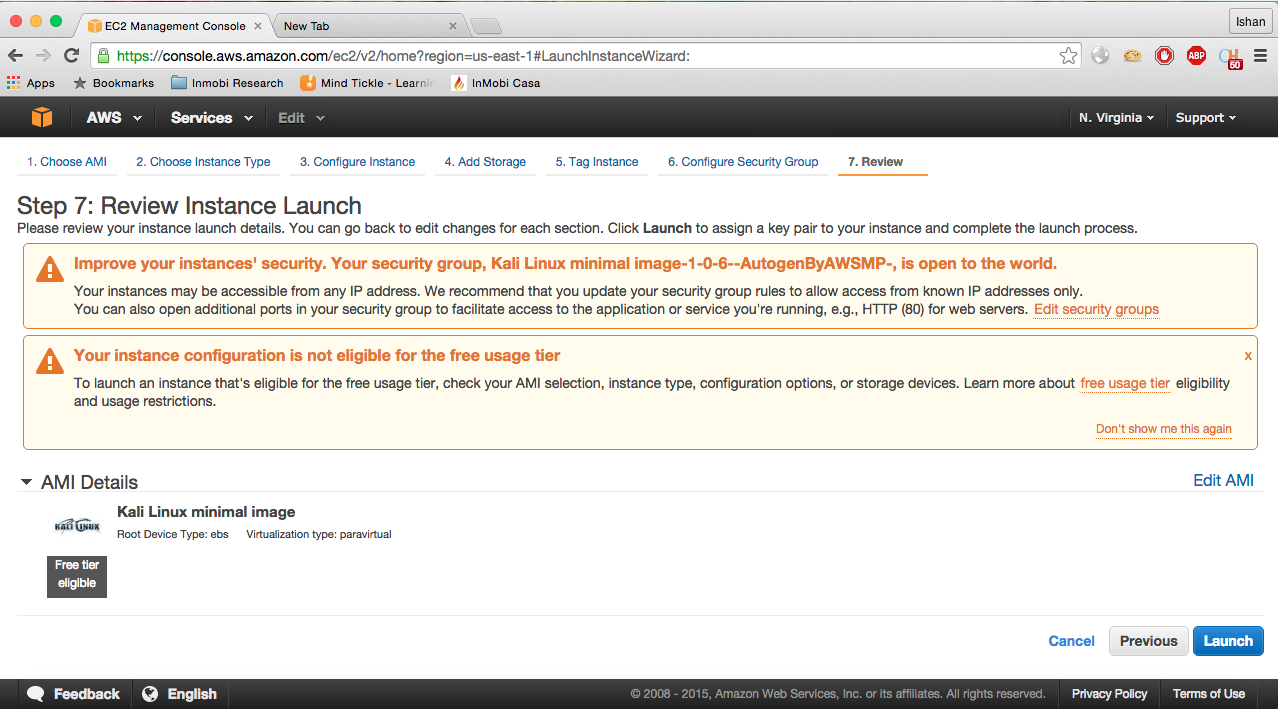
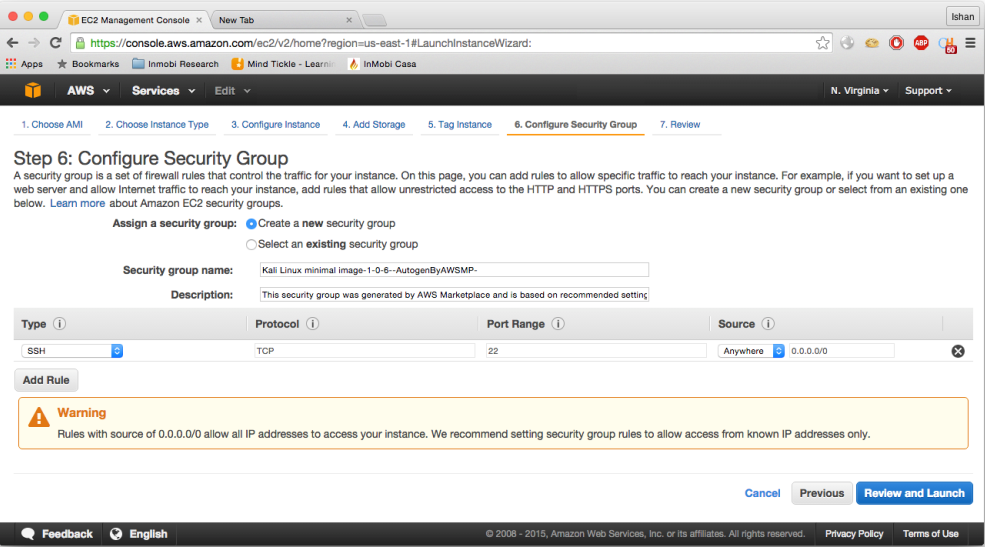
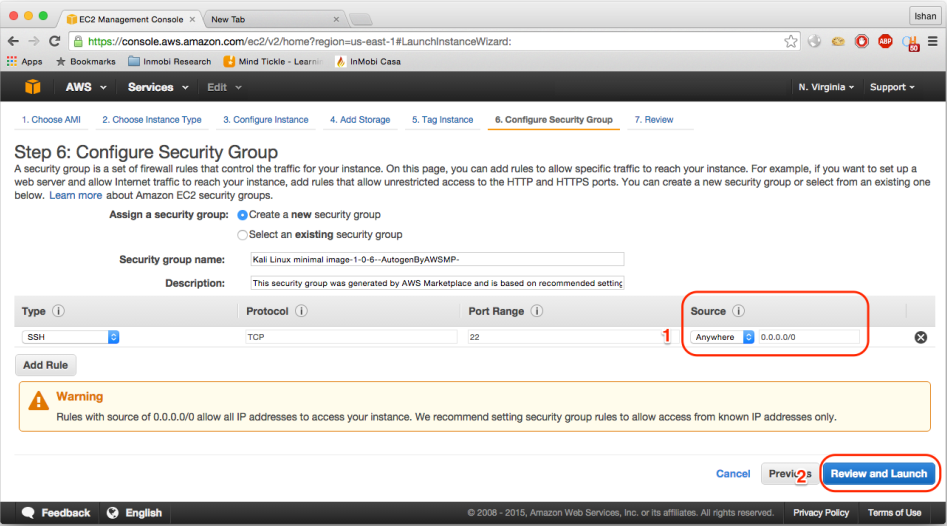
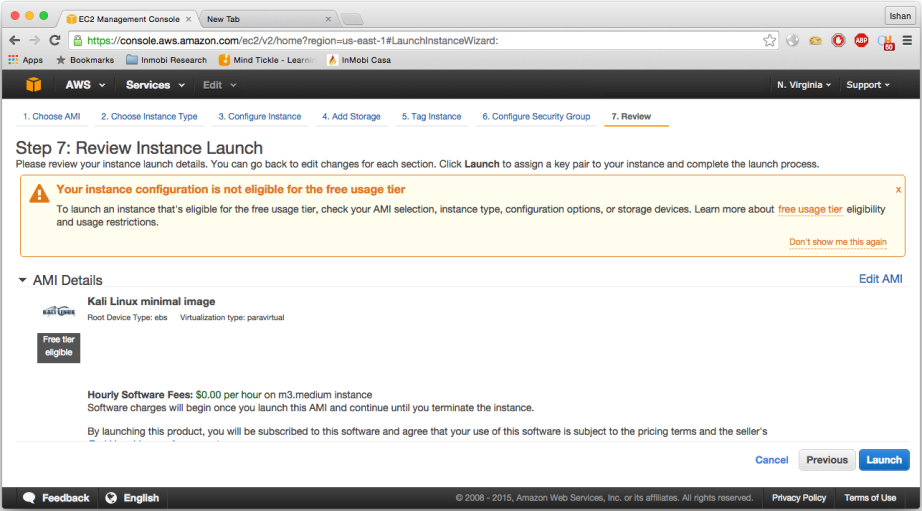
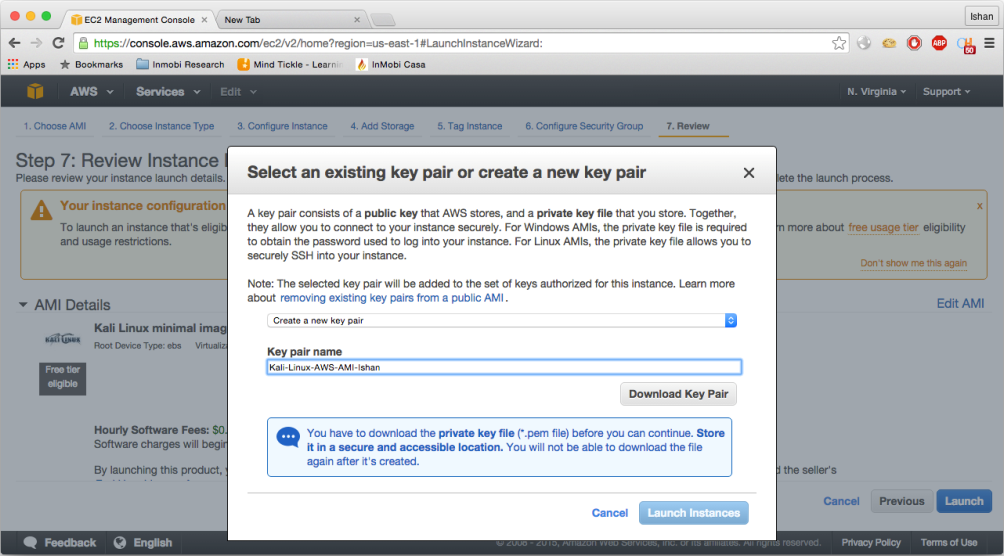
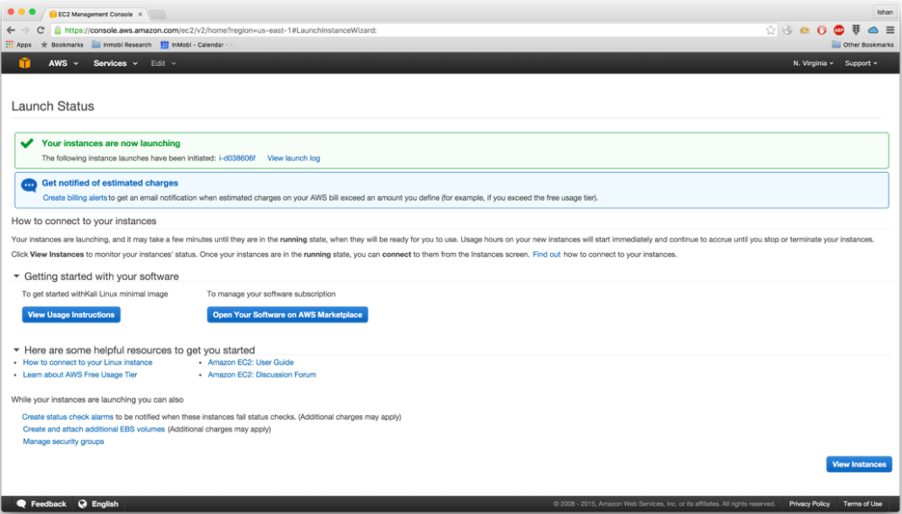
Getting Started - Setting Up an Environment
Network Information Gathering
Network Vulnerability Assessment
Network Exploitation
Web Application Information Gathering
Web Application Vulnerability Assessment
Web Application Exploitation
System and Password Exploitation
Privilege Escalation and Exploitation
Wireless Exploitation
Pen Testing 101 Basics