

As we have already touched upon in the preface, the version of the Docker Engine we are going to be covering in this book is very much a Linux-based tool, so how does it work on macOS and Windows?
It is easy to assume that because macOS is an operating system built on-top of a UNIX like kernel called XNU that Docker will just run as it would do on a Linux machine, unfortunately, a lot of the features which allow Docker to run are not present in the Kernel used by macOS.
While there is the recently launched Windows Subsystem for Linux which is currently in beta, Docker for Windows does not currently take advantage of this, meaning that there is even less of a Linux-like kernel for Docker to use.
Note
The Windows Subsystem for Linux exposes an Ubuntu shell which allows you to run native Linux command-line tools on your Windows installation; for more information, please see https://msdn.microsoft.com/en-gb/commandline/wsl/about.
So how does Docker for Mac and Windows work? The latest versions of macOS and Windows 10 Professional ship with hypervisors which are built into the operating systems kernel, macOS has Hypervisor framework while Windows 10 uses Hyper-V.
Note
Hypervisor framework allows developers to build applications without the need to install third-party kernel extensions, meaning they can leverage full hardware virtualization but remain purely in user space meaning that virtual machines remain sandboxed as if they were running as a native application. The following URL gives a technical overview: https://developer.apple.com/reference/hypervisor
For Docker for Mac Docker have built their own open source framework which works with the Hypervisor framework called HyperKit: you can find out more about HyperKit at https://github.com/docker/HyperKit/.
Hyper-V has been the native hypervisor for Windows-based operating systems since Windows Server 2008; it has also been part of the desktop version of Windows since Windows 8 (Professional and Enterprise editions), it allows users and developers to launch Windows and Linux virtual machines with hardware virtualization in a sandboxed environment. For more information on Hyper-V, please see https://www.microsoft.com/en-us/cloud-platform/server-virtualization.
Docker for Mac and Windows uses these native virtualisation technologies to launch a virtual machine running their MobyLinux distribution, MobyLinux is a light-weight distribution based on Alpine Linux who's only function is to run Docker.
Note
The ISO for Alpine Linux currently weighs in at 26 MB, and a fully functioning minimal installation requires a footprint of ~130MB, while the distribution is extremely small it is as useable and secure as more common Linux distributions. You can find out more at https://alpinelinux.org/.
Docker for Mac and Windows takes care of launching, configuring, and maintaining the virtual machine as well as functions such as networking and mounting filesystems from your local machine to a MobyLinux virtual machine.
Docker for Mac has the following system requirements; if your machine does not meet them then Docker for Mac will fail to install:
Your Mac must be a 2010 or later model, with support for Intel's hardware support for memory man agement unit (MMU) virtualization.
You must be running OS X El Capitan 10.11 or newer. I recommend that you are running the latest macOS.
You must have at least 4GB of RAM.
Versions of VirtualBox 4.3.30 or lower must NOT be installed as this causes problems with Docker for Mac.
To check that your machine can support Docker for Mac you can run the following command:
sysctl kern.hv_support
This should return a 1 when you run the command; this means the virtualization is enabled in your kernel as it is available on your CPU.
Docker for Mac is available from the following URL:
https://store.docker.com/editions/community/docker-ce-desktop-mac
I would recommend sticking with the Stable channel for now as this is the version we will be installing on remote machines in later chapters. Clicking on Get Docker for Mac (stable) will kick off a download of a disk image (DMG) file, once downloaded double-click on the file to mount it.
Like most macOS apps, all you have to do is the following:
Drag the Docker application from the mounted disc image to your applications folder; opening the mounted image in the macOS finder by double clicking on it makes this task easy, as you can see from the following screenshot:

Once the application has been copied, you can close the finder window and open your Applications, find Docker, and open it:

When you open Docker for the first time you will be walked through the initial installation:

Clicking Next will tell you that Docker will ask for your password, it needs this to complete the installation.

After clicking OK and entering your password when prompted a whale icon will appear in the menu bar, and while Docker starts you should see something which looks like the following popup:

Clicking Got it! will close the pop-up. You can tell that Docker has started as the small boxes on the whales back in the icon will stop animating; also left-clicking over the icon will bring up a menu which shows the status of your Docker installation:

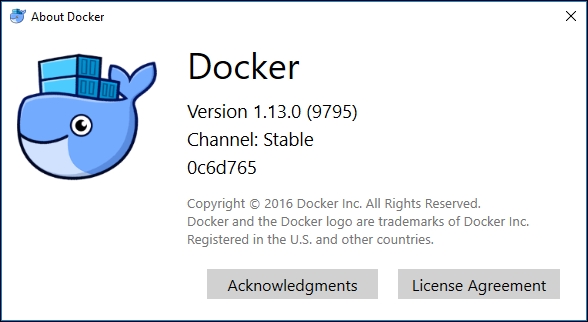
Selecting About Docker from the menu will open the following window:

Running the following command in a terminal shows additional information about your Docker installation:
docker version
You should see something like the following output:

As you can see, it gives details on the Docker client which is installed on your macOS host and the MobyLinux virtual machine the client is connecting to.
Docker for Windows has the following system requirements; if your machine does not meet them then Docker for Windows will inform you before exiting:
You must be running a 64bit Windows 10 Pro, Enterprise and Education (1511 November update, build 10586 or later) installation or later (there are plans to support other versions in the future)
Hyper-V must be enabled, though the installer will enable it for you if needed
You must have at least 4GB of RAM
Docker for Windows is available from the following URL:
https://store.docker.com/editions/community/docker-ce-desktop-windows
Like Docker for Mac, I would recommend sticking with the Stable channel. Clicking on Get Docker for Windows (stable) will download an installer; once the installer has finished downloading, you will be given the option to Run it.
When the Docker for Windows installer first opens, you will be greeted by the Docker License Agreement:
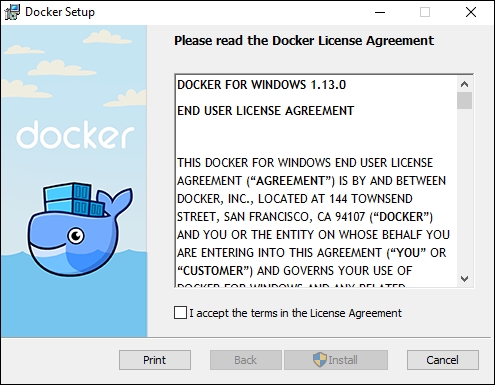
Clicking I accept the terms of the License Agreement will enable the Install button, clicking Install with immediately start the installation.
After a minute or two, you should receive confirmation that the installation has been completed.
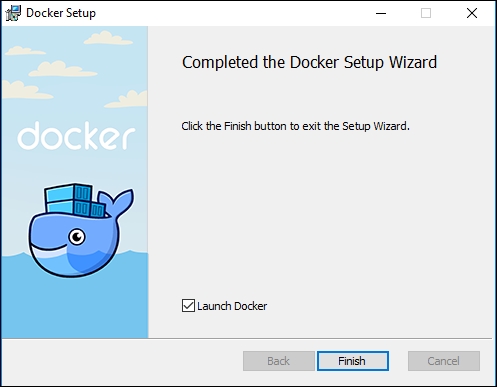
Making sure that Launch Docker is ticked (it should be by default), click on Finish to open Docker. If you do not have Hyper-V enabled, then you will receive the following prompt:
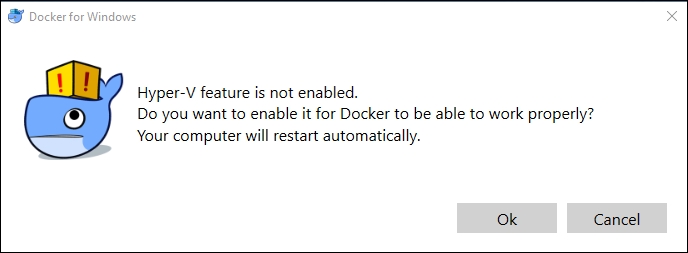
Clicking Ok will reboot your computer so ensure that you have saved any open documents you may have. Once rebooted, Docker should launch automatically, and like Docker for Mac, you will notice that there is an icon of a whale in your menu bar:
Once Docker has started, selecting About Docker from the menu will open the following window:
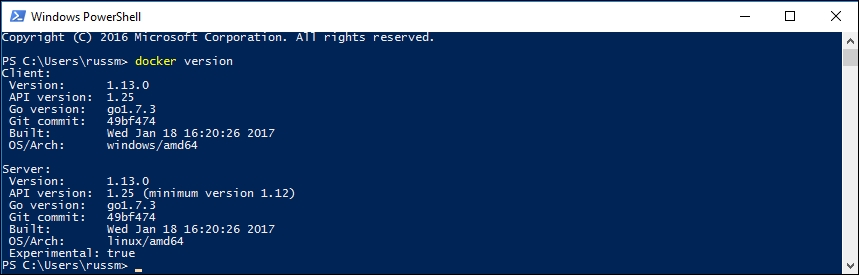
Finally, open Windows PowerShell and entering the following command:
docker version
This will return similar information on Docker for Mac, showing both the client information and details on the MobyLinux virtual machine:
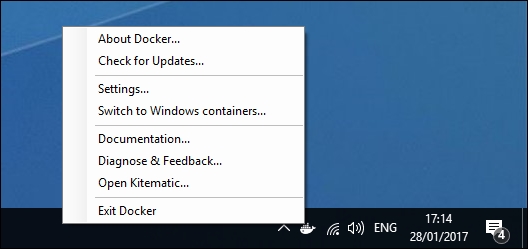
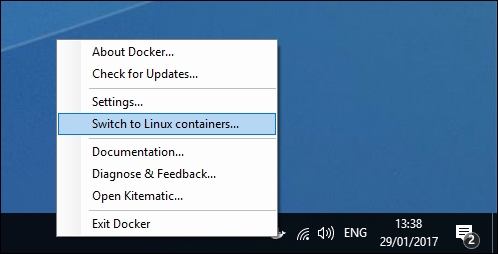
There is one more thing with Docker for Windows: you can run native Windows containers. You can enable this feature by selecting the Switch to Windows containers … option from the menu; if it is your first time enabling this feature then you will get the following dialog popup:

Clicking Ok will reboot your machine. Once rebooted, selecting the menu option again will switch you over from using Linux to Windows; this is reflected when you run the following:
docker version
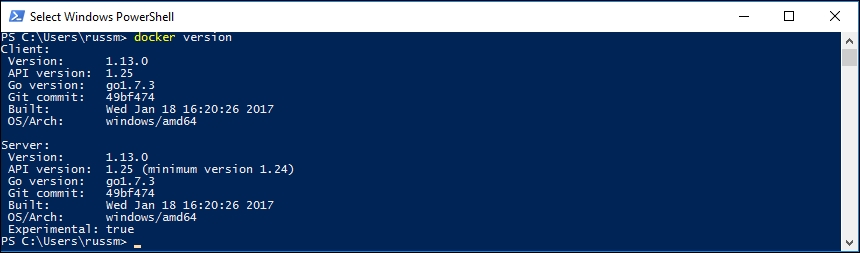
As you can see, the server OS/Arch has changed from linux/amd64 to windows/amd64. We will not be looking at Windows containers in this book; you can change back to Linux containers by using the menu option:
Both Docker for Mac and Windows allow you to easily update your installed version of Docker. If you have an old version of Docker for Mac or Windows installed, you should have been prompted that there is a later version of Docker available when you first open Docker. I you haven't had a prompt then selecting Check for Updates… from the menu will kick off the upgrade process, which is similar to the installation process we have already covered for each of the versions.
If there are no updates, then you will receive a notification confirming you are on the latest version.