

Now that we have the right URL for a post page, let's make a view for individual posts:
var PostView = Backbone.View.extend({
  template: _.template($("#postView").html()),
  events: {
    'click a': 'handleClick'
  },
  render: function () {
    var model = this.model.toJSON();
    model.pubDate = new Date(Date.parse(model.pubDate)).toDateString();
    this.el.innerHTML = this.template(model);
    return this;
  },
  handleClick: function (e) {
    e.preventDefault();
    postRouter.navigate($(e.currentTarget).attr("href"),
      {trigger: true});
    return false;
  }
});
This view should mark an important milestone in your Backbone education: you understand most of the conventions that you're looking at in this code. You should recognize all the properties of the view, as well as most of the method content. I want to point out here there's much more convention going on than you may realize. For example, the template property is only ever referred to inside the render method, so you could call it something different, or put it inside the render method, as shown in the following line of code:
var template = _.template($("#postView").html());Even the render method is only used by us when rendering the view. It's convention to call it render, but really, nothing will break if you don't. Backbone never calls it internally.
Tip
You might wonder why we follow these Backbone conventions if we don't have to. I think it's partly because they are very sensible defaults, and because it makes reading other people's Backbone code much easier. However, another good reason to do it is because there are many third-party Backbone components that depend on these conventions. When using them, conventions become expectations that are required for things to work.
However, there are a few things in this view that will be new to you. First, instead of putting the template text in a string that gets passed directly to _.template, we're putting it in the index.ejs file and using jQuery to pull it in. This is something you'll see often; it's handy to do because most applications will have larger templates, and it's hard to manage a lot of HTML in JavaScript strings. So, put the following code in your index.ejs file related to your "actual" script tags:
<script type="text/template" id="postView">
  <a href='/'>All Posts</a>
  <h1>{{title}}</h1>
  <p>{{pubDate}}</p>
  {{content}}
</script>
It's important to give your script tag a type attribute, so the browser doesn't try to execute it as JavaScript. What that type is doesn't really matter; I use text/template. We also give it an id attribute, so we can reference it from the JavaScript code. Then, in our JavaScript code, we use jQuery to get the element, and then get its content using the html method.
The other different piece of this view is that we're not passing this.model.toJSON() directly to the render method. Instead, we're saving it to the model variable, so that we can format the pubDate property. When stored as JSON, dates aren't very pretty. We use a few built-in Date methods to fix this up and reassign it to the model. Then, we pass the updated model object to the render method.
If you're wondering why we're using events and handleClick to override the anchor action again, notice the All Posts link in our template; this will be displayed above our post content. However, I hope you notice the flaw in this pattern: this will sabotage all links that might be in the content of our post, which might lead outside our blog. This is another reason why, as I said earlier, this pattern of view-changing isn't that great; we'll look at improvements on this in future chapters.
Now that we've created this view, we can update the singlePost method in our router:
singlePost: function (id) {
  var post = this.posts.get(id);
  var pv = new PostView({ model: post });
  this.main.html(pv.render().el);
}
Instead of just logging the ID to the console, we find the post with that ID in our this.posts collection. Then, we create a PostView instance, giving it that post as a model. Finally, we replace the content of the this.main element with the rendered content of the post view.
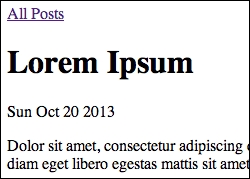
If you do a simple click-through test now, you should be able to go to our home page, click on the post's title, and see this:
You should be congratulated! You've just built a complete Backbone application (albeit an application with an extremely low level of functionality but an application nonetheless).