

Magento 2.0 has a complex control of its themes. It works with multiple directories to generate the final result for the user on its frontend.
In this chapter we will consolidate the basic concepts that you need to create your very first example of Magento theme and activate it.
At the end of this chapter, you will be able to create the basic structure of your own theme. The following topics are covered in this chapter:
- The basic concepts of Magento themes
- Magento 2.0 theme structure
- The Magento Luma theme
- Magento theme inheritance
- CMS blocks and pages
- Custom variables
- Creating a basic Magento 2.0 theme
According to the official documentation available at http://goo.gl/D4oxO1, a Magento theme is a component that provides the visual design for an entire application area using a combination of custom templates, layouts, styles, or images. Themes are implemented by different vendors (frontend developers) and intended to be distributed as additional packages for Magento systems similar to other components.
Magento has its own particularities because it is based on Zend Framework and consequently adopts the MVC architecture as a software design pattern. When the Magento theme process flow becomes a subject, you have some concerns to worry about when you plan to create your own theme. Let's focus on these concepts to create our own theme by the end of this chapter.
Magento 2.0 has a new approach toward managing its themes. Generally, the Magento 2.0 themes are located in the app/design/frontend/<Vendor>/ directory. This location differs according to the built-in themes, such as the
Luma theme, which is located in vendor/magento/theme-frontend-luma.
The different themes are stored in separate directories, as in the following screenshot:
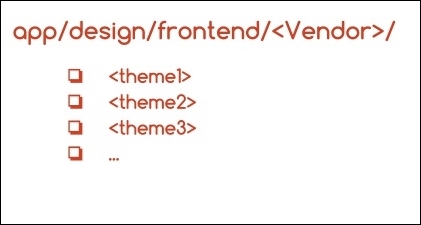
Each vendor can have one or more themes attached to it. So, you can develop different themes inside the same vendor.
The theme structure of Magento 2.0 is illustrated as follows:

How the Magento theme structure works is quite simple to understand: each <Vendor>_<Module> directory corresponds to a specific module or functionality of your theme. For example, Magento_Customer has specific .css and .html files to handle the Customer module of the Magento vendor. Magento handles a significant number of modules. So, I strongly suggest that you navigate to the vendor/magento/theme-frontend-luma folder to take a look at the available modules for the default theme.
In the Magento 2.0 structure, we have three main files that manage the theme behavior, which are as follows:
composer.json: This file describes the dependencies and meta informationregistration.php: This file registers your theme in the systemtheme.xml: This file declares the theme in system and is used by the Magento system to recognize the theme
All the theme files inside the structure explained previously can be divided into static view files and dynamic view files. The static view files have no processing by the server (images, fonts, and .js files), and the dynamic view files are processed by the server before delivering the content to the user (template and layout files).
Static files are generally published in the following folders:
/pub/static/frontend/<Vendor>/<theme>/<language><theme_dir>/media/<theme_dir>/webNote
For further information, please access the official Magento theme structure documentation at http://goo.gl/ov3IUJ.
The Magento CE 2.0 version comes with a new theme named Luma that implements Responsive Web Design (RWD) practices.

The Luma theme style is based on the Magento user interface (UI) library and uses CSS3 media queries to work with screen width, adapting the layout according to device access.
The Magento UI is a great toolbox for theme development in Magento 2.0 and provides the following components to customize and reuse user interface elements:
- The actions toolbar
- Breadcrumbs
- Buttons
- Drop-down menus
- Forms
- Icons
- Layout
- Loaders
- Messages
- Pagination
- Popups
- Ratings
- Sections
- Tabs and accordions
- Tables
- Tooltips
- Typography
- A list of theme variables
The Luma theme uses some of the
blank theme features to be functional. The Magento 2.0 blank theme, available in the vendor/magento/theme-frontend-blank folder, is the basic Magento theme and is declared as the parent theme of Luma. How is this possible? Logically, Magento has distinct folders for every theme, but Magento is too smart to reuse code; it takes advantage of theme inheritance. Let's take a look at how this works.
The frontend of Magento allows designers to create new themes based on the basic blank theme, reusing the main code without changing its structure. The fallback system is a theme's inheritance mechanism and allows developers to create only the files that are necessary for customization.
The Luma theme, for example, uses the fallback system by inheriting the blank theme basic structure. The Luma theme parent is declared in its theme.xml file as follows:
<theme xmlns:xsi="http://www.w3.org/2001/XMLSchema-instance" xsi:noNamespaceSchemaLocation="urn:magento:framework:Config/etc/theme.xsd">
    <title>Magento Luma</title>
    <parent>Magento/blank</parent>
    <media>
        <preview_image>media/preview.jpg</preview_image>
    </media>
</theme>
Inheritance works similar to an override system. You can create new themes using the existent ones (parents) and by replacing (that is, overriding) an existing file with the same name but in your specific theme folder (child).
For example, if you create a new theme in the app/design/frontend/<Vendor>/<theme>/ folder and declare Magento/blank as a parent theme, the theme.xml file and registration.php, you have the entire blank theme structure ready to work in your new theme, including RWD layouts and styles.
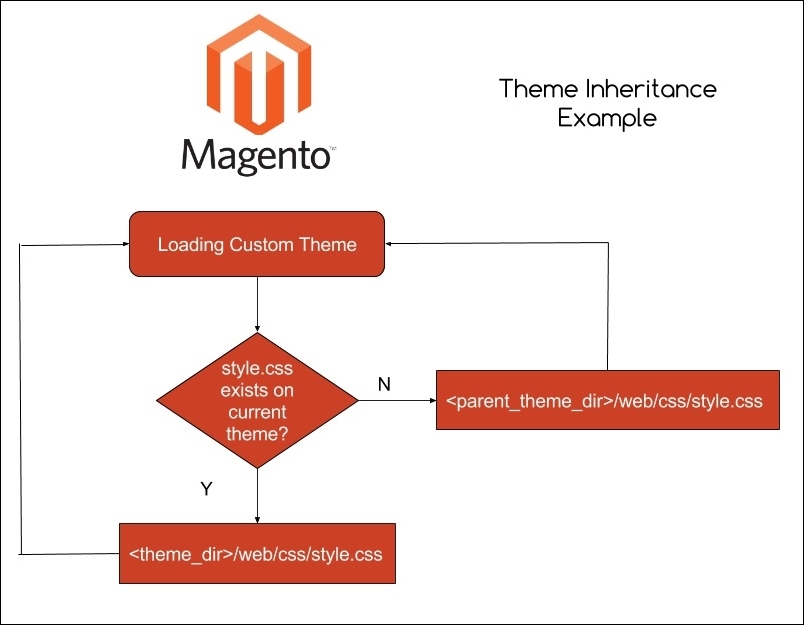
Let's say that you have a specific .css file available in the <theme_dir>/web/css folder. If you delete this file, the fallback system will search the file in the <parent_theme_dir>/web/css folder, as shown in the following figure:
Magento has a flexible theme system. Beyond Magento code customization, the admin can create blocks and content on the Magento admin panel, such as Home Page, About us, or any static page that you want to create. CMS pages and blocks on Magento give you the power to embed HTML code in your page.
You can create or edit pages and blocks by accessing the Admin area (http://localhost/packt/admin_packt) by navigating to Content | Pages.

Custom variables are pieces of HTML code that contain specific values as programming variables. By creating a custom variable, you can apply it to multiple areas on your site. An example of the custom variable structure is shown here:
{{config path="web/unsecure/base_url"}}This variable shows the URL of the store.
Now, let's create a custom variable to see how it works. Perform the following steps:
- Open your favorite browser and access the admin area through
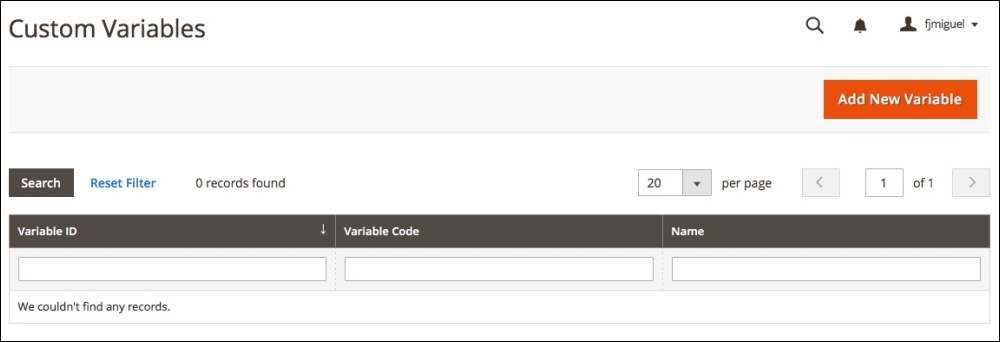
http://localhost/packt/admin_packt. - Navigate to System | Custom Variables
- Then, click on the Add New Variable button.
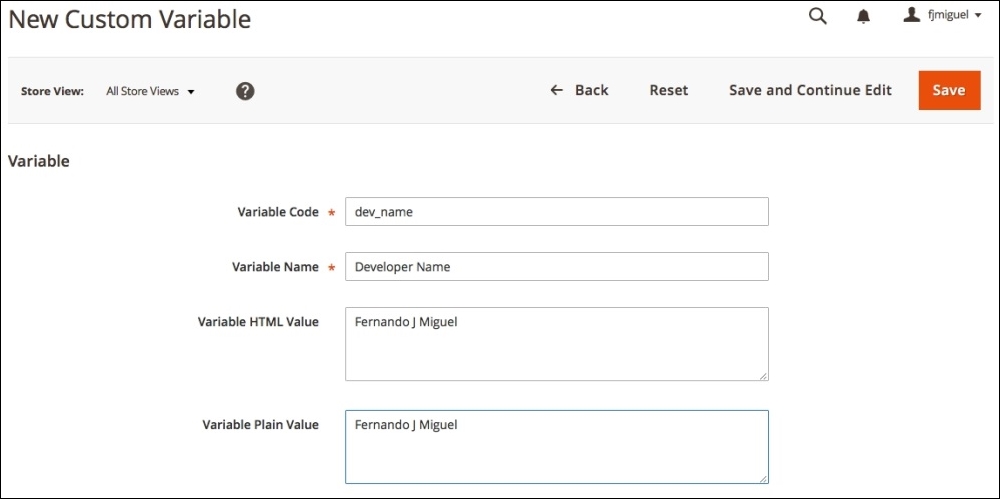
- In the Variable Code field, enter the variable in lowercase with no spaces—for example,
dev_name. - Enter the variable name, which explains the variable purpose.
- Enter the HTML and plain text values of the custom variable in the Variable HTML Value and Variable Plain Value fields and save it.
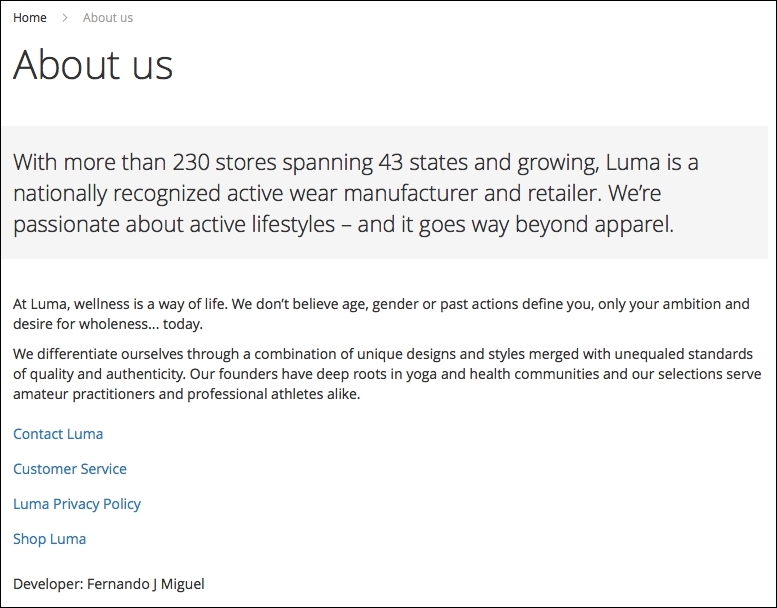
Now, we have a custom variable that stores the developer's name. Let's use this variable inside the CMS About Us page via the following steps:
- In the Admin area, navigate to Content | Pages.
- Click to edit the About Us item.
- Then, click on the Content side menu.
- Click on the Show / Hide Editor button to hide the HTML editor.
- Put the following code at the end of the content:
{{CustomVar code="dev_name"}} - Finally, save the content.

Let's take a look at the result in the following screenshot:
After understanding the basic Magento 2.0 theme structure, you have the right credentials to go to the next level: creating your own theme. In this chapter, we will develop a simple theme and activate it on the Magento Admin panel. The basic idea is to give you the right directions to Magento theme development and provide you with the tools to let your imagination fly around the creation of various Magento themes!
Before starting the creation, let's disable Magento cache management. It is important when you work with Magento development to get updates in real time. You learned about cache management in Chapter 2, Magento 2.0 Features:
- Open the terminal (Linux, OS X) or command prompt (Windows) and access the
<your Magento install dir>/bindirectory. - Then, run the
php magento cache:disablecommand to disable all the cache systems.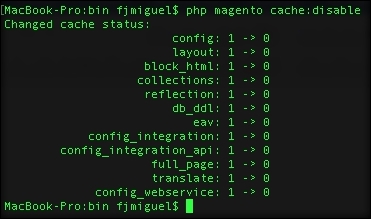
To create a basic theme structure, follow these steps:
The next step is to declare the theme information for Magento to recognize it as a new theme. Perform the following:
- Open your preferred code editor (Sublime Text2, TextMate, Atom.io).
- Create a new file named
theme.xmlunder your theme directory (app/design/frontend/Packt/basic/theme.xml). - Use the following code in the
theme.xmlfile and save the file:<theme xmlns:xsi="http://www.w3.org/2001/XMLSchema-instance" xsi:noNamespaceSchemaLocation="urn:magento:framework:Config/etc/theme.xsd"> <title>Basic theme</title> <parent>Magento/blank</parent> <!-- <media> <preview_image>media/preview.jpg</preview_image> </media>--> </theme>
This is a basic declaration for the Magento system to recognize our theme as an official theme. This code configures the theme name, parent, and preview image. The preview image is a preview for basic visualization purposes. We don't have a preview image right now, which is the why the code is commented; avoid unnecessary errors.
Once we have the basic configurations, we need to register the theme in the Magento system:
- Open your preferred code editor (Sublime Text2, TextMate, or Atom.io).
- Create new file named
registration.phpunder your theme directory (app/design/frontend/Packt/basic/registration.php). - Use the following code in registration.php and save the file:
<?php
/**
 * Copyright © 2016 Magento. All rights reserved.
 * See COPYING.txt for license details.
 */
\Magento\Framework\Component\ComponentRegistrar::register(
    \Magento\Framework\Component\ComponentRegistrar::THEME,
    'frontend/Packt/basic',
    __DIR__
);
This code simply registers our theme in the Magento system by passing a parameter of your new theme's structure directory.
In your theme, you can configure the image properties of the products in the Magento Catalog module by creating the view.xml file. You can control this specific configuration using the id attribute of every product's HTML5 element:
- Open your preferred code editor (Sublime Text2, TextMate, or Atom.io).
- Create a new directory named
etcunder your theme directory (app/design/frontend/Packt/basic/etc). - Create a new file named
view.xmlunder youretcdirectory (app/design/frontend/Packt/basic/etc/view.xml). - Then, use the following code in
view.xmland save the file:<image id="category_page_grid" type="small_image"> <width>250</width> <height>250</height> </image>
In the view.xml file, we declared the values of the width and height of the product image. The id and type attributes specified the kind of image that this rule will be applied to.
The static files (images, .js files, .css files, and fonts) will be stored in the web directory. Inside the web directory, we will organize our static files according to its scope. Create a new directory named web under your directory app/design/frontend/Packt/basic/web theme and create the following directory structure:
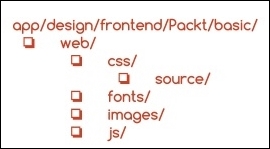
With this simple structure, you can manage all the static files of your custom theme.
By default in Magento 2.0, the theme logo is always recognized by the system by the name logo.svg. Magento 2.0 also recognizes the logo's default directory as <theme_dir>/web/images/logo.svg. So, if you have a logo.svg file, you can simply put the file in the right directory.
However, if you want to work with a different logo's name with a different format, you have to declare it in the Magento system. We will make a declaration with this new logo in the Magento_Theme directory because the new logo is a customization of the Magento_Theme module. We will override this module by taking advantage of the fallback system. As you may note, Magento has a specific pattern of declaring elements. This is the way in which Magento organizes its life cycle.
Let's declare a new theme logo by performing the following steps:
- Choose one logo for the example and save the file as
logo.pngin theapp/design/frontend/Packt/basic/Magento_Theme/web/imagesdirectory. - Open your preferred code editor (Sublime Text2, TextMate, or Atom.io).
- Create new file named
default.xmlunder yourlayoutdirectory (app/design/frontend/Packt/basic/Magento_Theme/layout). - Use the following code in
default.xmland save the file:<page xmlns:xsi="http://www.w3.org/2001/XMLSchema-instance" xsi:noNamespaceSchemaLocation="urn:magento:framework:View/Layout/etc/page_configuration.xsd"> <body> <referenceBlock name="logo"> <arguments> <argument name="logo_file" xsi:type="string"> Magento_Theme/images/logo.png </argument> <argument name="logo_img_width" xsi:type="number"> your_logo_width </argument> <argument name="logo_img_height" xsi:type="number"> your_logo_height </argument> </arguments> </referenceBlock> </body> </page>
This declaration has three different arguments to manage three attributes of your new logo: filename, width, and height. Don't forget to replace the your_logo_width and your_logo_height attributes with the correct size of the logo that you choose.
The logo_file argument seems to be wrong because we created our image in the Magento_Theme/web/images directory; however, thank God this is not true. I'll explain: when we activate the new theme, Magento processes the static files and copies them to the pub/static directory. This occurs because static files can be cached by Magento, and the correct directory for this is pub. So, we need to create the web directory for Magento to recognize the files as static files.
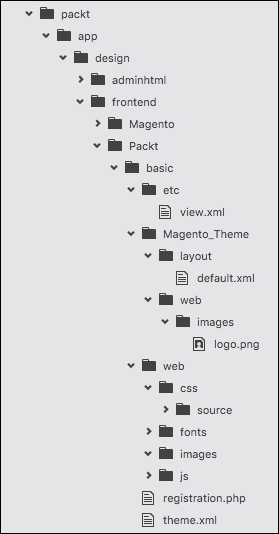
The final theme directory structure is illustrated as follows:
Once we have the theme ready to launch, we need to activate it in the Magento admin dashboard:
- First, access the Magento admin area URL (
http://localhost/packt/admin_packt) in your favorite browser. - Navigate to Stores | Configuration | Design.
- Then, select the Basic theme option as your Design Theme value and save the configuration.

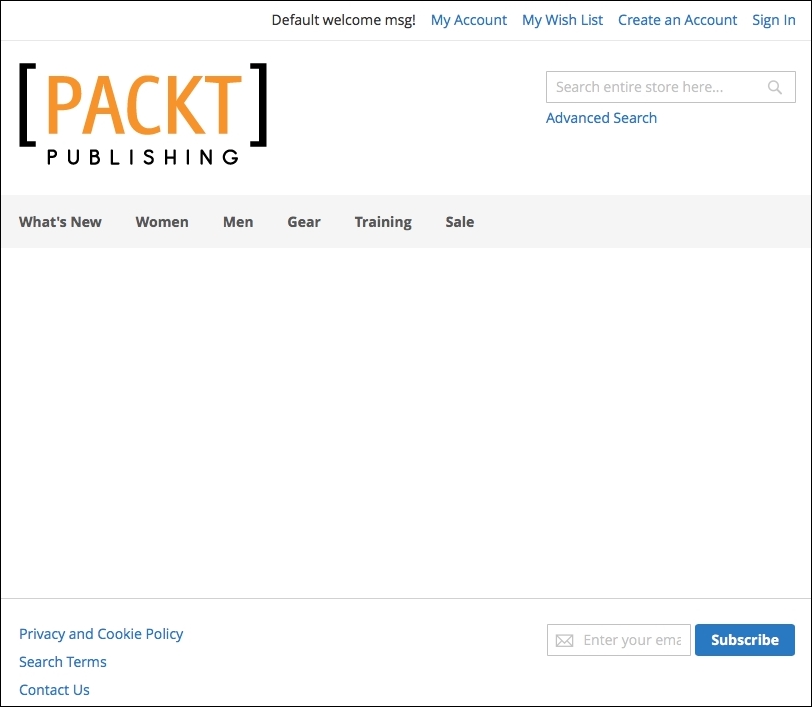
Navigate to the home page of your site by accessing the http://localhost/packt URL to see the final result:
Creating and declaring a theme
To create a basic theme structure, follow these steps:
The next step is to declare the theme information for Magento to recognize it as a new theme. Perform the following:
- Open your preferred code editor (Sublime Text2, TextMate, Atom.io).
- Create a new file named
theme.xmlunder your theme directory (app/design/frontend/Packt/basic/theme.xml). - Use the following code in the
theme.xmlfile and save the file:<theme xmlns:xsi="http://www.w3.org/2001/XMLSchema-instance" xsi:noNamespaceSchemaLocation="urn:magento:framework:Config/etc/theme.xsd"> <title>Basic theme</title> <parent>Magento/blank</parent> <!-- <media> <preview_image>media/preview.jpg</preview_image> </media>--> </theme>
This is a basic declaration for the Magento system to recognize our theme as an official theme. This code configures the theme name, parent, and preview image. The preview image is a preview for basic visualization purposes. We don't have a preview image right now, which is the why the code is commented; avoid unnecessary errors.
Once we have the basic configurations, we need to register the theme in the Magento system:
- Open your preferred code editor (Sublime Text2, TextMate, or Atom.io).
- Create new file named
registration.phpunder your theme directory (app/design/frontend/Packt/basic/registration.php). - Use the following code in registration.php and save the file:
<?php
/**
 * Copyright © 2016 Magento. All rights reserved.
 * See COPYING.txt for license details.
 */
\Magento\Framework\Component\ComponentRegistrar::register(
    \Magento\Framework\Component\ComponentRegistrar::THEME,
    'frontend/Packt/basic',
    __DIR__
);
This code simply registers our theme in the Magento system by passing a parameter of your new theme's structure directory.
In your theme, you can configure the image properties of the products in the Magento Catalog module by creating the view.xml file. You can control this specific configuration using the id attribute of every product's HTML5 element:
- Open your preferred code editor (Sublime Text2, TextMate, or Atom.io).
- Create a new directory named
etcunder your theme directory (app/design/frontend/Packt/basic/etc). - Create a new file named
view.xmlunder youretcdirectory (app/design/frontend/Packt/basic/etc/view.xml). - Then, use the following code in
view.xmland save the file:<image id="category_page_grid" type="small_image"> <width>250</width> <height>250</height> </image>
In the view.xml file, we declared the values of the width and height of the product image. The id and type attributes specified the kind of image that this rule will be applied to.
The static files (images, .js files, .css files, and fonts) will be stored in the web directory. Inside the web directory, we will organize our static files according to its scope. Create a new directory named web under your directory app/design/frontend/Packt/basic/web theme and create the following directory structure:
With this simple structure, you can manage all the static files of your custom theme.
By default in Magento 2.0, the theme logo is always recognized by the system by the name logo.svg. Magento 2.0 also recognizes the logo's default directory as <theme_dir>/web/images/logo.svg. So, if you have a logo.svg file, you can simply put the file in the right directory.
However, if you want to work with a different logo's name with a different format, you have to declare it in the Magento system. We will make a declaration with this new logo in the Magento_Theme directory because the new logo is a customization of the Magento_Theme module. We will override this module by taking advantage of the fallback system. As you may note, Magento has a specific pattern of declaring elements. This is the way in which Magento organizes its life cycle.
Let's declare a new theme logo by performing the following steps:
- Choose one logo for the example and save the file as
logo.pngin theapp/design/frontend/Packt/basic/Magento_Theme/web/imagesdirectory. - Open your preferred code editor (Sublime Text2, TextMate, or Atom.io).
- Create new file named
default.xmlunder yourlayoutdirectory (app/design/frontend/Packt/basic/Magento_Theme/layout). - Use the following code in
default.xmland save the file:<page xmlns:xsi="http://www.w3.org/2001/XMLSchema-instance" xsi:noNamespaceSchemaLocation="urn:magento:framework:View/Layout/etc/page_configuration.xsd"> <body> <referenceBlock name="logo"> <arguments> <argument name="logo_file" xsi:type="string"> Magento_Theme/images/logo.png </argument> <argument name="logo_img_width" xsi:type="number"> your_logo_width </argument> <argument name="logo_img_height" xsi:type="number"> your_logo_height </argument> </arguments> </referenceBlock> </body> </page>
This declaration has three different arguments to manage three attributes of your new logo: filename, width, and height. Don't forget to replace the your_logo_width and your_logo_height attributes with the correct size of the logo that you choose.
The logo_file argument seems to be wrong because we created our image in the Magento_Theme/web/images directory; however, thank God this is not true. I'll explain: when we activate the new theme, Magento processes the static files and copies them to the pub/static directory. This occurs because static files can be cached by Magento, and the correct directory for this is pub. So, we need to create the web directory for Magento to recognize the files as static files.
The final theme directory structure is illustrated as follows:
Once we have the theme ready to launch, we need to activate it in the Magento admin dashboard:
- First, access the Magento admin area URL (
http://localhost/packt/admin_packt) in your favorite browser. - Navigate to Stores | Configuration | Design.
- Then, select the Basic theme option as your Design Theme value and save the configuration.
Navigate to the home page of your site by accessing the http://localhost/packt URL to see the final result:
Simple product image configuration
In your theme, you can configure the image properties of the products in the Magento Catalog module by creating the view.xml file. You can control this specific configuration using the id attribute of every product's HTML5 element:
- Open your preferred code editor (Sublime Text2, TextMate, or Atom.io).
- Create a new directory named
etcunder your theme directory (app/design/frontend/Packt/basic/etc). - Create a new file named
view.xmlunder youretcdirectory (app/design/frontend/Packt/basic/etc/view.xml). - Then, use the following code in
view.xmland save the file:<image id="category_page_grid" type="small_image"> <width>250</width> <height>250</height> </image>
In the view.xml file, we declared the values of the width and height of the product image. The id and type attributes specified the kind of image that this rule will be applied to.
The static files (images, .js files, .css files, and fonts) will be stored in the web directory. Inside the web directory, we will organize our static files according to its scope. Create a new directory named web under your directory app/design/frontend/Packt/basic/web theme and create the following directory structure:
With this simple structure, you can manage all the static files of your custom theme.
By default in Magento 2.0, the theme logo is always recognized by the system by the name logo.svg. Magento 2.0 also recognizes the logo's default directory as <theme_dir>/web/images/logo.svg. So, if you have a logo.svg file, you can simply put the file in the right directory.
However, if you want to work with a different logo's name with a different format, you have to declare it in the Magento system. We will make a declaration with this new logo in the Magento_Theme directory because the new logo is a customization of the Magento_Theme module. We will override this module by taking advantage of the fallback system. As you may note, Magento has a specific pattern of declaring elements. This is the way in which Magento organizes its life cycle.
Let's declare a new theme logo by performing the following steps:
- Choose one logo for the example and save the file as
logo.pngin theapp/design/frontend/Packt/basic/Magento_Theme/web/imagesdirectory. - Open your preferred code editor (Sublime Text2, TextMate, or Atom.io).
- Create new file named
default.xmlunder yourlayoutdirectory (app/design/frontend/Packt/basic/Magento_Theme/layout). - Use the following code in
default.xmland save the file:<page xmlns:xsi="http://www.w3.org/2001/XMLSchema-instance" xsi:noNamespaceSchemaLocation="urn:magento:framework:View/Layout/etc/page_configuration.xsd"> <body> <referenceBlock name="logo"> <arguments> <argument name="logo_file" xsi:type="string"> Magento_Theme/images/logo.png </argument> <argument name="logo_img_width" xsi:type="number"> your_logo_width </argument> <argument name="logo_img_height" xsi:type="number"> your_logo_height </argument> </arguments> </referenceBlock> </body> </page>
This declaration has three different arguments to manage three attributes of your new logo: filename, width, and height. Don't forget to replace the your_logo_width and your_logo_height attributes with the correct size of the logo that you choose.
The logo_file argument seems to be wrong because we created our image in the Magento_Theme/web/images directory; however, thank God this is not true. I'll explain: when we activate the new theme, Magento processes the static files and copies them to the pub/static directory. This occurs because static files can be cached by Magento, and the correct directory for this is pub. So, we need to create the web directory for Magento to recognize the files as static files.
The final theme directory structure is illustrated as follows:
Once we have the theme ready to launch, we need to activate it in the Magento admin dashboard:
- First, access the Magento admin area URL (
http://localhost/packt/admin_packt) in your favorite browser. - Navigate to Stores | Configuration | Design.
- Then, select the Basic theme option as your Design Theme value and save the configuration.
Navigate to the home page of your site by accessing the http://localhost/packt URL to see the final result:
Creating static files' directories
The static files (images, .js files, .css files, and fonts) will be stored in the web directory. Inside the web directory, we will organize our static files according to its scope. Create a new directory named web under your directory app/design/frontend/Packt/basic/web theme and create the following directory structure:
With this simple structure, you can manage all the static files of your custom theme.
By default in Magento 2.0, the theme logo is always recognized by the system by the name logo.svg. Magento 2.0 also recognizes the logo's default directory as <theme_dir>/web/images/logo.svg. So, if you have a logo.svg file, you can simply put the file in the right directory.
However, if you want to work with a different logo's name with a different format, you have to declare it in the Magento system. We will make a declaration with this new logo in the Magento_Theme directory because the new logo is a customization of the Magento_Theme module. We will override this module by taking advantage of the fallback system. As you may note, Magento has a specific pattern of declaring elements. This is the way in which Magento organizes its life cycle.
Let's declare a new theme logo by performing the following steps:
- Choose one logo for the example and save the file as
logo.pngin theapp/design/frontend/Packt/basic/Magento_Theme/web/imagesdirectory. - Open your preferred code editor (Sublime Text2, TextMate, or Atom.io).
- Create new file named
default.xmlunder yourlayoutdirectory (app/design/frontend/Packt/basic/Magento_Theme/layout). - Use the following code in
default.xmland save the file:<page xmlns:xsi="http://www.w3.org/2001/XMLSchema-instance" xsi:noNamespaceSchemaLocation="urn:magento:framework:View/Layout/etc/page_configuration.xsd"> <body> <referenceBlock name="logo"> <arguments> <argument name="logo_file" xsi:type="string"> Magento_Theme/images/logo.png </argument> <argument name="logo_img_width" xsi:type="number"> your_logo_width </argument> <argument name="logo_img_height" xsi:type="number"> your_logo_height </argument> </arguments> </referenceBlock> </body> </page>
This declaration has three different arguments to manage three attributes of your new logo: filename, width, and height. Don't forget to replace the your_logo_width and your_logo_height attributes with the correct size of the logo that you choose.
The logo_file argument seems to be wrong because we created our image in the Magento_Theme/web/images directory; however, thank God this is not true. I'll explain: when we activate the new theme, Magento processes the static files and copies them to the pub/static directory. This occurs because static files can be cached by Magento, and the correct directory for this is pub. So, we need to create the web directory for Magento to recognize the files as static files.
The final theme directory structure is illustrated as follows:
Once we have the theme ready to launch, we need to activate it in the Magento admin dashboard:
- First, access the Magento admin area URL (
http://localhost/packt/admin_packt) in your favorite browser. - Navigate to Stores | Configuration | Design.
- Then, select the Basic theme option as your Design Theme value and save the configuration.
Navigate to the home page of your site by accessing the http://localhost/packt URL to see the final result:
Creating a theme logo
By default in Magento 2.0, the theme logo is always recognized by the system by the name logo.svg. Magento 2.0 also recognizes the logo's default directory as <theme_dir>/web/images/logo.svg. So, if you have a logo.svg file, you can simply put the file in the right directory.
However, if you want to work with a different logo's name with a different format, you have to declare it in the Magento system. We will make a declaration with this new logo in the Magento_Theme directory because the new logo is a customization of the Magento_Theme module. We will override this module by taking advantage of the fallback system. As you may note, Magento has a specific pattern of declaring elements. This is the way in which Magento organizes its life cycle.
Let's declare a new theme logo by performing the following steps:
- Choose one logo for the example and save the file as
logo.pngin theapp/design/frontend/Packt/basic/Magento_Theme/web/imagesdirectory. - Open your preferred code editor (Sublime Text2, TextMate, or Atom.io).
- Create new file named
default.xmlunder yourlayoutdirectory (app/design/frontend/Packt/basic/Magento_Theme/layout). - Use the following code in
default.xmland save the file:<page xmlns:xsi="http://www.w3.org/2001/XMLSchema-instance" xsi:noNamespaceSchemaLocation="urn:magento:framework:View/Layout/etc/page_configuration.xsd"> <body> <referenceBlock name="logo"> <arguments> <argument name="logo_file" xsi:type="string"> Magento_Theme/images/logo.png </argument> <argument name="logo_img_width" xsi:type="number"> your_logo_width </argument> <argument name="logo_img_height" xsi:type="number"> your_logo_height </argument> </arguments> </referenceBlock> </body> </page>
This declaration has three different arguments to manage three attributes of your new logo: filename, width, and height. Don't forget to replace the your_logo_width and your_logo_height attributes with the correct size of the logo that you choose.
The logo_file argument seems to be wrong because we created our image in the Magento_Theme/web/images directory; however, thank God this is not true. I'll explain: when we activate the new theme, Magento processes the static files and copies them to the pub/static directory. This occurs because static files can be cached by Magento, and the correct directory for this is pub. So, we need to create the web directory for Magento to recognize the files as static files.
The final theme directory structure is illustrated as follows:
Once we have the theme ready to launch, we need to activate it in the Magento admin dashboard:
- First, access the Magento admin area URL (
http://localhost/packt/admin_packt) in your favorite browser. - Navigate to Stores | Configuration | Design.
- Then, select the Basic theme option as your Design Theme value and save the configuration.
Navigate to the home page of your site by accessing the http://localhost/packt URL to see the final result:
Applying the theme
Once we have the theme ready to launch, we need to activate it in the Magento admin dashboard:
- First, access the Magento admin area URL (
http://localhost/packt/admin_packt) in your favorite browser. - Navigate to Stores | Configuration | Design.
- Then, select the Basic theme option as your Design Theme value and save the configuration.
Navigate to the home page of your site by accessing the http://localhost/packt URL to see the final result:
Now, you have all the basic concepts to create a custom theme for Magento and all the information to think in terms of the Magento structure when an idea for your new design comes to mind.
In this chapter, you learned the basic concepts of Magento 2.0 themes, how theme inheritance (that is, the fallback system) works, and which directories Magento uses to create its themes according to the admin area configurations. Finally, you created your own basic theme with these examples.
However, what about creating a quality theme? Is it possible with the knowledge acquired in this chapter? Of course! We will go to the next level in the next chapter and create a responsive theme by example.