
List elements are commonly used around the Web; they can be used to display search results, menus, and navigational items to name a few. Thanks to CSS, they no longer need to be boring, and it is possible to style list elements to make your data beautiful.
With jQuery, it is possible to populate a list element dynamically. This can be done directly from a JavaScript array via an AJAX response, with data from a web server or some other source.
Create a blank HTML document named recipe-9.html, and ensure that it is saved to a location where the latest version of jQuery can be included.
Learn how to dynamically populate a list with jQuery by performing each of the following recipes:
In order to demonstrate how you can use jQuery to populate a list element, we will create a JavaScript array of objects. Add the following HTML and JavaScript code to
recipe-9.html, which you have just created:<!DOCTYPE html> <html> <head> <title>Populating list elements</title> <script src="jquery.min.js"></script> <script type="text/javascript"> var names = [ { id: 1, firstname: 'Leon', lastname: 'Revill' }, { id: 2, firstname: 'Allyce', lastname: 'Wolverson' }, { id: 3, firstname: 'Harry', lastname: 'Round' }, { id: 4, firstname: 'Chris', lastname: 'Wilshaw' } ]; $(function(){ }); </script> </head> <body> <ul id="namelist"></ul> </body> </html>Add the following JavaScript within
$(function(){});, just under the JavaScript array. This JavaScript will use the objects within the JavaScript array we created in the Getting ready section to populate the list element on our page.$.each(names, function(index, obj){ $('#namelist').append("<li>#" + obj.id + " " + obj.firstname + " " + obj.lastname + "</li>"); });
We use jQuery's $.each() function to loop through each of the JavaScript objects within the names array. Then, for each of these objects, we can create a <li> element and insert the values of the id, firstname, and lastname variables. Finally, we can use the jQuery append() function to append the list element to the end of the unordered list.
Within the $.each() function, the first parameter is the array we wish to iterate through and the second parameter is the function we wish to execute for each of the objects within the names array. The specified function also has two arguments: index and obj. The index argument will contain the current array index of the JavaScript object, and the obj variable will contain the actual JavaScript object. Both these variables are available within the specified callback function.
We are then able to reference obj.propertyName (replace propertyName with a property of the object) in order to access specific parts of the object we wish to use. By doing this, we construct a string and pass it to the
append() function, which then appends it to the specified #nameslist unordered list.
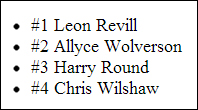
Open the HTML page within the browser, and you should see the list populated with the names from the JavaScript array, illustrated as follows: