
As mentioned before, when you launch Lumion for the very first time, a benchmark starts to evaluate your workstation. After that comes the Files menu that is composed of five tabs—New, Examples, Load scene, Save scene (this tab only appears after you open a scene), and Import full scene.
The New tab is where you start a new project and here you can find nine different scenes to help you start working with Lumion. Keep in mind that the difference between each scene is the settings used for landscaping, weather, and lighting, which means that you can pick any scene available and then create the other eight scenes easily. Let's click on the White scene to start working with Lumion and explore the interface to see where we can find the main menus.
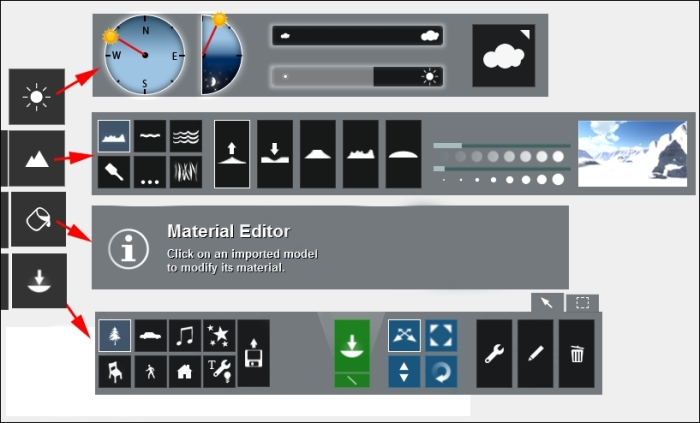
Lumion tries to provide you with a friendly user interface and, initially, this may be confusing because you almost have no visual information and don't know where to find the menus. Lumion has four main menus that you can find on the left-hand side of the screen and when Lumion opens a new scene, the Import menu is the one that is opened by default. The other three menus only appear when you move the mouse close to the Import menu icon that you see on the screen. The following image shows you the toolbars that appear when you open each menu:
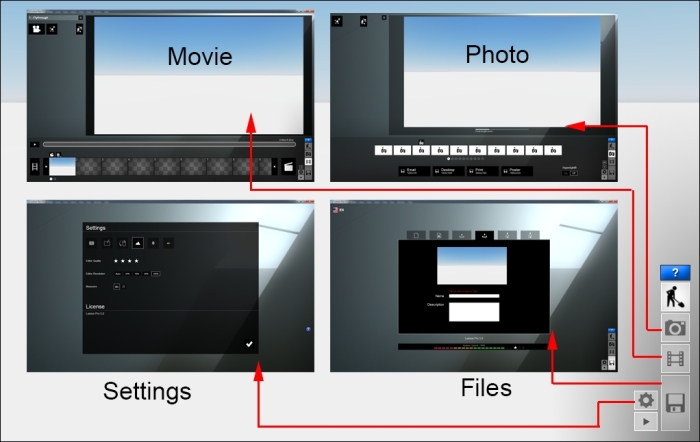
The next section that is essential is located on the right-hand side of the screen and here, you can see some small icons that give you access to different menus, as you can see in the following screenshot:
What essential information is missing here? How do you control the viewport and the camera? The easiest way to learn this is by having a look at the following screenshot:

This information is available when you work with Lumion; you just need to hover your mouse over the Help button and all of these tips will appear. However, there are some shortcuts you can use to control the camera, which are as follows:
All of these shortcuts and keys that are used to control the viewport while working in Lumion will be used later to control and tweak the cameras used for the animation clip and to render images.