Book Image

Vue.js 2 and Bootstrap 4 Web Development

Book Image

Vue.js 2 and Bootstrap 4 Web Development

Overview of this book

In this book, we will build a full stack web application right from scratch up to its deployment. We will start by building a small introduction application and then proceed to the creation of a fully functional, dynamic responsive web application called ProFitOro. In this application, we will build a Pomodoro timer combined with office workouts. Besides the Pomodoro timer and ProFitOro workouts will enable authentication and collaborative content management. We will explore topics such as Vue reactive data binding, reusable components, routing, and Vuex store along with its state, actions, mutations, and getters. We will create Vue applications using both webpack and Nuxt.js templates while exploring cool hot Nuxt.js features such as code splitting and server-side rendering. We will use Jest to test this application, and we will even revive some trigonometry from our secondary school! While developing the app, you will go through the new grid system of Bootstrap 4 along with Vue.js’ directives. We will connect Vuex store to the Firebase real-time database, data storage, and authentication APIs and use this data later inside the application’s reactive components. Finally, we will quickly deploy our application using the Firebase hosting mechanism.
Table of Contents (19 chapters)
Vue.js 2 and Bootstrap 4 Web Development
Credits
About the Author
Acknowledgments
About the Reviewer
www.PacktPub.com
Customer Feedback
Preface
Index

Extra mile – connecting your Firebase project to a custom domain


It's fairly easy to connect the Firebase project to a custom domain. First of all, of course, you need to buy this domain. For this application, I bought the pleaseintroduceyourself domain with the cheapest top-level domain, .xyz. It cost me a bit more than a dollar per year on GoDaddy (https://godaddy.com). After you have your domain, it's really easy. Go to the Firebase web console of the project. Click on the Hosting tab on the left-hand side. Then, click on the CONNECT DOMAIN button:

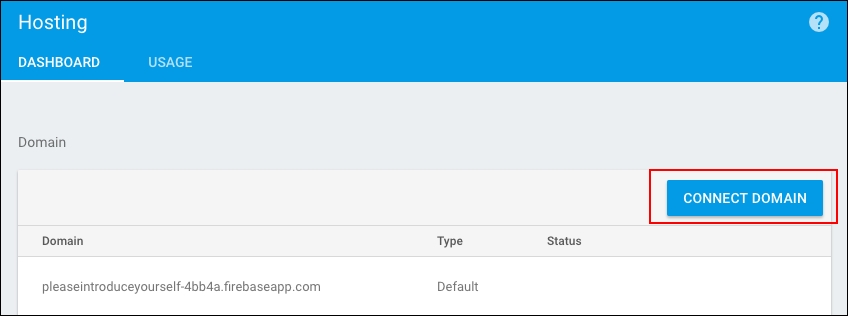
Click on the CONNECT DOMAIN button

In the popup, input your domain name:

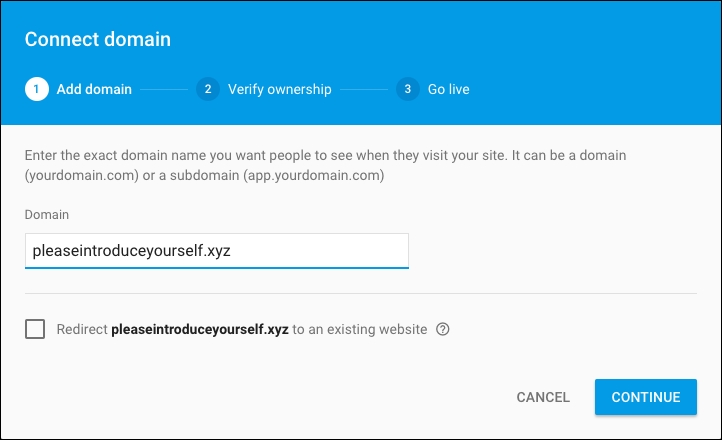
Input your domain name

It will suggest that you add a TXT DNS record to your domain. Just open your DNS provider page, select your domain, find out how to add DNS records, and add the record with the TXT type. In my case, with GoDaddy, the record adding section looks like this:

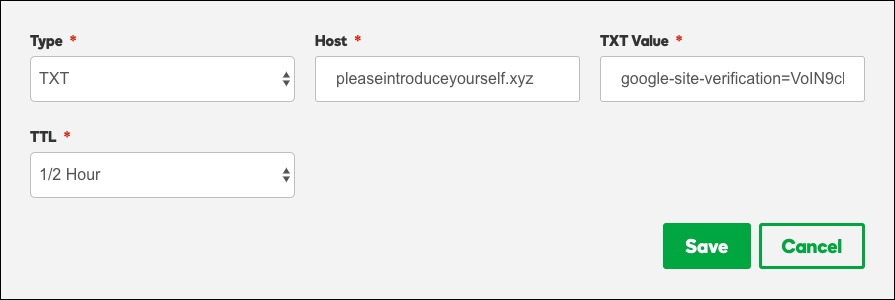
Adding the DNS TXT record to our domain

After the handshake is established (mind, it might take some time), Firebase will propose you the final step—adding the A record to your domain. Follow the exact same procedure as in the previous step; just instead of records of type TXT, add records of type A.

It will take some time until the changes are completely propagated. In my case, it took around an hour. After a while, you will be able to open your new page with the https://<your domain>.<your top level domain> address. In my case, as you already know, it's https://pleaseintroduceyourself.xyz/.