

In the previous chapter, you learned the fundamentals of creating a custom Magento 2.0 theme, and we created the basic structure by example. In this chapter, we will create our own theme project called the CompStore theme.
The following topics will be covered in this chapter:
- Developing the CompStore theme
- Introduction to Composer Dependency Manager
- CSS preprocessing with LESS
- Creating new content for the CompStore theme
- Developing a custom CompStore theme using CSS
- Creating a custom template
The CompStore theme project is the new Magento 2.0 theme that you will develop for a hypothetical computer store client or for a theme marketplace such as http://themeforest.net/. I strongly suggest you to take a look at the Become an author page at http://themeforest.net/become_an_author in order to explore the options to monetize your Magento theme development expertise. Logically, you have to work harder before publishing and selling your own theme solution, but it will be worth it!
Magento 2.0 themes and modules work with the
Composer (https://getcomposer.org/) dependency manager for PHP to generate a reliable deployment of Magento components. This is a great evolution in the Magento universe because this management can provide a powerful environment for the deployment of modules and themes. So, we will create a composer file for our new theme solution.
Before we start the theme development, let's take a look at Composer.
Inspired by
npm (https://www.npmjs.com/) and
bundler (http://bundler.io/), Composer (https://getcomposer.org/) manages the dependencies of your project and installs packages in predetermined directories (for example, vendor) using the composer.json file in the Magento module or theme. This kind of management is very useful once each library has your specific dependency. Composer doesn't let you waste your time by connecting the dependencies to every deployment that you want to do.

In the next chapters, we will use Composer to install components on Magento. However, first, we will start the development of our theme; it is necessary to declare our composer.json file. For now, let's install Composer on the operating system.
To install Composer on Unix-like systems (such as Unix, Linux, and OS X), you simply need to run these two commands in the terminal:
$ curl -s https://getcomposer.org/installer | php
$ sudo mv composer.phar /usr/local/bin/composer
The first command downloads the composer.phar installation file. The second command moves the file to the bin directory to install Composer globally on your computer.
Run the following command to check whether Composer was successfully installed:
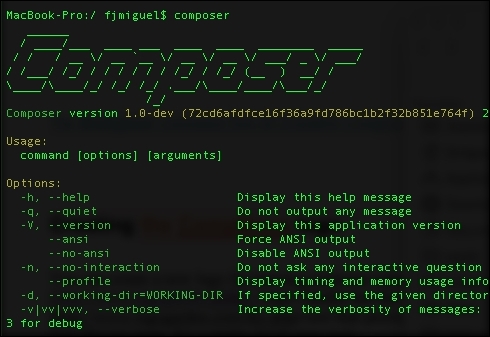
$ composer
The $ composer command lists all the available Composer commands and their descriptions:
To install Composer on Windows, you simply have to download and execute Composer-Setup.exe, which is available on https://getcomposer.org/Composer-Setup.exe.
This executable file will install the latest Composer version and set up your path to use the composer command in the command prompt window. Open the command prompt window and run command composer to get the list of available commands of Composer.
Installing Composer on Unix-like operating systems
To install Composer on Unix-like systems (such as Unix, Linux, and OS X), you simply need to run these two commands in the terminal:
$ curl -s https://getcomposer.org/installer | php
$ sudo mv composer.phar /usr/local/bin/composer
The first command downloads the composer.phar installation file. The second command moves the file to the bin directory to install Composer globally on your computer.
Run the following command to check whether Composer was successfully installed:
$ composer
The $ composer command lists all the available Composer commands and their descriptions:
To install Composer on Windows, you simply have to download and execute Composer-Setup.exe, which is available on https://getcomposer.org/Composer-Setup.exe.
This executable file will install the latest Composer version and set up your path to use the composer command in the command prompt window. Open the command prompt window and run command composer to get the list of available commands of Composer.
Installing Composer on Windows
To install Composer on Windows, you simply have to download and execute Composer-Setup.exe, which is available on https://getcomposer.org/Composer-Setup.exe.
This executable file will install the latest Composer version and set up your path to use the composer command in the command prompt window. Open the command prompt window and run command composer to get the list of available commands of Composer.
As you noted in the previous chapter, Magento can store different themes inside the same vendor scope. The proposal project called CompStore will be a template of the Packt vendor. This is the same vendor created in the previous chapter.
First of all, it is important to build the theme directory in the Packt vendor directory (<Magento root directory>/app/design/frontend/Packt/compstore). Create this folder as the following image suggests:
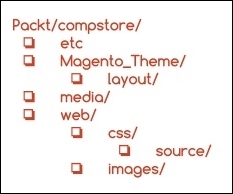
The etc directory usually handles the XML configuration of some components. The Magento_Theme directory will override the native Magento_Theme module by adding new functionalities. The media directory will store the preview image of the CompStore theme. Meanwhile, the web directory would have store CSS and image files by now.
The Compstore theme will have Luma as the parent theme. This example shows you the power of the abstraction used in Magento theme projects. Create the theme.xml file in the Packt/compstore directory with the following code:
<theme xmlns:xsi="http://www.w3.org/2001/XMLSchema-instance" xsi:noNamespaceSchemaLocation="urn:magento:framework:Config/etc/theme.xsd">
    <title>CompStore Electronics</title>
    <parent>Magento/luma</parent>
    <media>
        <preview_image>media/preview.jpg</preview_image>
    </media>
</theme>
The theme.xml file declares the title and parent of the CompStore theme. Create a simple preview.jpg image with a size of 800 x 800 and save it in the Packt/compstore/media directory. For example, the Magento logo is centered at the image size of 800 x 800.
This image shows the preview of the new theme, but as you don't have a preview yet, you can create a placeholder for now.
The next step is creating the registration.php file in the Packt/compstore directory with the following code:
<?php

\Magento\Framework\Component\ComponentRegistrar::register(
    \Magento\Framework\Component\ComponentRegistrar::THEME,
    'frontend/Packt/compstore',
    __DIR__
);
In the registration.php file, the CompStore theme of the Packt vendor registers the new theme of the Magento system.
The theme.xml and registration.php files were created earlier. By now, I think you are very comfortable with the structure of these files because you worked with them in the basic theme and now in the CompStore theme. This point forward, you will be introduced to some new concepts of theme development in Magento 2.0, starting with the creation of the composer.json file. Create the composer.json file in the Packt/compstore directory with the following code:
{
    "name": "packt/compstore",
    "description": "CompStore electronics theme",
    "require": {
        "php": "~5.5.0|~5.6.0|~7.0.0",
        "magento/theme-frontend-luma": "~100.0",
        "magento/framework": "~100.0"
    },
    "type": "magento2-theme",
    "version": "1.0.0",
    "license": [
        "OSL-3.0",
        "AFL-3.0"
    ],
    "autoload": {
        "files": [ "registration.php" ]
    }
}
This file has the .json (http://www.json.org/) format and handles important information of the project and its dependencies. As we discussed earlier, this kind of control is crucial because it generates more organization for your project. Let's navigate to the principal parameters of the composer.json file:
- Name: This refers to the name of the component
- Description: This provides the description of the component
- Require: These are the dependencies of the project (the PHP version and the Magento libraries)
- Type: This describes the type of component (the theme or module)
- Version: This describes the version of the component
- License: This parameter describes the licenses applied on a component (Open Source License or Academic Free License)
- Autoload: This parameter defines the files and classes that will be autoloaded upon component activation.
Before applying CSS in the CompStore Magento theme, it is important to study CSS behavior in the Magento system. The stylesheets in Magento 2.0 are preprocessed and compiled to CSS using the LESS technology. LESS (http://lesscss.org/) is a CSS preprocessor that extends the CSS traditional features by including variables and functions to generate a powerful CSS code and saves the time in maintaining the code.
All the .less files that you will save in your theme are compiled by the LESS engine but you will always declare .css in the Magento theme frontend. Here are a couple of examples:
- Frontend declaration: <
css src="css/styles.css" /> - Root source file:
<Magento _theme_dir>/web/css/styles.less
For further information, access the Magento 2.0 official documentation at http://goo.gl/XLkOcQ.
A CompStore theme inherits the Luma theme, which in turn inherits a blank theme, as shown here:

Once you have to make changes in CompStore in order to customize the new theme, you can think about the functionalities already available in the other themes to apply your changes.
The vendor directory under the Magento 2.0 root directory handles all the native Magento modules and themes. The Magento blank and Luma themes, which you have been working on until now, are available in vendor/magento/theme-frontend-blank and vendor/magento/theme-frontend-luma, respectively. So, the CompStore theme "receives" all the features of the themes under these folders. It's important to fix these basic concepts to understand the context that you inserted when you developed a Magento theme solution.
Once you have a solid concept about the behavior, let's create a custom .css file for the CompStore theme:
- Copy the
packt/vendor/magento/theme-frontend-blank/web/css/_styles.lessfile to thepackt/app/design/frontend/Packt/compstore/web/csslocation - Open the copied file and insert an
importcommand as the following example:@import 'source/lib/_lib.less'; @import 'source/_sources.less'; @import 'source/_components.less'; @import 'source/compstore.less';
- Save the file.
- Now, open your favorite code editor and create the
compstore.lessfile under thepackt/app/design/frontend/compstore/web/css/sourcedirectory and type this code:@color-compstore: #F6F6F6; body{ background: @color-compstore; } - Using override, let's change the product page color schema by creating the
_theme.lessfile under thepackt/app/design/frontend/compstore/web/css/sourcedirectory. Execute the following://Change color of elements in Product Page @color-catalog: #4A96AD; @page__background-color: @color-catalog; @sidebar__background-color: @color-gray40; @primary__color: @color-gray80; @border-color__base: @color-gray76; @link__color: @color-gray56; @link__hover__color: @color-gray60; @button__color: @color-gray20; @button__background: @color-gray80; @button__border: 1px solid @border-color__base; @button-primary__background: @color-orange-red1; @button-primary__border: 1px solid @color-orange-red2; @button-primary__color: @color-white; @button-primary__hover__background: darken(@color-orange-red1, 5%); @button-primary__hover__border: 1px solid @color-orange-red2; @button-primary__hover__color: @color-white; @navigation-level0-item__color: @color-gray80; @submenu-item__color: @color-gray80; @navigation__background: @color-gray40; @navigation-desktop-level0-item__color: @color-gray80; @navigation-desktop-level0-item__hover__color: @color-gray34; @navigation-desktop-level0-item__active__color: @navigation-desktop-level0-item__color; @tab-control__background-color: @page__background-color; @form-element-input__background: @color-gray89; @form-element-input-placeholder__color: @color-gray60; @header-icons-color: @color-gray89; @header-icons-color-hover: @color-gray60;
With the compstore.less and _theme.less files, the background and product page colors will change according to the new proposal of the CompStore theme.
You can create a new logo for learning purposes using the Logomakr free online service (http://logomakr.com/). It's a pretty easy tool.
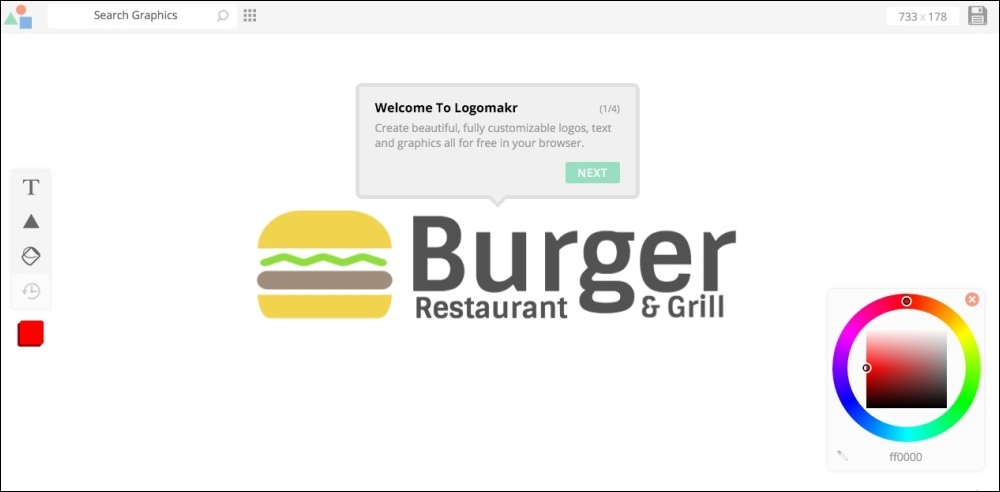
I created this logo for the CompStore theme using Logomakr:

My CompStore proposal of the logo was made in Logomakr, which is a solution developed by Webalys (http://www.streamlineicons.com) and FlatIcon (http://www.flaticon.com) and licensed under Creative Commons by 3.0 (http://creativecommons.org/licenses/by/3.0). If you use this solution for other projects, don't forget to give the due credit to Logomakr.
After finishing the logo, save it under the app/design/frontend/Packt/compstore/Magento_Theme/web/images/logo.png path.
You can feel free to use your own solution for logo instead of using Logomakr.
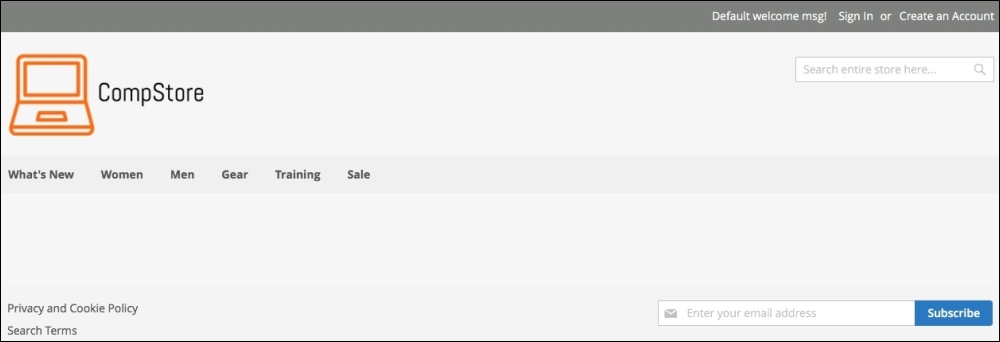
As you learned in the previous chapter, it's time to activate the new theme. Activate the CompStore Electronics theme in the Admin area (http://localhost/packt/admin_packt) to see the following result:
Sometimes, when you update in the Magento structure or activate a new theme, you need to deploy the theme and module changes. If you want to deploy your changes, follow these steps:
- Open the terminal or command prompt.
- Delete the
packt/pub/static/frontend/<Vendor>/<theme>/<locale>directory. - Delete the
var/cachedirectory. - Delete the
var/view_preprocesseddirectory. - Then, access the
packt/bindirectory. - Run the php
magento setup:static-content:deploycommand. - In some cases, it is necessary to give
writepermissions again to the directories.
Once the new theme is activated, it's time to handle the content by creating some options and configuring the products and categories.
To create new categories, you will need access the Admin area (http://localhost/packt/admin_packt) and follow this recipe:
- Navigate to the Products | Categories menu.
- Delete all the subcategories of Default Category by clicking on them and pressing the Delete Category button.
- Create three new subcategories of Default Category named Notebook, Desktops, and Peripherals. Be sure to set to Yes the Include in Navigation Menu option for each category.
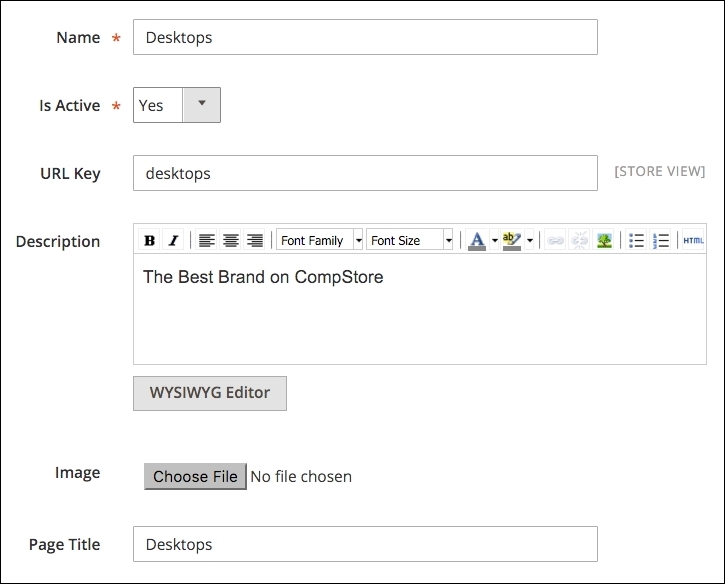
In the Add Category option, you have option to fill the Description, Page Title, and Meta Information areas for SEO purposes, as shown in the following screenshot:
To create new products, you will need access to the Admin area (http://localhost/packt/admin_packt) and follow this recipe:
- Access the Admin area (
http://localhost/packt/admin_packt) and navigate to Products | Catalog. - Click on the Add Product button.
- In the New Product page, enter all the required Product Information input.
- Set the values of Price and Quantity categories.
- Choose an image to upload.
- Choose In Stock for the Stock Availability field.
- Choose Main Website in the Websites tab.
- Save your new product.
- You can add three to nine products for testing purposes.

Magento has a widget management system that allows the flexibility of the content. The widget helps create a specific list of new products in the home page. To create a new widget, follow these steps:
- Navigate to Content | Widgets
- Click on the Add Widget button
- Then, in the StoreFront properties, perform the following:
- For the Display on field, select the Specified Page option
- In the Page field, select the CMS Home Page option
- In the Container field, select the Main Content Area option
- The Template field should be CMS Static Block Default Template

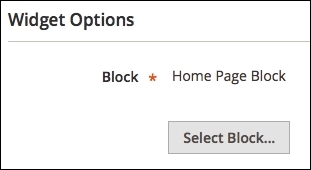
- In Widget Options, perform the following:
- Select Home Page Block.
- Then, click on the Save button.

The default block configuration contains the images and products of the Luma theme. Let's change it via the following steps:
- Navigate to Content | Blocks.
- Click to edit Home Page Block
- In the Content field, enter the following HTML code:
<div class="blocks-promo"> <a class="block-promo home-main" href="{{store url=""}}notebook.html"> <img src="{{media url="wysiwyg/home-main.jpg"}}" alt="" /> <span class="content bg-white"><span class="info">New Desktop available!</span> <strong class="title">New Brands</strong> <span class="action more button">Shop New Desktop</span> </span> </a> </div> <div class="content-heading"> <h2 class="title">New Products</h2> <p class="info">Here is what`s trending on CompStore now</p> - Position the cursor under the last line of the HTML code and click on the Insert Widget icon, as shown in the following screenshot:

- Select Catalog Products List as Widget Type.
- Select all the categories created earlier in the Conditions field.

- Click on the Insert Widget button.
- If you prefer, you can change the image of the block.
- Finally, click on the Save Block button.
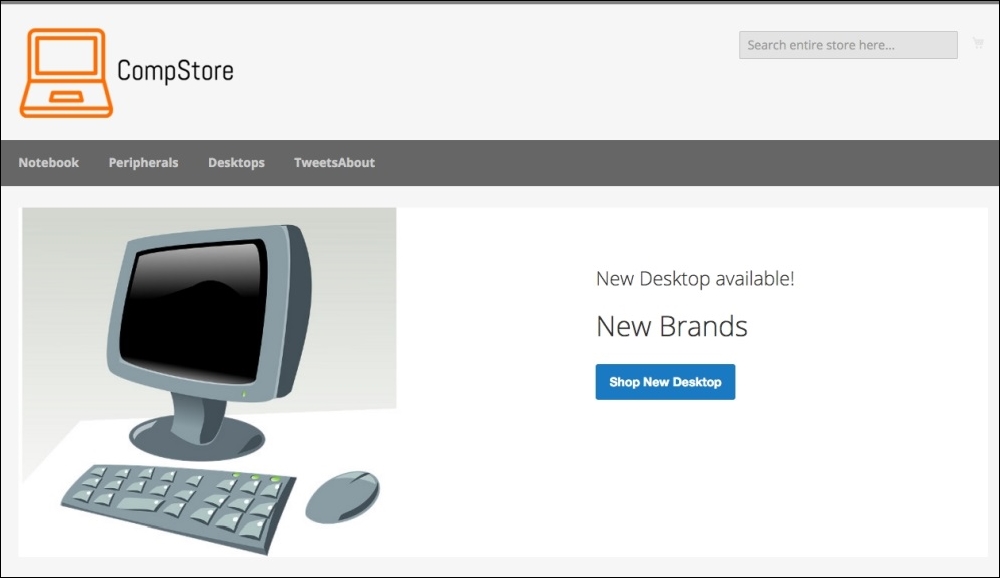
Go to the Home page to see the final result:
Magento works with .phtml template files to generate the view layer for the users. The modules and themes in Magento have its specific group of .phtml files to show data to the users. Let's create a custom template example in the CompStore theme to see how it works:
- Create the
Magento_Catalogdirectory under thecompstoretheme directory. - Copy the contents of
vendor/magento/module_catalog/view/frontend/templatestoapp/design/frontend/Packt/compstore/Magento_Catalog/templates. - Then, open the
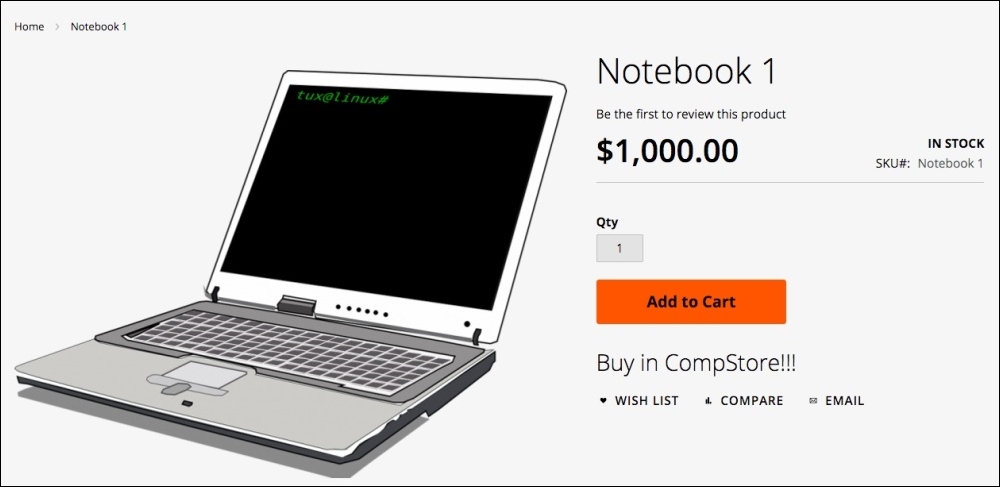
app/design/frontend/Packt/compstore/Magento_Catalog/templates/product/view/addto.phtmlfile in your favorite code editor. - Go to Line 17 and enter the following code:
<div><h2>Buy in CompStore!!!</h2></div>
- Save the file.
- Delete the
var/view_preprocessed/andpub/static/frontend/Packt/compstore/directories. - Deploy static content files by running the
php magento setup:static-content:deploycommand. - If necessary, give
writepermission to thepubdirectory.
Navigate to the product page to see the result, as in the following screenshot:
With the content learned in this chapter, you can now develop your own themes and customize solutions. The modern developer creates tools that can maximize the quality and minimize the effort to develop.
As a suggestion, try to read Chapter 4, Magento 2.0 Theme Development – the Developers' Holy Grail, again to create specific Magento pages and layout rules for the CompStore theme. You have uncountable possibilities to develop quality themes for Magento e-commerce and a great solid path to specialize more and more.
Now that you have all the tools to develop a theme for Magento, we will start discovering how to write Magento extensions by programming specific solutions in the next chapter.