

Pre-committing checks setup overview
Having static code analysis tools such as TypeScript, ESLint, and Prettier is great; we have configured them and can run individual scripts whenever we make some changes to ensure everything is in the best order.
However, there are some drawbacks. Developers can forget to run all checks before committing to the repo, which can still bring problematic and inconsistent code to production.
Fortunately, there is a solution that can fix this problem: whenever we try to commit to the repository, we want to run all checks in an automated way.
This is the flow we want to have:
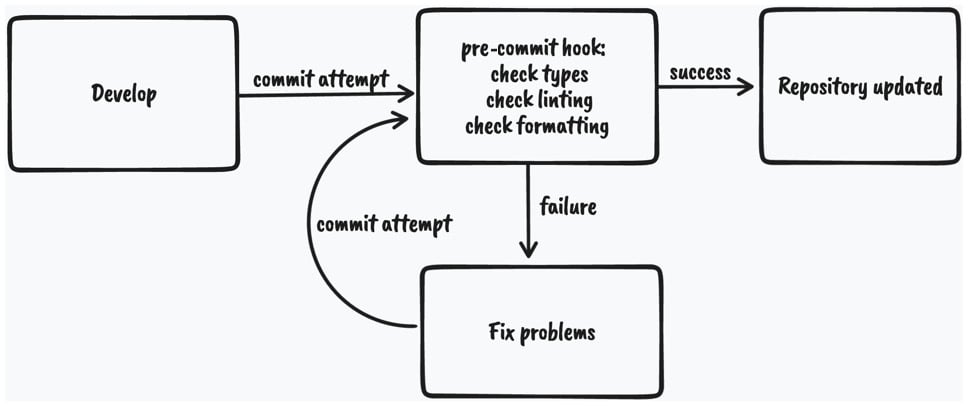
Figure 2.1 – Pre-commit code checking diagram
As we can see, whenever we attempt to commit to the repository, the git pre-commit hook will run and execute the scripts that will do the checking. If all the checks pass, the changes will be committed to the repository; otherwise, we will have to fix the issues and try again.
To enable this flow, we will use husky and lint-staged:
huskyis a tool that allows us to run git hooks. We want to run the pre-commit hook to run the checks before committing our changes.lint-stagedis a tool that allows us to run those checks only on files that are in the staging area of Git. This improves the speed of code checking since doing that on the entire code base might be too slow.
We already have these tools installed and configured, but if we didn’t, they could be installed using the following command:
npm install –-save-dev husky lint-staged
Then, we would need to enable Git hooks:
npx husky install
Then, we would need to create the pre-commit hook:
npx husky add .husky/pre-commit "npx lint-staged"
The Husky pre-commit hook will run lint-staged. Then, we would need to define what commands lint-staged should run inside the lint-staged.config.js file:
module.exports = {
  '*.{ts,tsx}': [
    'npm run lint',
    "bash -c 'npm run types:check'",
    'npm run format:check',
  ],
};
If we try to commit code that contains any violations, it will fail and stop us from committing the changes.
Now that we covered most of our setup, let’s look at the structure of our project.