
Creating a basic directive that allows you to vertically scroll to an element
In this recipe, you'll create a directive to allow the user to scroll to a particular element on the page, on click.
Getting ready
The project for this recipe resides in chapter02/start_here/ng-scroll-to-directive:
- Open the project in VS Code.
- Open the terminal, and run
npm installto install the dependencies of the project. - Once done, run
ng serve -o.This should open the app in a new browser tab, and you should see something like this:
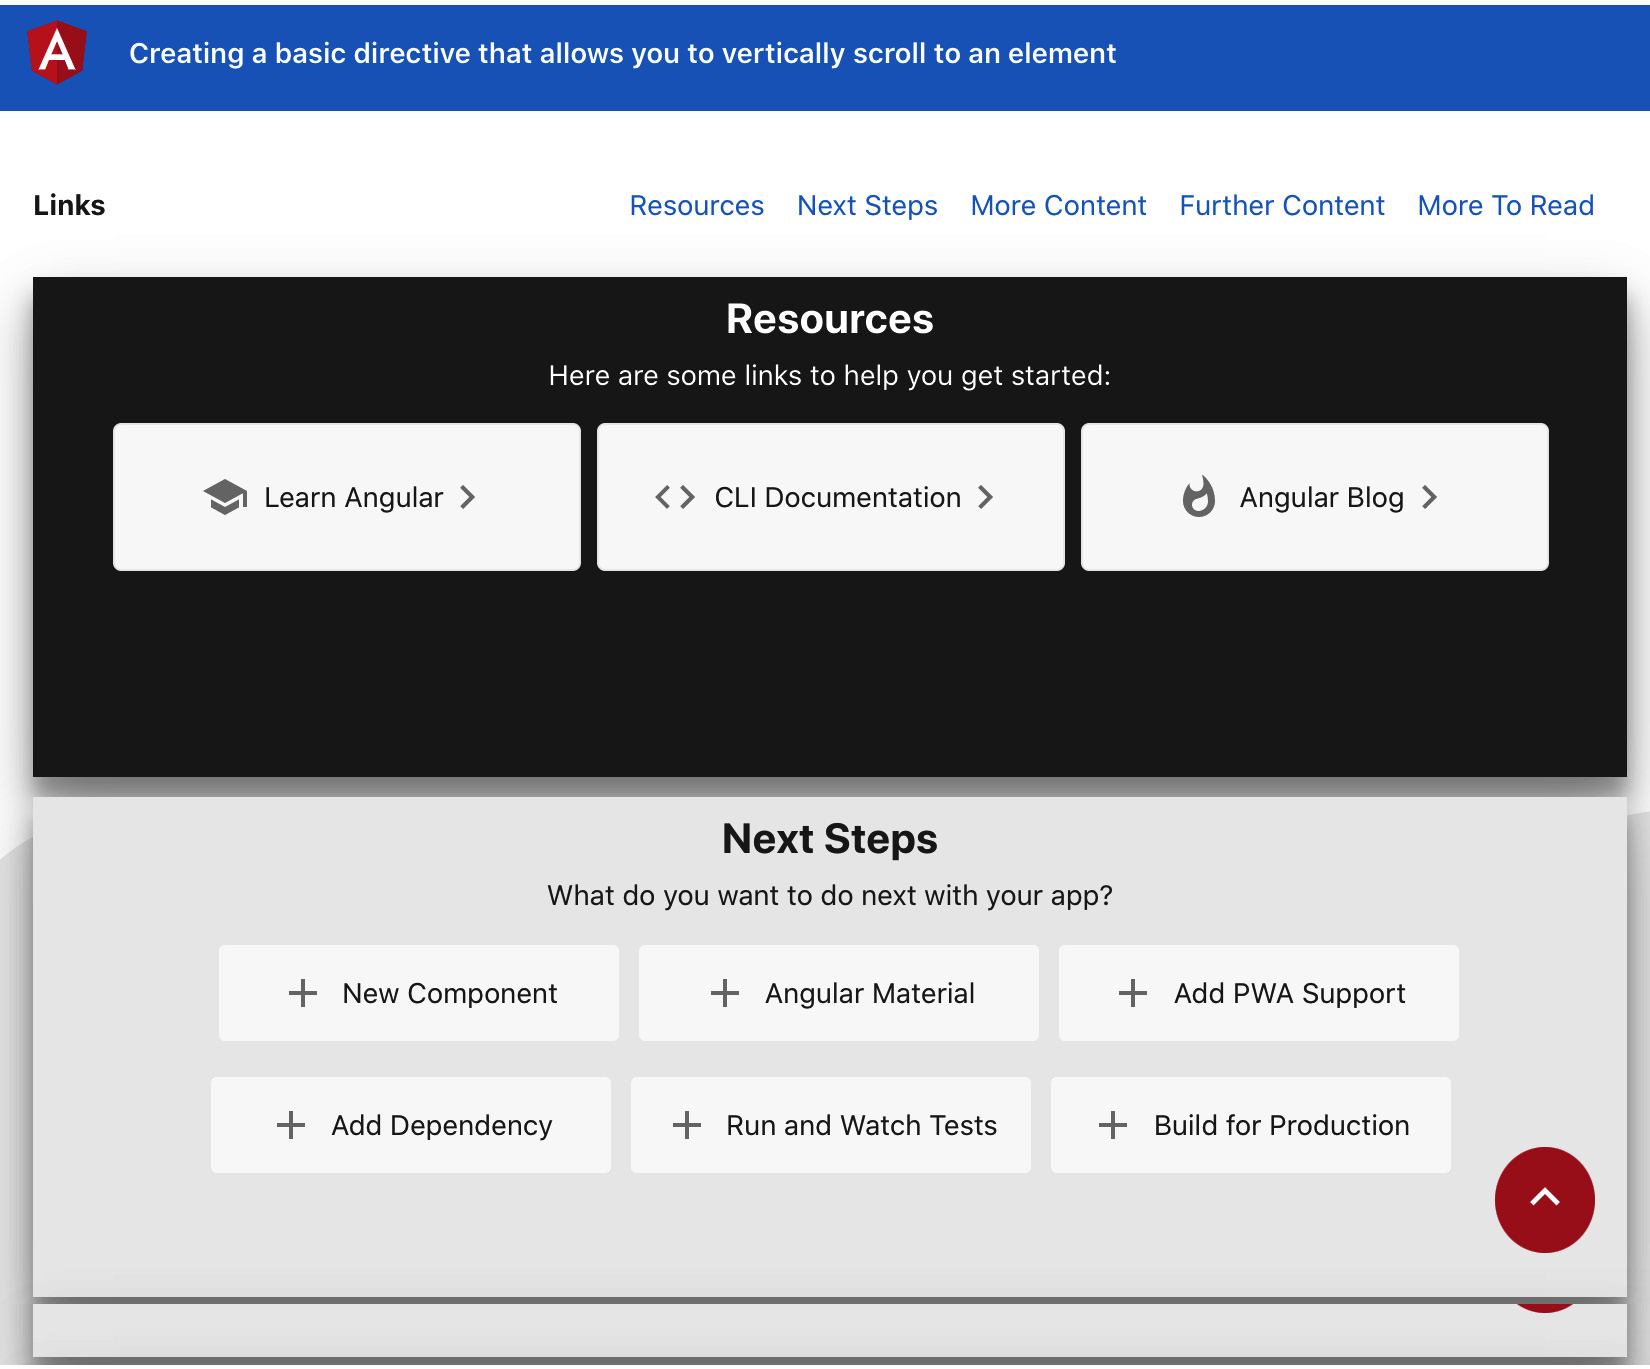
Figure 2.3 – ng-scroll-to-directive app running on http://localhost:4200
How to do it…
- First off, we'll create a
scroll-todirective so that we can enhance our application with smooth scrolls to different sections. We'll do this using the following command in the project:ng g directive directives/scroll-to
- Now, we need to make the directive capable of accepting an
@Input()that'll contain the Cascading Style Sheets (CSS) Query Selector for our target section that we'll scroll to upon the element'sclickevent. Let's add the input as follows to ourscroll-to.directive.tsfile:import { Directive, Input } from '@angular/core'; @Directive({ selector: '[appScrollTo]' }) export class ScrollToDirective { @Input() target = ''; constructor() { } } - Now, we'll apply the
appScrollTodirective to the links in theapp.component.htmlfile along with the respective targets so that we can implement the scroll logic in the next steps. The code should look like this:... <div class="content" role="main"> <div class="page-links"> <h4 class="page-links__heading"> Links </h4> <a class="page-links__link" appScrollTo target="#resources">Resources</a> <a class="page-links__link" appScrollTo target="#nextSteps">Next Steps</a> <a class="page-links__link" appScrollTo target="#moreContent">More Content</a> <a class="page-links__link" appScrollTo target="#furtherContent">Further Content</a> <a class="page-links__link" appScrollTo target="#moreToRead">More To Read</a> </div> ... <div class="to-top-button"> <a appScrollTo target="#toolbar" class= "material-icons"> keyboard_arrow_up </a> </div> </div>
- Now, we'll implement the
HostListener()decorator to bind theclickevent to the element the directive is attached to. We'll just log thetargetinput when we click the links. Let's implement this, and then you can try clicking on the links to see the value of thetargetinput on the console:import { Directive, Input, HostListener } from '@angular/core'; @Directive({ selector: '[appScrollTo]' }) export class ScrollToDirective { @Input() target = ''; @HostListener('click') onClick() { console.log(this.target); } ... } - Since we have the
clickhandler set up already, we can now implement the logic to scroll to a particular target. For that, we'll use thedocument.querySelectormethod, using thetargetvariable's value to get the element, and then theElement.scrollIntoView()web API to scroll the target element. With this change, you should have the page being scrolled to the target element already when you click the corresponding link:... export class ScrollToDirective { @Input() target = ''; @HostListener('click') onClick() { const targetElement = document.querySelector (this.target); targetElement.scrollIntoView(); } ... } - All right—we got the scroll working. "But what's new, Ahsan? Isn't this exactly what we were already doing with the href implementation before?" Well, you're right. But, we're going to make the scroll super smoooooth. We'll pass
scrollIntoViewOptionsas an argument to thescrollIntoViewmethod with the{behavior: "smooth"}value to use an animation during the scroll. The code should look like this:... export class ScrollToDirective { @Input() target = ''; @HostListener('click') onClick() { const targetElement = document.querySelector (this.target); targetElement.scrollIntoView({behavior: 'smooth'}); } constructor() { } }
How it works…
The essence of this recipe is the web API that we're using within an Angular directive, and that is Element.scrollIntoView(). We first attach our appScrollTo directive to the elements that should trigger scrolling upon clicking them. We also specify which element to scroll to by using the target input for each directive attached. Then, we implement the click handler inside the directive with the scrollIntoView() method to scroll to a particular target, and to use a smooth animation while scrolling, we pass the {behavior: 'smooth'} object as an argument to the scrollIntoView() method.
There's more…
scrollIntoView()method documentation (https://developer.mozilla.org/en-US/docs/Web/API/Element/scrollIntoView)- Angular attribute directives documentation (https://angular.io/guide/testing-attribute-directives)