

NetBeans comes pre-configured with the GlassFish 2 application server, and with the JavaDB RDBMS. If we wish to use the embedded GlassFish 2 and JavaDB RDBMS, then there is nothing we need to do to configure NetBeans.
We can, however, integrate NetBeans with other Java EE application servers such as GlassFish 1, Sun Java Application Server, JBoss, Weblogic, or WebSphere. We can also integrate NetBeans with several versions of Tomcat.
Integrating NetBeans with an application server is very simple. To do so, we need to take the following steps:
Note
In this section we will illustrate how to integrate NetBeans with JBoss 4.2.2 (the latest stable release at the time of writing). The procedure is very similar for other application servers or servlet containers.
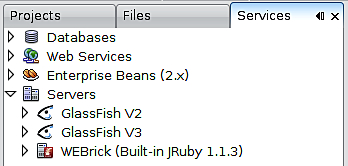
First, we need to click on the tab labeled Services, it can be found at the top-right of the NetBeans main window.
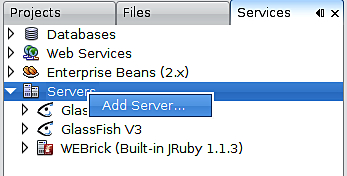
Next, we need to right-click on the node labeled Servers in the tree inside the Services tab, and select Add Server... from the resulting pop-up menu.
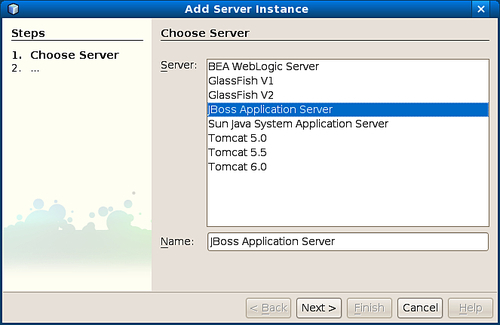
Then we need to select the server to install from the list in the resulting window, and click on the button labeled Next>.
We then need to enter a location in the file system where the application server is installed and click Next>.

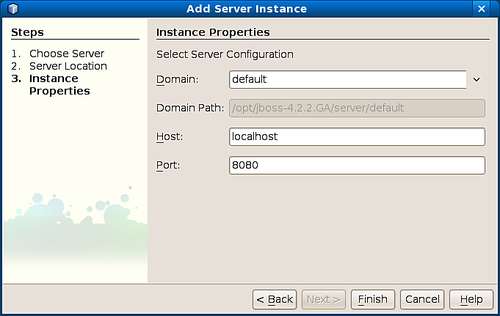
Finally, we need to select a Domain, Host, and Port for our application server, then click on the Finish button.
The Services tab should now display our newly added application server.

That's it! We have successfully integrated NetBeans with a third party application server.
NetBeans comes with built-in integration with the JavaDB RDBMS system. Additionally, it comes with JDBC drivers for other RDBMS systems such as MySQL and PostgreSQL, as well as the JDBC-ODBC bridge driver to connect to RDBMS systems that don't natively support JDBC or for which a JDBC driver is not readily available.
Although the JDBC-ODBC bridge allows us to connect to most RDBMS systems without having to obtain a JDBC driver, it is usually a better idea to obtain a JDBC driver for our RDBMS. The JDBC-ODBC bridge does not offer the best performance and there are JDBC drivers available for the vast majority of RDBMS systems.
Note
In this section, we will create a connection to HSQLDB, an open source RDBMS written in Java, to illustrate how to integrate NetBeans with a third party RDBMS. The procedure is very similar for other RDBMS systems such as Oracle, Sybase, SQL Server, and so on.
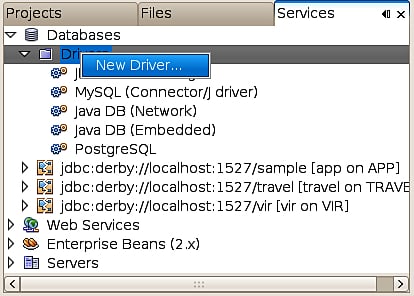
Before we can connect to a third party RDBMS, we need to add its JDBC driver to NetBeans. To add the JDBC driver, we need to right-click on the Drivers node under the Databases node in the Services tab.
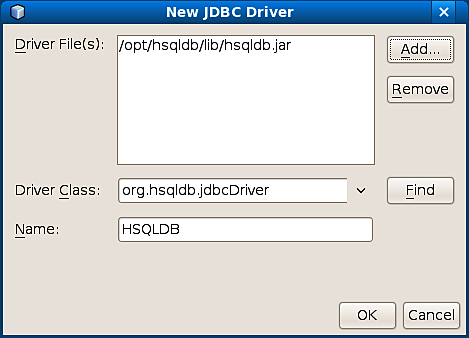
We then need to select a JAR file containing the JDBC driver for our RDBMS. NetBeans guesses the name of the driver class containing the JDBC driver. If more than one driver class is found in the JAR file, the correct one can be selected from the drop-down menu labeled Driver Class. We need to click the OK button to add the driver to NetBeans.
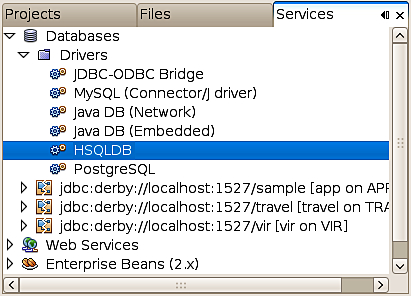
Once we have followed the above procedure, our new JDBC driver is displayed in the list of registered drivers.
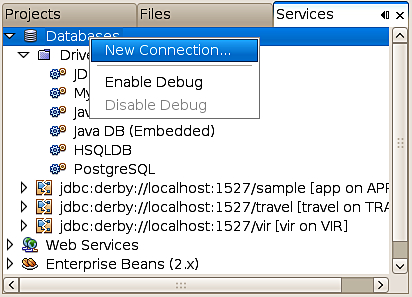
Once we have added the JDBC driver for our RDBMS to NetBeans, we are ready to connect to the third party RDBMS.
Then we need to enter the JDBC URL, username, and password for our database.

After clicking the OK button, NetBeans may ask us to select a database schema.
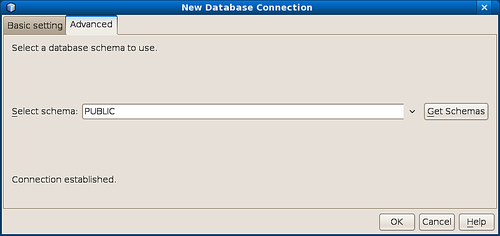
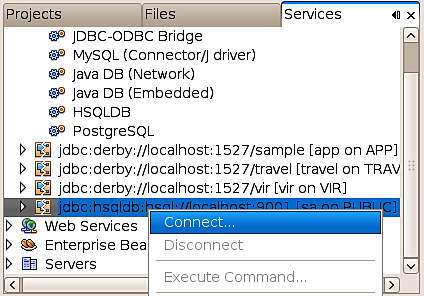
After selecting the schema and clicking the OK button, our database is shown in the list of databases in the Services tab. We can connect to it by right-clicking on it, selecting Connect from the resulting pop-up, then entering our username and password for the database (if we chose not to allow NetBeans to "remember" the password when we added the database).
We have now successfully connected NetBeans to a third party RDBMS.