
It is always good to set up a development environment and test an application before publishing it on the production web server. For the purpose of this book, we will also set up the development environment with a web server and Joomla!.
You can use any web server that supports PHP. For the purpose of this book, we will use the most popular web server — Apache, version 1.3 or version 2. If you are using Linux as an operating system, then you may get the Apache server bundled with the Linux OS. However, you are always free to download the latest version of Apache from its website at http://httpd.apache.org/. The Apache web server is available for both Linux and Windows operating systems, and you can download the appropriate version for your own operating system.
In order to use Joomla! we need to set up a relational database system. We will be using MySQL as the database system. Like Apache, MySQL is also available for free to download for Linux, for Windows, and for other platforms as well. You can download it from http://www.mysql.com/.
To run Joomla! we need a web server capable of running PHP scripts. We can easily download the PHP bundle, install it, and configure the Apache web server for PHP. Joomla! will run on both PHP4 and PHP5, but to take advantage of the advanced Joomla! features and PHP5's rich features, we will use PHP5. You can download PHP5 from the website http://www.php.net. Like Apache and MySQL, PHP is also available for Linux, Windows, and other platforms.
For the development server, users with less technical skills may find it daunting to set up the web server, database server, and to configure PHP and its libraries. Administration of these services also becomes complex. To ease the task of setting up a development environment with Apache, MySQL, and PHP, there are several packaged software applications, such as WampServer, PHPTriad, EasyPHP, and so on that include all the three services and can be installed in one shot. For our development environment, we will use WampServer for Windows.
The latest version of the WampServer package contains Apache2.2.x, MySQL 5.1.x, and PHP 5.2.x. To setup the development environment for using Joomla! with Flash, follow these steps:
1. Get the WAMP Server: The WAMP Server provides you with Apache, MySQL, and PHP. Point your browser to www.wampserver.com, and download the latest version of the WAMP Server.
2. Install the WAMP Server: Once the WAMP Server is downloaded to your computer, double-click on the installation file. By default, it will be installed at
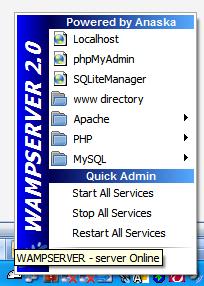
C:\wamp. Under that, there will be a directorywwwthat is known as the web directory. This means that whatever web application you want to run should be put inside this folder (in our case it isc:\wamp\www).3. Run the WAMP Server: You can configure your WAMP Sever to run when Windows starts. Alternatively, you can run it as and when needed. You can start the WAMP Server from Start | All Programs | WampServer | start WampServer. When the WAMP Server is started, you will see the WampServer icon in the system tray. Click on that icon, and you get the WampServer menu, as shown in the next screenshot:
For starting all the services (Apache, MySQL, and PHP), click on .Start All Services. For configuring PHP, go to .PHP. You can create databases with .phpMyAdmin.
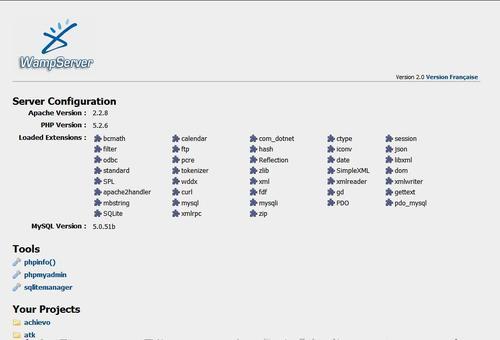
To see the default page in the web root, click on .Localhost or type http://localhost/ in your browser's address bar. It will display a page like the one shown in the next screenshot:
Once you get the web server with MySQL and PHP running, you can proceed with installing Joomla! on that web server as follows:
1. Get theJoomla installation package: Now it is your turn to get the Joomla! installation package, through which you will install Joomla! on your local computer. Open your browser and type www.joomla.org in the address bar. You will see the Joomla! home page. On the right side, there is a download link for the latest release. Click on this link to download the latest release of Joomla!. It comes as
.zipor.tgzarchive.2. Create the database for Joomla!: Before starting the Joomla! installation, you need to create a MySQL database on the
localhost. Open your browser and point it to http://localhost/phpmyadmin. In the phpMyAdmin screen, enter the name of the database and create it. Remember the name of the database as the Joomla! installation wizard will ask for it later.3. Install Joomla! on your local computer: Once you have downloaded the installation package for Joomla!, unpack the Joomla! installation files to your web root directory (for example
c:\wamp\www\dreamschool), and then point your browser to http://localhost/dreamschool/. That starts the Joomla! installation wizard. Follow the wizard, and complete the Joomla! installation.
While learning the techniques of using Flash in the Joomla! Content Management System, we will be building a Joomla!-based site to demonstrate Flash functionalities. To illustrate the example, we will build a fictitious school website — DreamSchool — that will include interactive material for learners, video tutorials, animations, and other stuff necessary for learning.
The example site will start with a basic installation of the latest version of Joomla!, and we will gradually make it stunning using Flash templates, headers, banners, content, videos, animation, charts, graphs, maps, and so on.