

SharePoint 2010 requires Microsoft SQL Server as a fundamental component of the overall SharePoint architecture. The content that you plan to manage in SharePoint, including web content and documents, literally is stored within and served from SQL Server databases. The SharePoint 2010 architecture itself relies on information stored in SQL Server databases, such as configuration and the many service applications. In this recipe, we will install and configure the components of SQL Server 2008 necessary to install SharePoint 2010.
I do not recommend SQL Server Express for your development environment, although this is a possible, free, and valid choice for the installation of SharePoint 2010. In my personal experience, I have valued the full power and flexibility of the full version of SQL Server as well as not having to live with the constraints and limitations of SQL Express. Besides, there is another little reason too! The Enterprise edition of SQL Server is either readily available with your MSDN subscription or downloadable as a trial from the Microsoft site.
Download SQL Server 2008 R2 Enterprise from your MSDN subscription, or type in sql server 2008 enterprise R2 trial download into your favorite search engine to download the 180-day trial from the Microsoft site.
For SQL Server 2008 R2 Enterprise, if you have MSDN software, then you will be provided with an ISO image that you can attach to the virtual machine.
If you download your SQL Server from the Microsoft site as a trial, extract the software (it is a self-extracting EXE) on your local machine, and then share the folder with your virtual machine. Finallly, run the Setup.exe file.
Here is your recipe for installing SQL Server 2008 R2 Enterprise. Carry out the following steps to complete this recipe:
You will be presented with the SQL Server Installation Center; on the left side of the screen, select Installation, as shown in the following screenshot:
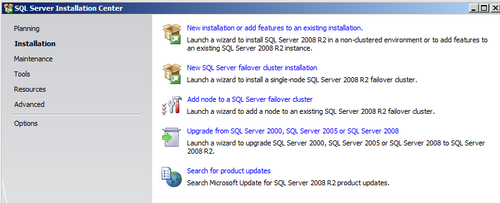
For the choices presented on the Installation screen, select New installation or add features to an existing installation.
The Setup Support Rules (shown in the following screenshot) will run to identify any possible problems that might occur when installing SQL Server. All rules should pass. Click OK to continue:

You will be presented with the SQL Server 2008 R2 Setup screen. On the first screen, you can select an evaluation or use your product key (from, for example, MSDN) and then click Next.
Accept the terms in the license, but do not check the Send feature usage data to Microsoft checkbox, and click Next.
On the Setup Support Files screen, click Install. All tests will pass except for a warning that you can safely ignore (the one noting we are installing on a domain controller), and click Next, as shown in the following screenshot:

On the Setup Role screen, select SQL Server Feature Installation and click Next.
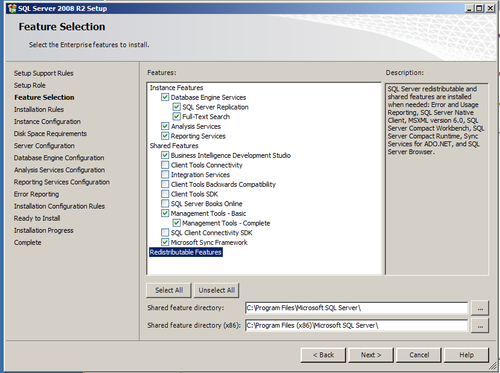
On the Feature Selection, as shown in the following screenshot, carry out the following tasks:
In Instance Features, select Database Engine Services (and both SQL Server Replication and Full Text Search), Analysis Services, and Reporting Services
In Shared Features, select Business Intelligence Development Studio, Management Tools Basic (and Management Tools Complete), and Microsoft Sync Framework
Finally, click Next.
On the Installation Rules screen, click Next
On the Instance Configuration screen, click Next.
On the Disk Space Requirements screen, click Next
On the Server Configuration screen:
Set the Startup Type for SQL Server Agent to be Automatic
Click on the button Use the same account for all SQL Server services. Select the account NT AUTHORITY\SYSTEM and click OK.
Finally, click Next.
On the Database Configuration Engine screen:
Look for the Account Provisioning tab and click the Add Current User button under Specify SQL Server administrators.
Finally, click Next
On the Analysis Services Configuration screen:
Look for the Account Provisioning tab and click the Add Current User button under Specify which users have administrative permissions for Analysis Services.
Finally, click Next.
On the Reporting Services Configuration screen, select the option to Install but do not configure the report server. Now, click Next.
On the Error Reporting Screen, click Next.
On the Installation Configuration Rules screen, click Next.
On the Ready to Install screen, click Install.
Your patience will be rewarded with the Complete screen! Finally, click Close. The Complete screen is shown in the following screenshot:

You can close the SQL Server Installation Center.
Configure SQL Server security for the SP_AppPool account:
Click Start | All Programs | SQL Server 2008 R2 | SQL Server Management Studio.
On Connect to server, type a period (.) in the Server Name field and click Connect.
Expand the Security node.
Right-click Logins and select New Login.
Use the Search function and enter SP_AppPool in the box Enter object name to select. Click the check names button and then click OK. In my case, you see the properly formatted THEOPENHIGHWAY\SP_AppPool in the login name text box.
On the Server Roles tab, ensure that the dbcreator and securityadmin roles are selected (in addition to the already selected public role).
Finally, click OK.
Congratulations! You have successfully installed and configured SQL Server 2008 R2 Enterprise and are ready for our next recipe Installing and configuring SharePoint Server 2010.