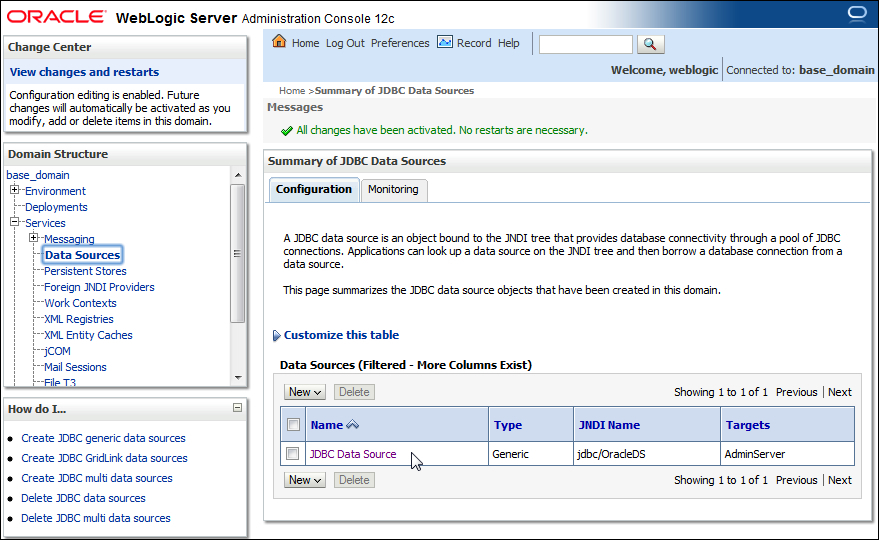

In this section we shall configure a data source
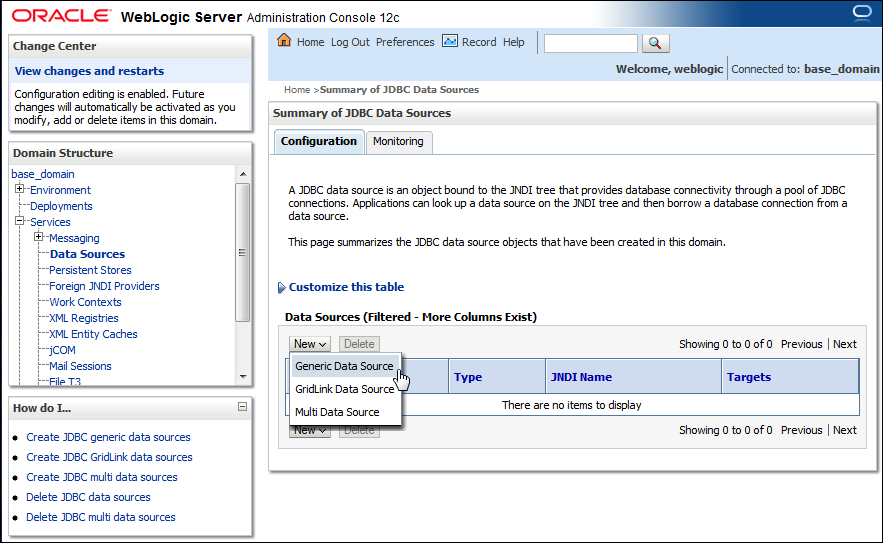
in Oracle WebLogic Server 12c. First, download and install the Oracle WebLogic Server from http://www.oracle.com/technetwork/middleware/ias/downloads/wls-main-0971. Configure the base_domain structure in the WebLogic Server console. We need to create a data source so that when we deploy and run the application in the server, the application has access to the database. Log in to the WebLogic Server Administration Console server for the base_domain domain using the URL http://localhost:7001/Console. In the base_domain domain structure, expand the Services tab and select the Data Sources node. In the Data Sources table, click on New and select
Generic Data Source as shown in the following screenshot:
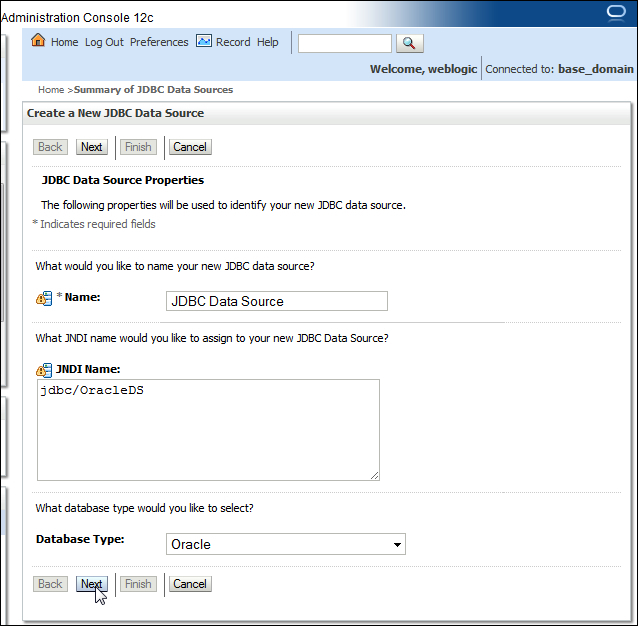
In Create a New JDBC Data Source, specify a data source name and JNDI Name (for example, jdbc/OracleDS) for the data source. The database shall be accessed using JNDI Name lookup in the Creating a session bean facade section. Select Database Type as Oracle and click on Next as shown in the following screenshot:
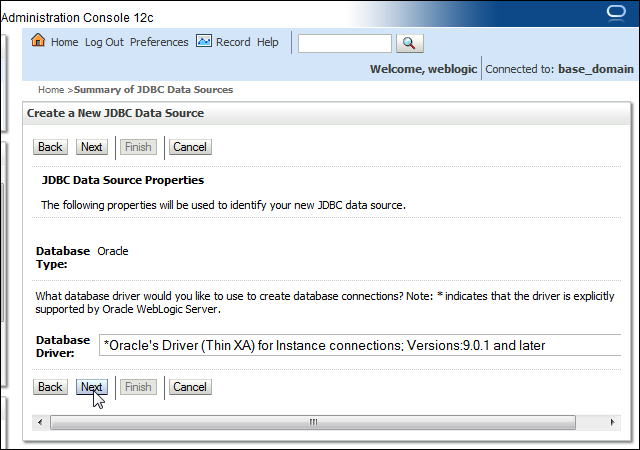
In JDBC Data Source Properties, select Database Driver as Oracle's Driver (Thin XA). Another JDBC driver may also be selected based on requirements. Refer to the Selection of the JDBC Driver document available at http://docs.oracle.com/cd/E14072_01/java.112/e10590/keyprog.htm#i1005587 for selecting a suitable JDBC driver. Click on Next as shown in the following screenshot:
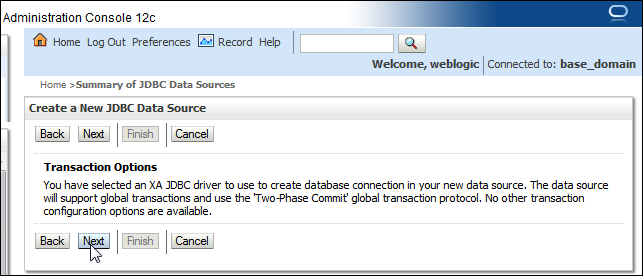
By default, an XA JDBC driver supports global transactions and uses the Two-Phase Commit global transaction protocol. Global transactions are recommended for EJBs using container managed transactions for relation between the JDBC driver (XA or non-XA) transactionality and EJB container managed transactions. Click on Next as shown in the following screenshot. (for more information on global transactions, refer http://docs.oracle.com/cd/E23943_01/web.1111/e13737/transactions.htm):
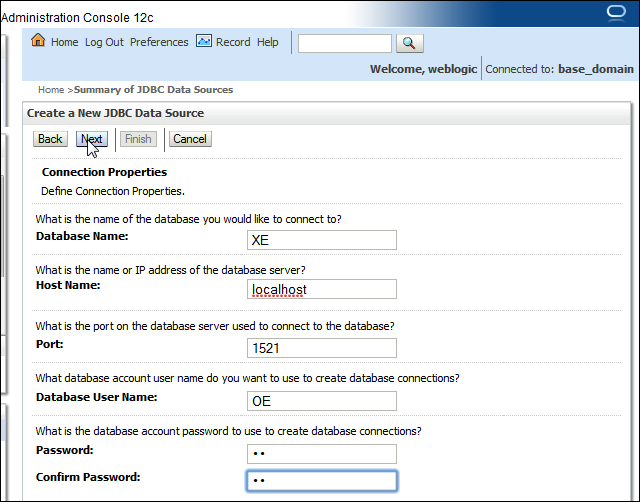
Specify
Database Name as XE, Host Name as localhost, Port as 1521, Database User Name and Password as OE, and click on Next as shown in the following screenshot:
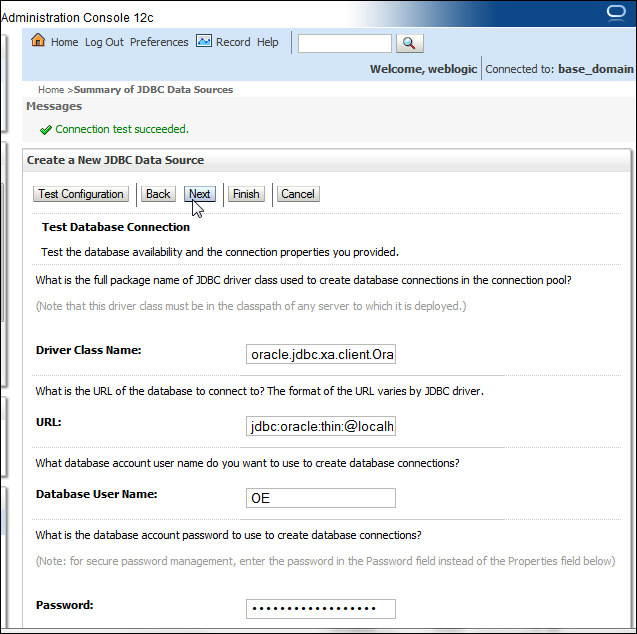
The Driver Class Name textbox and connection URL textbox get configured. Click on the Test Configuration button to test the database connection. If a connection gets established the message Connection test succeeded. gets displayed. Click on Next as shown in the following screenshot:
In Select targets, select the AdminServer option and click on Finish. A data source gets added to the data sources table. The data source configuration may be modified by clicking on the data source link as shown in the following screenshot: