

The essential feature that needs to be configured correctly is the Android SDK. Although Android Studio automatically installs the latest Android SDK available, you should have everything you need beforehand to create your first application. It is important to check it and to learn how we can change it.
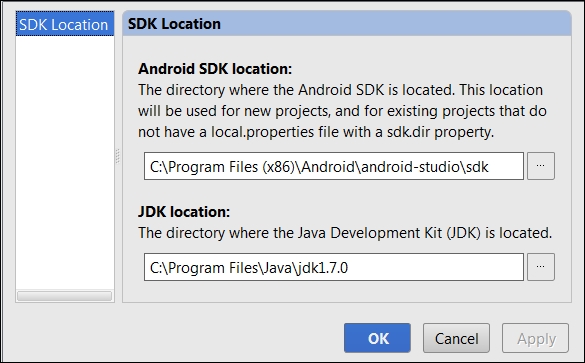
In the Android Studio welcome screen, navigate to Configure | Project Defaults | Project Structure. In SDK Location, you should have a selected Android SDK location, as shown in the next screenshot. This selected SDK location is the default location that will be used in our Android projects. However, we can change it later for specific projects that require special settings.
If you don't have any Android SDK configured in Android Studio, then you have to add it manually.
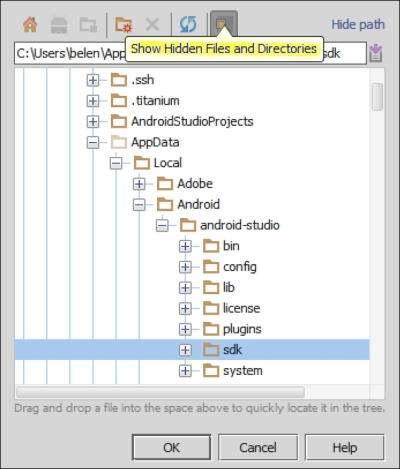
To accomplish this task, click on the ellipsis button to add an Android SDK, and then select the home directory for the SDK. Check whether you have it in your system by navigating to your Android Studio installation directory. You should find a folder named sdk. It contains the Android SDK and its tools. The Android Studio installation directory might be in a hidden folder, so click on the button highlighted in the following screenshot to show hidden files and directories:
If you wish to use another Android SDK location that is different from the location included with Android Studio, select this instead. For example, if you previously used the Android Development Tools (ADT) plugin for Eclipse, you already have an Android SDK installed in your system.