
String interpolation is a very easy and precise way to inject variable values into a string. An interpolated string expression looks at contained expressions. It then replaces those expressions with the ToString representations of the expressions' results.
Create a new class to test your code. We will use the example of reading the current exchange rate for a specific currency to illustrate how string interpolation can be used to output strings to the user interface.
Create a new class by right-clicking on your solution, selecting Add, and then selecting New Project from the context menu:

From the Add New Project dialog screen, select Class Library from the installed templates and call your class
Chapter1: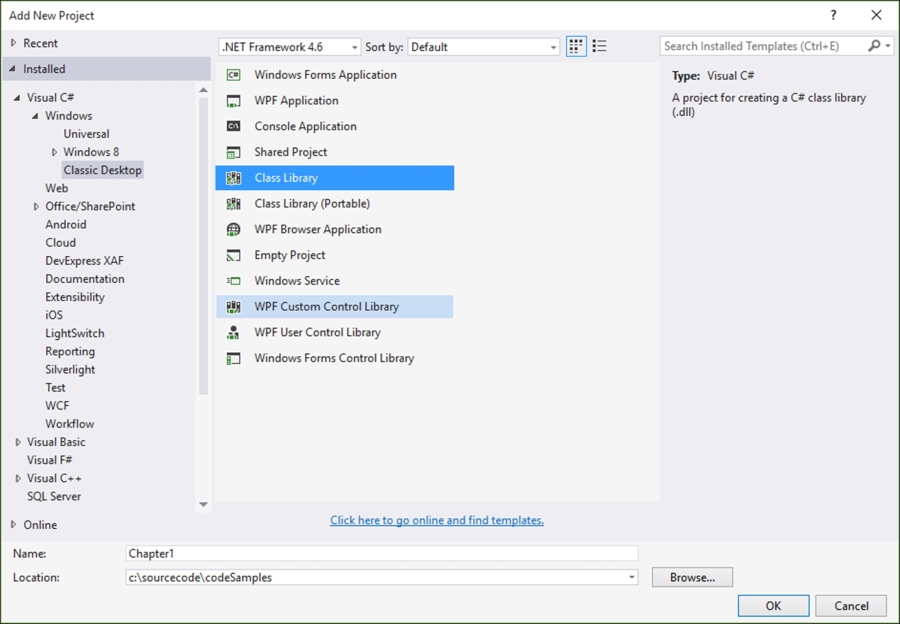
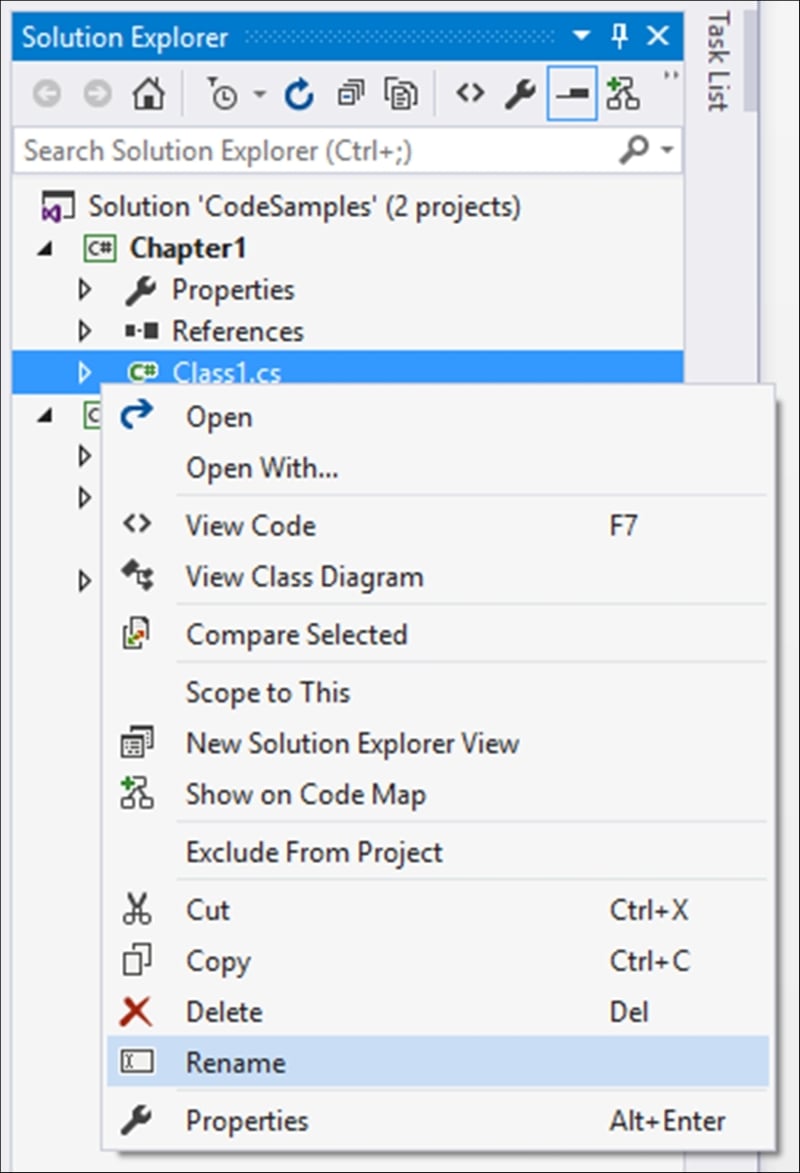
Your new class library will be added to your solution with a default name of
Class1.cs, which I renamed toRecipes.csin order to distinguish the code properly. You can, however, rename your class to whatever you like if that makes more sense to you.To rename your class, simply click on the class name in Solution Explorer and select Rename from the context menu:
Visual Studio will ask you to confirm a rename of all references to the Class1 code element in the project. Just click on Yes:

The class that is created now needs to be made static using the
statickeyword. Also, rename the class name in code toRecipe1StringInterpolation:namespace Chapter1 { public static class Recipe1StringInterpolation { } }Note
Note that static classes, therefore, do not need to be instantiated and will be sealed classes by default. This means that they cannot be inherited further. In practice, you would normally define helper or utility classes as static. These are classes that will be used often by your application to, for example, parse dates or perform calculations. The use of the
statickeyword here is simply to illustrate the specific new features of C# 6.0 within a class that can easily and quickly be called from the console application. The static class in reality would most likely not be a good fit for all the examples illustrated.Inside your class, add a property to contain the base currency:
public static string BaseCurrency { get; private set; }Next, include a dummy method to return the exchange rate:
private static decimal PreformConversion(string toCurrency)
{
    decimal rate = 0.0m;

    if (BaseCurrency.Equals("ZAR"))
    {
        switch (toCurrency)
        {
            case "USD":
                rate = 16.3040m;
                break;
            default:
                rate = 1.0m;
                break;
        }
    }

    return rate;
}
The last method to add is the method that will return the interpolated string expression:
public static string ReadExchangeRate(string fromCurrencyCode, string toCurrencyCode)
{
    BaseCurrency = fromCurrencyCode;
    decimal conversion = PreformConversion(toCurrencyCode);
    return $"1 {toCurrencyCode} = {conversion} {fromCurrencyCode} ";
}
You now need to hook up the class you created to your console application. You therefore need to add a reference to the class from the console application. Right-click on References in your
CodeSamplesproject and select Add Reference…: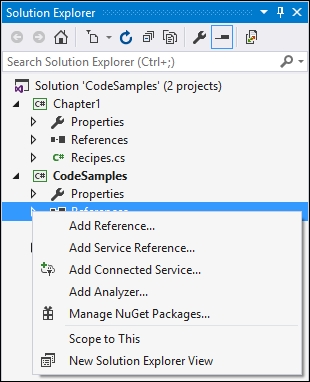
From the Reference Manager dialog that pops up, select the
Chapter1solution to add it as a reference. Then, click on the OK button:
In your
CodeSamplesproject, double-click on theProgram.csfile and add the following code to theMainmethod:string RandDollarExchangeRate = Chapter1.Recipe1StringInterpolation.ReadExchangeRate("ZAR", "USD"); Console.WriteLine("The current Rand / Dollar exchange rate is:"); Console.WriteLine(RandDollarExchangeRate); Console.Read();To see the result, run your application and see the output in the console application:

The interpolated string expression is output as
1 USD = 16,3040 ZAR.
The console application passes the currency codes for South African Rand and US Dollar to the static class by calling the following line of code: Chapter1.Recipe1StringInterpolation.ReadExchangeRate("ZAR", "USD");
This class is static and, as mentioned previously, does not need to be instantiated. The ReadExchangeRate method then reads the exchange rate and formats it into a suitable string using string interpolation. You will notice that the interpolated string expression is written as $"1 {toCurrencyCode} = {conversion} {fromCurrencyCode} ";.
The toCurrencyCode, conversion, and fromCurrencyCode variables are expressed directly inside the string expression. This is a much easier way of formatting strings because you can do away with String.Format, used in the previous versions of C#. Previously, the same expression would have been written as String.Format("1 {0} = {1} {2} ", toCurrencyCode, conversion, fromCurrencyCode);.
As you can see, the interpolated string expression is much easier to read and write. In reality though, string interpolation is merely syntactical sugar because the compiler treats the expression like String.Format anyway. You might be wondering how you would express a curly bracket when using string interpolation. To do this, you can simply use a double curly bracket in your expression. If you need to express the exchange rate as {16,3040}, you would need to express it as $"{{{conversion}}}";.
You can also format your string right there inside the interpolated string expression. If you returned the $"The date is {DateTime.Now}"; expression, the output would be The date is 2016/01/10 3:04:48 PM. You can go ahead and modify the expression to format the date using a colon, followed by the format to use. Change the code to $"The date is {DateTime.Now : MMMM dd, yyyy}";. The output will be formatted and result in The date is January 5, 2016.
Another great tip is that you can express a condition in the string expression. Consider the following line of code that determines whether a year is a leap year or not:
$"The year {DateTime.Now.Year} {(DateTime.IsLeapYear(DateTime.Now.Year) ? " is " : " is not ")} a leap year.";We can use the ternary ? operator one step further. Consider the following line of code:
$"There {(StudentCount > 1 ? "are " : "is ")}{StudentCount} student{(StudentCount > 1 ? "s" : "")} in the list."As the colon is used to denote formatting, we have to wrap the conditional part of the expression in parenthesis. String interpolation is a very nice way to express strings in code that is easy to read and understand.