Book Image

Salesforce Lightning Cookbook

By : Syed Chand Shah
Book Image

Salesforce Lightning Cookbook

By: Syed Chand Shah

Overview of this book

<p><span id="description" class="sugar_field">The new Lightning Experience combines three major components—Lightning Design System, Lightning App Builder, and Lightning Components—to enable anyone to quickly and easily create beautiful, modern enterprise apps. If you wish to meet the challenges that Lightning throws at you head-on, then look no further because this practical book will be your faithful companion and ensure that you make best use of the Lightning platform.</span></p> <p><span class="sugar_field"><span id="description" class="sugar_field"> The book starts by walking you through the three major Lightning Components and helps you enable and configure a Lightning solution. You will explore the art of working with standard components and build a basic layout for the application. Then, you will add more advanced components using the Lightning Framework. Finally, you will also build and migrate reports and dashboards to make your app look more professional. Towards the end of the book, you’ll make use of Design System to work with Salesforce data and lay out the entire page with the components that you’ve built, before integrating Visualforce in your application.</span> </span></p>
Table of Contents (11 chapters)

Flows in Lightning pages


In this recipe, we are going to take a look at creating and activating simple flows, in order to use flows in your Lightning system.
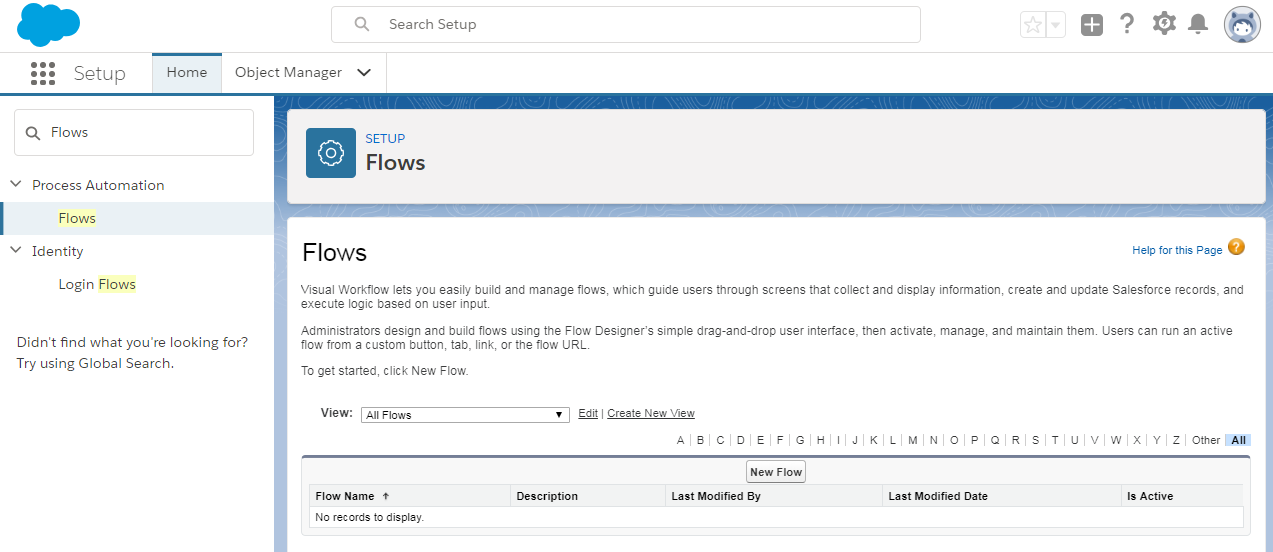
How to do it...

  1. Go to Setup. Search for Flows in the quick search tool. Under Process Automation, you should see Flows. If you see a tick by the Is Active option, you have an active flow. If you want to use this flow by click on the Activate button. If you want to create a new flow, you can click on the New Flow button, as shown in the following screenshot:
  1. You can add components such as screens:
  1. We will need to perform some logic for every component that you add, as follows:
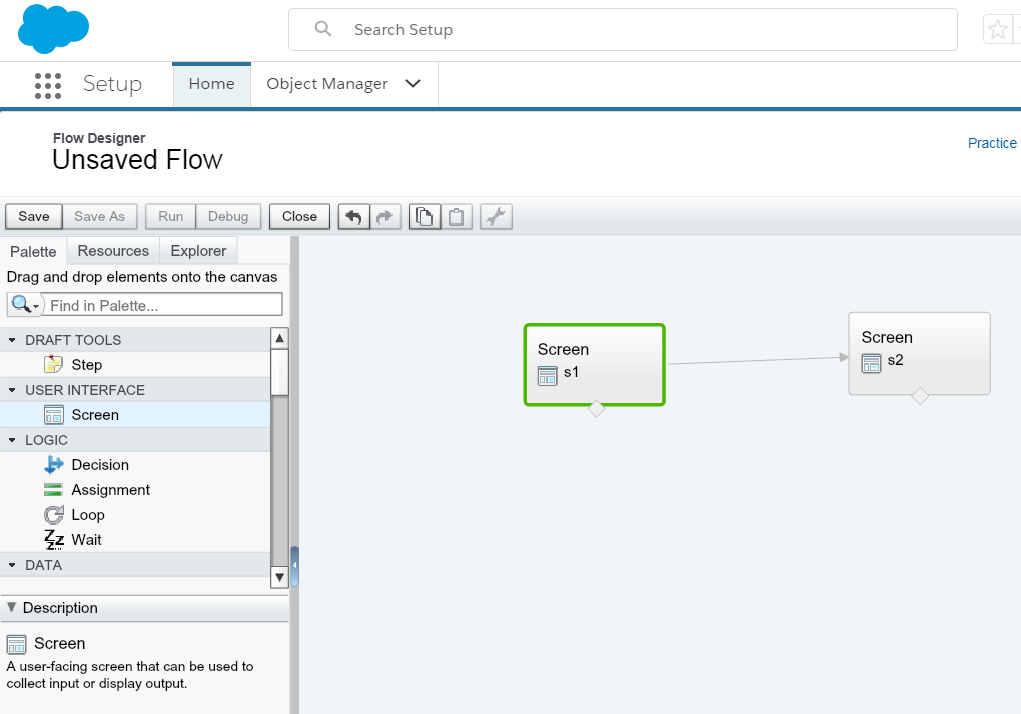
  1. Link the components and you can also make a component the start element by clicking on the plus icon.
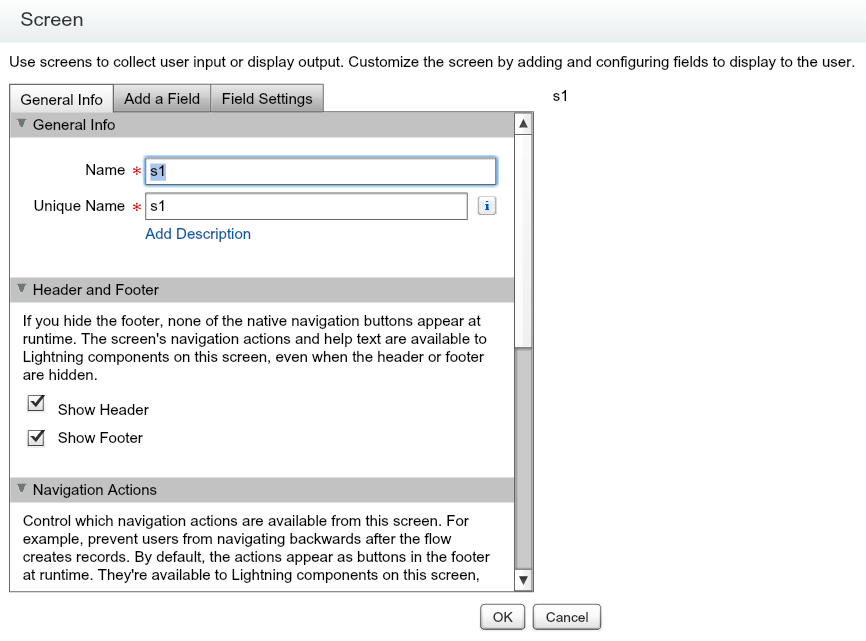
  2. In this manner, you can create a flow, and then save and activate it.
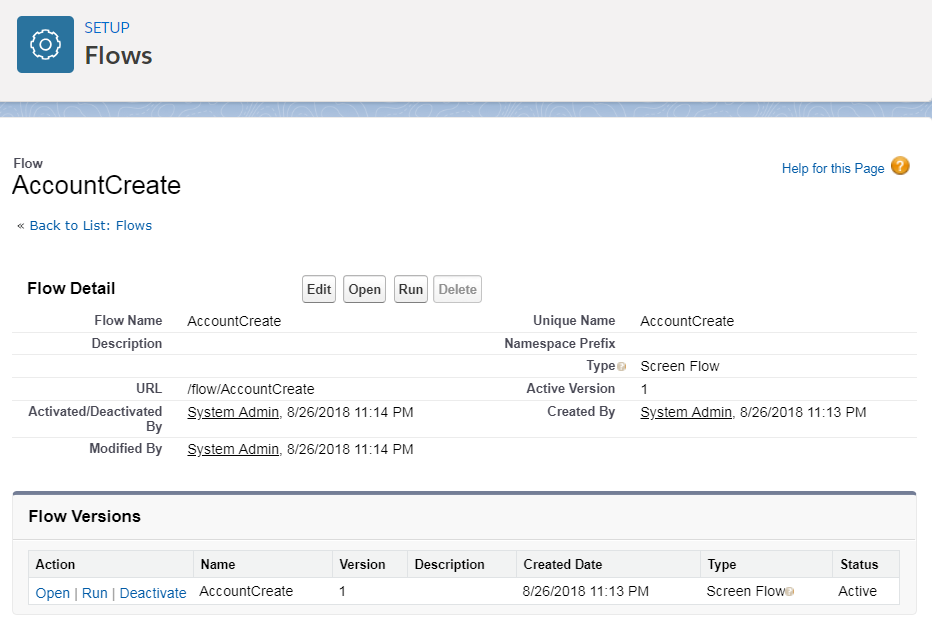
  1. If you go to that specific flow's detail page, you will see an Activate link. Clicking on the link will activate the flow:
  1. So, you have created and activated the flows; now, let's use them. Let's use...