
Now that we have loaded all of the available data into QGIS, let's aggregate it into a single database. QGIS supports working with various database management systems and their spatial extensions (PostgreSQL/PostGIS, Oracle Spatial/GeoRaster, MSSQL Spatial, SQL Anywhere, and SQLite/SpatiaLite). Among them, PostGIS and SpatiaLite are the ones you have probably already heard about. Being common, these spatial databases are usually used for different purposes. PostGIS is an example of an enterprise solution used mostly on a server to provide spatial data maintenance and access for multiple users. SpatiaLite is a lightweight file database for personal use. Usage of SpatiaLite database has a number of advantages as follows:
All of the data is stored in a single, portable file, and you don't get overwhelmed by different file types (for example,
.shp,.dbf,.shx,.prj,.qpj, and so on)Shapefile limitations for size (up to 2 GB) and field name length (10 characters) can be omitted
Built-in spatial indices allow you to perform searches for large areas faster
This is a real relational database in a single format that allows you to use various spatial functions and SQL-based workflows
Perform the following steps to assemble your data into a single SpatiaLite database:
First of all, you need to create an empty spatial database to load your data into. You can do this from the Browser panel. Right-click on the SpatiaLite entry and choose the Create database shortcut. Specify the folder and a
.sqlitedatabase file name. You will get the The database has been created message. Now you can expand the entry and see your newly created empty database.-
We will use the DB Manager core plugin that provides a single interface to work with different databases to load the data. The plugin functionality is accessible by going to Database | DB Manger. On the left side of the window, you can see a tree list of available database connections grouped by type. Once created, your database will automatically be available under the SpatiaLite item, and you can connect to it by double-clicking. When the connection is established, you will see general information about the database or its selected items in the Info tab on the right side of the window. To import files into the database, click on the Import layer/file button
 , or access it from the Table menu.

In the opened Import vector layer window, you should define the layer you want to import. It could be one of the already loaded layers available in the Input drop-down list, or the layer you choose from the filesystem by clicking on the browse button .... Then, define the Output table name (in our case, it is
ny_boroughs, the same as the input).
The following options allow you to exercise more control over your data:
Primary key: If this is not specified, the field will be named
pkby defaultGeometry column: If this is not specified, the field will be named
geomby defaultSource SRID and Target SRID: These are CRS EPSG codes read from the data, but you can specify them manually if the data isn't accompanied by projection files, or if you want to reproject it before loading it to the database
Encoding: If not specified, the dataset charset is set to UTF-8 by default
Drop existing table: If you import a table with the same name as a previously existing table, it will be replaced by the new table
Create single-part geometries instead of multipart: Multipart features will be disaggregated into single-part geometries before loading to the database
Create spatial index: A spatial index that allows faster spatial search and query performance will be created
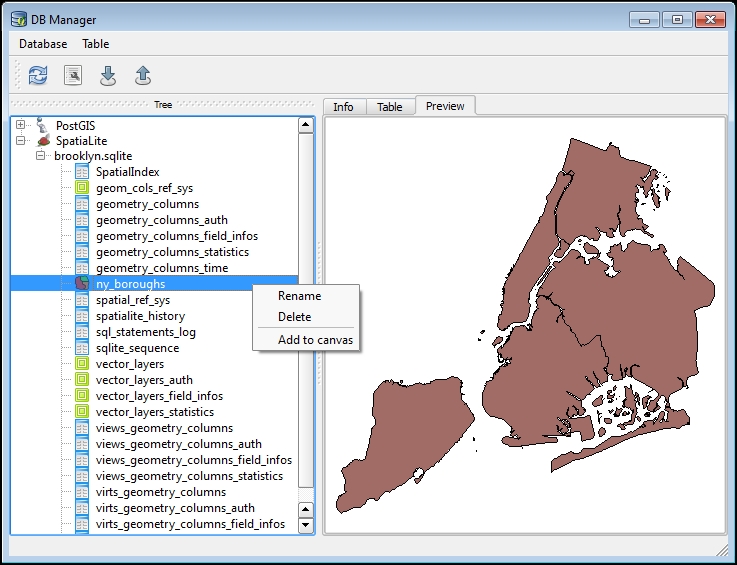
After hitting OK and waiting a little (depending on the file size, the process may take some time), you will get the Import was successful message. To explore the imported table click on the Refresh button  , and you will see a geometry table in the list of database items. From the Info tab, you can view information about table, geometry type, fields, and triggers. The Table tab displays data in a tabular form, and the Preview tab displays spatial geometry, if any. By right-clicking on any element, you can delete, rename, or add it to the map canvas. All other opened layers can be loaded in a similar way.