
Once we have completed the development for our ASP.NET core application, we need to deploy the application so that it can be accessed by our users.
In any application, irrespective of whether it is the web, desktop, or mobile application, not all the functionalities have been achieved through code. In fact, you should not try to achieve everything through code.
In this chapter, you are going to learn about the following topics:
- Configuration in the ASP.NET Core application
- Signing up to the Microsoft Azure platform
- Deploying the ASP.NET Core application to the Azure Cloud platform
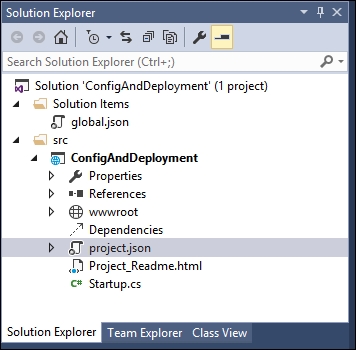
If you have built a web application using any of the previous versions of ASP.NET MVC, there will be a file by the name of Web.config (an XML file) where you can configure all the dependencies for your application. But in ASP.NET Core, there will be no Web.config file in your solution:
Instead, we have project.json (a JSON file), where we will configure the dependencies for your application. Before discussing the contents of project.json, let us discuss a bit about JSON.
JSON is an acronym of JavaScript Object Notation. It is the open standard data exchange format. It will be in human-readable text and consist of attribute/value pairs. Consider the following JSON, and let's dissect it to see what it represents:
{
  "addressess": [
    {
      "DoorNo": 16,
      "Street": "King Street",
      "areaname": "Mascot"
    },
    {
      "DoorNo": 12,
      "Street": "High Street",
      "areaname": "North Sydney"
    }
  ]
}
Each piece of data is an attribute value pair, separated by a colon. For example, "DoorNo": 16 tells that the value for DoorNo variable is 16 in the first record. Each attribute value pair (sometimes called a property) is separated by a comma. For example, consider the following three properties:
"DoorNo": 16,
"Street": "King Street",
"areaname": "Mascot"
Each record or object is contained within a pair of curly braces. For example, the following JSON data represents a record or an object:
{
    "DoorNo": 16,
    "Street": "King Street",
    "areaname": "Mascot"
}
Similar records can be grouped together and could be formed as an array (of objects). Square brackets are used to represent the array in JSON format as in the following example:
"addressess": [
  {
    "DoorNo": 16,
    "Street": "King Street",
    "areaname": "Mascot"
  },
  {
    "DoorNo": 12,
    "Street": "High Street",
        "areaname": "North Sydney"
  }
]
If we have to represent the same data in XML format, you can do so as follows. Please note that for each piece of information, we should have a start tag and an end tag (ends with "/"):
<addresses>
  <address>
    <DoorNo>16</DoorNo>
    <Street>King Street</Street>
    <areaname>Mascot</areaname>
  </address>

  <address>
    <DoorNo>12</DoorNo>
    <Street>High Street</Street>
    <areaname>North Sydney</areaname>
  </address>
</addresses>
All of the project configuration should go into the project.json file for the ASP.NET Core application. The following is the project.json file that was created when using the predefined ASP.NET Core web application template:
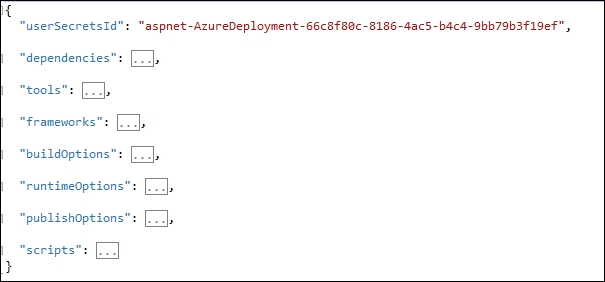
There are different predefined nodes in this JSON file for different functionalities. Let us take some important nodes in this project.json file and discuss them.
The dependencies node lists all the dependencies for your ASP.NET Core application.
The following is a fragment of the dependencies node in the ASP.NET Core application. Each dependency is an attribute value pair where the attribute represents the dependency and the value represents the version of the dependency. If you need to provide more information for the dependency, you can have a nested JSON configuration as it is in Microsoft.NETCore.App:
"dependencies":{
  "Microsoft.NETCore.App":{
    "version": "1.0.0-rc2-3002702",
    "type": "platform"
    },
    "Microsoft.ApplicationInsights.AspNetCore": "1.0.0-rc2-final",
"Microsoft.AspNetCore.Authentication.Cookies": "1.0.0-rc2- final",In this node, we mention the frameworks that we depend on for the ASP.NET Core application. dotnet5.6 represents the full blown .NET framework and dnxcore50 represents the .NET Core framework containing the subset of functionalities of the complete .NET framework:
"frameworks":{
  "netcoreapp1.0":{
    "imports":[
      "dotnet5.6",
      "dnxcore50",
      "portable-net45+win8"
      ]
    }
  },
Microsoft Azure is a cloud computing platform and infrastructure from Microsoft for building, deploying, and managing applications and services. It supports different programming languages and arrays of services.
You can deploy your application in any server with Internet Information Service (IIS) in your network. But this restricts your application to being accessed only from within your network, assuming your server could only be accessed from within your network (as in most network setups). In this section, we are going to deploy the ASP.NET Core application in Microsoft Azure so that your users across the globe can access your application.
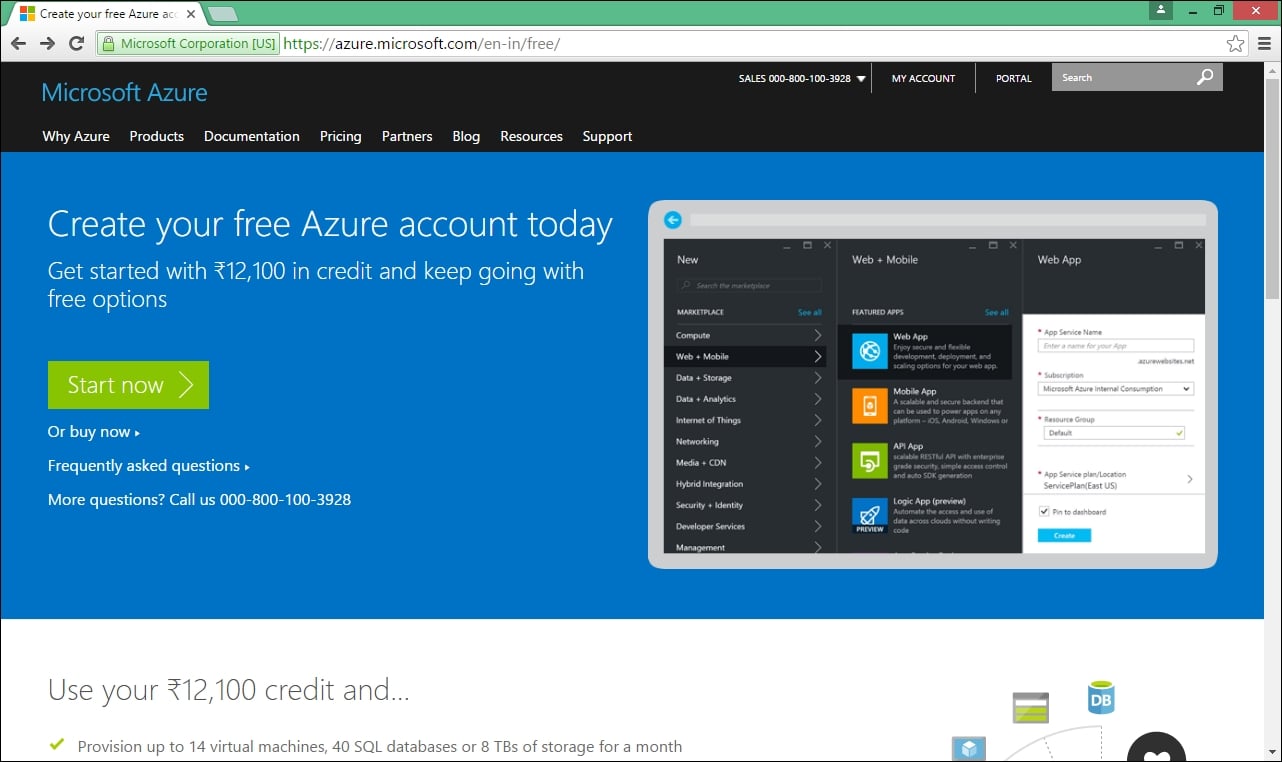
In order for your application to be deployed to Azure, you need to have an account with Azure. You can create an Azure account for free and you'll have sufficient credits to deploy your application for free within the first 30 days ( https://azure.microsoft.com/en-in/):
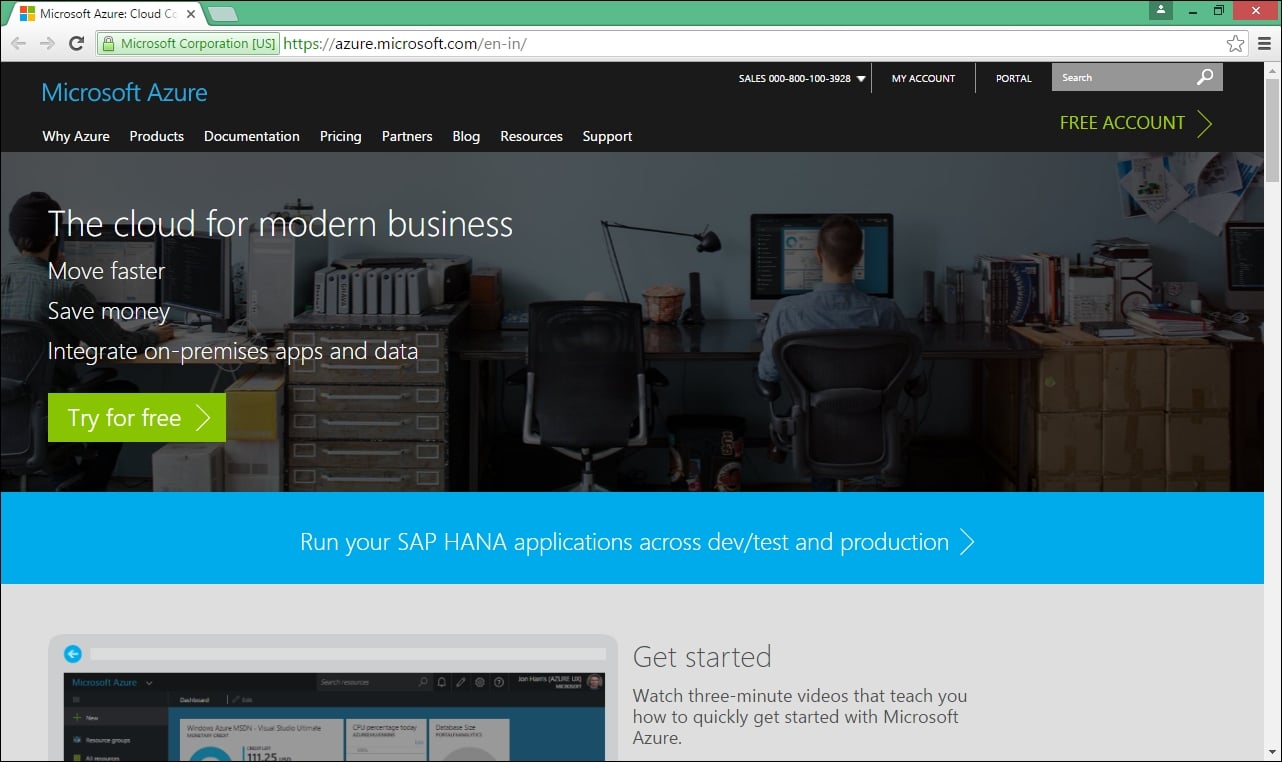
Click the Try for free button or Free Account link in the top right-hand corner and you'll be forwarded to the following page:
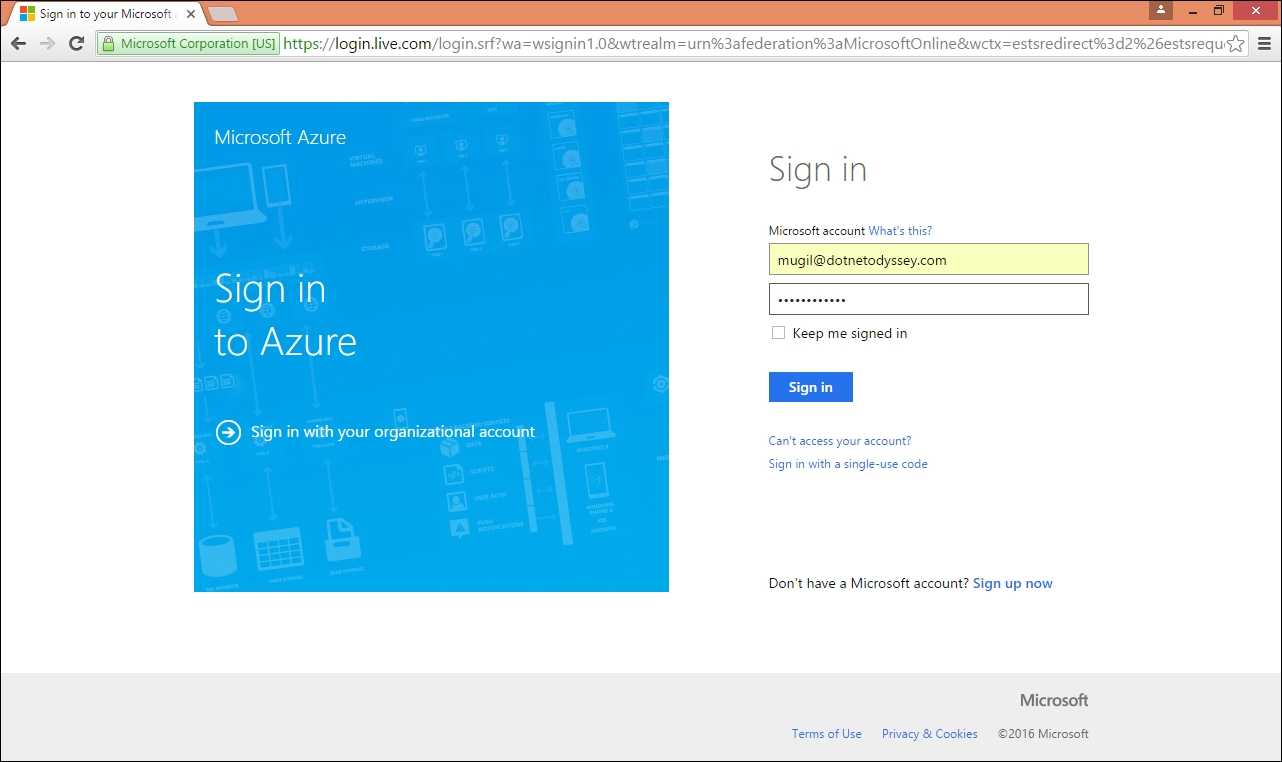
Click the Start now button and you'll be redirected to the following page. Enter your Microsoft account credentials and click the Sign In button. If you don't have a Microsoft account, you can create one by clicking on the sign up now link at the bottom of the page:
As I have a Microsoft account already, I have signed in with my credentials. Once you have signed-in, you will be asked for details about your country, first name, second name, and your work phone, as follows:

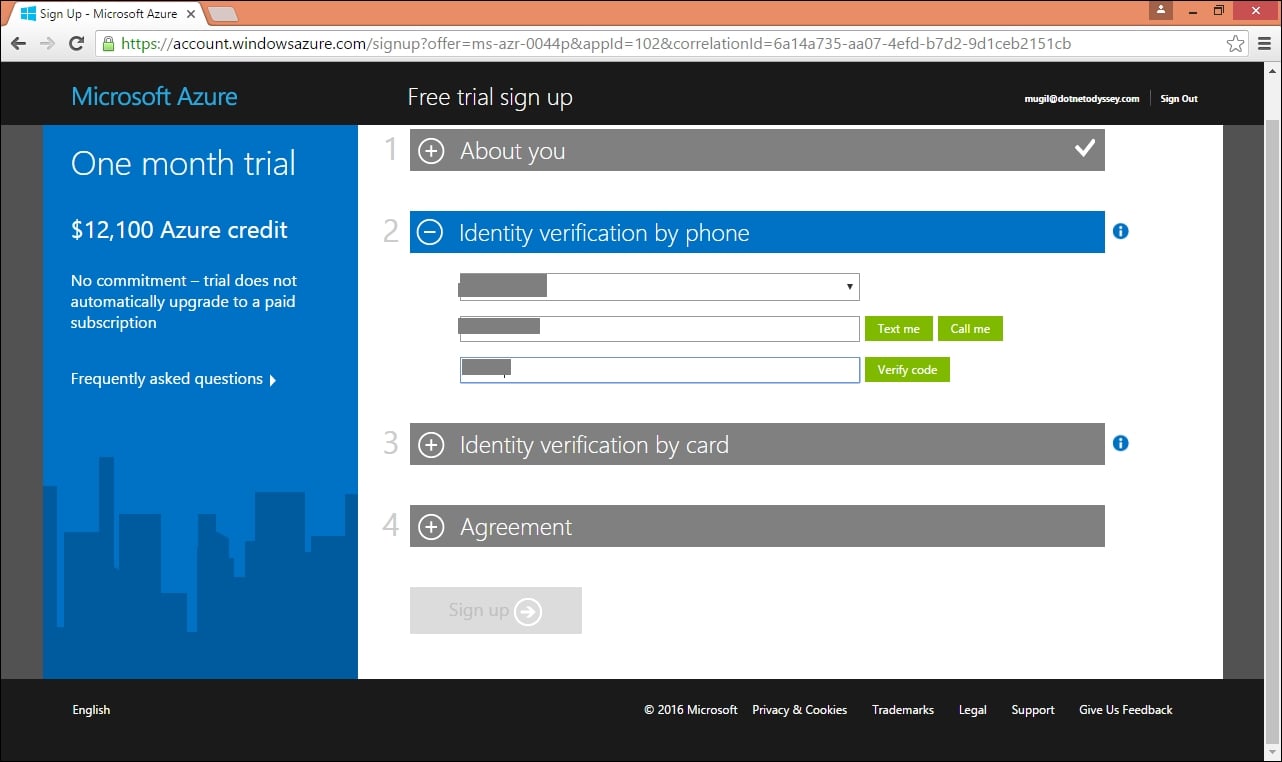
Once you have entered all the necessary details, you will be asked for your country code and phone number so that Azure can text you or call you to verify you are a real person and not a robot  . If you choose the option of text me, you will get a code to your mobile phone; you need to enter it in the last field and click Verify Code:
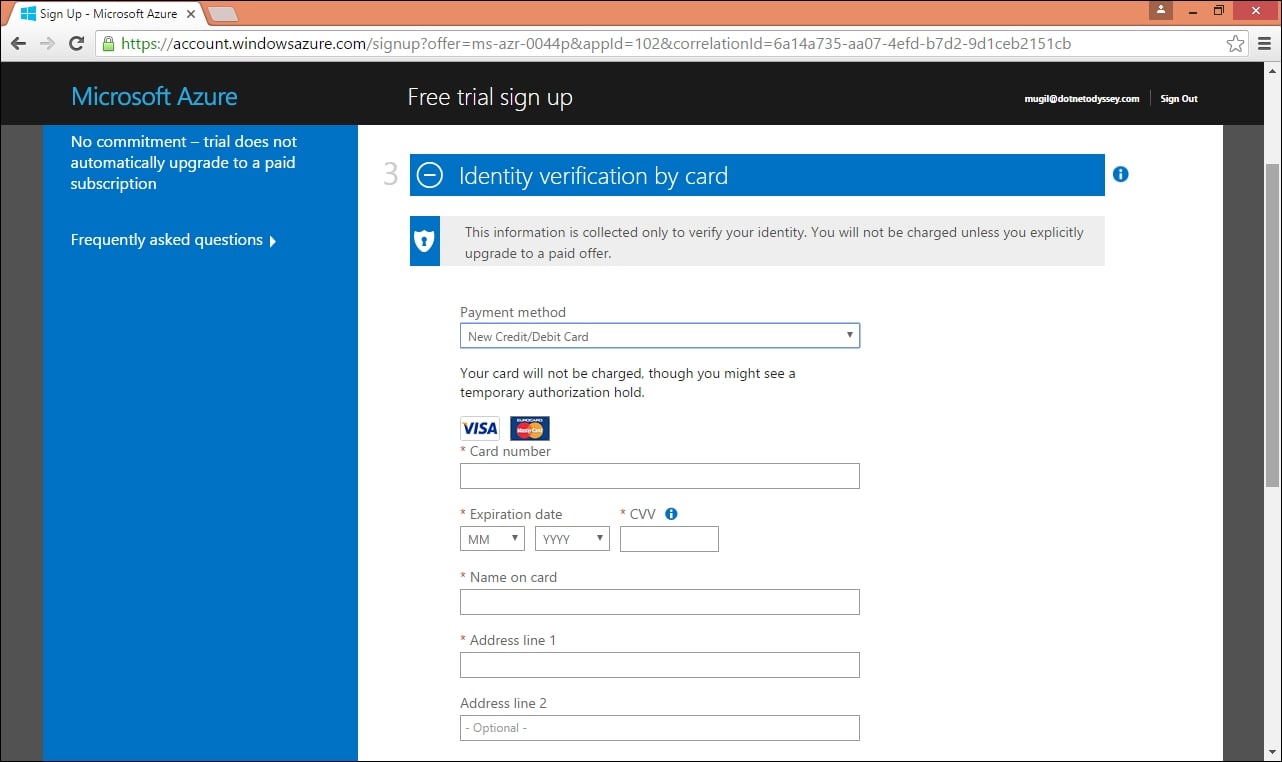
Once you have been verified by phone, you need to enter your credit card information in the following form. You'll be billed for approximately $1 and it will be refunded within five to six business days back to your account. This information is collected to identify the user's identity and the user will not be billed unless the user explicitly opted for the paid service:
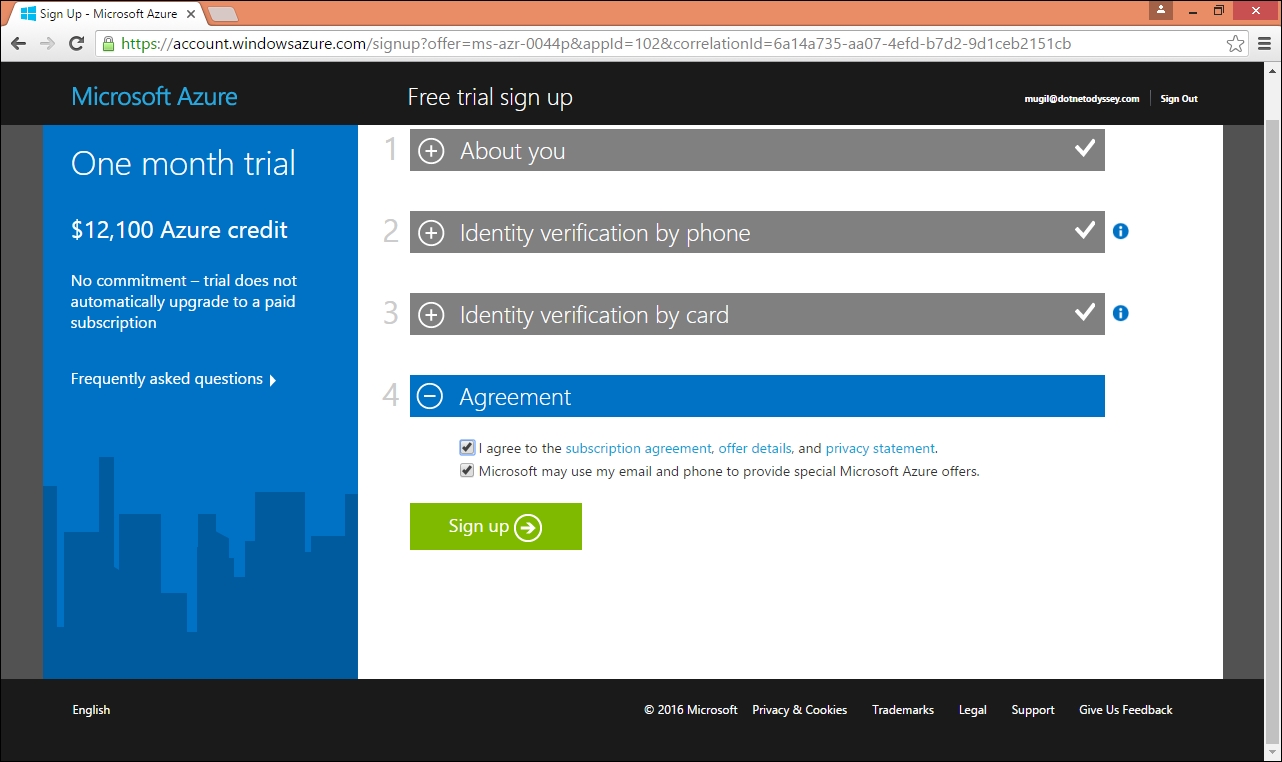
Once you enter your credit card information and click Next, you will have to agree to the subscription agreement as the final step in the sign-up process:
Once you click the Sign up button, it will take another five minutes to complete the process. You'll be shown the following screen until the process completes:

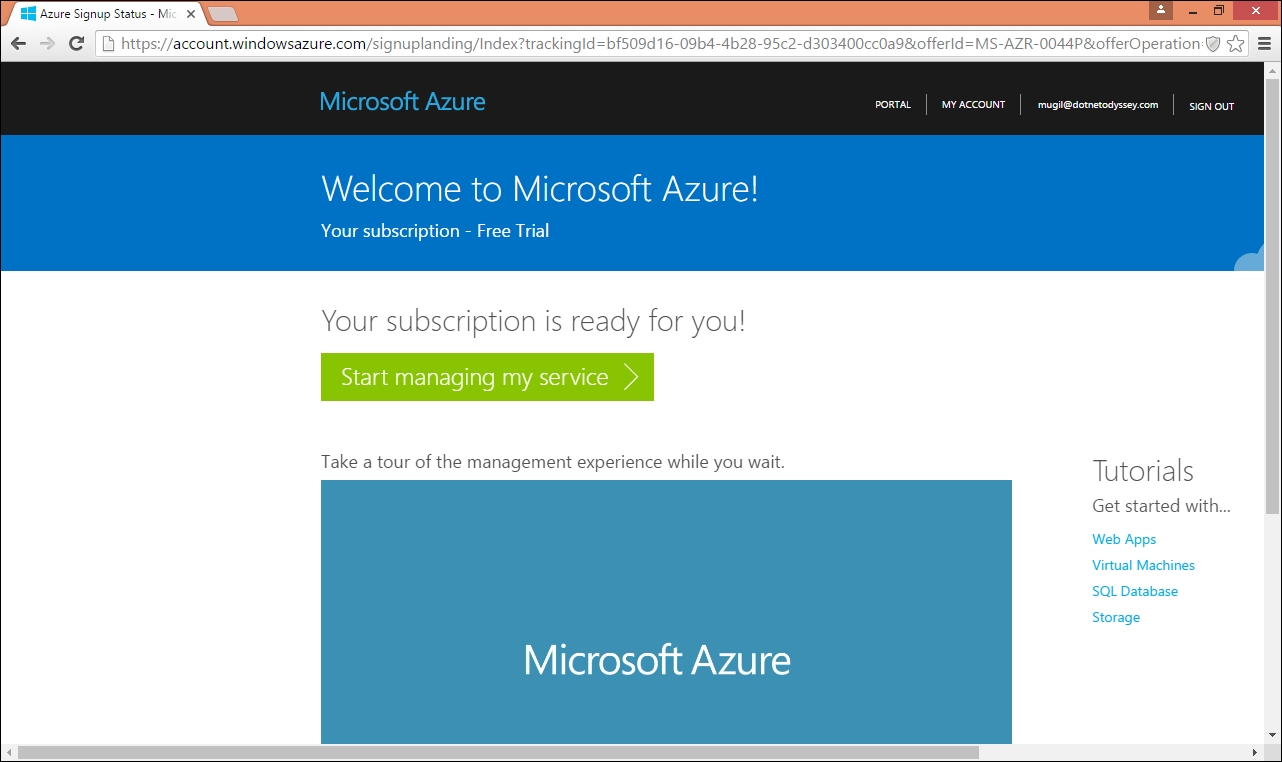
Once the sign-up process completes, you'll be shown the following screen. You'll also get a confirmation e-mail (to the e-mail ID that you gave in the first step) with the subscription details:
In order to publish the ASP.NET Core application to Azure from the Visual Studio 2015 Community Edition, you should have Visual Studio 2015 Update 2 installed (at least) and you should install/enable the SQL Server Data Tools.
You can download the Visual Studio 2015 Update 2 from the URL at https://www.visualstudio.com/en-us/news/vs2015-update2-vs.aspx and install it.
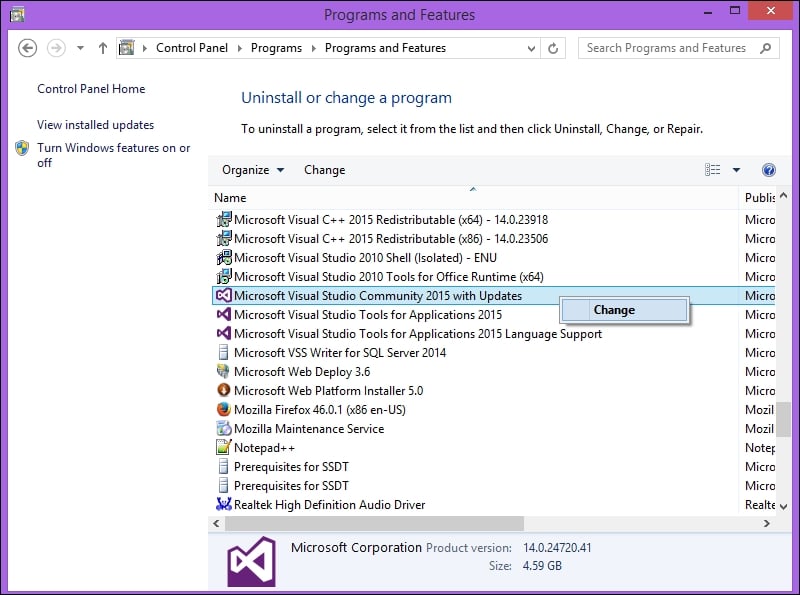
To install the SQL Server Data Tools, go to Control Panel | Programs and Features. Right-click on the Microsoft Visual Studio Community 2015 and select the Change, option, as shown in the following screenshot:
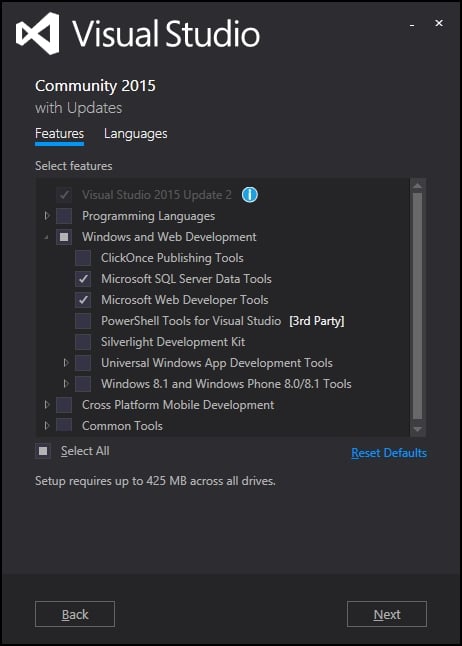
Once you click on Change option, you will get the following window—where you have to choose the Modify button. Once you click the Modify button, you'll be given an option where you can modify the Visual Studio installation options. I have selected Microsoft SQL Server Data Tools , as depicted in the following screenshot:
Once you click Next, Visual Studio will install the SQL Server Data Tools and once it is completed, you will get the following screen, which shows the setup completion status:

Signing up to Microsoft Azure
In order for your application to be deployed to Azure, you need to have an account with Azure. You can create an Azure account for free and you'll have sufficient credits to deploy your application for free within the first 30 days ( https://azure.microsoft.com/en-in/):
Click the Try for free button or Free Account link in the top right-hand corner and you'll be forwarded to the following page:
Click the Start now button and you'll be redirected to the following page. Enter your Microsoft account credentials and click the Sign In button. If you don't have a Microsoft account, you can create one by clicking on the sign up now link at the bottom of the page:
As I have a Microsoft account already, I have signed in with my credentials. Once you have signed-in, you will be asked for details about your country, first name, second name, and your work phone, as follows:
Once you have entered all the necessary details, you will be asked for your country code and phone number so that Azure can text you or call you to verify you are a real person and not a robot . If you choose the option of text me, you will get a code to your mobile phone; you need to enter it in the last field and click Verify Code:
Once you have been verified by phone, you need to enter your credit card information in the following form. You'll be billed for approximately $1 and it will be refunded within five to six business days back to your account. This information is collected to identify the user's identity and the user will not be billed unless the user explicitly opted for the paid service:
Once you enter your credit card information and click Next, you will have to agree to the subscription agreement as the final step in the sign-up process:
Once you click the Sign up button, it will take another five minutes to complete the process. You'll be shown the following screen until the process completes:
Once the sign-up process completes, you'll be shown the following screen. You'll also get a confirmation e-mail (to the e-mail ID that you gave in the first step) with the subscription details:
In order to publish the ASP.NET Core application to Azure from the Visual Studio 2015 Community Edition, you should have Visual Studio 2015 Update 2 installed (at least) and you should install/enable the SQL Server Data Tools.
You can download the Visual Studio 2015 Update 2 from the URL at https://www.visualstudio.com/en-us/news/vs2015-update2-vs.aspx and install it.
To install the SQL Server Data Tools, go to Control Panel | Programs and Features. Right-click on the Microsoft Visual Studio Community 2015 and select the Change, option, as shown in the following screenshot:
Once you click on Change option, you will get the following window—where you have to choose the Modify button. Once you click the Modify button, you'll be given an option where you can modify the Visual Studio installation options. I have selected Microsoft SQL Server Data Tools , as depicted in the following screenshot:
Once you click Next, Visual Studio will install the SQL Server Data Tools and once it is completed, you will get the following screen, which shows the setup completion status:
Prerequisites to Azure deployment
In order to publish the ASP.NET Core application to Azure from the Visual Studio 2015 Community Edition, you should have Visual Studio 2015 Update 2 installed (at least) and you should install/enable the SQL Server Data Tools.
You can download the Visual Studio 2015 Update 2 from the URL at https://www.visualstudio.com/en-us/news/vs2015-update2-vs.aspx and install it.
To install the SQL Server Data Tools, go to Control Panel | Programs and Features. Right-click on the Microsoft Visual Studio Community 2015 and select the Change, option, as shown in the following screenshot:
Once you click on Change option, you will get the following window—where you have to choose the Modify button. Once you click the Modify button, you'll be given an option where you can modify the Visual Studio installation options. I have selected Microsoft SQL Server Data Tools , as depicted in the following screenshot:
Once you click Next, Visual Studio will install the SQL Server Data Tools and once it is completed, you will get the following screen, which shows the setup completion status:
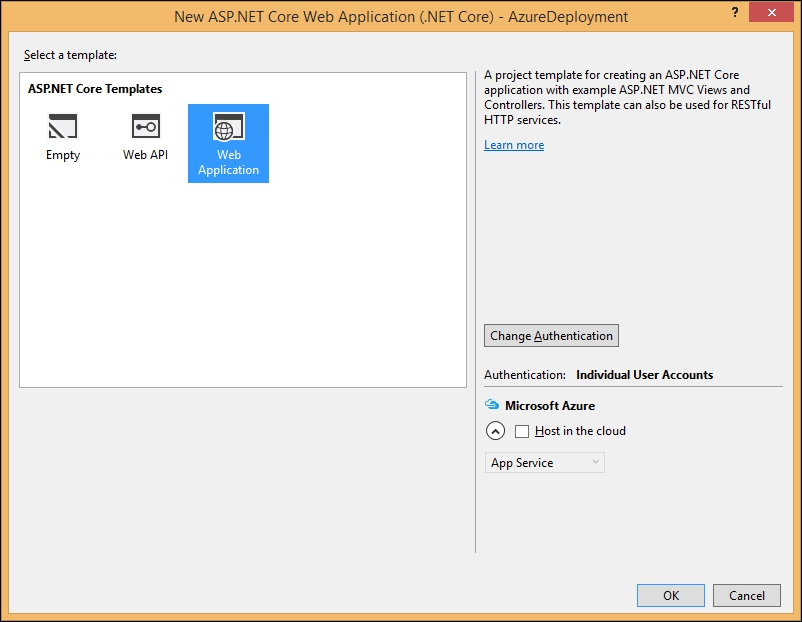
Let's create an ASP.NET Core application that we can deploy in Microsoft Azure:
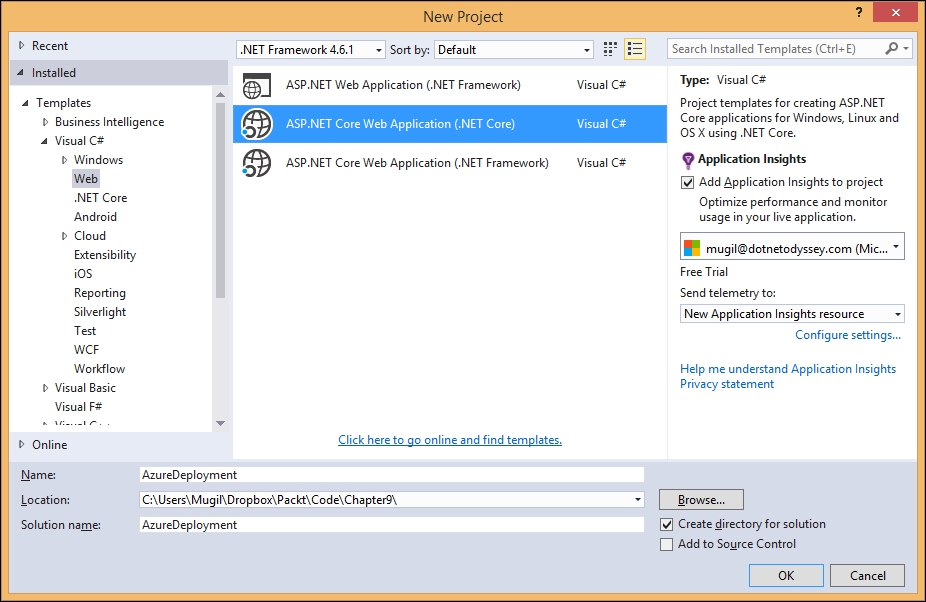
The ASP.NET Core application will be created once you click the OK button:
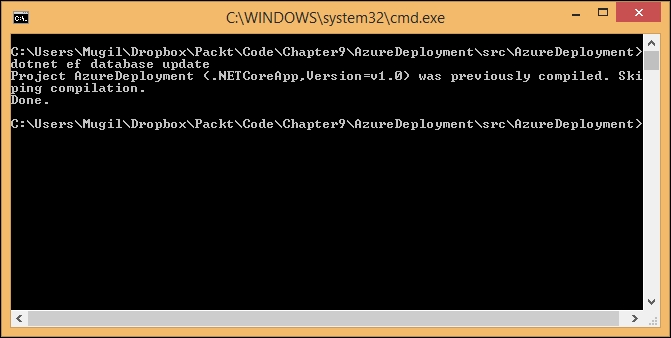
As the default ASP.NET Core Web Application template uses the Entity Framework, we need to execute the following command in order to create the database migration:
dotnet ef database update
Once you enter the command in Command Prompt (in the project's path), the migration file will be created. This migration file will contain all the changes to the database. This migration will be applied at the time of deployment at Azure so that Azure can create the necessary database scripts for Azure deployment:
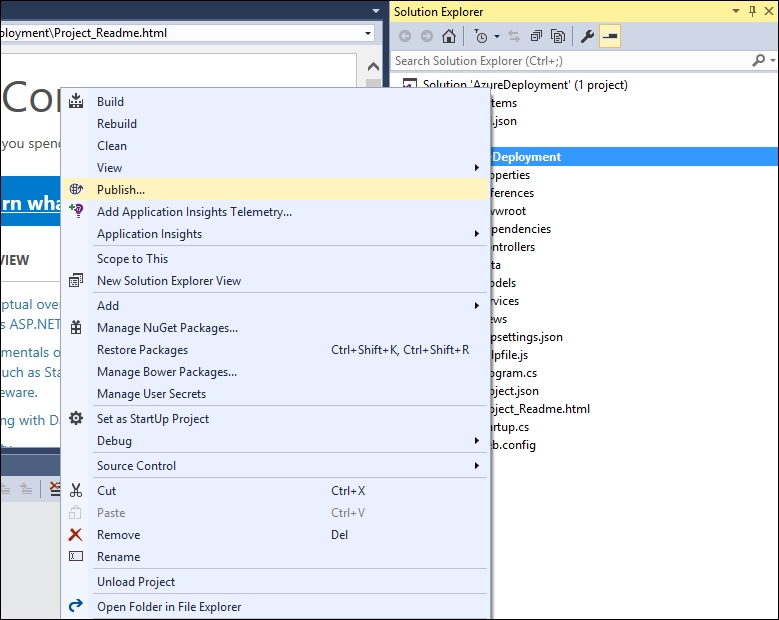
Once the database migration is completed, right-click on the created Core application and select the Publish option, as shown in the following screenshot:
When you click the Publish option, you'll be shown the following screen, depicting various publishing options available for you:

Please select the Microsoft Azure App Service option to publish the web application on the Microsoft Azure platform:
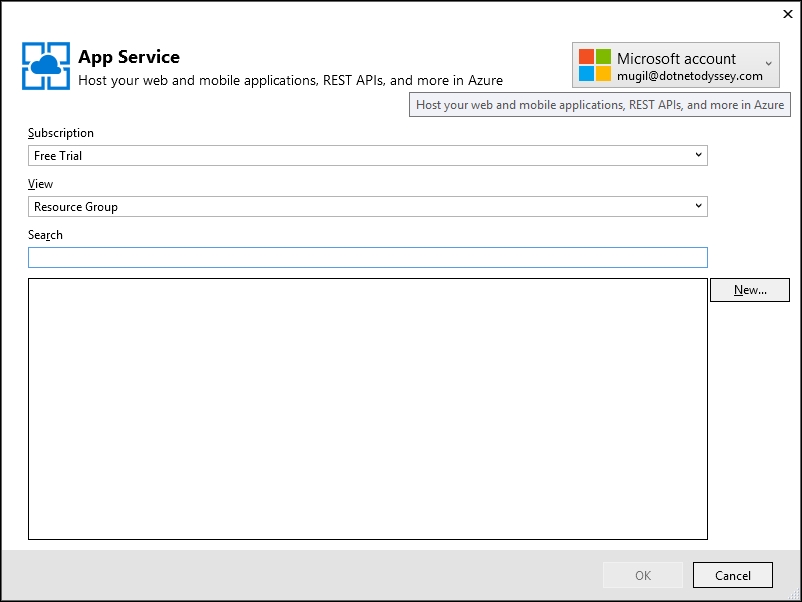
Click on the New button, and you will get the following screen:
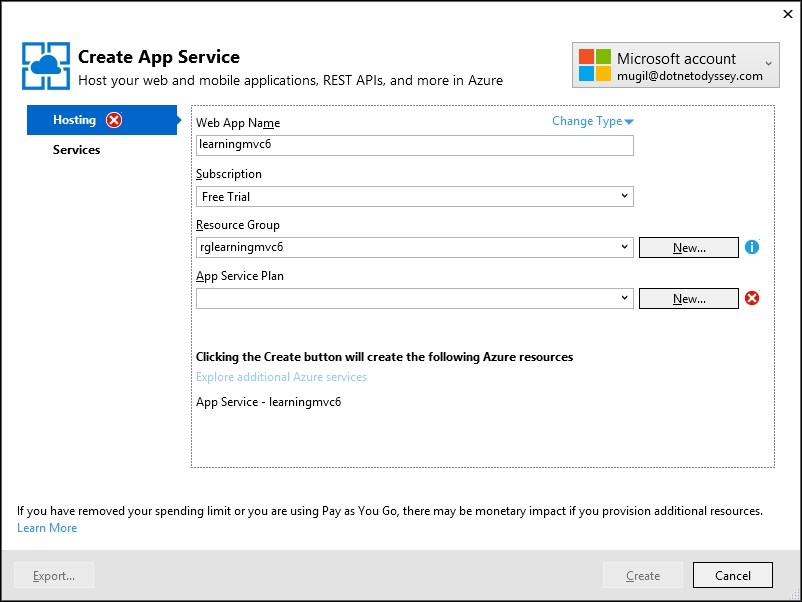
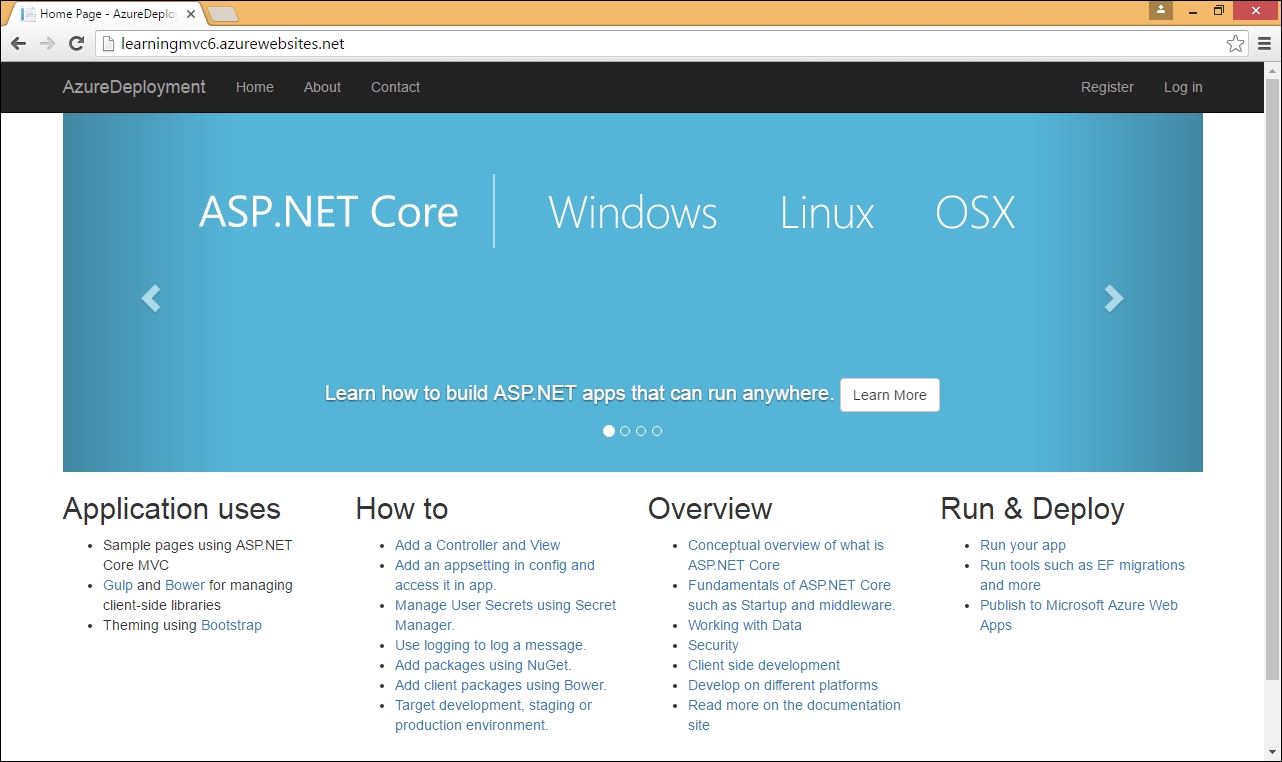
You can change the web app name to whatever name you would like to have. I have changed the web app name to learningmvc6.
Click on the New button beside the Resource Group and enter the name for the resource group. The resource group is just a tag where you can group all of your computing resources so that if you want to delete all the resources, you can just delete the resource group. For example, a resource group could comprise of a web server and a database server—you can think of it like a collection of resources.
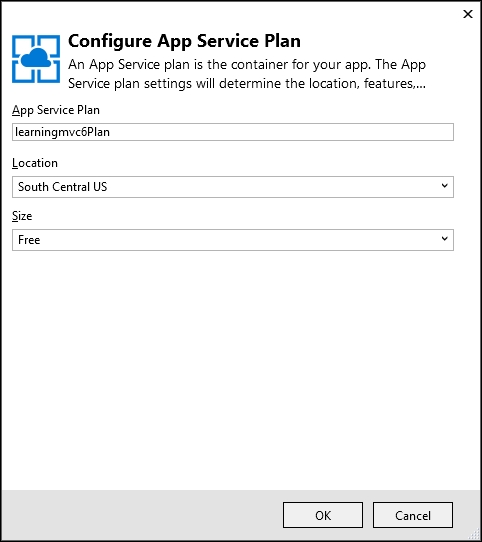
Now, click on the New button beside the App Service Plan. You will get the following window where you can choose the location and size of your web application container. Your location could be anywhere from South Central US to Europe, from Japan to Canada. Your application container could be anything from free to a machine with 7 GB RAM. I have chosen the free option as our objective is to deploy the ASP.NET Core application in a cloud environment rather than to deploy an application which is to be accessed by millions of users. Of course, you can achieve the same with ASP.NET Core and Microsoft Azure:
Now, we can configure the SQL database which is available as an additional Azure service.
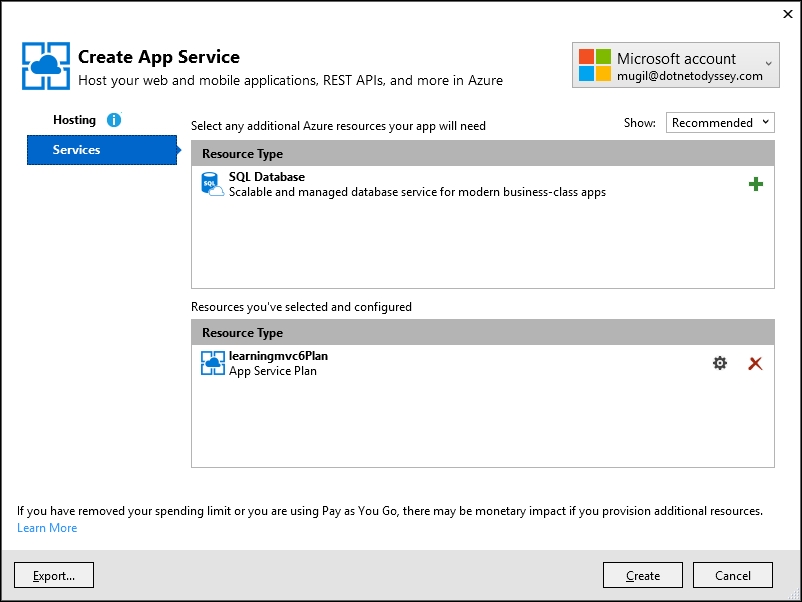
Click on the + button which is available at the top section which will lead us to the configuration of the SQL database.
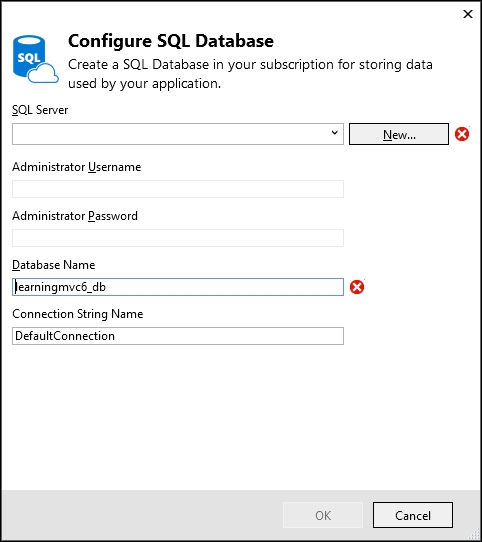
If you have any existing SQL server in the Azure environment, you can use it. As I don't have any such server, I am going to create a SQL server by clicking the New button beside SQL Server:

Please enter the administrator user name and password for the SQL Server and click OK. You will see the following screen:
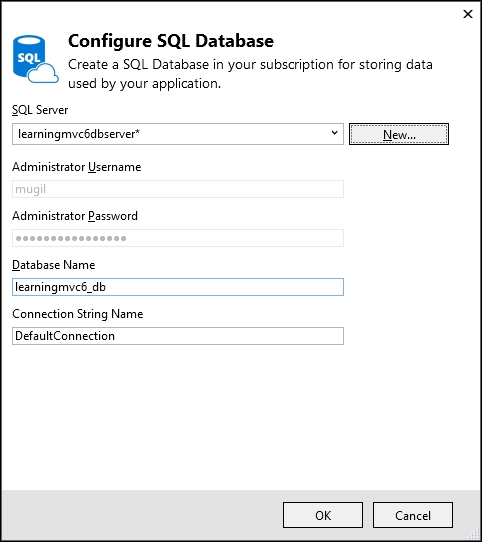
Once you click OK, you will get the following screen:

Click OK on the preceding screen and we will see the Create App Service screen:
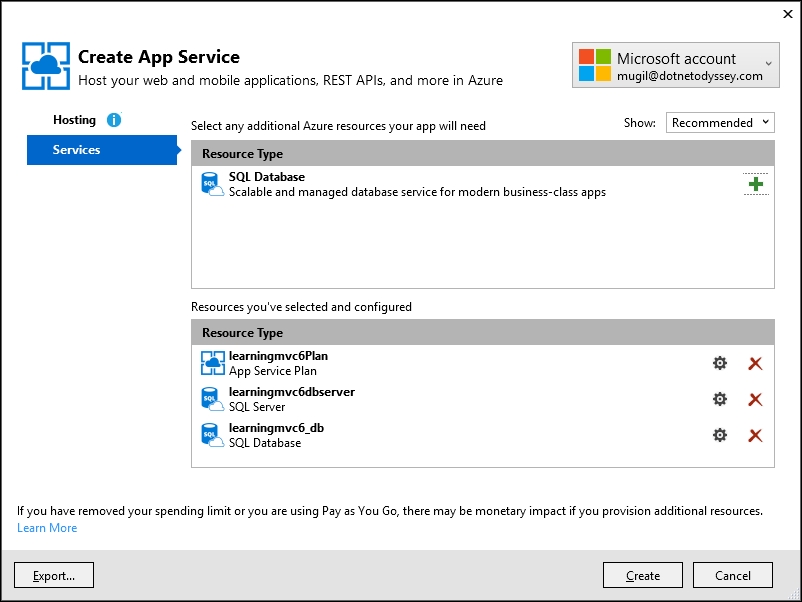
Click Create once we have configured all the required Azure services:

The preceding screen shows the deployment configuration options, such as the Site name and Destination URL for our application. Click Next on the preceding screen:
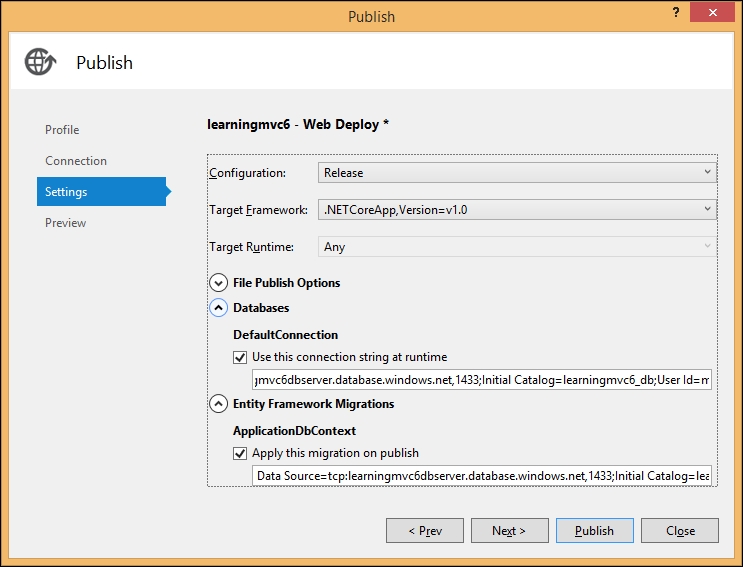
It is important to note that you need to expand the Databases option and Entity Framework Migrations options and select both the checkboxes. The first checkbox represents the connection string that should be used at runtime and the second checkbox represents the database migration that should be applied on publication.

The preceding screen is the preview screen where you can see the files that would be deployed when you publish. This is an optional step—if you want to see the files, you can click the Start Preview button. Or else, you can click the Publish button to publish the web application in the Azure platform.
Once you click the Publish button, our ASP.NET Core application will be deployed in Azure and your application URL will be opened on successful publication. You will get the following screen:
In this section of the chapter, we are going to learn how to create and deploy the ASP.NET Core web application in the Linux platform. I am going to deploy the application in the cloud using Amazon Web Services (AWS). Obviously, you don't need AWS to deploy the ASP.NET Core application on Linux. I am just using it so that I do not need to install Linux on my local machine. And another advantage of hosting with AWS (or any other public cloud service provider or any hosting provider) is that I can access the web application from anywhere as it will be publicly available.
We have the following prerequisites to create and deploy in the Linux environment:
- Linux machine
- Putty client (if you are using a remote Linux machine)
We are going to use AWS to create a Linux machine. The advantage of using AWS or any other cloud provider is that we can use their service only when we need it and we can wind down the machine when you are done with it. You only need to pay for the time when you are using it. For the first year, AWS has a free tier where you can host the machine (if it is eligible for the free tier) without having to pay anything. I have been using AWS for more than couple of years to try out many things in the cloud, hence I am not eligible for the free tier.
However, you can install Linux on your Windows PC by using any virtualization software. Ubuntu Linux has the option of booting up from the USB drive itself so that you don't need to disturb anything in your local PC.
Once you sign-up for an AWS account, you can go to the EC2 dashboard, where you can create EC2 instances:
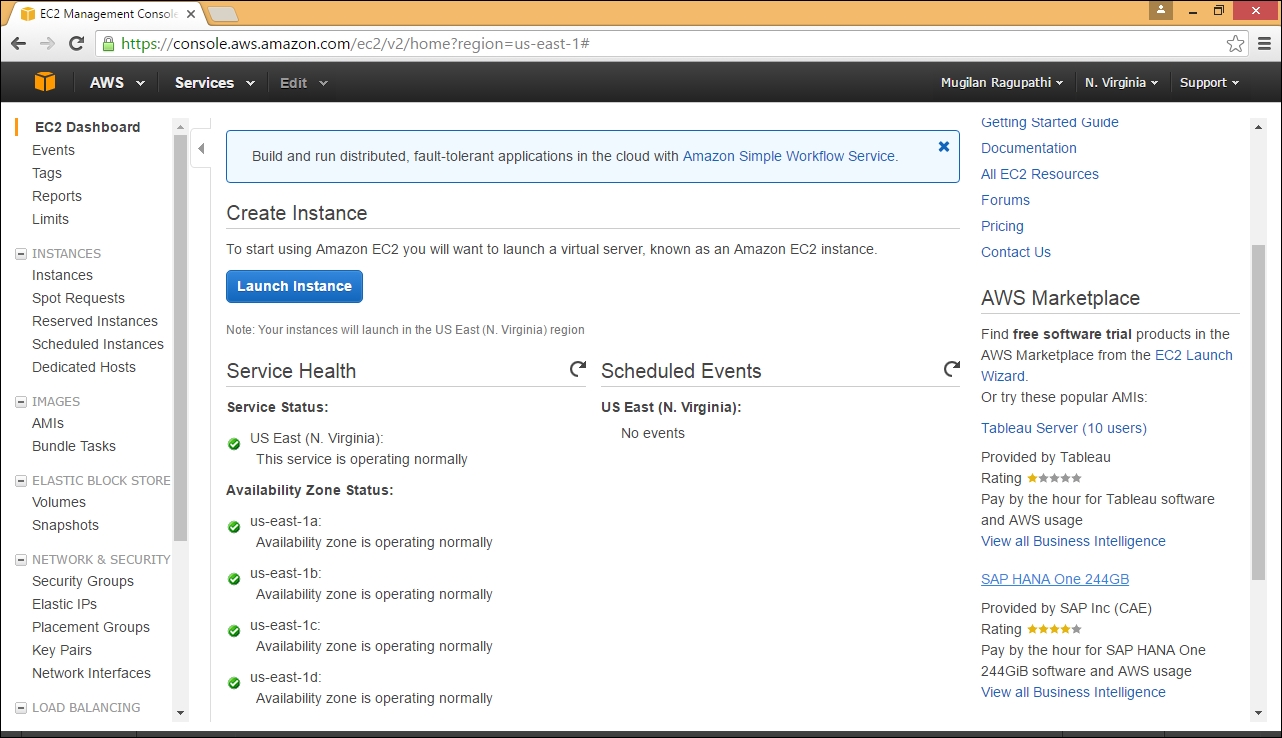
Click Launch Instance in the preceding screen. A wizard will be launched where it will help you in selecting and configuring the instances. In this step, we are selecting the Ubuntu Linux server because of its ease of use.
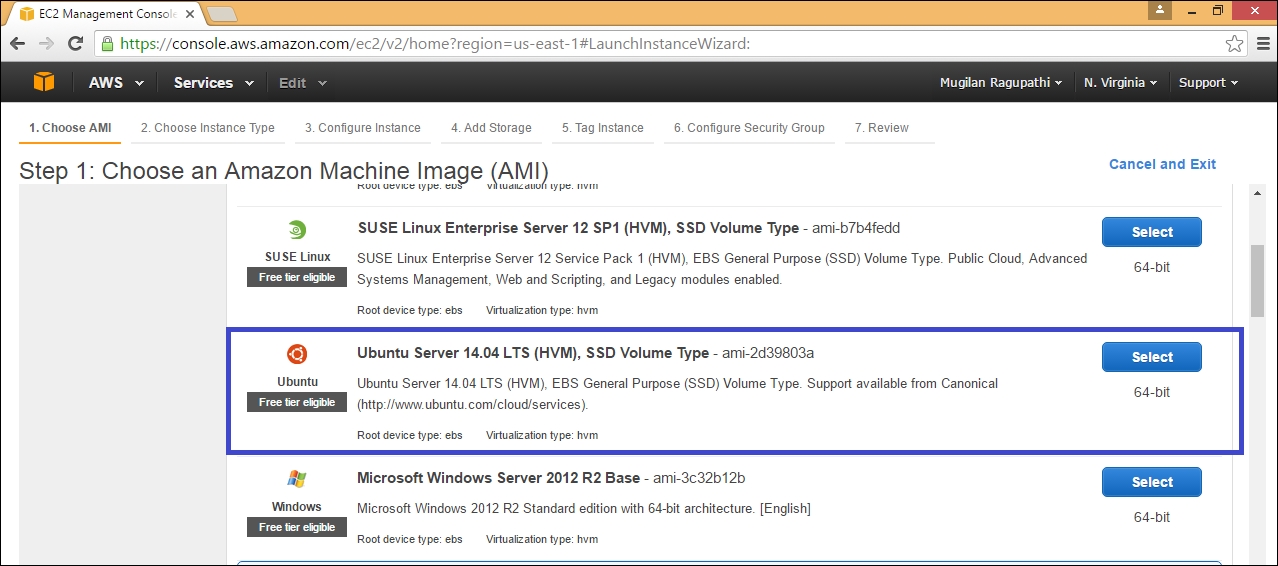
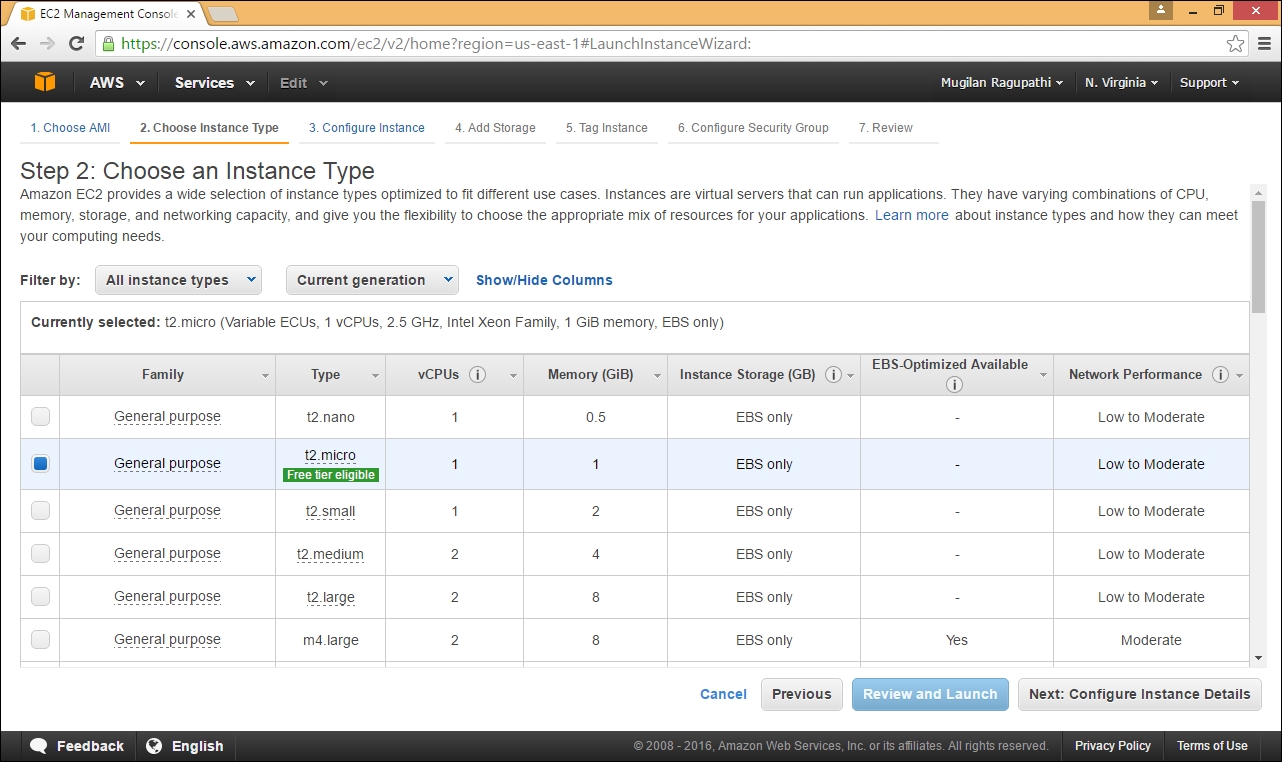
There are different kinds of instances available in AWS ranging from nano (with 0.5 GB RAM) to large machines (with 1952 GB RAM). We are going to choose micro instance as it is eligible for the free tier:
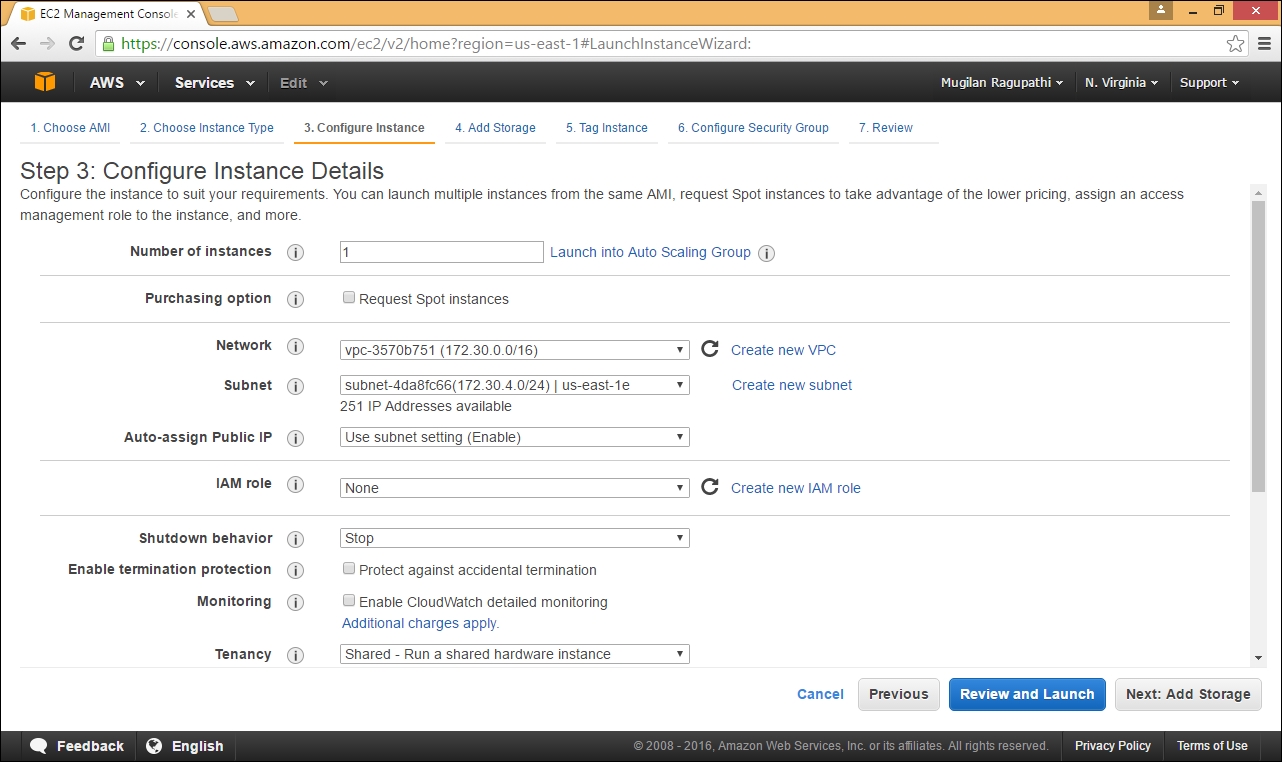
In previous step, we can configure the instances for the cloud. We can create an auto scale group where the AWS cloud will spin up the instances automatically when the load is high. As our objective is to create and deploy the ASP.NET Core web application, we are going to leave the default values as they are and click Next: Add Storage to move to the next screen:
The micro instances do not come with any external storage. Hence, we need to add the storage in order to use it. We have three options for storage to choose from: General Purpose SSD, Provisioned SSD, and Magnetic SSD. Out of the three, the General Purpose SSD is the storage that would be usually used.
When your application is making high input-output operations, the throughput may come down. But in the Provisioned SSD you can maintain the required throughput from the storage device. Magnetic storage is just an old type of storage. We are going to use the General Purpose 8 GB Solid State Drive (SSD) as it serves our purpose well.

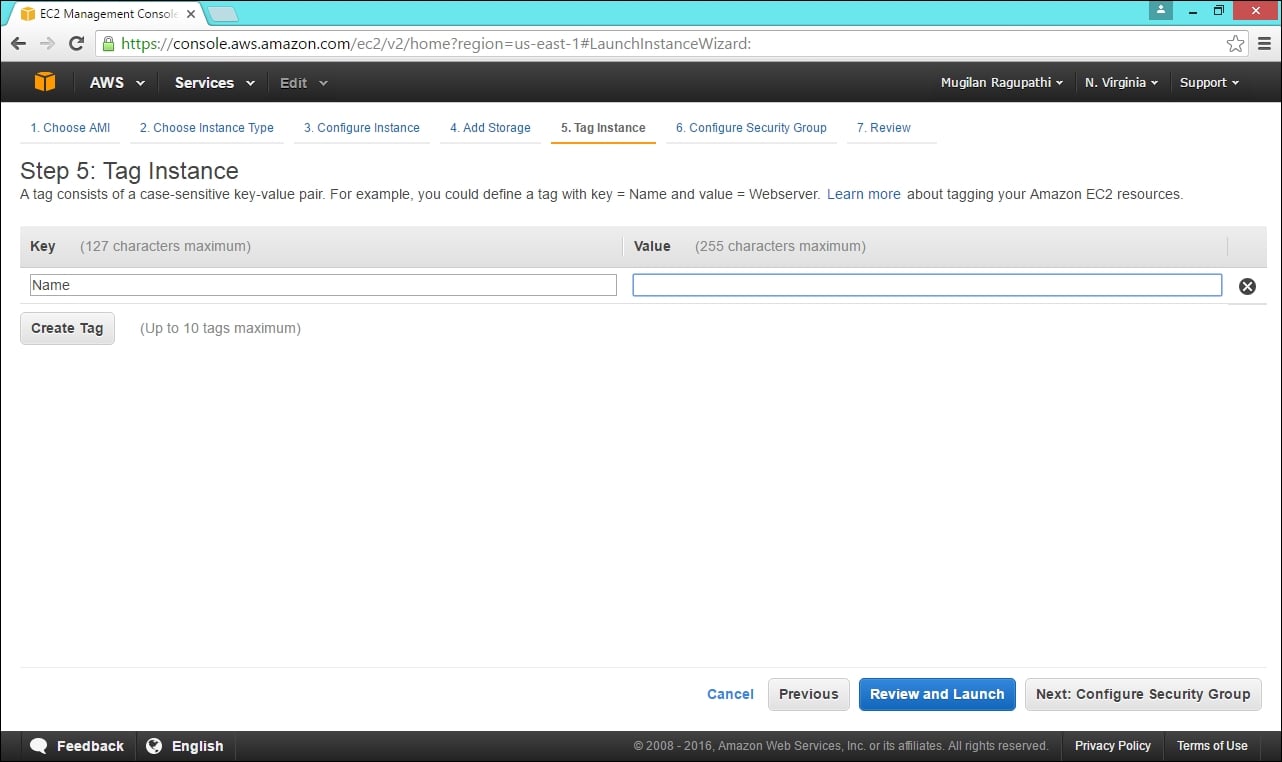
If you are using multiple instances, you can tag them so that you can control the instances by using the tag name. As we are going to launch only one instance, I am just going to leave it blank and move on to the next step:
In this step, we can configure the security group for the instance—which ports should be opened for the incoming traffic. The general rule in any configuration is to only open up the ports what you need and nothing else. You also need to tell the IP (or its range) from where the machine could be accessed from. As it is a demo application, we are going to open ports 22, for Secure Shell (SSH); for using PuTTY, and 80, for accessing the Core web application.
Once you have configured the Security Groups, click Review and Launch.

On the following screen, you can review the chosen options:
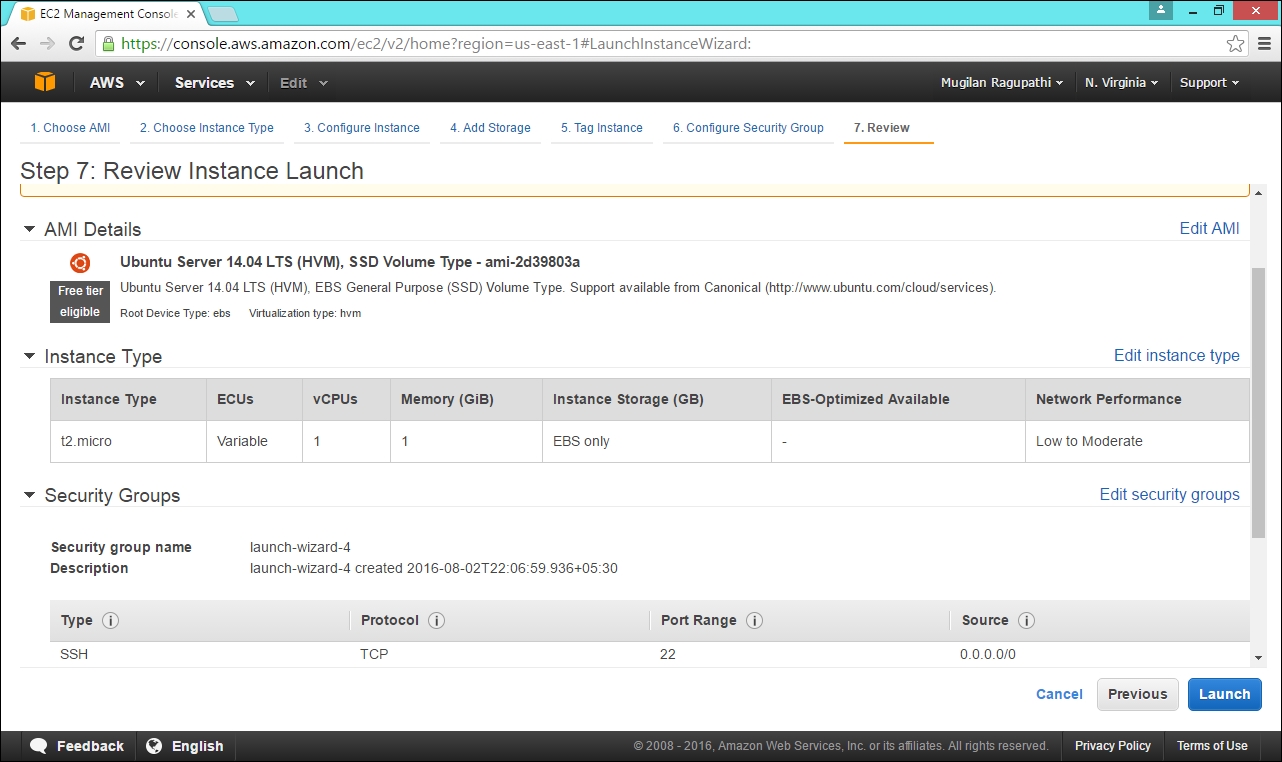
You can click Launch once you are fine with the selected options. Otherwise, you can go back to the previous step to reconfigure them with the correct values.
When you click Launch, it will ask you to choose a key pair which you will be using to log into any AWS server. If you do not have one, you can create one. As I have created one already, I am going to use the existing one, as shown in the following screenshot:
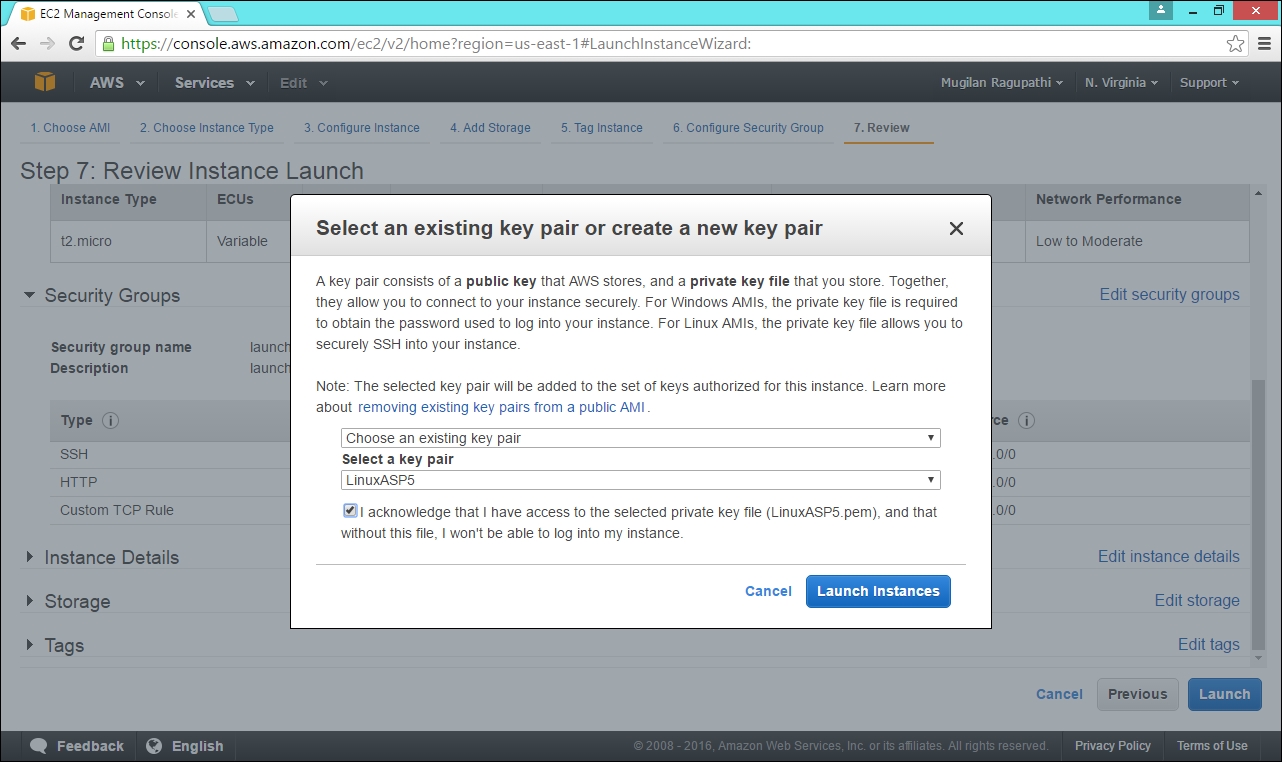
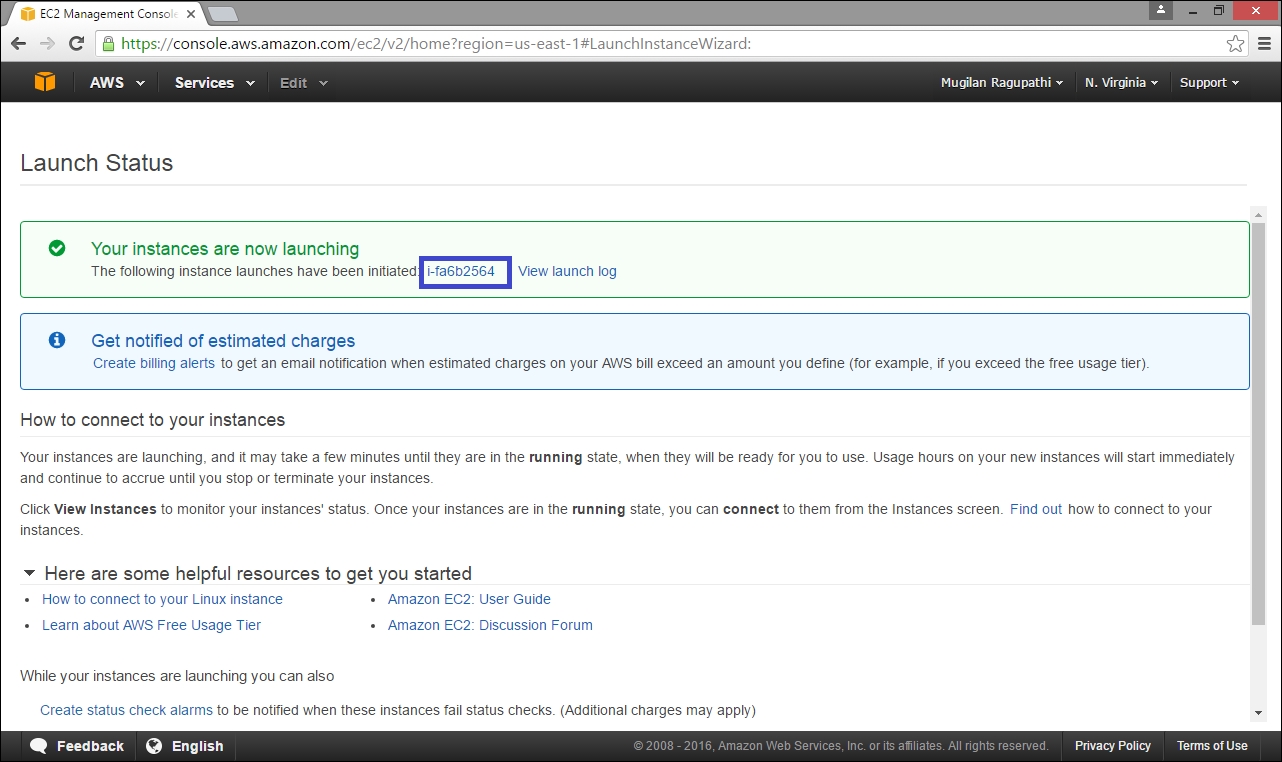
Select the key pair and click Launch Instances. AWS will spin up new instances for us and the status will be shown (as in the following screenshot). The instance ID will also be available (boxed in the screenshot):
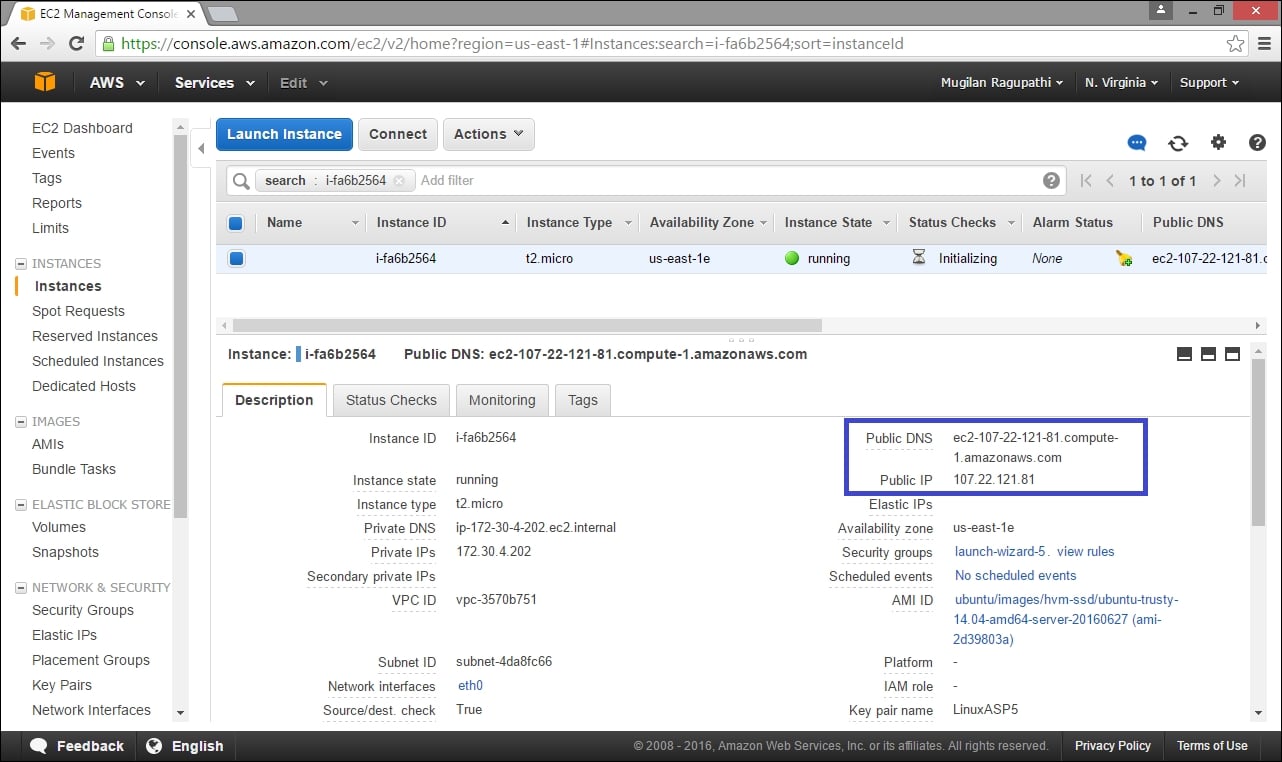
Clicking on the blue colored link will fetch you the status (as shown in the following screenshot). The Public DNS and Public IP are important values which you will be using to connect to that server. Hence, I've boxed them in the screenshot:
Having created a new Linux server where we can create an ASP.NET 5 web application and host it, we need to install the PuTTY client, a small application that can send commands to the Linux server and receive the responses. As we are going to install the application in a Linux server, we need to have a way for connecting from your Windows PC to the Linux server. The PuTTY client application does exactly that.
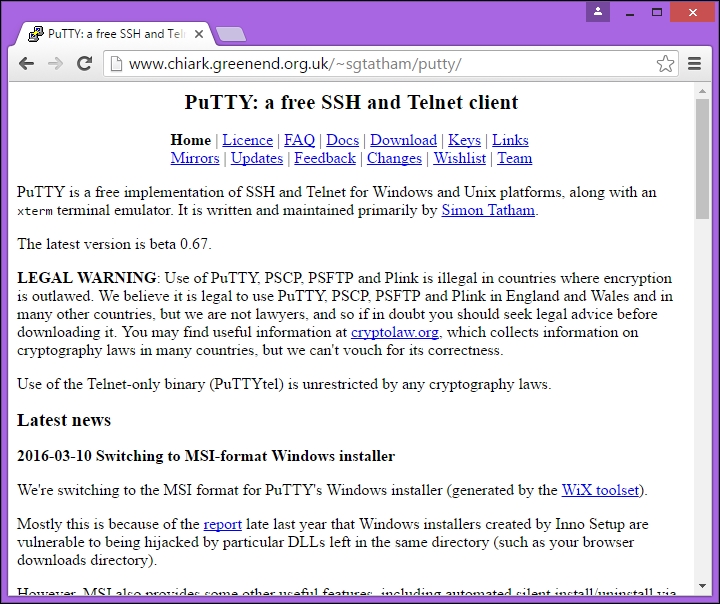
You can download the PuTTY client by visiting http://www.chiark.greenend.org.uk/~sgtatham/putty/ .
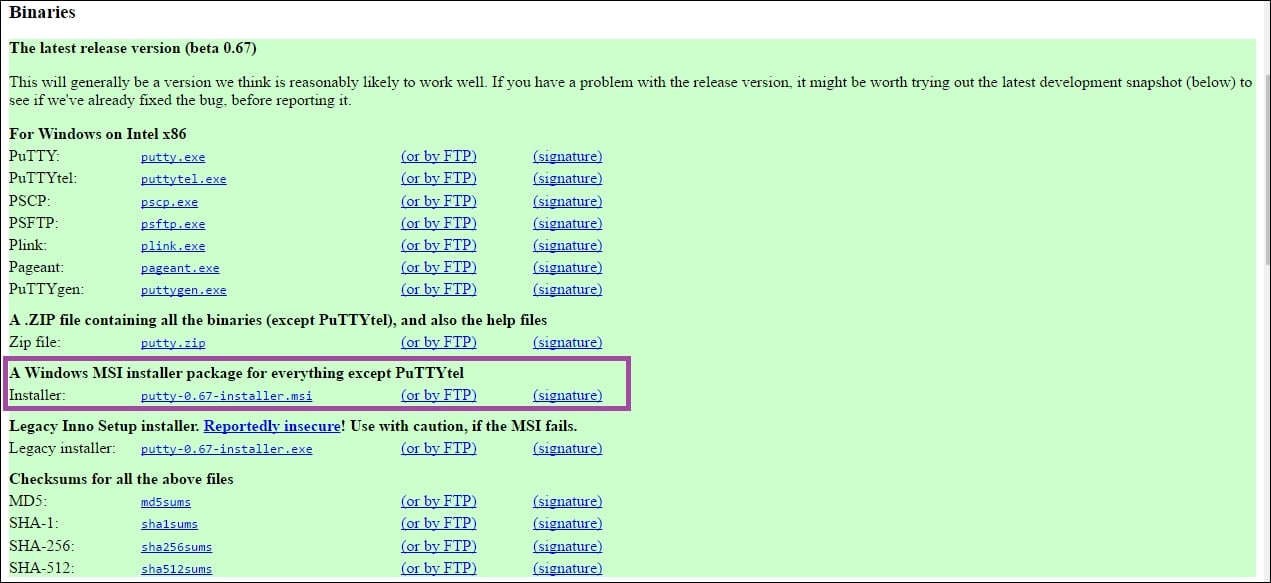
Click on the Download link and select the link (boxed in the screenshot) in the following screen:
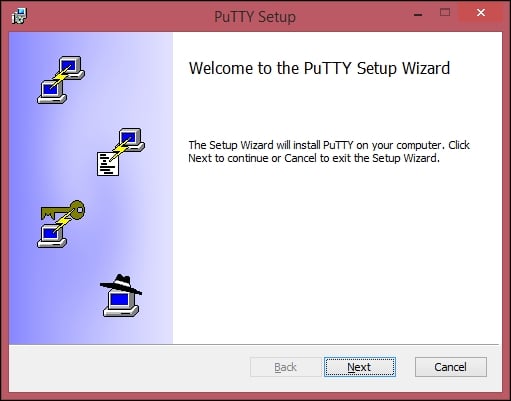
It will download the MSI file. Once it's downloaded, launch the installer and you'll be shown the following welcome screen:
Click Next and you'll see following screen:
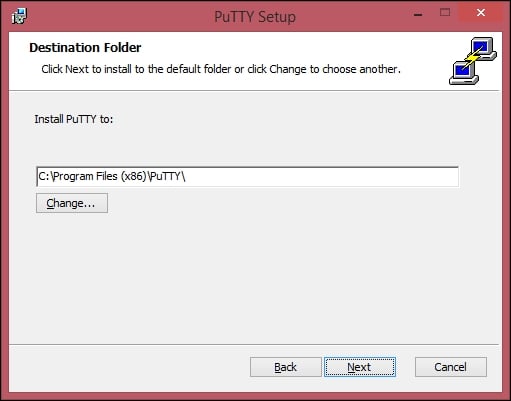
Choose the installation folder—you can leave it as it is and click Next:
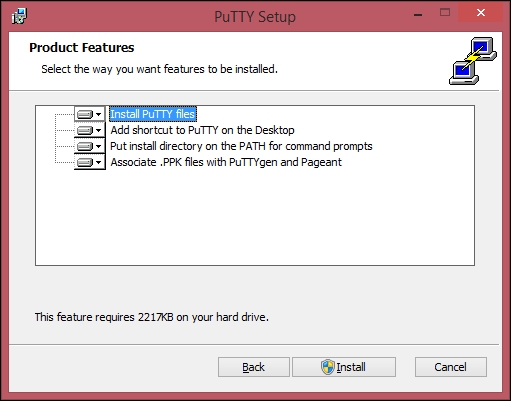
Select the product features which you want to install. You can leave the default selection and click Install. Once it is installed, you will be shown the following screen:
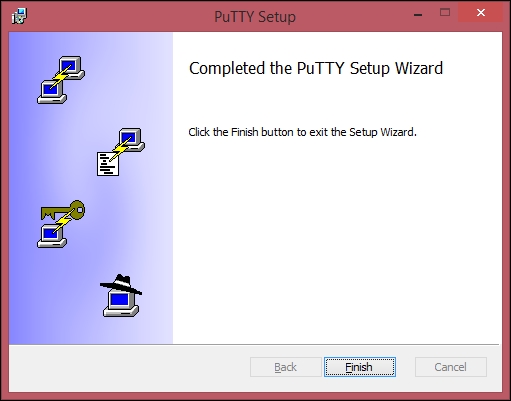
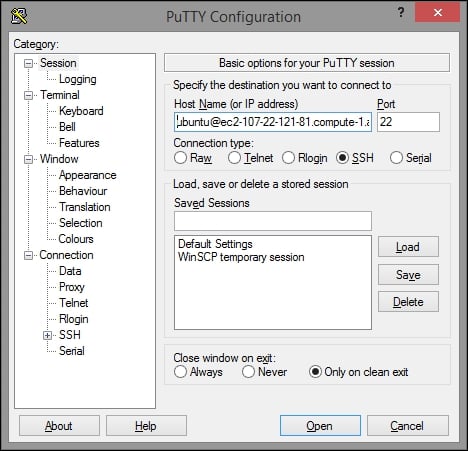
Click Finish and launch the PuTTY application. It will open the PuTTY configuration window, where we are going to enter the hostname and authentication details. The hostname is <username>@<public DNS>. In our case, it is [email protected]. Ubuntu is the default user for the Ubuntu AMI that we have chosen. We can get the public DNS value in the status window as shown earlier:
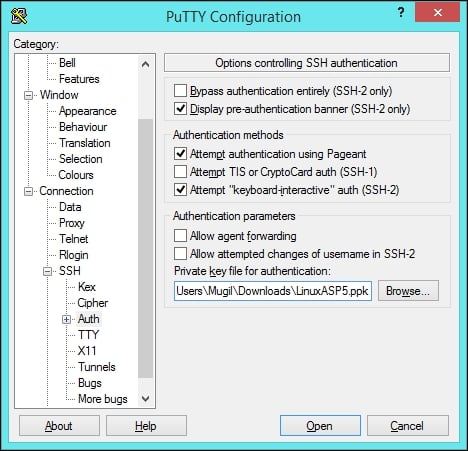
For authentication, select Connection | SSH | Auth in the left-hand pane and select the PPK file (private key file) that we created earlier:
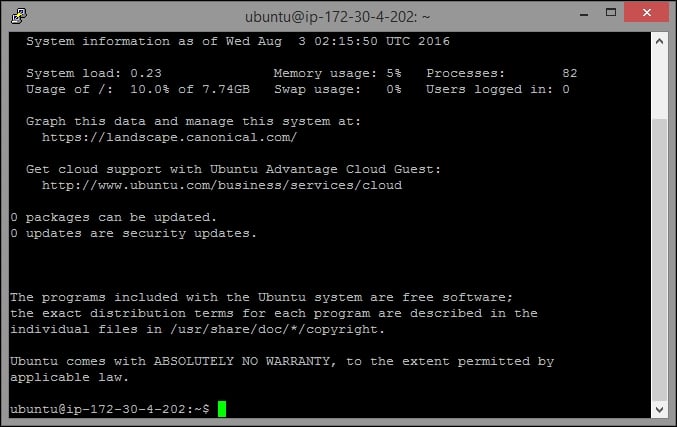
Click Open. You'll get a warning asking you whether you trust this host. Click yes and you'll be shown the Command Prompt of the Linux screen.
Next, we need to install .NET Core before creating the ASP.NET 5 application and eventually host them.
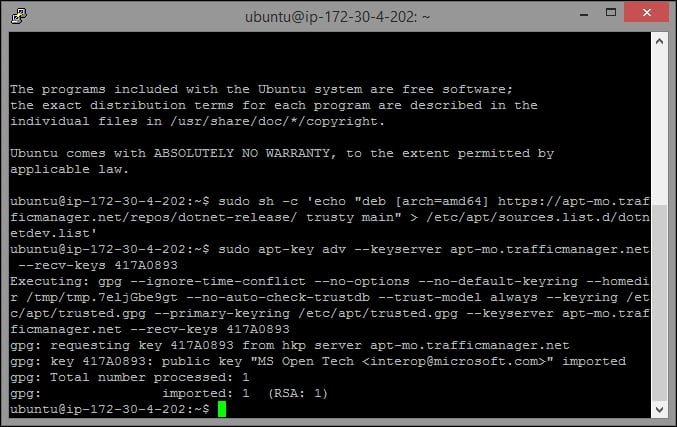
In order to install .NET Core on Ubuntu, we need to first set up the apt and get feed that hosts the package that we need. Enter the following commands:
sudo sh -c 'echo "deb [arch=amd64] https://apt-mo.trafficmanager.net/repos/dotnet-release/ trusty main" > /etc/apt/sources.list.d/dotnetdev.list'sudo apt-key adv --keyserver apt-mo.trafficmanager.net --recv-keys 417A0893
You will get the following screen:
Then update it by issuing the following command, which will download the required packages and install them:
sudo apt-get update
You will see the following screen for this command:
Install the .NET Core with the following command:
sudo apt-get install dotnet-dev-1.0.0-preview2-003121
The following screen will be displayed:
Creating a Linux machine
We are going to use AWS to create a Linux machine. The advantage of using AWS or any other cloud provider is that we can use their service only when we need it and we can wind down the machine when you are done with it. You only need to pay for the time when you are using it. For the first year, AWS has a free tier where you can host the machine (if it is eligible for the free tier) without having to pay anything. I have been using AWS for more than couple of years to try out many things in the cloud, hence I am not eligible for the free tier.
However, you can install Linux on your Windows PC by using any virtualization software. Ubuntu Linux has the option of booting up from the USB drive itself so that you don't need to disturb anything in your local PC.
Once you sign-up for an AWS account, you can go to the EC2 dashboard, where you can create EC2 instances:
Click Launch Instance in the preceding screen. A wizard will be launched where it will help you in selecting and configuring the instances. In this step, we are selecting the Ubuntu Linux server because of its ease of use.
There are different kinds of instances available in AWS ranging from nano (with 0.5 GB RAM) to large machines (with 1952 GB RAM). We are going to choose micro instance as it is eligible for the free tier:
In previous step, we can configure the instances for the cloud. We can create an auto scale group where the AWS cloud will spin up the instances automatically when the load is high. As our objective is to create and deploy the ASP.NET Core web application, we are going to leave the default values as they are and click Next: Add Storage to move to the next screen:
The micro instances do not come with any external storage. Hence, we need to add the storage in order to use it. We have three options for storage to choose from: General Purpose SSD, Provisioned SSD, and Magnetic SSD. Out of the three, the General Purpose SSD is the storage that would be usually used.
When your application is making high input-output operations, the throughput may come down. But in the Provisioned SSD you can maintain the required throughput from the storage device. Magnetic storage is just an old type of storage. We are going to use the General Purpose 8 GB Solid State Drive (SSD) as it serves our purpose well.
If you are using multiple instances, you can tag them so that you can control the instances by using the tag name. As we are going to launch only one instance, I am just going to leave it blank and move on to the next step:
In this step, we can configure the security group for the instance—which ports should be opened for the incoming traffic. The general rule in any configuration is to only open up the ports what you need and nothing else. You also need to tell the IP (or its range) from where the machine could be accessed from. As it is a demo application, we are going to open ports 22, for Secure Shell (SSH); for using PuTTY, and 80, for accessing the Core web application.
Once you have configured the Security Groups, click Review and Launch.
On the following screen, you can review the chosen options:
You can click Launch once you are fine with the selected options. Otherwise, you can go back to the previous step to reconfigure them with the correct values.
When you click Launch, it will ask you to choose a key pair which you will be using to log into any AWS server. If you do not have one, you can create one. As I have created one already, I am going to use the existing one, as shown in the following screenshot:
Select the key pair and click Launch Instances. AWS will spin up new instances for us and the status will be shown (as in the following screenshot). The instance ID will also be available (boxed in the screenshot):
Clicking on the blue colored link will fetch you the status (as shown in the following screenshot). The Public DNS and Public IP are important values which you will be using to connect to that server. Hence, I've boxed them in the screenshot:
Having created a new Linux server where we can create an ASP.NET 5 web application and host it, we need to install the PuTTY client, a small application that can send commands to the Linux server and receive the responses. As we are going to install the application in a Linux server, we need to have a way for connecting from your Windows PC to the Linux server. The PuTTY client application does exactly that.
You can download the PuTTY client by visiting http://www.chiark.greenend.org.uk/~sgtatham/putty/ .
Click on the Download link and select the link (boxed in the screenshot) in the following screen:
It will download the MSI file. Once it's downloaded, launch the installer and you'll be shown the following welcome screen:
Click Next and you'll see following screen:
Choose the installation folder—you can leave it as it is and click Next:
Select the product features which you want to install. You can leave the default selection and click Install. Once it is installed, you will be shown the following screen:
Click Finish and launch the PuTTY application. It will open the PuTTY configuration window, where we are going to enter the hostname and authentication details. The hostname is <username>@<public DNS>. In our case, it is [email protected]. Ubuntu is the default user for the Ubuntu AMI that we have chosen. We can get the public DNS value in the status window as shown earlier:
For authentication, select Connection | SSH | Auth in the left-hand pane and select the PPK file (private key file) that we created earlier:
Click Open. You'll get a warning asking you whether you trust this host. Click yes and you'll be shown the Command Prompt of the Linux screen.
Next, we need to install .NET Core before creating the ASP.NET 5 application and eventually host them.
In order to install .NET Core on Ubuntu, we need to first set up the apt and get feed that hosts the package that we need. Enter the following commands:
sudo sh -c 'echo "deb [arch=amd64] https://apt-mo.trafficmanager.net/repos/dotnet-release/ trusty main" > /etc/apt/sources.list.d/dotnetdev.list'sudo apt-key adv --keyserver apt-mo.trafficmanager.net --recv-keys 417A0893
You will get the following screen:
Then update it by issuing the following command, which will download the required packages and install them:
sudo apt-get update
You will see the following screen for this command:
Install the .NET Core with the following command:
sudo apt-get install dotnet-dev-1.0.0-preview2-003121
The following screen will be displayed:
Installing the PuTTY client
Having created a new Linux server where we can create an ASP.NET 5 web application and host it, we need to install the PuTTY client, a small application that can send commands to the Linux server and receive the responses. As we are going to install the application in a Linux server, we need to have a way for connecting from your Windows PC to the Linux server. The PuTTY client application does exactly that.
You can download the PuTTY client by visiting http://www.chiark.greenend.org.uk/~sgtatham/putty/ .
Click on the Download link and select the link (boxed in the screenshot) in the following screen:
It will download the MSI file. Once it's downloaded, launch the installer and you'll be shown the following welcome screen:
Click Next and you'll see following screen:
Choose the installation folder—you can leave it as it is and click Next:
Select the product features which you want to install. You can leave the default selection and click Install. Once it is installed, you will be shown the following screen:
Click Finish and launch the PuTTY application. It will open the PuTTY configuration window, where we are going to enter the hostname and authentication details. The hostname is <username>@<public DNS>. In our case, it is [email protected]. Ubuntu is the default user for the Ubuntu AMI that we have chosen. We can get the public DNS value in the status window as shown earlier:
For authentication, select Connection | SSH | Auth in the left-hand pane and select the PPK file (private key file) that we created earlier:
Click Open. You'll get a warning asking you whether you trust this host. Click yes and you'll be shown the Command Prompt of the Linux screen.
Next, we need to install .NET Core before creating the ASP.NET 5 application and eventually host them.
In order to install .NET Core on Ubuntu, we need to first set up the apt and get feed that hosts the package that we need. Enter the following commands:
sudo sh -c 'echo "deb [arch=amd64] https://apt-mo.trafficmanager.net/repos/dotnet-release/ trusty main" > /etc/apt/sources.list.d/dotnetdev.list'sudo apt-key adv --keyserver apt-mo.trafficmanager.net --recv-keys 417A0893
You will get the following screen:
Then update it by issuing the following command, which will download the required packages and install them:
sudo apt-get update
You will see the following screen for this command:
Install the .NET Core with the following command:
sudo apt-get install dotnet-dev-1.0.0-preview2-003121
The following screen will be displayed:
Installing of .NET Core in a Linux machine
In order to install .NET Core on Ubuntu, we need to first set up the apt and get feed that hosts the package that we need. Enter the following commands:
sudo sh -c 'echo "deb [arch=amd64] https://apt-mo.trafficmanager.net/repos/dotnet-release/ trusty main" > /etc/apt/sources.list.d/dotnetdev.list'sudo apt-key adv --keyserver apt-mo.trafficmanager.net --recv-keys 417A0893
You will get the following screen:
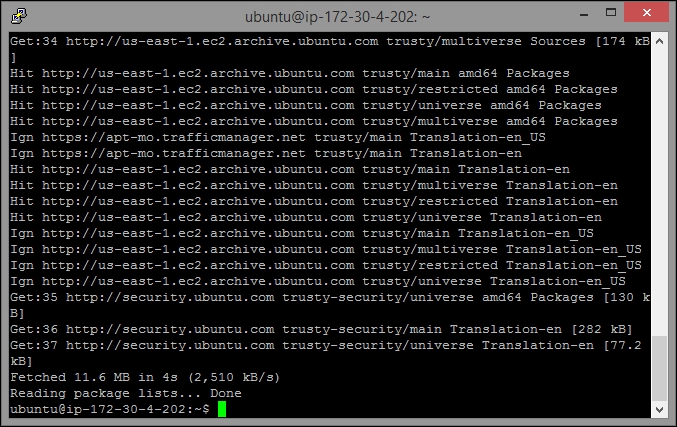
Then update it by issuing the following command, which will download the required packages and install them:
sudo apt-get update
You will see the following screen for this command:
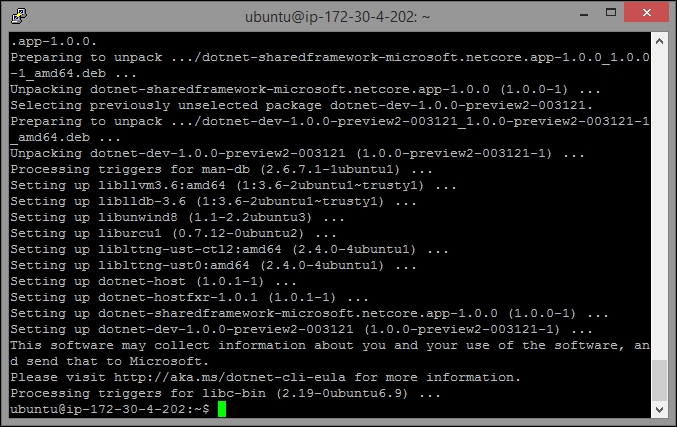
Install the .NET Core with the following command:
sudo apt-get install dotnet-dev-1.0.0-preview2-003121
The following screen will be displayed:
Issue the following commands to create a new directory where we will create the ASP.NET 5 application. The first command ( mkdir - make directory) is for creating a directory in Linux and the second command ( cd - change directory) is for going inside the folder. And the last command is the command line to create a .NET Core application:
mkdir aspnetcoreapp
cd aspnetcoreapp
dotnet new
The following screen will be displayed:

This will create the .NET Core application, which has a couple of files—Program.cs and project.json. It's a bare minimum application that does not have even Startup file.
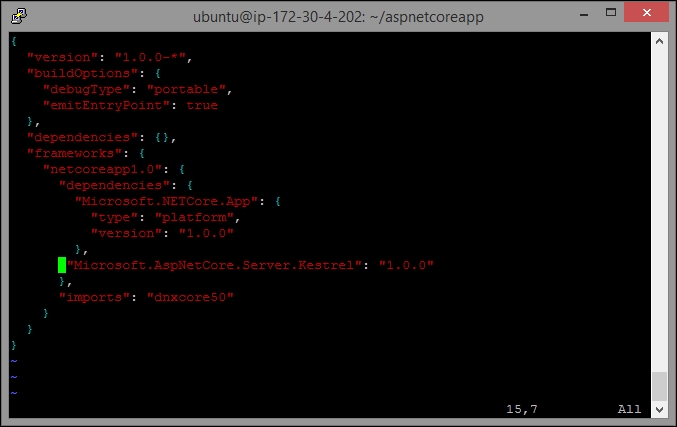
We need to add the Kestrel HTTP Server package as a dependency in project.json. You can edit the file by issuing the command
vi project.json
. By default, the vi editor will open the file in read-only mode. You need to press Esc + I in order to make it to the edit mode. Add the line "Microsoft.AspNetCore.Server.Kestrel": "1.0.0" as shown in the following screenshot:
Press the Escape key and ":" and type wq to write into and quit the vi editor.
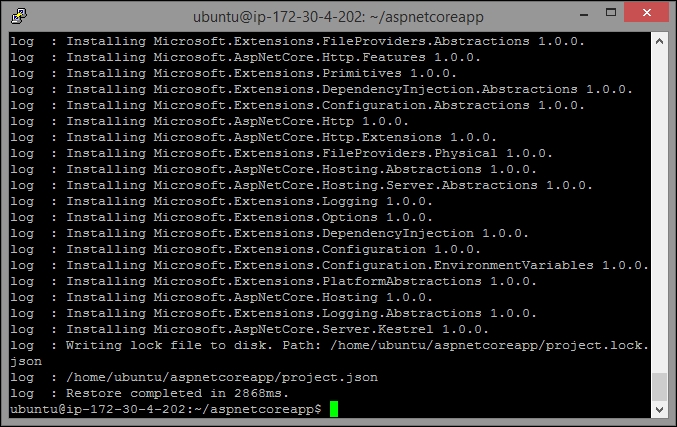
As we have added the dependency, we need to restore the packages by executing the following command:
dotnet restore
Once you enter this command, all the packages will be restored as shown in the following screenshot:
Create a new file, Startup.cs, with the following content. You can create a new file by issuing the command
vi Startup.cs
. As usual, we need to press Esc + I to make the file in write and read mode. Paste the following content (you can paste it by right-clicking on the mouse after copying it from here):
using System;
using Microsoft.AspNetCore.Builder;
using Microsoft.AspNetCore.Hosting;
using Microsoft.AspNetCore.Http;
namespace aspnetcoreapp
{
  public class Startup
  {
    public void Configure(IApplicationBuilder app)
    {
      app.Run(context =>
        {
          return context.Response.WriteAsync("This is ASP.NET Core application running in Linux!");
         });
    }
  }
}
Press Esc + :
and type wq, to save the file. Update the Program.cs file with the following content:
namespace aspnetcoreapp
{
  public class Program
  {
    public static void Main(string[] args)
    {
      var host = new WebHostBuilder()
      .UseKestrel()
      .UseStartup<Startup>()
      .Build();
       host.Run();
     }
   }
}
You'll see the following screen:

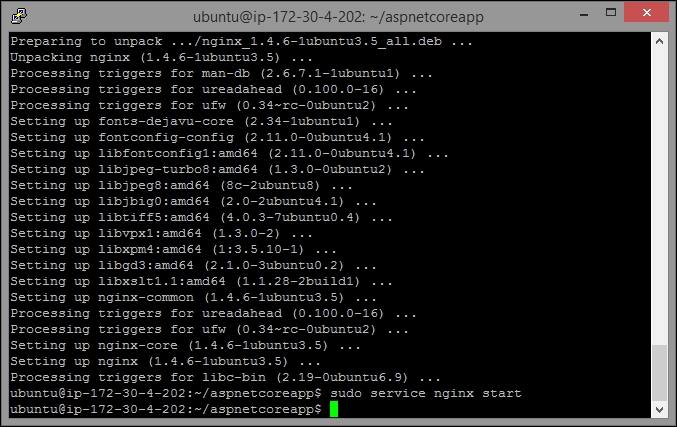
We have created the ASP.NET Core web application. Now we need to install Nginx, a reverse proxy server, which enables you to offload work such as serving static content, caching, and compressing requests. You can configure Nginx to listen on a particular port (we'll discuss the details later in this chapter). You can install Nginx by issuing the following command:
sudo apt-get install nginx
Once it is installed, you can issue the following command to start the service:
sudo service nginx start
When you'll run the command, you'll see the following screen:
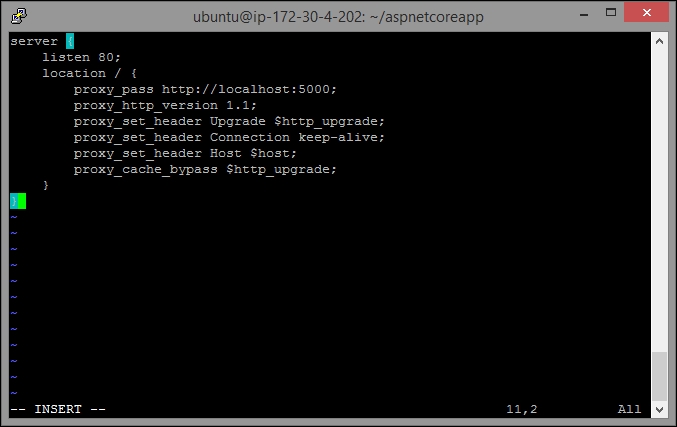
Configure the Nginx server by modifying the file (/etc/nginx/sites-available/default) to have the following content—so that Nginx will forward the request to ASP.NET. In order to modify this file, you need to have sufficient rights—try switching to a super user. The
Sudo su
is the command for switching it to a super user. See the following code:
server {
  listen 80;
  location / {
    proxy_pass http://localhost:5000;
    proxy_http_version 1.1;
    proxy_set_header Upgrade $http_upgrade;
    proxy_set_header Connection keep-alive;
    proxy_set_header Host $host;
    proxy_cache_bypass $http_upgrade;
  }
}
The code looks like the following:
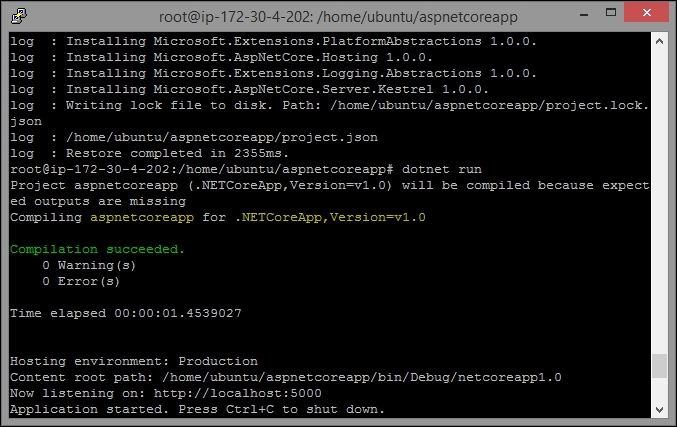
Run the application by executing the following command:
dotnet run
You will see the following screen:
Now access the application from your browser using the public DNS (AWS created the public DNS when the instance was launched):
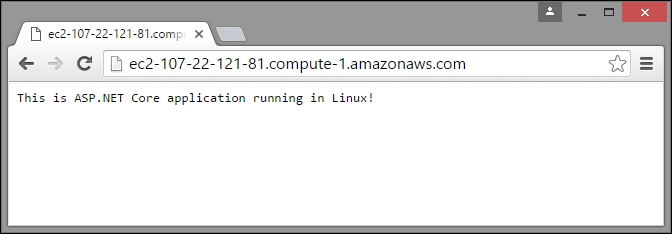
Voila! We have created the ASP.NET Core web application and launched it in the Linux box. We have even used the cloud through Amazon Web Services (AWS).
In this chapter, you have learned about the different components available in the project.json file, where all the configuration of your ASP.NET Core goes. We have discussed how to sign up to the Microsoft Azure cloud platform and deploy the ASP.NET Core application in the Azure platform. We have also learned how to create and deploy the ASP.NET Core web application in Linux using Amazon Web Services in the cloud.