
As discussed in the first chapter, all web applications receive requests from the server and produce a response, that is delivered back to the end user. A Controller does the job of receiving the request and producing the output based on the input data in ASP.NET MVC.
In this chapter, you'll be learning about the following topics:
- Role of the Controller in ASP.NET MVC applications
- Routing introduction and concepts
- Creating your first ASP.NET 5 application
- Installation of the ASP.NET Core
NuGetpackages in your application - Creation of your first Controller and
actionmethod, which returns a simple Hello World - Adding a View and making the changes that allow your Controller to use that View
- Adding a Model and passing that Model data to your View
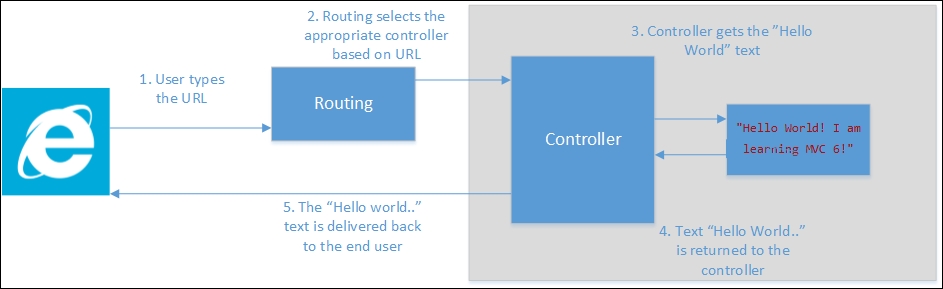
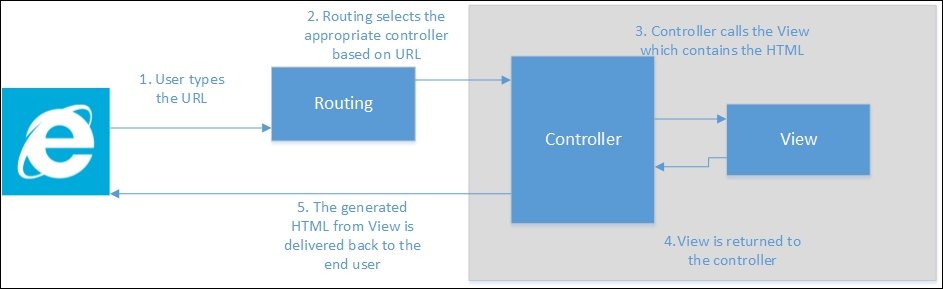
At the high level, the Controller orchestrates between the Model and the View, and sends the output back to the user. This is also the place where authentication is usually done through action filters. Action filters will be discussed in detail in the Filters section of this chapter. The following figure illustrates the high-level flow of a request (with the steps) in ASP.Net MVC and shows us how the Controller fits into the big picture:
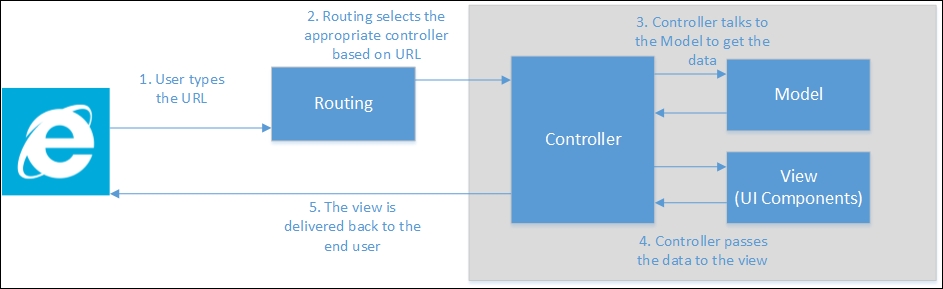
The following is the sequence of events that will happen at high level when the user is accessing the ASP.NET Core application:
- The user types the URL in the browser.
- Based on the pattern of the URL, the routing engine selects the appropriate Controller.
- The Controller talks to the Model to get any relevant data through its action methods. Action methods are methods within a
controllerclass. - The Controller then passes the data to the View to present it in a viewable format, typically as HTML elements.
- The View is finally delivered to the user, which he would be viewing in his browser.
Before discussing the controller, let us discuss the fundamentals of routing concepts, as the routing engine only chooses the appropriate controller and action method at runtime.
The routing engine is responsible for getting the incoming request and routing that request to the appropriate Controller based on the URL pattern. We can configure the routing engine so that it can choose the appropriate controller based on the relevant information.
By convention, ASP.NET MVC follows this pattern: Controller/Action/Id.
If the user types the URL http://yourwebsite.com/Hello/Greeting/1, the routing engine selects the Hello controller class and Greeting action method within the HelloController, and passes the Id value as 1. You can give default values to some of the parameters and make some of the parameters optional.
The following is the sample configuration:
The template: "{controller=Hello}/{action=Greeting}/{id?}");In the preceding configuration, we are giving three instructions to the routing engine:
- Use the routing pattern
controller/action/id. - Use the default values
HelloandGreetingfor thecontrollerandactionrespectively, if the values forcontrolleroractionare not supplied in the URL. - Make the
Idparameter optional so that the URL does not need to have this information. If the URL contains thisIdinformation, it will use it. Otherwise, theIdinformation will not be passed to theactionmethod.
Let us discuss how the routing engine selects the controller classes, action methods, and Id values for different URLs:
URL1:http://localhost/
Controller: Hello
Action method: Greeting
Id: no value is passed for the id parameter
Reasoning: The Hello controller is passed as the default value as per the routing configuration, as no value is passed as the Controller in the URL.
The following action method will be picked up by the routing handler when the preceding URL is passed:
public class HelloController : Controller {
  public ActionResult Greeting(int id) {
    return View();
  }
}

URL2: http://localhost/Hello/Greeting2
Controller: Hello
Action method: Greeting2
Id: no value is passed for the id parameter
Reasoning: The Hello controller will be chosen as the URL contains Hello as the first parameter, and the Greeting2 action method will be chosen as the URL contains Greeting2 as the second parameter. Please note that the default value mentioned in the configuration would be picked only when no value is present in the URL. As the id parameter is optional and the URL does not contain the value for id, no value is passed to the id parameter.
The following action method Greeting2 will be picked up by the routing handler when the preceding URL is passed:
public class HelloController : Controller {
  public ActionResult Greeting(int id) {
    return View();
  }

  public ActionResult Greeting2(int id) {
    return View();
  }
}

URL3: http://localhost/Hello2/Greeting2
Controller: Hello2
Action method: Greeting2
Id: no value is passed for the id parameter
Reasoning: As Hello2 is passed as the first parameter, the Hello2 controller will be selected, and Greeting2 is the action method selected since Greeting2 is passed as the second parameter. As the id parameter is optional and no value is passed for the parameter id, no value will be passed for the id.
The following action method will be picked up by the routing handler when the preceding URL is passed:
public class Hello2Controller : Controller {
  public ActionResult Greeting2(int id) {
    return View();
  }
}
URL4: http://localhost/Hello3/Greeting2/1
Controller: Hello3
Action method: Greeting2
Id: 1
Reasoning: Hello3 is the controller selected as it is mentioned as the first parameter, Greeting4 is the action method, and 1 is the value passed as the id.
The following action method will be picked up the routing handler when the preceding URL is passed:
public class Hello3Controller : Controller {
  public ActionResult Greeting2(int id) {
    return View();
  }
}
We will discuss routing in detail in a later chapter.
Once the request reaches the controller, the controller will create a response by talking to the Model and may pass the data to View and the View will then be rendered to the end user.
It's time to get our hands dirty. Let us create a simple ASP.NET 5 application. Fire up Visual Studio and follow these steps:
- Create a project by selecting File | New Project in Visual Studio. The first option is for creating an earlier version of the ASP.NET Web application. The second option is for creating the ASP.NET Core application using the .NET Core framework. The third option is for creating the ASP.NET Core application using the .NET framework. The difference between the second and third option is that the .NET framework supports all the functionalities of existing .NET frameworks whereas .NET Core supports only the core functionalities. The advantage of using the .NET core library is that it can be deployed on any platform.

- Select the Empty template from the list of ASP.NET 5 templates. The second option is for creating the Web API application (for building the HTTP-based services) and the third option is for creating a web application containing some basic functionalities which you can run just from out of the box without you ever needing to write anything.

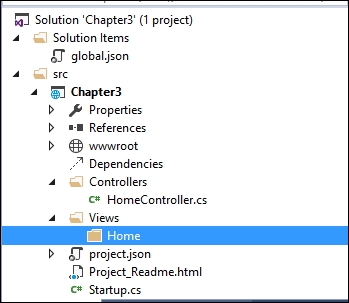
- Once you click OK in the window as shown in the preceding screenshot, (after selecting the Empty template option) a solution will be created as shown in the following screenshot:

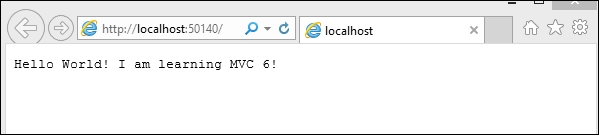
- When you run the application (by pressing F5) without any changes, you'll get the simple Hello World! text on your screen as shown in the following screenshot:

We have not done any coding in this newly created application. So, have you thought about how it displays the text Hello World!?
The answer lies in the Startup.cs file, which contains a class by the name of Startup. This class contains the Main method, which acts as the entry point for the web application. If you have used any of the previous versions of ASP.NET MVC, or even ASP.NET Web Forms, this would not be the case.
ASP.NET 5 runtime calls the ConfigureServices and Configure methods. For example, if you want to configure any service, you can add it here. Any custom configuration for your application can be added to this Configure method:
public void ConfigureServices(IServiceCollection services) {

}

// This method gets called by the runtime. Use this method to  configure the HTTP request pipeline.
public void Configure(IApplicationBuilder app) {
  app.UseIISPlatformHandler();
  app.Run(async (context) => {
    await context.Response.WriteAsync("Hello World!");
  });

}
There are only a couple of statements in the Configure method. The first statement tells the run-time to use the IISPlatformHandler for handling all the incoming HTTP requests. Let us leave aside async, await, and context for the moment in the second statement, which we will discuss later. In essence, the second statement tells the run-time to return Hello World! for all the incoming requests irrespective of the incoming URL.
When you type the URL http://localhost:50140/Hello in your browser, it will still return the same Hello World!.
This is the reason we got the Hello World! when we ran the application.
As we have chosen the Empty template while creating the ASP.NET 5 application, no component will have been installed. Even MVC wouldn't be installed by default when you select the Empty template as we did.
You can confirm it by opening the project.json file, where you can see no ASP.NET MVC is mentioned in the list of dependencies:
"dependencies": {
  "Microsoft.AspNet.IISPlatformHandler": "1.0.0-rc1-final",
  "Microsoft.AspNet.Server.Kestrel": "1.0.0-rc1-final"
},
So first, let us install the ASP.Net Core package for our application.
Follow these steps to install the NuGet package of ASP.NET MVC:
- Right click on the project, and select the Manage NuGet Packages option:

- Select the Include Prerelease checkbox so that the NuGet Package Manager will list out all the prerelease packages. Search for
MVCand you'll get the Microsoft.AspNet.MVC package, as shown in the following result, and click on the Install button on the right-hand side:
- Review the changes:

- Once you click on Review Changes, the following dialog box will appear where you need to accept the license terms:

The NuGet Package Manager will download and install the ASP.NET Core and will update the project.json file and the associated references.
Now, your project.json file will have updated dependencies. The second line Microsoft.AspNet.Mvc is added:
"dependencies": {
  "Microsoft.AspNet.IISPlatformHandler": "1.0.0-rc1-final",
  "Microsoft.AspNet.Mvc": "6.0.0-rc1-final",
  "Microsoft.AspNet.Server.Kestrel": "1.0.0-rc1-final"
},
Alternatively, you can also update the project.json with the NuGet package along with the version information. The NuGet Package Manager will automatically download and install them.
ASP.NET Core is installed in our application. Now, we need to tell our application to use ASP.NET MVC.
This needs a couple of changes to the Startup.cs file:
- Configure the application to add the MVC service. This can be done by adding the following line to the
ConfigureServicesmethod of theStartupclass:services.AddMvc();
- Configure the routing so that our correct controllers will be picked for the incoming requests based on the URL entered. The following code snippet needs to be updated in the
Configuremethod of theStartup.csfile:app.UseMvc(routes => {app.UseMvc(routes => { routes.MapRoute( name: "default", template: "{controller=Home}/{action=Index}/{id?}"); });
In the preceding statement, we are configuring the routes for our application.
In this chapter and most of the chapters in this book, we will write codes manually or choose an Empty template instead of relying on scaffolding templates. For those who are new to the term scaffolding, scaffolding is a feature that generates all the necessary boilerplate code for you for the selected item (for example, the Controller) instead of you needing to write everything. Though I agree that scaffolding templates are useful and save time in generating the boilerplate code, they hide many of the details that beginners have to understand. Once you write code manually, you'll know all the intricacies of how each of the components is contributing to the big picture. Once you are strong in the fundamentals, you can use scaffolding templates to save you time in writing the boilerplate code.
Before creating the Controller, we need to remove the following app.Run statement as this will return Hello World! for all the incoming requests. As we want incoming requests to be handled by the controllers, we need to remove the following code from the Configure method of the Startup class:
app.Run(async (context) => {
  await context.Response.WriteAsync("Hello World!");
});
We have installed the ASP.NET Core in our application. So, we are geared up to creating our first ASP.NET Core controller. Create a folder with the name Controllers and add a new Controller by selecting from the context menu as shown in the following screenshot:
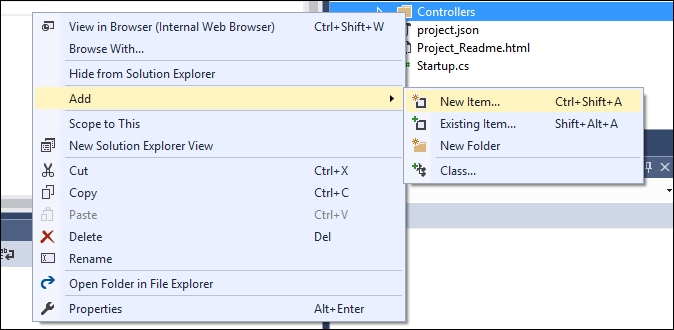
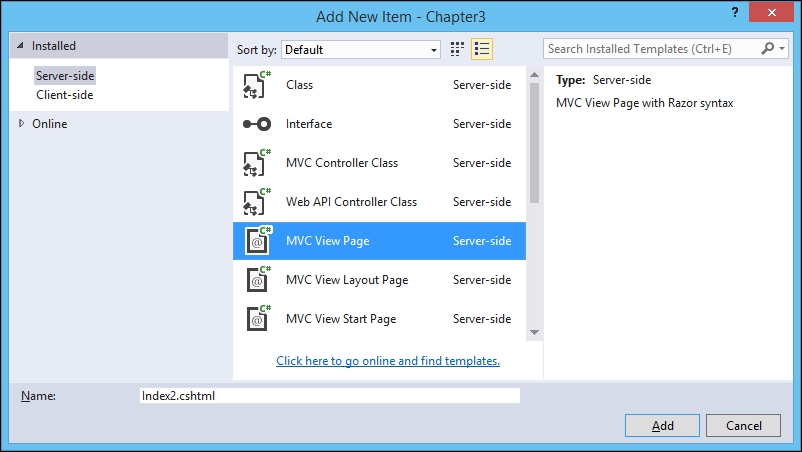
Once you select Add | New Item, you will be shown the following list of options. We are going to add an MVC controller class to our project:
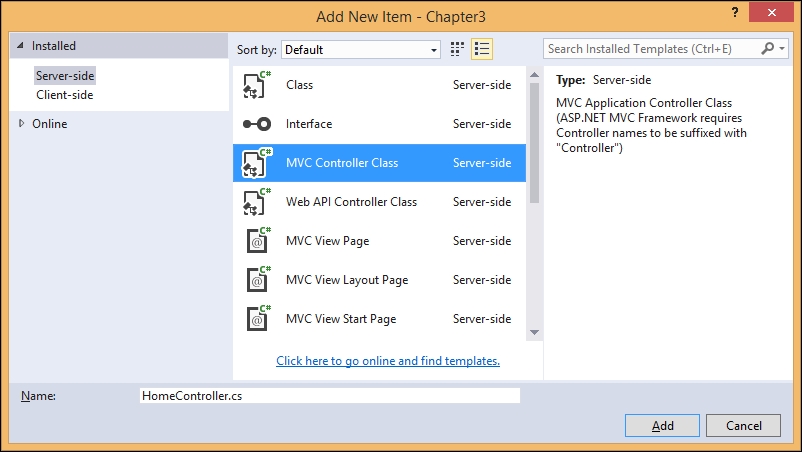
A class will be created with the following content:
public class HomeController : Controller {
  // GET: /<controller>/
  public IActionResult Index() {
    return View();
  }
}
All controllers, both MVC and Web API controllers, inherit from the Controller base class. In earlier versions of ASP.NET MVC, MVC controllers would inherit from the Controller class and Web API controllers would inherit from the APIController class.
In the preceding HomeController class, we have a single action method by Index that returns the corresponding View. When you run the application as it is, you'll get a 500 Internal Server Error. The reason being is that no View has been created for the Index action of the HomeController and ASP.NET Core tries to search for that View. As the View is not available, it returns a 500 Internal Server Error.
Instead of creating and returning that View, let us make a simple change to this action method. Let us return a string, Hello World! I am learning MVC 6!, and change the return type of IActionResult:
public string Index() {
  return "Hello World! I am learning MVC 6!";
}
Run the application. You'll see the Hello World! I am learning MVC 6! in your browser as shown in the following screenshot. Please make sure that you remove the app.Run statement in the Configure method as mentioned earlier:
Voila! We have changed the ASP.NET Core application to render the custom content instead of the boring Hello World. What we have done may seem like a marginal improvement, but we have used controllers and action methods in our ASP.NET Core application, which has brought a lot of structure and flexibility to the web application development.
The following is the sequence of steps that occur when we run the application:
- The application runs on the URL
http://localhost:50140, where50140is the port number selected by IIS Express to run the application on my local system. This number may vary. - As we have not passed any parameter, default values for the
Controllerandactionmethod will be selected. In our case,HomeControllerwill be chosen as theControllerandIndexwill be chosen as theactionmethod in theHomeController. SinceIDis the optional value and it is not passed, thisIDparameter is ignored. - After the
Controllerandactionmethods are selected by the routing engine, control is passed to theactionmethod of the selected controller. In our case, it will be theIndexaction method of theHomeController. - In the
Indexaction method, we are returning a string,Hello World! I am learning ASP.Net MVC 6!. This text is returned from the controller, which would then return back to the user.
If you noticed, the default return type in the action method of the controller was IActionResult and then we changed the return type to the string in order to return the text Hello World....
The IActionResult is the interface that we can use to return different types of ActionResult, ranging from a simple string to complex JSON data, so, we don't need to change the return type of the action method to return the string.
In the earlier example, I have changed the return type to the string to make things simple. Now, let us make a simple change to return the string by keeping the return type (IActionResult) as it is:
// GET: /<controller>/
public IActionResult Index() {
  return Content("Hello World! I am learning MVC 6!");
}
While returning the string, we are using the virtual method, called Content from the Controller class (the base controller from where HomeController is inherited from) in the preceding action method. The purpose of this Content() method is to convert the string to the type IActionResult.
Now, run the application. We should be getting the same result.
IActionResult is capable of returning different data types:
ContentResult: Can return a text result.EmptyResult: Returns anullresult.FileResult: Returns a binary output to write to the response.HttpStatusCodeResult: Provides a way to return.JavaScriptResult: Returns a script that can be executed from the client side.JSonResult: When you return a serialized JSON object.RedirectResult: Redirects to anotheractionmethod.RedirectToRouteResult: Represents a result that performs a redirection by using a specified route values dictionary.
IActionResult
If you noticed, the default return type in the action method of the controller was IActionResult and then we changed the return type to the string in order to return the text Hello World....
The IActionResult is the interface that we can use to return different types of ActionResult, ranging from a simple string to complex JSON data, so, we don't need to change the return type of the action method to return the string.
In the earlier example, I have changed the return type to the string to make things simple. Now, let us make a simple change to return the string by keeping the return type (IActionResult) as it is:
// GET: /<controller>/
public IActionResult Index() {
  return Content("Hello World! I am learning MVC 6!");
}
While returning the string, we are using the virtual method, called Content from the Controller class (the base controller from where HomeController is inherited from) in the preceding action method. The purpose of this Content() method is to convert the string to the type IActionResult.
Now, run the application. We should be getting the same result.
IActionResult is capable of returning different data types:
ContentResult: Can return a text result.EmptyResult: Returns anullresult.FileResult: Returns a binary output to write to the response.HttpStatusCodeResult: Provides a way to return.JavaScriptResult: Returns a script that can be executed from the client side.JSonResult: When you return a serialized JSON object.RedirectResult: Redirects to anotheractionmethod.RedirectToRouteResult: Represents a result that performs a redirection by using a specified route values dictionary.
We were returning a simple string from the controller. Although that explains the concept of how the Controller and action method works, it is not of much practical use.
Let us create a new action method by the name, Index2:
public IActionResult Index2() {
  return View(); // View for this 'Index2' action method
}
Now, we have created the action method that returns a View. But we still have not added the View for the same. By convention, ASP.NET MVC would try to search for our View in the folder Views\{ControllerName}\{ActionMethod.cshtml}. With respect to the preceding example, it will try to search for Views\Home\Index2.cshtml. Please note that the name of the controller folder-is Home , not HomeController. Only the prefix is needed as per convention. As this folder structure and file are not available, you'll get a 500 Internal Server Error when you try to access this action method through the URL http://localhost:50140/Home/Index2.
So, let us create a folder structure. Right-click on the solution, select Add | New Folder from the context menu, create a folder called Views, and then create a subfolder by the name Home within the Views folder:
Right click on the Home folder, and select Add | New Item from the context menu. A dialog will appear as shown in the following screenshot. Give the name of the file as Index2.cshtml, as our action method name is Index2. cshtml is the razor view engine (this will be discussed in detail in the ViewEngines section of the Views chapter) extension used when you are using C#.
A file by the name Index2.cshtml will be created when you click the Add button in the preceding screen with the following content:

@* is the comment syntax in the razor view engine. You can write any C# code within the @{} block.
Let us add a simple HTML block after the generated code:
<html>
<body>
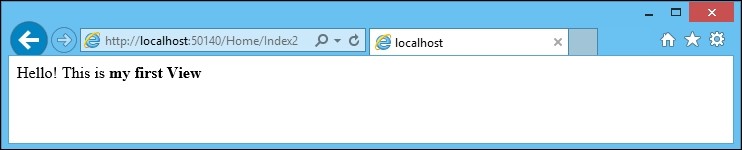
Hello! This is <b>my first View</b>
</body>
</html>
Now, when you run the application, you will get the following output:
The following diagram explains the request flow and how we generate the response through the View:
Models represent your business domain classes. Now, we are going to learn about how to use the Models in our controller. Create a Models folder and add a simple Employee class. This is a just a plain old C# class:
public class Employee {
  public int EmployeeId { get; set; }
  public string Name { get; set; }
  public string Designation { get; set; }
}
Create a new action method, Employee, in our HomeController, and create an object of the Employee Model with some values, and pass the Model to the View. Our idea is to use the Model employee values in the View to present them to the user:
using Chapter3.Models;
public IActionResult Employee() {
  //Sample Model - Usually this comes from database
 Employee emp1 = new Employee {
    EmployeeId = 1,
    Name = "Jon Skeet",
    Designation = " Software Architect"
  };
  return View(emp1);
}
Now, we need to add the respective View for this action method. Add a new Razor view file in the View\Home folder.
Add the following code snippet. Whatever comes after the @ symbol is considered as Razor code. In the following code, we are trying to access the properties of the Model object that is passed to our view. In our case, Model represents the employee object that we have constructed in our action method. You can access the object from View using the Model keyword:
<html>
  <body>
 Employee Name : @Model.Name <br/>
    Employee Designation: @Model.Designation <br/>
  </body>
</html>
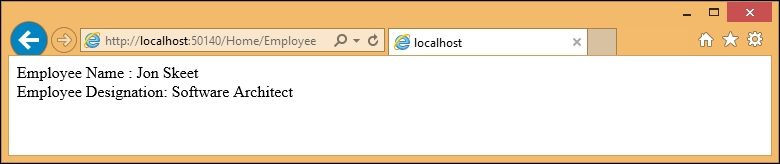
When you run the application and type the URL http://localhost:50140/Home/Employee, you'll see the following output:
We have just discussed how to pass the data from the Controller to the View using the Model object. While calling the View, we are passing the model data as a parameter. But there are times when you want to pass some temporary data to the View from the Controller. This temporary data may not deserve a model class. In such scenarios, we can use either ViewBag or ViewData.
ViewData is the dictionary and ViewBag is the dynamic representation of the same value.
Let us add the company name and company location property using ViewBag and ViewData as shown in the following code snippet:
public IActionResult Employee() {
  //Sample Model - Usually this comes from database
  Employee emp1 = new Employee {
    EmployeeId = 1,
    Name = "Jon Skeet",
    Designation = " Software Architect"
  };

  ViewBag.Company = "Google Inc";
  ViewData["CompanyLocation"] = "United States";

  return View(emp1);
}
Make the respective changes in the View file as well so that we can display the Company name and Company location values:
<html>
  <body>
    Employee Name : @Model.Name <br/>
    Employee Designation: @Model.Designation <br/>
    Company : @ViewBag.Company <br/>
    Company Location: @ViewData["CompanyLocation"] <br />
  </body>
</html>
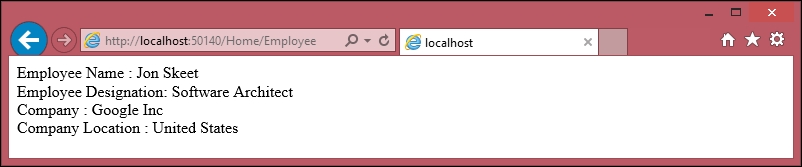
Run the application after making the preceding changes:
ViewBag and ViewData represent the same collection, even though the entries in the collection are accessed through different methods. ViewBag values are dynamic values and are executed at run-time, whereas the ViewData is accessed through the dictionary.
To test this, let us make a simple change to our view file:
Employee Name : @Model.Name <br/>
Employee Designation: @Model.Designation <br/>
Company : @ViewData["Company"] <br />
Company Location : @ViewBag.CompanyLocation <br />
Even though I have stored the Company value using ViewBag in the Controller, I am accessing the same using ViewData. The same is the case for the Company Location value, we have stored the value using ViewData in the Controller, but we are accessing the value using ViewBag.
When you run the application after making the preceding changes, you'll see the same result as you have seen before.
Filters in ASP.NET MVC enable you to run code before or after a particular stage in the execution pipeline. They can be configured globally per-controller or per-action.
There are different kinds of filters, and each filter is executed at a different stage in the pipeline. For example, action filters are executed when the action method is executed.
Let us use a simple example to see how an action filter (a type of filter) works.
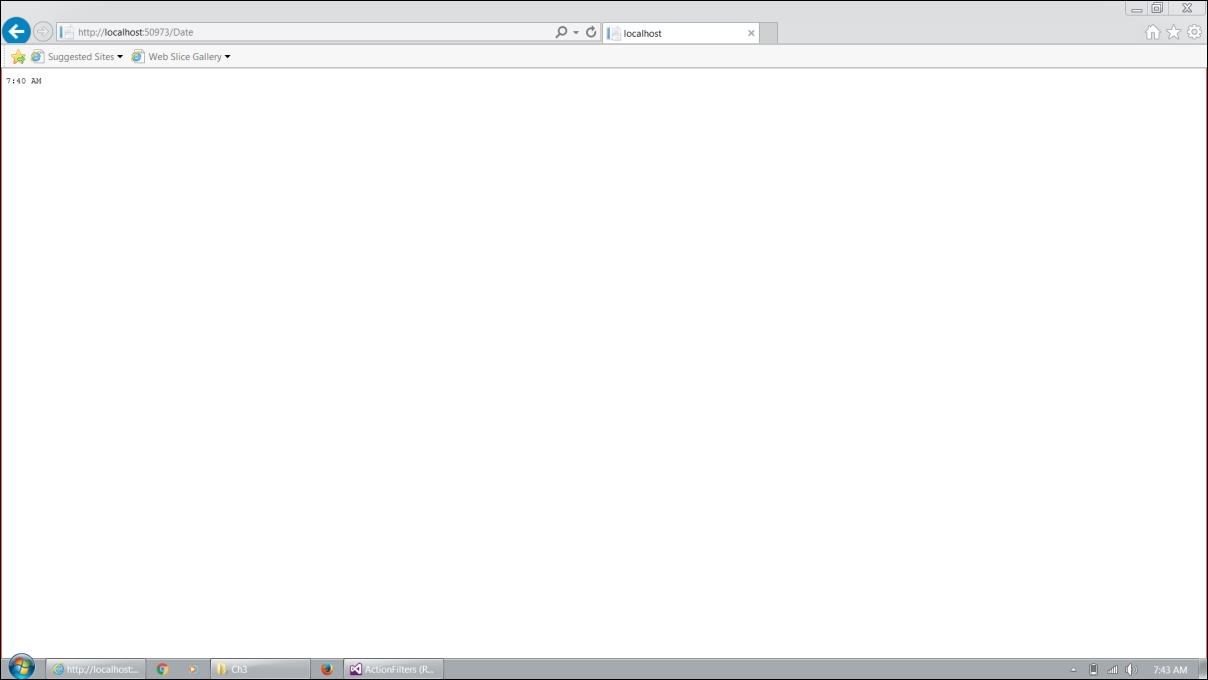
I have created a simple controller, DateController, where I am just displaying the time. In this action method, I am using a predefined action filter by the name of ResponseCache, that caches the response for the duration specified in seconds. In the following code snippet, we have mentioned the duration as 600 seconds. So, the response will be cached for 10 minutes.
public class DateController : Controller {
  [ResponseCache(Duration = 600)]
  public IActionResult Index() {
    return Content(DateTime.Now.ToShortTimeString());
  }
}
When I run it for the first time, it displays the time as expected. But when you refresh the browser (which indirectly fires the request again), the time is not updated as the response is cached already by the application. In the following screenshot, even though the time is 7:43, the application is still showing as 7:40:
The following are the predefined types of filters available in ASP.NET Core.
These are used for authorization and are mainly intended to determine whether the current user is authorized for the request being made.
These are the filters that handle the request after authorization and are the last one to handle the request before it leaves the filter pipeline. They are used to implement caching or by passing the filter pipeline.
These wrap calls to individual action method calls and can manipulate the arguments passed in the action as well as the action result returned from it.
Authorization filters
These are used for authorization and are mainly intended to determine whether the current user is authorized for the request being made.
These are the filters that handle the request after authorization and are the last one to handle the request before it leaves the filter pipeline. They are used to implement caching or by passing the filter pipeline.
These wrap calls to individual action method calls and can manipulate the arguments passed in the action as well as the action result returned from it.
Resource filters
These are the filters that handle the request after authorization and are the last one to handle the request before it leaves the filter pipeline. They are used to implement caching or by passing the filter pipeline.
These wrap calls to individual action method calls and can manipulate the arguments passed in the action as well as the action result returned from it.
Action filters
These wrap calls to individual action method calls and can manipulate the arguments passed in the action as well as the action result returned from it.
Exception filters
These are used to manage the unhandled exceptions in ASP.NET MVC.
Result filters
This wrap the individual action results and they only run when the action method is executed successfully.
In this chapter, we have built our first ASP.NET 5 application from scratch and we have installed ASP.NET Core in our ASP.NET 5 application. We have learned how the controller fits into the overall ASP.NET MVC application and learned how to build your first controller with the action methods. We also learned about how to use Model and View in our Controller. We have also discussed different ways to pass the data from the Controller to the View using ViewBag and ViewData. We have also learned about filters in ASP.NET MVC and how to make use of predefined filters in ASP.NET Core.