
Security is essential to all types of applications, including web applications. Would you use Facebook if anyone could update your status by impersonating you? If that were possible, then no one would come back to Facebook. From this example, we can see that security is not so much a feature as it is a necessity for all applications.
In this chapter, we are going to learn about the following topics:
- Authentication and authorization
- ASP.NET Identity
- How to implement security in an ASP.NET Core application using ASP.NET Identity with Entity Framework
When we talk about the security of an application, we primarily want to prevent any unauthorized access, meaning that only the people who have access to the information should be able to access it—nothing more, nothing less.
Before proceeding further, I would like to clarify some of the core concepts regarding security.
Authorization is the process where we verify whether the user has access to the requested resource. They might have legitimate access to the system, but they might not have access to the requested resource as they do not have the required access. For example, only the admin user can access the configuration page of the application, whereas normal users should not be allowed to use this page.
ASP.NET Identity provides several features for securing the application.
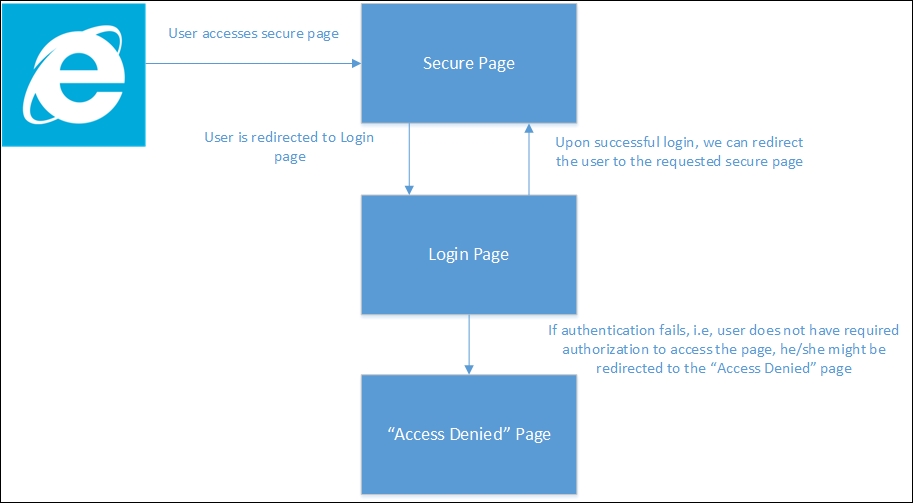
Let us consider the following simple scenario where the user tries to access the Secure Page, a page to which only authorized people should have access. As the user is not logged in, they will be redirected to the Login Page so that we can authenticate and authorize the user. Upon successful authentication, the user is redirected to the Secure Page. If for any reason, we can not authenticate and authorize the user, we can redirect them to the "Access denied" Page:
ASP.NET Core Identity is a membership system that enables you to secure the application easily, and which has features such as adding login functionality to your application. The following are the steps that we need to follow in order to use ASP.NET Identity (with Entity Framework) for our application:
- Add the relevant dependencies to the
project.jsonfile. - Create an
appsettings.jsonfile and store the database connection string. - Create an
ApplicationUserclass andApplicationDbContextclass. - Configure the application to use ASP.NET Identity.
- Create ViewModels for registration and login.
- Create the necessary controller and associated action methods and Views.
If you want to use ASP.NET Identity with Entity Framework in your application, you need to add the following dependencies:
"EntityFramework.Commands": "7.0.0-rc1-final",
    "EntityFramework.MicrosoftSqlServer": "7.0.0-rc1-final",
    "Microsoft.AspNet.Authentication.Cookies": "1.0.0-rc1-final",
Create an appsettings.json file and store the database connection string.
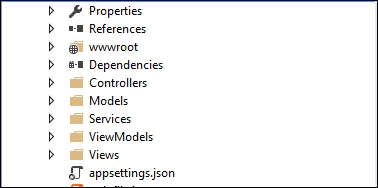
Create a file with the name appsettings.json at the root level of the project, as shown in the following screenshot:
Store the following connection string in appsettings.json. This connection string will be used by ASP.NET Identity to store the data in relevant tables:
{
  "Data": {
    "DefaultConnection": {
      "ConnectionString": "Server=(localdb)\\mssqllocaldb;Database=aspnet_security;Trusted_Connection=True;MultipleActiveResultSets=true"
   }
  }
}
Create a Models folder and a couple of files—ApplicationDbContext.cs and ApplicationUser.cs—as shown in the following screenshot:

The ApplicationUser class inherits from the IdentityUser class (available at the AspNet.Identity.EntityFramework6 namespace) as follows:
public class ApplicationUser : IdentityUser
{
..
}
You can add properties to the user as per the needs of your application. I have not added any properties as I would like to keep things simple to show the features of ASP.NET Identity.
The ApplicationDbContext class inherits from the IdentityDbContext class of ApplicationUser. In the constructor method, we pass the connectionstring, which is eventually passed to the base class.
Even the OnModelCreating method is overridden. If you want to change any table names (to be generated by Identity), you can do so as follows:
public class ApplicationDbContext : IdentityDbContext<ApplicationUser>
    {
        public ApplicationDbContext(string nameOrConnectionString) : base(nameOrConnectionString) { }

        protected override void OnModelCreating(DbModelBuilder modelBuilder)
        {
            base.OnModelCreating(modelBuilder);
        }
    }
Once we create the Models file, we need to configure the application and services. You can configure these in Configure and ConfigureServices, which are found in the Startup class.
Adding ApplicationUser and ApplicationDbContext classes
Create a Models folder and a couple of files—ApplicationDbContext.cs and ApplicationUser.cs—as shown in the following screenshot:
The ApplicationUser class inherits from the IdentityUser class (available at the AspNet.Identity.EntityFramework6 namespace) as follows:
public class ApplicationUser : IdentityUser
{
..
}
You can add properties to the user as per the needs of your application. I have not added any properties as I would like to keep things simple to show the features of ASP.NET Identity.
The ApplicationDbContext class inherits from the IdentityDbContext class of ApplicationUser. In the constructor method, we pass the connectionstring, which is eventually passed to the base class.
Even the OnModelCreating method is overridden. If you want to change any table names (to be generated by Identity), you can do so as follows:
public class ApplicationDbContext : IdentityDbContext<ApplicationUser>
    {
        public ApplicationDbContext(string nameOrConnectionString) : base(nameOrConnectionString) { }

        protected override void OnModelCreating(DbModelBuilder modelBuilder)
        {
            base.OnModelCreating(modelBuilder);
        }
    }
Once we create the Models file, we need to configure the application and services. You can configure these in Configure and ConfigureServices, which are found in the Startup class.
In order to use Identity, we just need to add the following line in the Configure method of the Startup class:
app.UseIdentity();
The complete Configure method is shown in the following code, along with the call of the UseIdentity method, which is app.UseIdentity():
public void Configure(IApplicationBuilder app, IHostingEnvironment env,  ILoggerFactory loggerFactory)
        {
            loggerFactory.AddConsole(Configuration.GetSection("Logging"));
            loggerFactory.AddDebug();

            if (env.IsDevelopment())
            {
                app.UseBrowserLink();
                app.UseDeveloperExceptionPage();
                app.UseDatabaseErrorPage();
            }
            else
            {
                app.UseExceptionHandler("/Home/Error");


            app.UseIISPlatformHandler(options => options.AuthenticationDescriptions.Clear());

            app.UseStaticFiles();

            app.UseIdentity();

            // To configure external authentication please see http://go.microsoft.com/fwlink/?LinkID=532715

            app.UseMvc(routes =>
            {
                routes.MapRoute(
                    name: "default",
                    template: "{controller=Home}/{action=Index}/{id?}");
            });
        }
In the ConfigureServices method, we will make the following changes:
- We will add the
ApplicationDbContextclass with the connection string taken from theappsettings.jsonfile - We will add Identity with
UserStoreandRoleStore - Finally, we will ask ASP.NET Core to return
AuthMessageSenderwhenever we ask for theIEmailSenderandISMSSenderclassespublic void ConfigureServices(IServiceCollection services { // Add framework services. services.AddScoped<ApplicationDbContext>(f => { return new ApplicationDbContext(Configuration["Data:DefaultConnection:ConnectionString"]); }); services.AddIdentity<ApplicationUser, IdentityRole>() .AddUserStore<UserStore<ApplicationUser, ApplicationDbContext>>() .AddRoleStore<RoleStore<ApplicationDbContext>>() .AddDefaultTokenProviders(); services.AddMvc(); // Add application services. services.AddTransient<IEmailSender, AuthMessageSender>(); services.AddTransient<ISmsSender, AuthMessageSender>(); }
Next, we will be creating several ViewModels that we will be using in our Views model.
To start with, we will create a RegisterViewModel class that contains three properties—Email, Password, and ConfirmPassword. We decorate the properties with appropriate attributes so that we can use client-side validation using an unobtrusive jQuery validation. We are making all the fields required as follows:
public class RegisterViewModel
    {
        [Required]
        [EmailAddress]
        [Display(Name = "Email")]
        public string Email { get; set; }

        [Required]
        [StringLength(100, ErrorMessage = "The {0} must be at least {2} characters long.", MinimumLength = 6)]
        [DataType(DataType.Password)]
        [Display(Name = "Password")]
        public string Password { get; set; }

        [DataType(DataType.Password)]
        [Display(Name = "Confirm password")]
        [Compare("Password", ErrorMessage = "The password and confirmation password do not match.")]
        public string ConfirmPassword { get; set; }
    }
Now, we can create the LoginViewModel model, which the user can use to log in to your application. There is an additional property, RememberMe, which, when checked, will enable you to log in without having to enter the password again:
public class LoginViewModel
    {
        [Required]
        [EmailAddress]
        public string Email { get; set; }

        [Required]
        [DataType(DataType.Password)]
        public string Password { get; set; }

        [Display(Name = "Remember me?")]
        public bool RememberMe { get; set; }
    }
Now we need to create an AccountController class, where we will define the action methods for authentication and authorization:
public class AccountController : Controller
    {
        private readonly UserManager<ApplicationUser> _userManager;
        private readonly SignInManager<ApplicationUser> _signInManager;
        private readonly IEmailSender _emailSender;
        private readonly ISmsSender _smsSender;
        private readonly ILogger _logger;

        public AccountController(
            UserManager<ApplicationUser> userManager,
            SignInManager<ApplicationUser> signInManager,
            IEmailSender emailSender,
            ISmsSender smsSender,
            ILoggerFactory loggerFactory)
        {
            _userManager = userManager;
            _signInManager = signInManager;
            _emailSender = emailSender;
            _smsSender = smsSender;
            _logger = loggerFactory.CreateLogger<AccountController>();
        }
    }
In the preceding code, we are using services provided by different components. UserManager and SignInManager are provided by ASP.NET Identity. The IEmailSender and ISmsSender are custom classes that we have written which will be used for sending e-mails and SMS messages. We will look more at e-mail and SMS later in this chapter. Logging is provided by the Microsoft Logging extension. The following is a simple login HTTPGET method. It simply stores the URL from where the Login method is accessed and returns the login page:
[HttpGet]
        [AllowAnonymous]
        public IActionResult Login(string returnUrl = null)
        {
            ViewData["ReturnUrl"] = returnUrl;
            return View();
        }
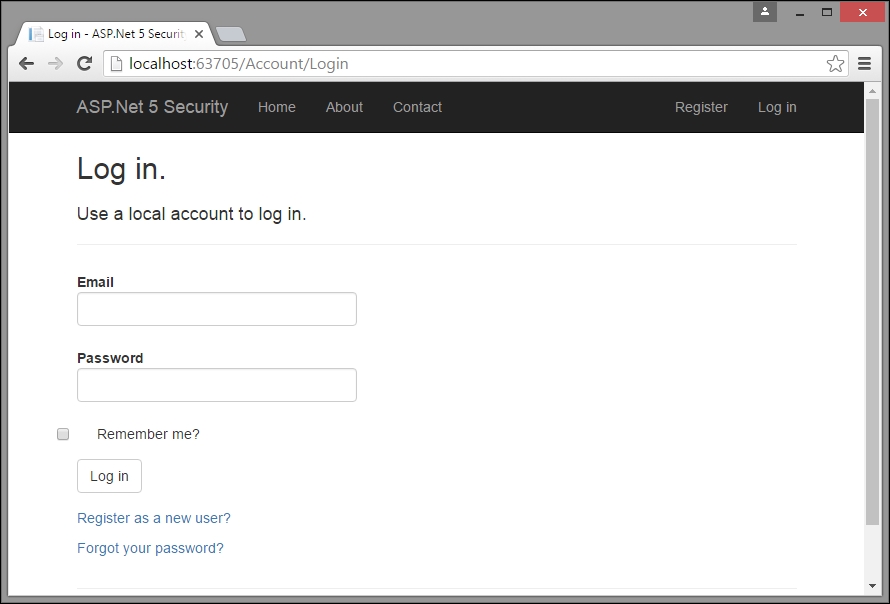
Now, we will create respective View page for the login. In this View page, we are just showing the following details:
@using System.Collections.Generic
@using Microsoft.AspNet.Http
@using Microsoft.AspNet.Http.Authentication
@using AspNet.Identity.EntityFramework6

@model LoginViewModel
@inject SignInManager<ApplicationUser> SignInManager

@{
    ViewData["Title"] = "Log in";
}

<h2>@ViewData["Title"].</h2>
<div class="row">
    <div class="col-md-8">
        <section>
            <form asp-controller="Account" asp-action="Login" asp-route-returnurl="@ViewData["ReturnUrl"]" method="post" class="form-horizontal" role="form">
                <h4>Use a local account to log in.</h4>
                <hr />
                <div asp-validation-summary="ValidationSummary.All" class="text-danger"></div>
                <div class="form-group">
                    <label asp-for="Email" class="col-md-2 control-label"></label>
                    <div class="col-md-10">
                        <input asp-for="Email" class="form-control" />
                        <span asp-validation-for="Email" class="text-danger"></span>
                    </div>
                </div>
                <div class="form-group">
                    <label asp-for="Password" class="col-md-2 control-label"></label>
                    <div class="col-md-10">
                        <input asp-for="Password" class="form-control" />
                        <span asp-validation-for="Password" class="text-danger"></span>
                    </div>
                </div>
                <div class="form-group">
                    <div class="col-md-offset-2 col-md-10">
                        <div class="checkbox">
                            <input asp-for="RememberMe" />
                            <label asp-for="RememberMe"></label>
                        </div>
                    </div>
                </div>
                <div class="form-group">
                    <div class="col-md-offset-2 col-md-10">
                        <button type="submit" class="btn btn-default">Log in</button>
                    </div>
                </div>
                <p>
                    <a asp-action="Register">Register as a new user?</a>
                </p>
                <p>
                    <a asp-action="ForgotPassword">Forgot your password?</a>
                </p>
            </form>
        </section>
    </div>

</div>

@section Scripts {
    @{ await Html.RenderPartialAsync("_ValidationScriptsPartial"); }
}
When the user logs into the application for the first time, they might not have any login credentials, so our application should provide a feature that they can use to create a login for themselves. We will create a simple Register action method that will just return a View with which the user can register themselves:
[HttpGet]
[AllowAnonymous]
public IActionResult Register()
{
    return View();
}
We will also create the corresponding View that contains input controls for e-mail, password, password confirmation, and a Register button:
@model RegisterViewModel
@{
    ViewData["Title"] = "Register";
}

<h2>@ViewData["Title"].</h2>

<form asp-controller="Account" asp-action="Register" method="post" class="form-horizontal" role="form">
    <h4>Create a new account.</h4>
    <hr />
    <div asp-validation-summary="ValidationSummary.All" class="text-danger"></div>
    <div class="form-group">
        <label asp-for="Email" class="col-md-2 control-label"></label>
        <div class="col-md-10">
            <input asp-for="Email" class="form-control" />
            <span asp-validation-for="Email" class="text-danger"></span>
        </div>
    </div>
    <div class="form-group">
        <label asp-for="Password" class="col-md-2 control-label"></label>
        <div class="col-md-10">
            <input asp-for="Password" class="form-control" />
            <span asp-validation-for="Password" class="text-danger"></span>
        </div>
    </div>
    <div class="form-group">
        <label asp-for="ConfirmPassword" class="col-md-2 control-label"></label>
        <div class="col-md-10">
            <input asp-for="ConfirmPassword" class="form-control" />
            <span asp-validation-for="ConfirmPassword" class="text-danger"></span>
        </div>
    </div>
    <div class="form-group">
        <div class="col-md-offset-2 col-md-10">
            <button type="submit" class="btn btn-default">Register</button>
        </div>
    </div>
</form>

@section Scripts {
    @{ await Html.RenderPartialAsync("_ValidationScriptsPartial"); }
}
The following is the corresponding POST action method for registration. Here, the program checks whether the model is valid, and, if it is valid, it will create an ApplicationUser object using the model data and call the Identity API (the CreateAsync method). If it can create the user variable, the user will log in using that user ID and be redirected to the Home page:
[HttpPost]
        [AllowAnonymous]
        [ValidateAntiForgeryToken]
        public async Task<IActionResult> Register(RegisterViewModel model)
        {
            if (ModelState.IsValid)
            {
                var user = new ApplicationUser { UserName = model.Email,  Email = model.Email };
                var result = await _userManager.CreateAsync(user,  model.Password);
                if (result.Succeeded)
                {
                    await _signInManager.SignInAsync(user, isPersistent:  false);
                    return RedirectToAction(nameof(HomeController.Index),  "Home");
                }
                AddErrors(result);
            }

            return View(model);
        }
The log-out functionality is pretty simple. It just needs to call the SignoutAsync method of Identity API and be redirected to the Index page:
[HttpPost]
        [ValidateAntiForgeryToken]
        public async Task<IActionResult> LogOff()
        {
            await _signInManager.SignOutAsync();
            _logger.LogInformation(4, "User logged out.");
            return RedirectToAction(nameof(HomeController.Index), "Home");
       }
Coming back to the log-in functionality, the following is the respective action method. We are calling the PasswordSignInAsync method of Identity API. Upon a successful login, we redirect the URL from where the log-in functionality is accessed:
[HttpPost]
        [AllowAnonymous]
        [ValidateAntiForgeryToken]
        public async Task<IActionResult> Login(LoginViewModel model, string returnUrl = null)
        {
            ViewData["ReturnUrl"] = returnUrl;
            if (ModelState.IsValid)
            {
                var result = await _signInManager.PasswordSignInAsync(model.Email, model.Password, model.RememberMe, lockoutOnFailure: false);
                if (result.Succeeded)
                {
                    return RedirectToLocal(returnUrl);
                }

            }
            // If there is any error, display the form again
            return View(model);
        }
If you want to add e-mail and SMS services to your application's authentication capabilities, you can do so by creating the interfaces and classes shown here:
public interface IEmailSender
{
        Task SendEmailAsync(string email, string subject, string message)
  }
  public interface ISmsSender
    {
        Task SendSmsAsync(string number, string message);
    }
public class AuthMessageSender : IEmailSender, ISmsSender
    {
        public Task SendEmailAsync(string email, string subject, string message)
        {
            // We can plug in our email service here to send an email.
            return Task.FromResult(0);
        }
        public Task SendSmsAsync(string number, string message)
        {
            // We can plug in our SMS service here to send a text message.
            return Task.FromResult(0);
        }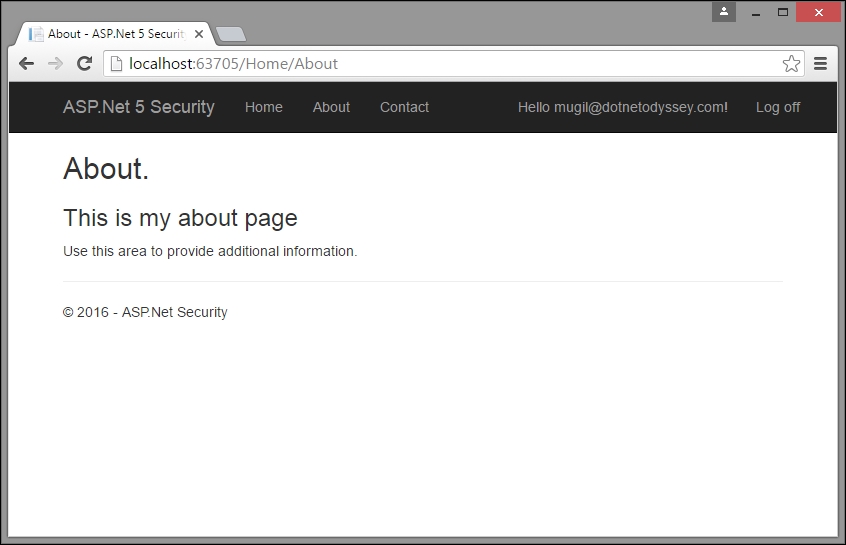
}For the sake of explanation, let us assume that the About page is a secure page and only authenticated users should be able to access it.
We just have to decorate the About action method in the Home controller with an[Authorize] attribute:
[Authorize]
        public IActionResult About()
        {
            ViewData["Message"] = "This is my about page";
            return View();
        }
Making the preceding change will redirect the user to the log-in page when the user tries to access the log-in page without logging in to the application:

In the following screenshot, you will notice an additional query parameter, ReturnURL, in the URL. This ReturnURL parameter will redirect the application to that specific page (the value passed in the ReturnURL parameter—Home/About in our case).
Once you log in, you'll be redirected to the page that you requested earlier:
When you register a new user, the details of the user will be stored in the relevant tables created by ASP.NET Identity.
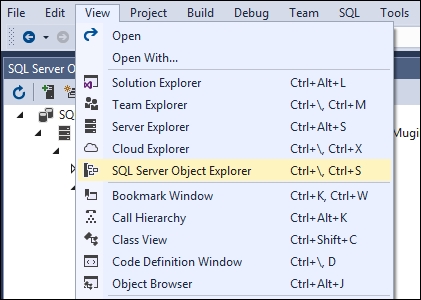
Open the SQL Server Object Explorer window by selecting the option View | SQL Server Object Explorer, as shown in the following screenshot:
Once you select the SQL Server Object Explorer option, you will see a window similar to the following screenshot. ASP.NET Identity creates a database for us by using Entity Framework and the connection string that we provided earlier in the appsettings.json package.
ASP.NET Identity creates several tables to maintain identity-related information and the database migration history of Entity Framework. As we are using ASP.NET Identity at the basic level, none of the identity-related tables will get populated, apart from dbo.AspNetUsers.:

You can right-click on the dbo.AspNetUsers table and select View Data to see the data:
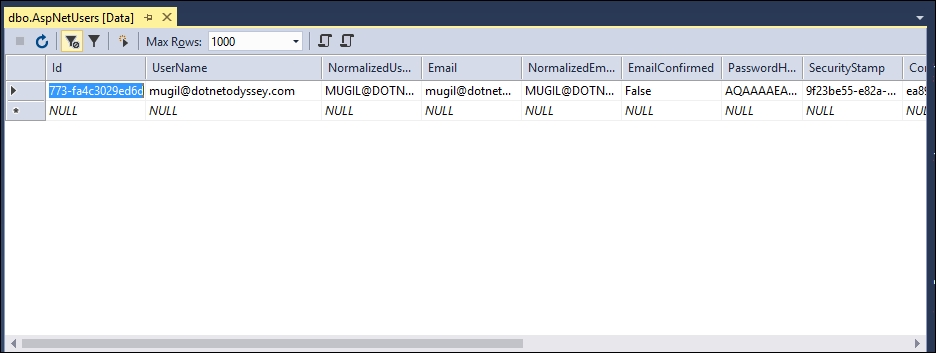
As only one user has been registered in our application, only one row has been created. Please note that the hashed password (marked by ASP.NET Identity for us) and no blank passwords will get stored in the table.
In this chapter, we learned about authentication and authorization. We also learned how to implement ASP.NET Identity in an ASP.NET Core application by following a step-by-step process. We also discussed the tables involved in ASP.NET Identity and learned how to see the data created by ASP.NET Identity.