
Installing Spark from already precompiled binaries is even easier than doing the same from the sources. In this recipe, we will show you how to do this by downloading the binaries from the web or by using pip.
To execute this recipe, you will need a bash Terminal and an internet connection. Also, to follow through with this recipe, you will need to have already checked and/or installed all the required environments we went through in the Installing Spark requirements recipe. In addition, you need to have administrative privileges (via the sudo command), as these will be necessary to move the compiled binaries to the destination folder.
Note
If you are not an administrator on your machine, you can call the script with the -ns (or --nosudo) parameter. The destination folder will then switch to your home directory and will create a spark folder within it; by default, the binaries will be moved to the /opt/spark folder and that's why you need administrative rights.
No other prerequisites are required.
To install from the binaries, we only need four steps (see the following source code) as we do not need to compile the sources:
The skeleton for our code looks as follows (see the Chapter01/installFromBinary.sh file):
#!/bin/bash
# Shell script for installing Spark from binaries
#
# PySpark Cookbook
# Author: Tomasz Drabas, Denny Lee
# Version: 0.1
# Date: 12/2/2017
_spark_binary="http://mirrors.ocf.berkeley.edu/apache/spark/spark-2.3.1/spark-2.3.1-bin-hadoop2.7.tgz"
_spark_archive=$( echo "$_spark_binary" | awk -F '/' '{print $NF}' )
_spark_dir=$( echo "${_spark_archive%.*}" )
_spark_destination="/opt/spark"
...
checkOS
printHeader
downloadThePackage
unpack
moveTheBinaries
setSparkEnvironmentVariables
cleanUp
The code is exactly the same as with the previous recipe so we will not be repeating it here; the only major difference is that we do not have the build stage in this script, and the _spark_source variable is different.
As in the previous recipe, we start by specifying the location of Spark's source code, which is in _spark_source. The _spark_archive contains the name of the archive; we use awk to extract the last element. The _spark_dir contains the name of the directory our archive will unpack into; in our current case, this will be spark-2.3.1. Finally, we specify our destination folder where we will be moving the binaries to: it will either be /opt/spark (default) or your home directory if you use the -ns (or --nosudo) switch when calling the ./installFromBinary.sh script.
Next, we check the OS name. Depending on whether you work in a Linux or macOS environment, we will use different tools to download the archive from the internet (check the downloadThePackage function). Also, when setting up the environment variables, we will output to different bash profile files: the .bash_profile on macOS and the .bashrc on Linux (check the setEnvironmentVariables function).
Following the OS check, we download the package: on macOS, we use curl and on Linux, we use wget tools to attain this goal. Once the package is downloaded, we unpack it using the tar tool, and then move it to its destination folder. If you are running with sudo privileges (without the -ns or --nosudo parameters), the binaries will be moved to the /opt/spark folder; if not—they will end up in the ~/spark folder.
Finally, we add environment variables to the appropriate bash profile files: check the previous recipe for an explanation of what is being added and for what reason. Also, follow the steps at the end of the previous recipe to test if your environment is working properly.
Nowadays, there is an even simpler way to install PySpark on your machine, that is, by using pip.
Note
pip is Python's package manager. If you installed Python 2.7.9 or Python 3.4 from http://python.org, then pip is already present on your machine (the same goes for our recommended Python distribution—Anaconda). If you do not have pip, you can easily install it from here: https://pip.pypa.io/en/stable/installing/.
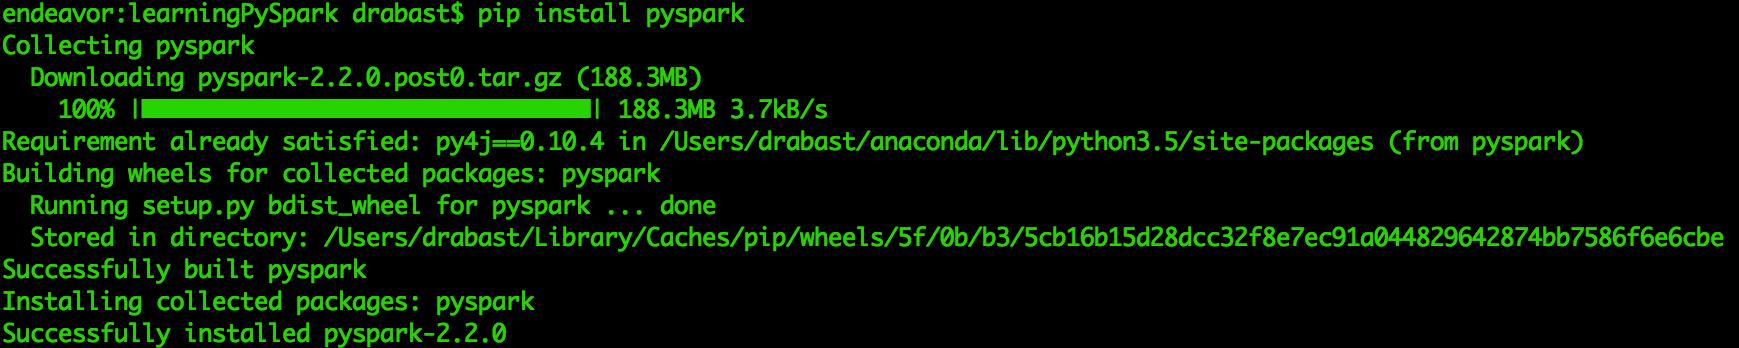
To install PySpark via pip, just issue the following command in the Terminal:
pip install pyspark
Or, if you use Python 3.4+, you may also try:
pip3 install pyspark
You should see the following screen in your Terminal: