
Reviewing the media
Looking at your media in the Organizer couldn't be easier. The main window displays all media files in a mode called Grid View—these are adjustable-size thumbnails, as displayed in the background of this image here. But if you create and populate albums, the main window will only display what's in each album.
Compartmentalizing an image collection into multiple albums, therefore, is an effective way to break up what would otherwise be a confusing mass of images on the main screen, into smaller, more visually digestible quantities:
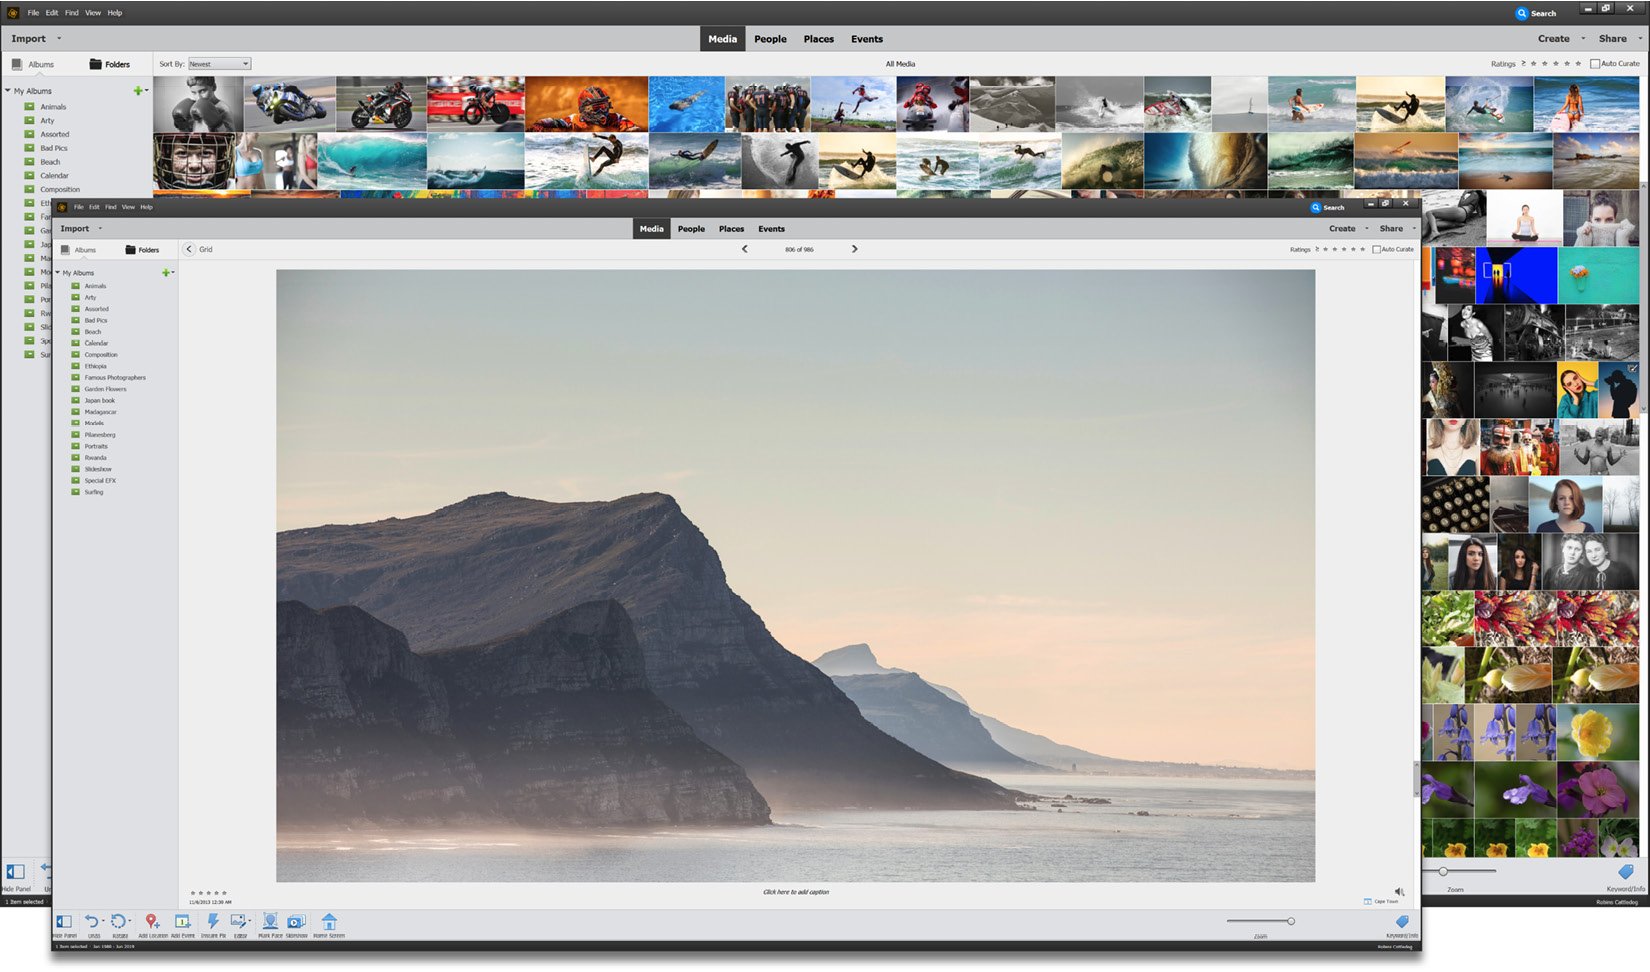
One quick tip for anyone wanting to sort through a lot of images is to maximize the thumbnail size so the screen effectively only displays one image at a time, as seen in the preceding coastal seascape image, then use the up/down arrows on the keyboard to scroll through the latest import while examining each file's full size. Every time you find an image that you love, want to keep, or think needs editing, you can classify it using the number keys to add one, two, three, four, or five stars (see the Organizing your work – ratings section later in this chapter). Use these to sort and search for images later. (Pressing the number zero on the keypad removes all star attributes.) You can also see that, once expanded to fullscreen, you can also type in a caption for the displayed image and play any associated sound (that is, if it's a movie clip).
Even better, there are no restrictions as to how many albums you can create and, since they are essentially virtual folders, they don't take up much storage space.
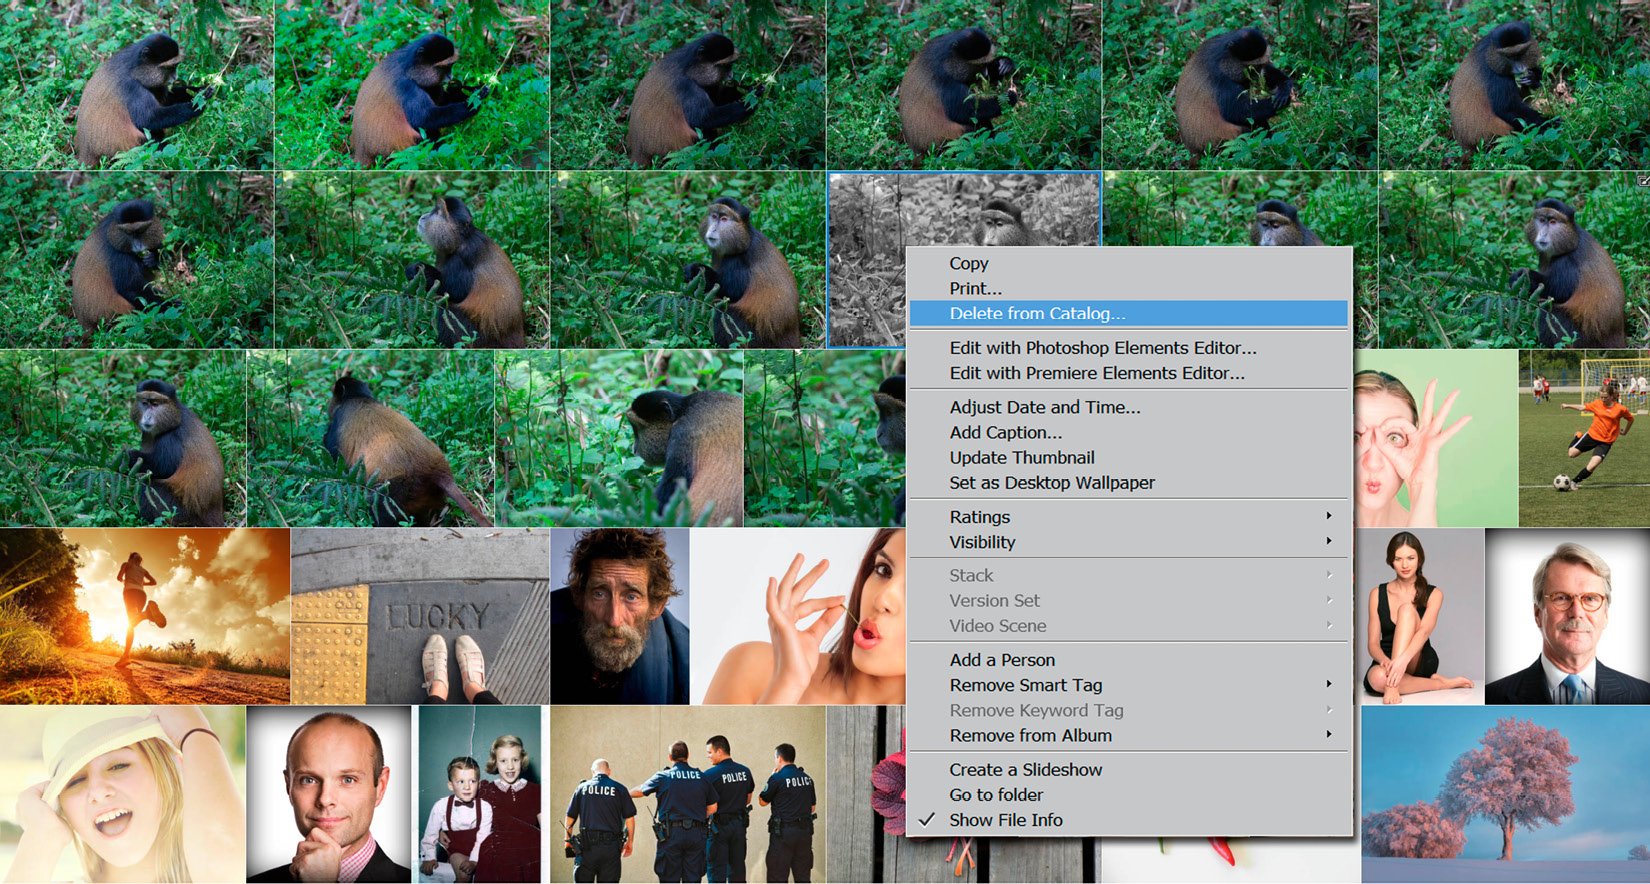
While sorting through recently imported images, get into the habit of right-clicking an image thumbnail – this reveals a contextual menu that offers many options, but in particular reference to sorting images, you can choose from any of the following:
- Delete from Catalog
- Edit with Photoshop Elements Editor
- Edit with Premiere Elements Editor
- Adjust Date and Time (this is good for when you cross different time zones)
- Add Caption
- Add a Rating (that is, 1-5 stars)
- Add a Person (identified in the image for later searches)
- Create a Slideshow (when more than one image thumbnail is selected)
- Show File Info (that is, view the file's metadata)
One question often asked is "In what order do I make my edits?" Follow some of the guidelines in the next section to learn the most efficient way to process and organize your photographic output.
Suggested editing workflow
Finding the best processes to sort out all your work is important. You really don't want to keep going back and forth importing, re-importing, then losing image files because they were not keyworded, labeled, or stored correctly.
The following is a list of my workflow actions:
- I always run through my latest import quickly, checking for quality.
- Files that are blurry, unsharp, or just not interesting get deleted. (Right-click to choose Delete from Catalog.)
Tip
You can also delete the original file entirely if required. This saves time and hard drive space if the image really is that poor and not worth keeping.
- Everything in that import then gets added to custom-named albums.
- Another important habit to get into is keywording. Select one or multiple images and add keywords. This is an invaluable search tool. You can add multiple keywords to one or hundreds of images at the same time.
- Import another batch of images and repeat the same steps.
Do not try to rename your files or folders in the Mac Finder app or Windows Explorer because this is liable to confuse Elements. Do all your renaming from within Elements and you should experience few problems.