Book Image

Building Smart Drones with ESP8266 and Arduino

By : Syed Omar Faruk Towaha
Book Image

Building Smart Drones with ESP8266 and Arduino

By: Syed Omar Faruk Towaha

Overview of this book

With the use of drones, DIY projects have taken off. Programmers are rapidly moving from traditional application programming to developing exciting multi-utility projects. This book will teach you to build industry-level drones with Arduino and ESP8266 and their modified versions of hardware. With this book, you will explore techniques for leveraging the tiny WiFi chip to enhance your drone and control it over a mobile phone. This book will start with teaching you how to solve problems while building your own WiFi controlled Arduino based drone. You will also learn how to build a Quadcopter and a mission critical drone. Moving on you will learn how to build a prototype drone that will be given a mission to complete which it will do it itself. You will also learn to build various exciting projects such as gliding and racing drones. By the end of this book you will learn how to maintain and troubleshoot your drone. By the end of this book, you will have learned to build drones using ESP8266 and Arduino and leverage their functionalities to the fullest.
Table of Contents (11 chapters)

Avoiding obstacles using ESP8266

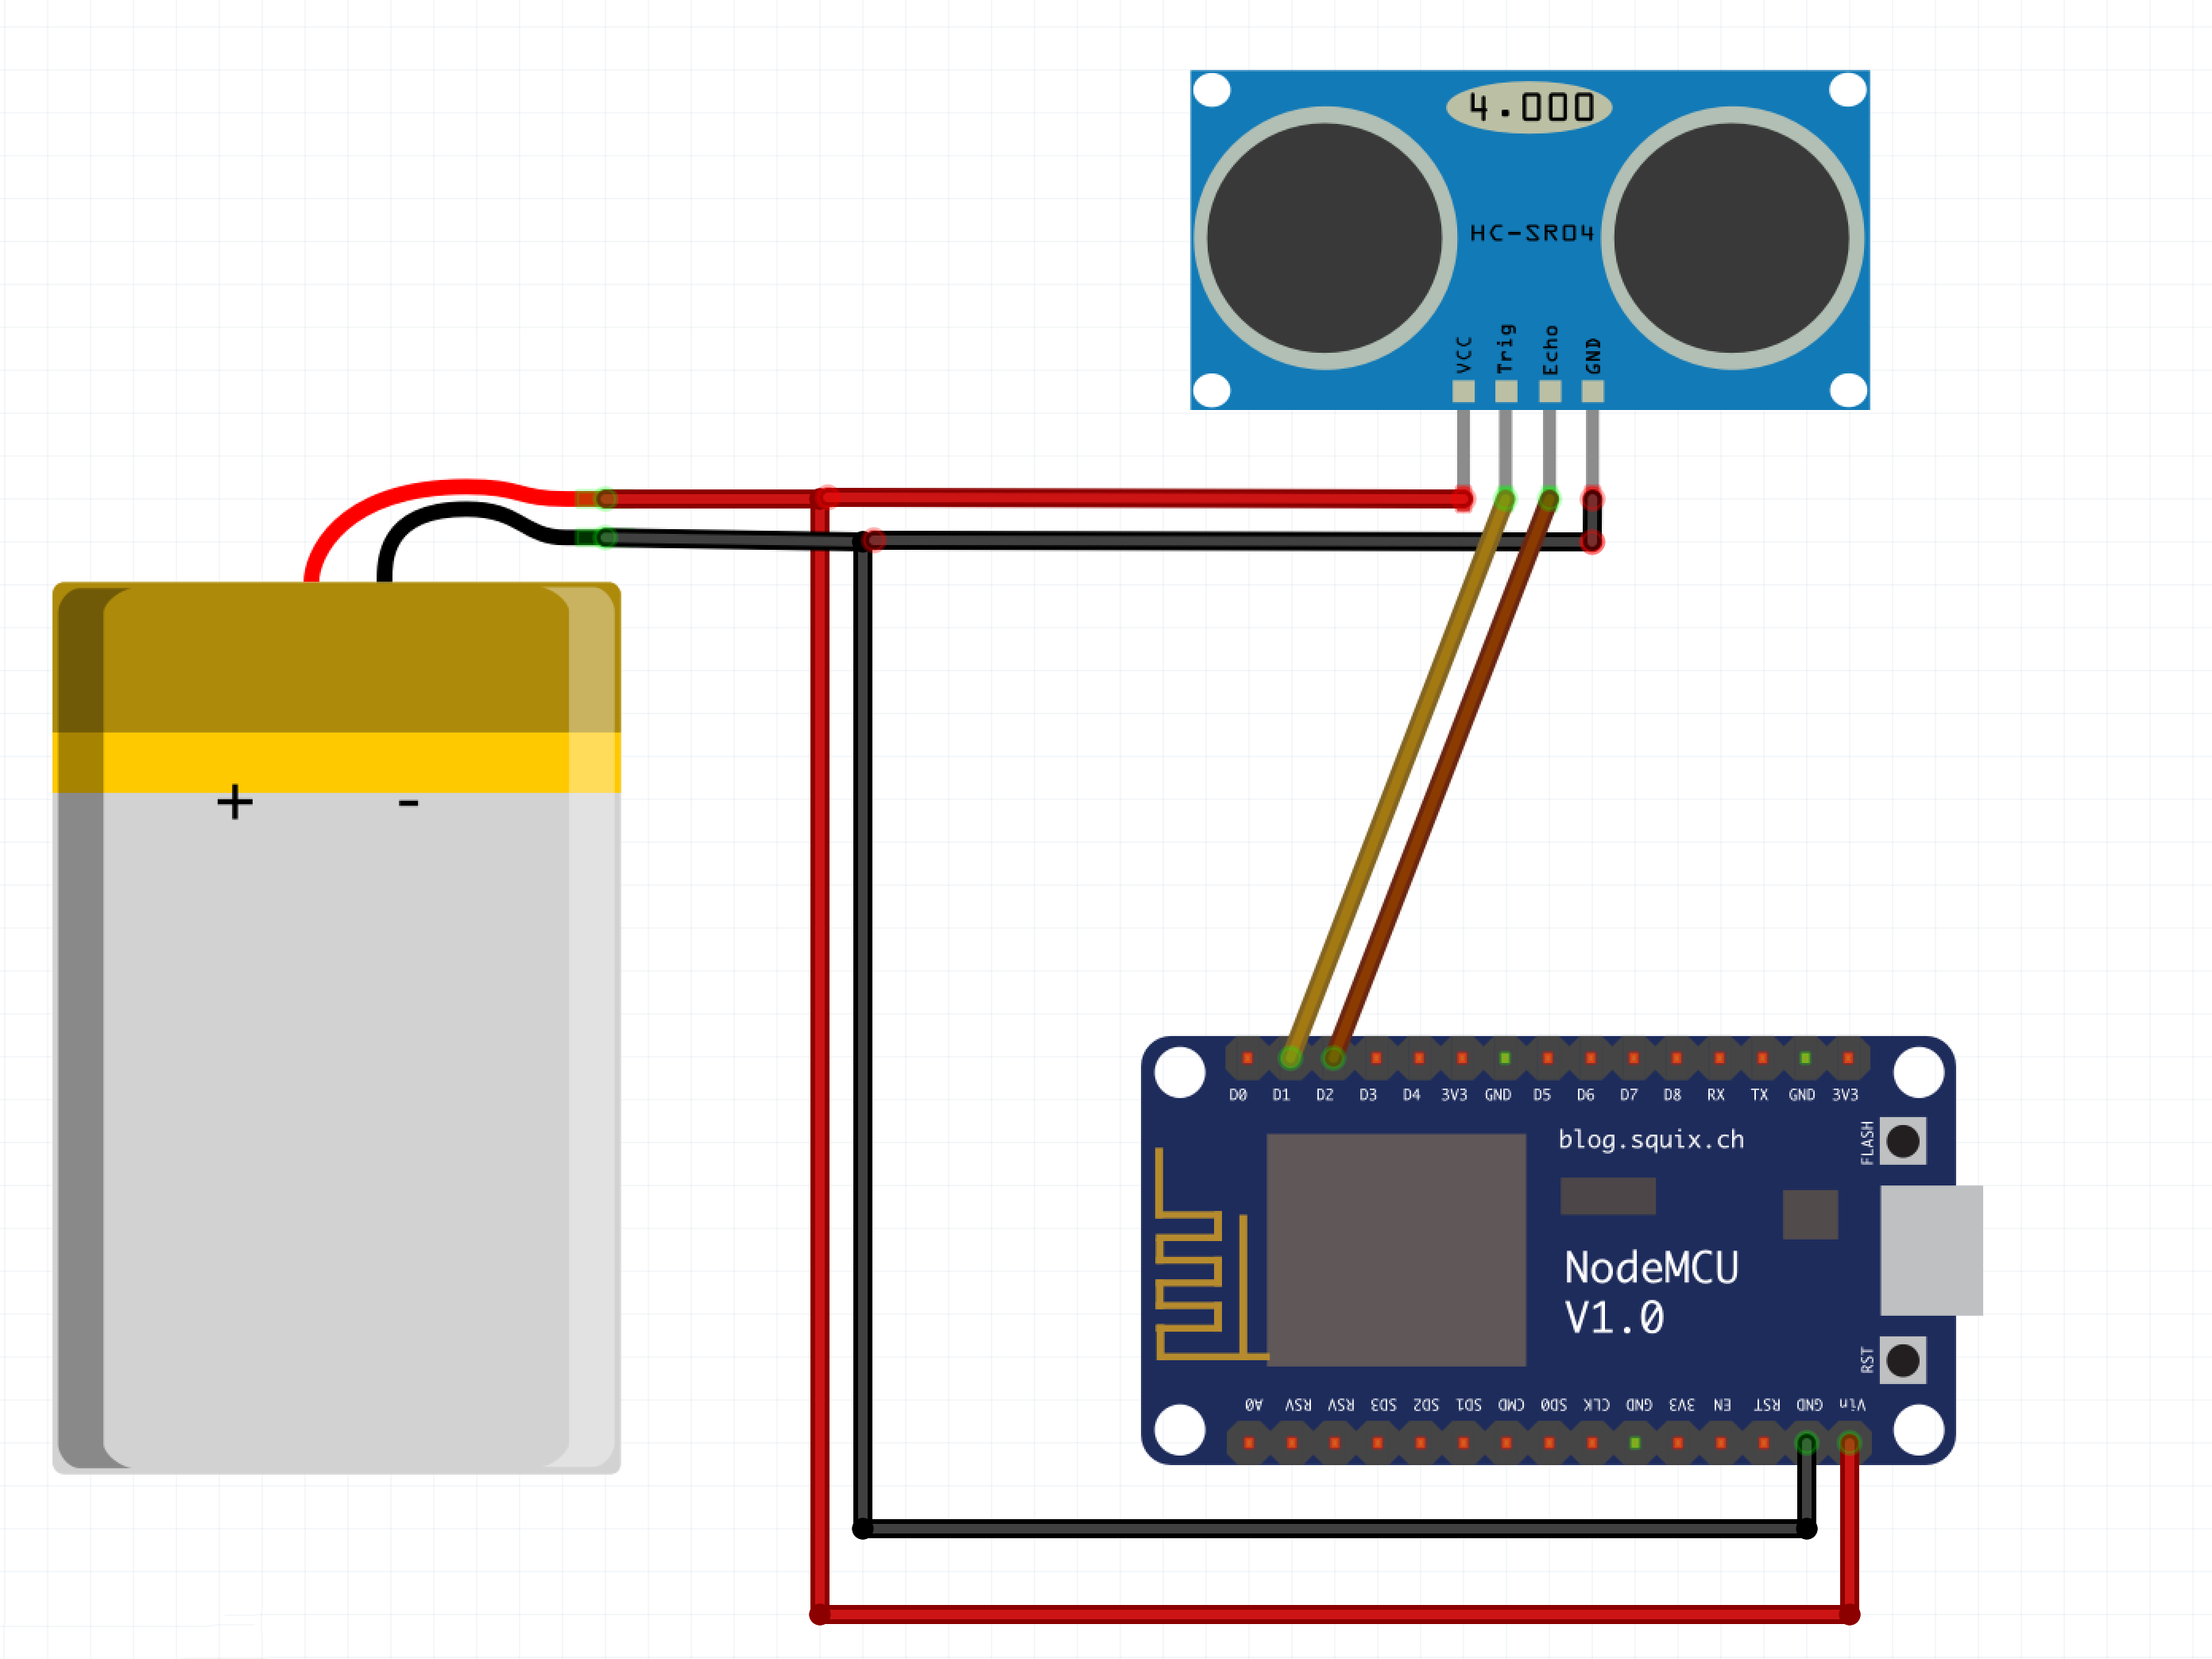
We will use a sensor to sense any object in front of it. We will use an ultrasonic sensor (HC-SR04 preferred). The intensity of the sensor will be shown by our Blynk app. So, let's start with the connection.

Connect the D1 and D2 to the Tring and Echo pins respectively. Since the sensor needs a 5V power supply, we will use an external battery to power it up. We will also use the same battery to power the NodeMCU after uploading the code. The pinout is as follows:

HC-SR04 NodeMCU
Trig D1
Echo D2
GND GND
VCC Vin

Refer to the following circuit diagram for clarification:

Refer to the following steps:

  1. Now, we open the Blynk app and create a project with the following settings:
  1. From the widgets, select Gauge. From the properties of the gauge, select a Virtual pin (I choose V1). Your Blynk part is done:
  1. Now, let's...