

Writing data to databases
When Tableau Prep was launched, it was only able to output data to files, including hyper extracts. Thankfully, Tableau introduced functionality to write to external databases in release 2020.3. With it, you can write the output of your flow directly to a database.
At the time of writing, the supported output types are SQL Server, Oracle, PostgreSQL, MySQL, Teradata, Snowflake, and Amazon Redshift.
Getting ready
In this recipe, we'll write data to SQL Server. You can write to any of the supported types listed previously. Ensure that you have the appropriate database details and write privileges before you continue.
How to do it…
To get started, open up Tableau Prep Builder and open the Superstore sample flow from the home screen, then follow these steps:
- The Superstore flow has two output steps. Delete the second output by right-clicking the step and selecting Remove:

Figure 2.34 – Removing a step from a flow
- Select the remaining output step, Create 'Superstore Sales.hyper', to bring up the bottom pane with the configuration options:

Figure 2.35 – Output configuration options
- Change the default output type from File to Database table:

Figure 2.36 – Changing the output type
Doing so will raise an error. This is expected, as the new output location has no default configuration and therefore the flow wouldn't work if we were to run it now. As we configure the connection, the error will disappear:

Figure 2.37 – Incomplete output configurations cause an error
- From the Select a Server dropdown, select your server type. For this recipe, let's select Microsoft SQL Server.
- When you've selected a database type, you'll be presented with the same Connection dialog as this type would show for an input step. Populate the dialog with your server details and click Sign In to continue.
- Once signed in, the Database dropdown becomes visible. From here, select the database to which you have write privileges. In my example, I will select Test Database, which I created for testing purposes.
- Next, you can select an existing table to write to from the Table dropdown or create a brand-new table. When creating a new table, you can use the format [schema].[table] to ensure you create the table in the appropriate schema. In this example, I'll create a new table, superstore.test:
![Figure 2.38 – Use [schema].[table] format to create a new table](https://static.packt-cdn.com/products/9781800563766/graphics/image/B16782_02_038.jpg)
Figure 2.38 – Use [schema].[table] format to create a new table
- Finally, select the desired Refresh option. You can choose from Create table, Append to table, and Replace data. Make sure you carefully select the option appropriate to you, to prevent accidental deletion of database data. In this example, I'll select Append to table, which will create my superstore.test table in the process as it does not yet exist:

Figure 2.39 – Table refresh options
- When you're ready, click Run Flow to execute the flow and write the output to the database:

Figure 2.40 – Output successfully written to database
- Using your favorite IDE, verify that the database table now exists, and that data has been written to it. I'm using Azure Data Studio with the query SELECT TOP(100) * FROM [superstore.test]. If all went well, your output will be successful:
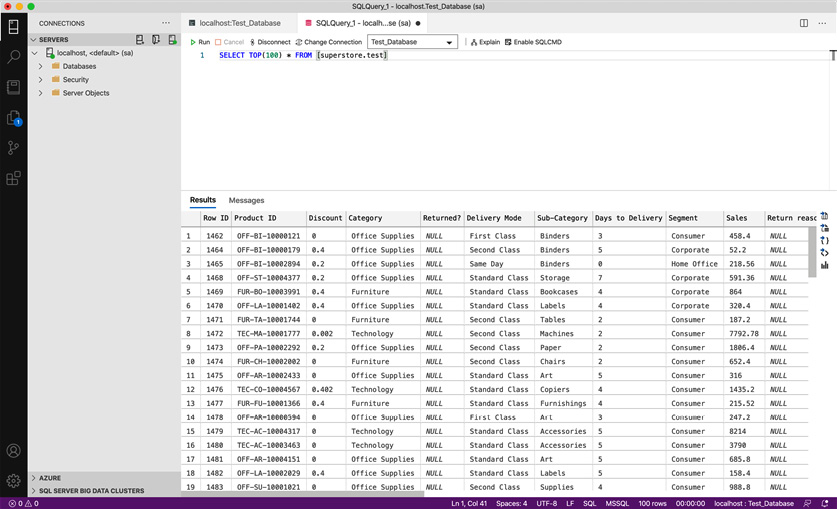
Figure 2.41 – Verifying the output in the database
Using the steps in this recipe, you have learned how to write data from Tableau Prep to a database.
How it works…
Using the Output tool, you can write data to a variety of database platforms. Doing so can add significant value to your use of Tableau Prep and allow you to prepare data for use with tools outside the Tableau ecosystem.