

Publishing a flow to Tableau Server
Once you have created a flow, you may wish to publish it to Tableau Server or Tableau Online. When you publish a flow, you and others can execute it on-demand with a single click from the Tableau Server interface.
Furthermore, you can increase the transparency of your data flow for your report users, as they will be able to see a diagram of the data flow.
In this recipe, we'll modify a sample flow to output data as a Hyper Extract to Tableau Server, publish the flow to the server, and execute it from the web interface.
Getting ready
To follow along with this recipe, you need access to a Tableau Server instance, either on-premises or with Tableau Online, with the appropriate privileges to publish data sources and flows.
Important note
If you're not sure whether you have the appropriate privileges, you will get an error message when attempting to publish your flow. Contact your Tableau administrator to request that your permissions be modified to allow you to publish data sources and Tableau Prep flows.
How to do it…
Start by opening Tableau, then follow these steps:
- Before we get to work, we have to connect to Tableau Server. To do this, select Sign In... from the Server menu and then enter your server URL or select Tableau Online. In both cases, you'll be prompted to enter your server credentials. Enter your credentials and click Sign In:

Figure 2.44 – Sign in to Tableau Server or Tableau Online
Note that Tableau Prep will not show any confirmation dialog to indicate a successful sign in. However, you can go back to the Server menu and, if you are signed in successfully, you will see the URL of your server in the menu instead of the Sign In option, as shown in the following screenshot:

Figure 2.45 – Sign in to Tableau Server or Tableau Online
- From the Tableau Prep welcome screen, open the Superstore flow from the Sample Flows section in the bottom left. This flow has two outputs, Create 'Superstore Sales.hyper' and Create 'Annual Regional Performance.hyper', as shown in the following screenshot:

Figure 2.46 – Open up the Superstore Sample flow
- By default, these two outputs write a Hyper output to a location on your computer. In this recipe, we'll change these outputs to write data to Tableau Server instead. To do this, select each output step and change the Save output to setting to Published data source, as shown in the following screenshot. Because we are already signed in to Tableau Server, the Server address is populated instantly. We can select a project from the Project dropdown. In this example, we'll use the default project as our destination:

Figure 2.47 – Change both outputs to Published data source
- Next, let's save our flow to Tableau Server. From the Server menu, select Publish Flow. Set the project set to default and the flow name to Superstore. Click Publish when ready, to save your flow to the server:

Figure 2.48 – Publish your flow to Tableau Server
- When the publishing process completes, Tableau Prep will automatically launch your default browser and open up the flow. As shown in the following screenshot, a visual of the flow is present to help users understand the data flow at a glance. Click the ellipsis next to the flow name to open up the flow context menu. In the menu, select Run Now. When prompted with a confirmation dialog, select Run Now again to execute your flow:

Figure 2.49 – Run your flow on Tableau Server
- The Superstore sample flow does not consume many resources and depending on your server's configuration should take a couple of minutes to complete. Refresh the page to see the most recent status. When the flow has completed, each output will display a Succeeded status, as shown in the following screenshot:

Figure 2.50 – View the status of your flow
- You can navigate to the default project folder by selecting default in the top-left corner. In the project folder, you'll now see the two outputs generated by our flow, Annual regional performance and Superstore Sales, as shown in the following screenshot:
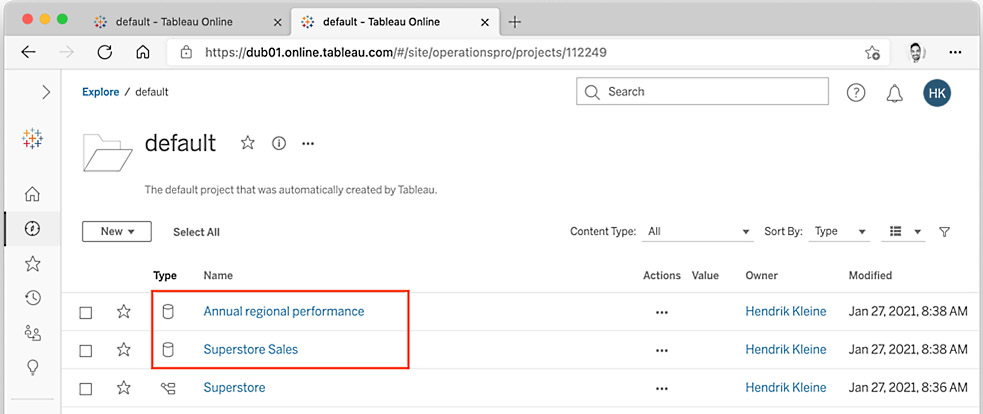
Figure 2.51 – Confirm the outputs have been created
With these steps completed, you've successfully completed this recipe.
How it works…
In this recipe, we learned how to connect Tableau Prep Builder to your Tableau Server or Tableau Online instance. We published a flow and ran it on the server, with two outputs being written to the server. Publishing flows and data sources to your server is an excellent step toward offering transparency into the data lineage and transformation process to the users of your outputs and all subsequent reports created in Tableau.