Most exercises in this book use a sample database, sqlda, which contains fabricated data for a fictional electric vehicle company called ZoomZoom. Set it up by performing the following steps:
- First, create a database titled
sqlda. Open the command line and type or paste the following command. Then, press the return key to execute it:createdb -U postgres sqlda
You will be prompted to enter the password that you set for the postgres superuser during installation:
Figure 0.22: PostgreSQL shell password request
- To check whether the database has been successfully created, log in to the shell by typing or pasting the following command and pressing the return key:
psql -U postgres
Enter your password when prompted. Press the return key to proceed.
- Type
\l (a backslash and a lowercase L) and then press the return key to check if the database has been created. The sqlda database should appear along with a list of the default databases:
Figure 0.23: PostgreSQL list of databases
- Download the
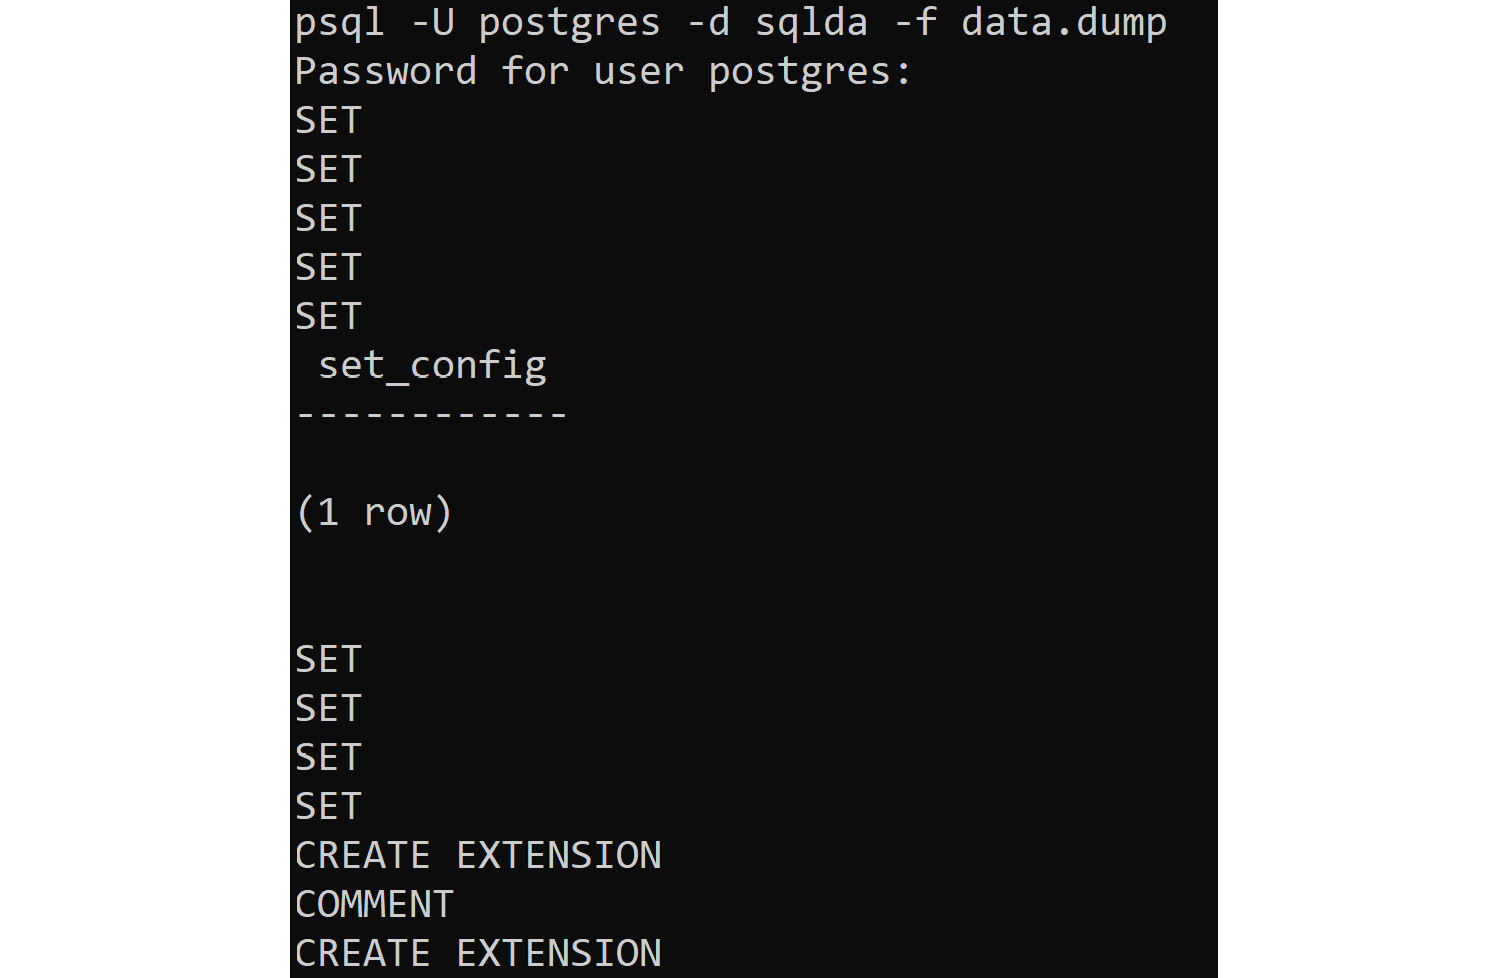
data.dump file from the Datasets folder in the GitHub repository of this book by clicking this link: http://packt.link/GuU31. Modify the highlighted path in the following command based on where the file is located on your system. Type or paste the command into the command line and press the return key to execute it:psql -U postgres -d sqlda -f C:\<path>\data.dump
Note
Alternatively, you can use the command line and navigate to the local folder where you have downloaded the file using the cd command. For example, if you have downloaded it to the Downloads folders of your computer, you can navigate to it using cd C:\Users\<your username>\Downloads. In this case, remove the highlighted path prefix in the step. The command should look like this: psql -U postgres -d sqlda -f data.dump.
You should get an output similar to the one that follows:
Figure 0.24: PostgreSQL database import
- Check whether the database has been loaded correctly. Log in to the
PostgreSQL console by typing or pasting the following command. Press the return key to execute it:psql –U postgres
In the shell, type the following command to connect to the sqlda database:
\c sqlda
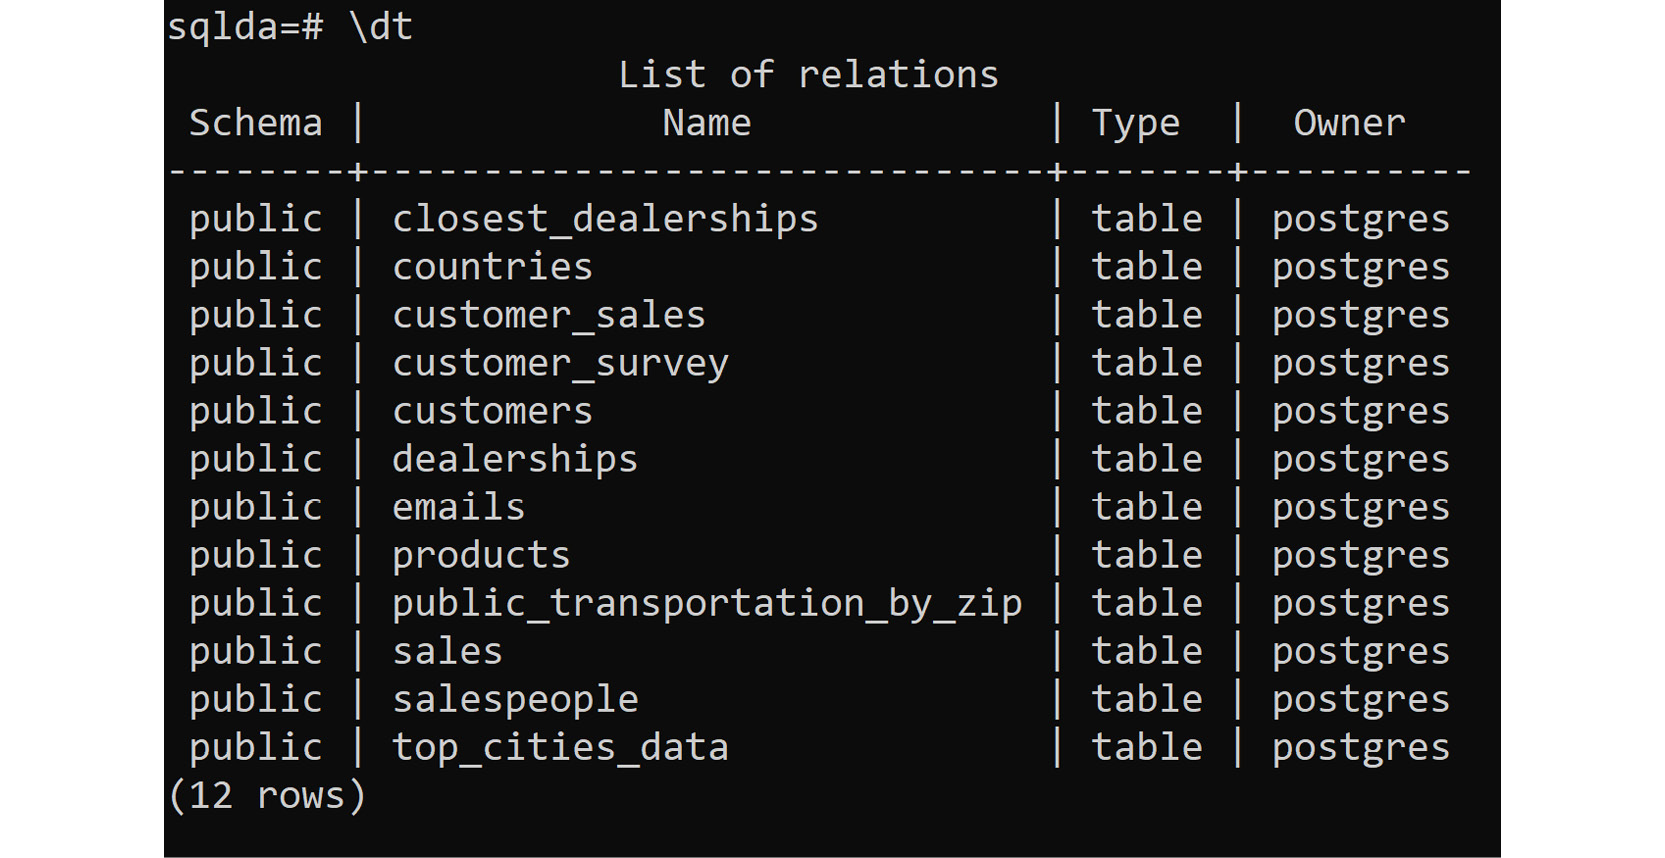
Then type \dt. This command should list all the tables in the database, as follows:
Figure 0.25: Validating that the database has been imported
Note
You are importing the database using the postgres superuser for demonstration purposes only. It is advised in production environments to use a separate account.


 Free Chapter


