

Integrating Optick
There are numerous profiling libraries for C++ that are useful for 3D graphics development. Some of them are truly generic, such as the one in the previous recipe, while others have specific functionality for profiling graphics applications. There is yet another popular, super-lightweight C++ open source profiler for games, called Optick (https://github.com/bombomby/optick). Besides Windows, Linux, and macOS, it supports Xbox and PlayStation 4 (for certified developers), as well as GPU counters in Direct3D 12 and Vulkan.
Getting ready
We use Optick version 1.3.1, which can be downloaded with the following Bootstrap script:
{
  "name": "optick",
  "source": {
    "type": "git",
    "url": "https://github.com/bombomby/optick.git",
    "revision": "1.3.1.0"
  }
}
If you want to compile the Optick GUI for Linux or macOS, please refer to the official documentation at https://github.com/bombomby/optick/wiki/How-to-start%3F-(Programmers-Setup). The source code for this recipe can be found in Chapter2/06_Optick.
How to do it...
Integration with Optick is similar to EasyProfiler. Let's go through it step by step:
- To start the capture, use the following two macros near the beginning of the
main()function:OPTICK_THREAD("MainThread"); OPTICK_START_CAPTURE(); - To mark up blocks for profiling, use the
OPTICK_PUSH()andOPTICK_POP()macros, as follows:{ OPTICK_PUSH( "Pass1" ); std::this_thread::sleep_for( std::chrono::milliseconds(2) ); ... OPTICK_POP(); } { OPTICK_PUSH( "Pass2" ); std::this_thread::sleep_for( std::chrono::milliseconds(2) ); ... OPTICK_POP(); }Blocks defined with
OPTICK_PUSH()do not close automatically at the scope exit; therefore, an explicit call toOPTICK_POP()is required. - At the end of the main loop, we save the profiling data to a file like this:
OPTICK_STOP_CAPTURE();
OPTICK_SAVE_CAPTURE("profiler_dump");
Now we can compile and run the demo application. The capture data will be saved inside a .opt file with the appended date and time: profiler_dump(2019-11-30.07-34-53).opt. Let's examine what the profiling results look like next.
How it works...
After the demo application exits, run the Optick GUI with the following command to inspect the profiling report:
Optick.exe "profiler_dump(2019-11-30.07-34-53).opt"
The output should be similar to the following screenshot. Each CPU frame can be inspected by clicking on it in the flame graph:
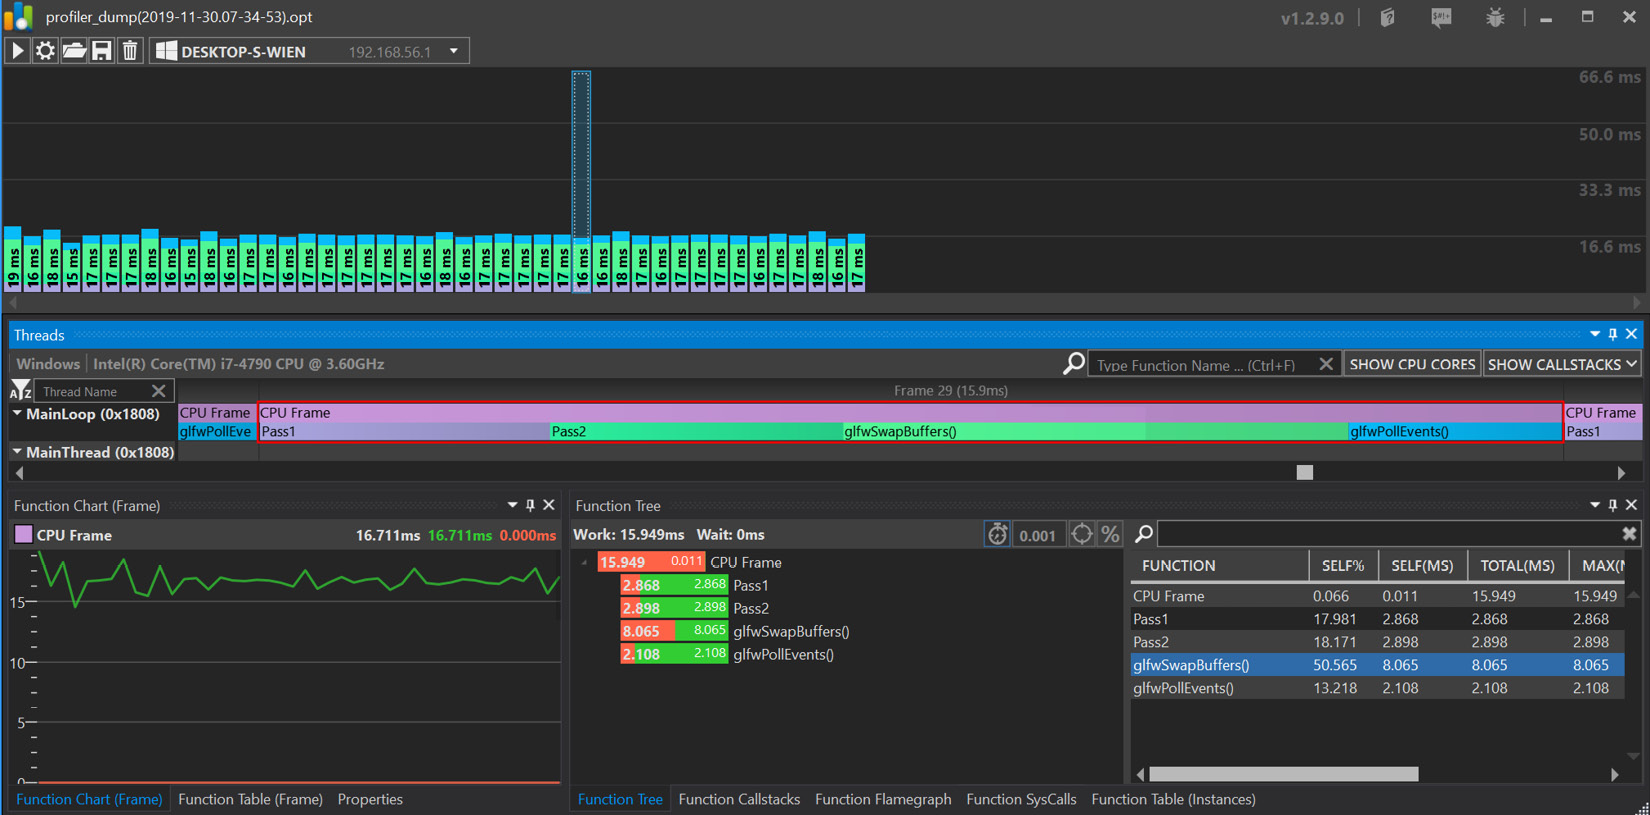
Figure 2.5 – The Optick GUI
Note
Building the Optick GUI for Linux or macOS is not possible since it is written in C# and requires at least the MS VS 2010 CMake generator.
There's more…
Optick provides integration plugins for Unreal Engine 4. For more details, please refer to the documentation at https://github.com/bombomby/optick/wiki/UE4-Optick-Plugin.
At the time of writing this book, building the Optick GUI was only possible on Windows. Therefore, Linux and OS X can only be used for data collection.