Book Image

Designing Purpose-Built Drones for Ardupilot Pixhawk 2.1

By : Ty Audronis
Book Image

Designing Purpose-Built Drones for Ardupilot Pixhawk 2.1

By: Ty Audronis

Overview of this book

The Ardupilot platform is an application ecosystem that encompasses various OS projects for drone programming, flight control, and advanced functionalities.The Ardupilot platform supports many Comms and APIs, such as DroneKit, ROS, and MAVLink. It unites OS drone projects to provide a common codebase. With the help of this book, you will have the satisfaction of building a drone from scratch and exploring its many recreational uses (aerial photography, playing, aerial surveillance, and so on). This book helps individuals and communities build powerful UAVs for both personal and commercial purposes. You will learn to unleash the Ardupilot technology for building, monitoring, and controlling your drones.This is a step-by-step guide covering practical examples and instructions for assembling a drone, building ground control unit using microcontrollers, QgroundControl, and MissionPlanner. You can further build robotic applications on your drone utilizing critical software libraries and tools from the ROS framework. With the help of DroneKit and MAVLink (for reliable communication), you can customize applications via cloud and mobile to interact with your UAV.
Table of Contents (16 chapters)
Title Page
Credits
About the Author
About the Reviewer
www.PacktPub.com
Customer Feedback
Preface

Programming the Pixhawk for our (basic) rover


There are two pieces of (free) software that you'll want. The first is your primary Pixhawk software (Mission Planner). The other is QgroundControl. Both are available from multiple sources, and a simple Google search will get you both.

Although we have the radio telemetry unit installed, on our very first startup of Pixhawk we're going to need to directly connect it to a computer via USB. Remember that plug on the side of the Pixhawk cube? That's our computer USB plug. It's best to use a laptop (so you can use it in the field).

The wizard

After connecting the Pixhawk to our computer, start up the Mission Planner software. You'll be confronted with this requestor:

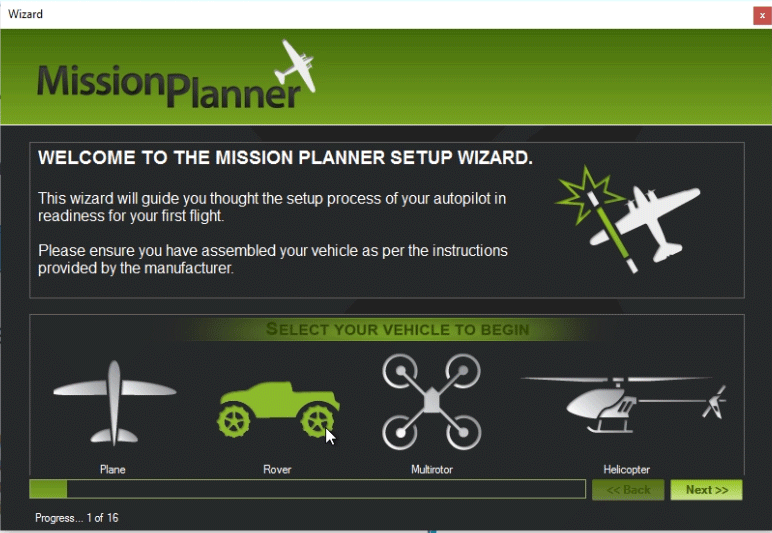
Obviously, you'll want to select Rover. This wizard will do the initial setup of your Pixhawk and calibrate it for use.

Next you simply select how the computer connects to the Pixhawk (as shown in the following screenshot):

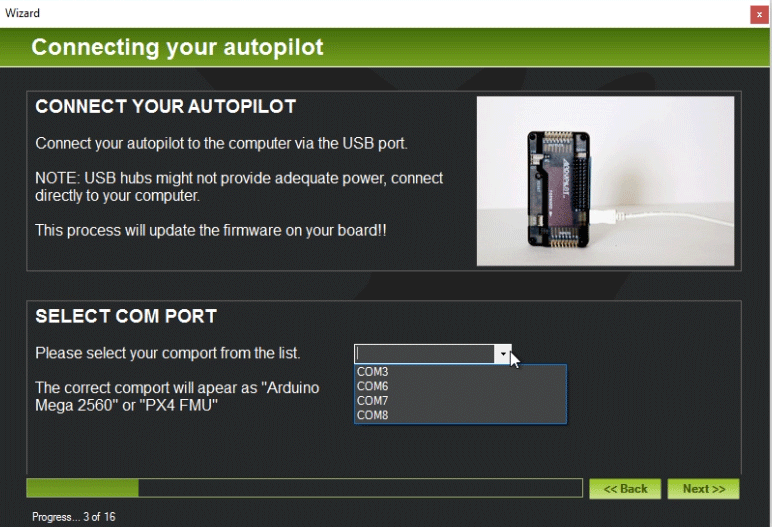
At this point, you must provide which port the Pixhawk is attached...