

Before you get started, you'll need to download and create a card with the Raspbian operating system. You are going to install Raspbian, an open source version of the Debian version of Linux, on your Raspberry Pi.
There are two approaches to getting Raspbian on your board. The board is getting popular enough that you can now buy an SD card that already has Rasbpian installed, or you can download it onto your personal computer and then install it on the card. If you are going to download a distribution, you need to decide if you are going to use a Windows computer to download and create an SD card, or a Linux machine.
No matter which machine you are going to use, you'll need to download an image. Open a browser window. Go to the Raspberry Pi site, www.raspberrypi.org, and select Downloads from the top of the page. This will give you a variety of download choices. Go to the Raspbian section and select the .zip file just to the right of the image identifier. This will download an archived file that has the image for your Raspbian operating system. Note the default username and password; you'll need those later.
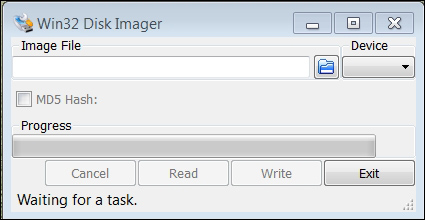
If you're using Windows, you'll need to unzip the file using an archiving program like 7-Zip. This will leave you with a file that has the .img extension, a file that can be imaged on your card. Next, you'll need a program that can write the image to the card. Use Image Writer if you are going to create your card using a Windows machine. You can find a link to this program at the top of the download section on the www.raspberrypi.org website. Plug your card into the PC, run this program, and you should see this:
Select the correct card and image; it should look something like this:
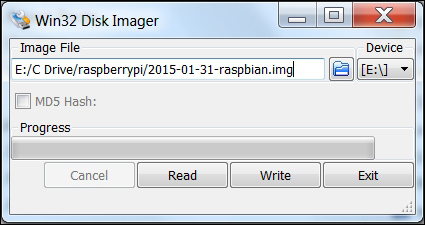
Then select Write. This will take some time, but when it is complete, eject the card from the PC.
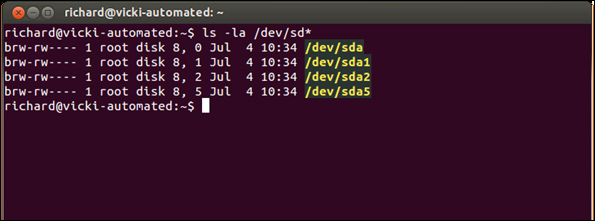
If you are using Linux, you'll need to unarchive the file and then write it to the card. You can do all of this with one command. However, you do need to find the /dev device label for your card. You can do this with the ls -la /dev/sd* command. If you run this before you plug in your card, you might see something like the following:
After plugging in your card, you might see something like the following:
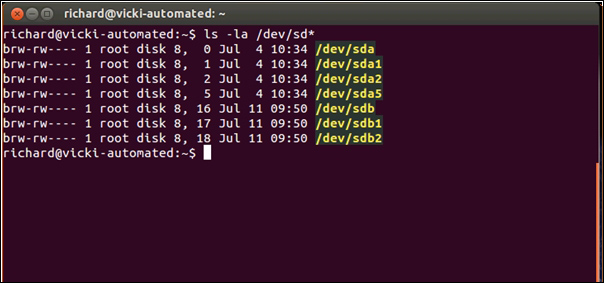
Note that your card is sdb. Now, go to the directory where you downloaded the archived image file and issue the following command:
sudo dd if=2015-01-31-raspbian.img of=/dev/sdX
The 2015-01-31-raspbian.img command will be replaced with the image file that you downloaded, and /dev/sdX will be replaced with your card ID; in this example, /dev/sdb.
Once your card image has been created, install it on the Raspberry Pi. You'll also need to plug your Raspberry Pi into the LAN cable, and the LAN cable into your wired LAN network.
Note
If you don't have a wired connection, you can complete the following steps by connecting your Raspberry Pi directly to a monitor, keyboard, and mouse.
Power the device. The POWER LED should light and your device should boot from the card. To configure the card, you'll need to access it remotely. To do this, you'll now need to connect to the device via SSH, a secure protocol that allows you to control one computer remotely from another computer.
One of the challenges of accessing the system remotely is that you need to know the IP address of your board. There is a way to discover this by using an IP scanner application. There are several scanners available for free; on Windows, a possible choice is Advanced IP Scanner, which is available from http://www.advanced-ip-scanner.com/. Here is what the program looks like when it is run:
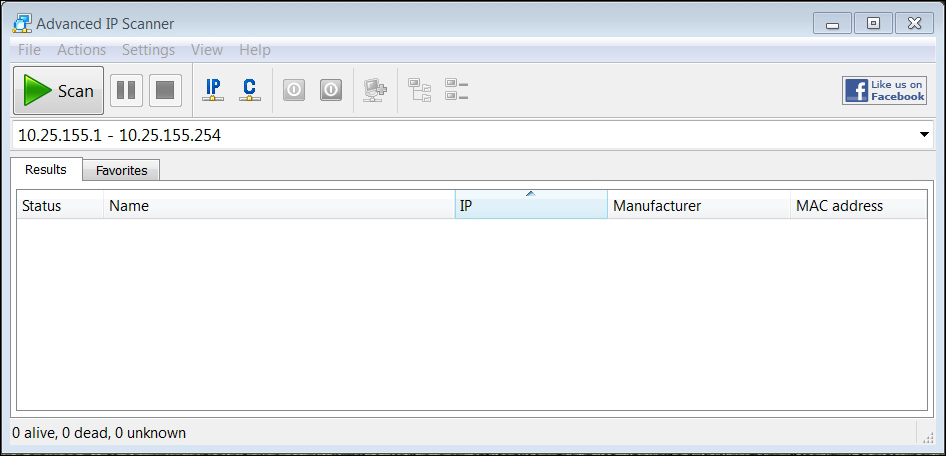
Clicking on the Scan selector scans for all the devices connected to the network. You can also do this in Linux; one application for IP scanning in Linux is called Nmap. To install Nmap, type in sudo apt-get install nmap. To run Nmap, type in sudo nmap -sP 10.25.155.1/154 and the scanner will scan the addresses from 10.25.155.1 to 10.25.155.154.
These scanners can let you know which addresses are being used, and this should then let you find your Raspberry Pi IP address. Since you are going to access your device via SSH, you'll also need an SSH terminal program running on your remote computer. If you are running Microsoft Windows, you can download such an application. One simple and easy choice is Putty. It is free and does a very good job of allowing you to save your configuration so you don't have to type it in each time. This program is available at www.putty.org.
Download Putty on your Microsoft Windows machine. Then run putty.exe. You should see a configuration window. It will look something like the following screenshot:

Type in the inet addr from the IP Scanner in the Host Name space and make sure that the SSH is selected. You may want to save this configuration under Raspberry Pi so you can reload it each time.
When you click on Open, the system will try to open a terminal window onto your Raspberry Pi via the LAN connection. The first time you do this, you will get a warning about an RSA key, as the two computers don't know about each other; so Windows is complaining that a computer it doesn't know is about to be connected in a fairly intimate way. Simply click on OK, and you should get a terminal with a login prompt, like the following screenshot:
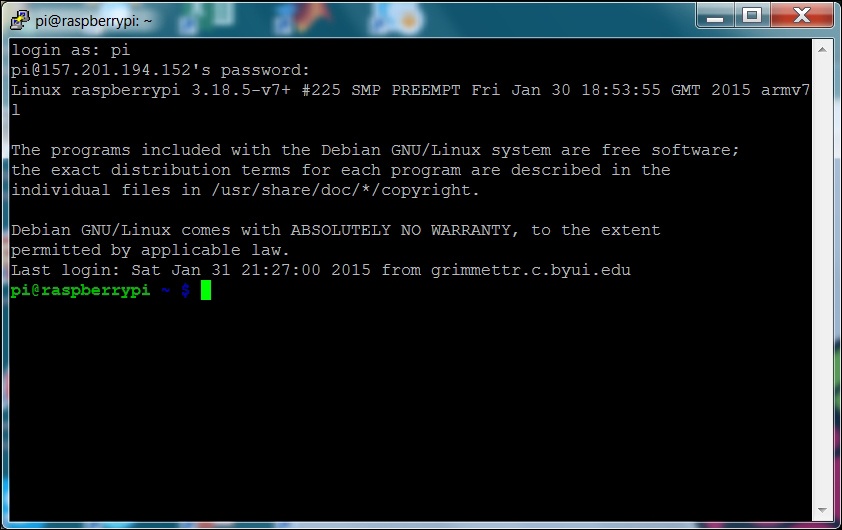
Now you can log in and issue commands to your Raspberry Pi. If you'd like to do this from a Linux machine, the process is even simpler. Bring up a terminal window and then type in ssh [email protected] –p 22, where xxx.xxx.xxx.xxx is the inet addr of your device. This will then bring you to the login screen of your Raspberry Pi, which should look similar to the previous screenshot.
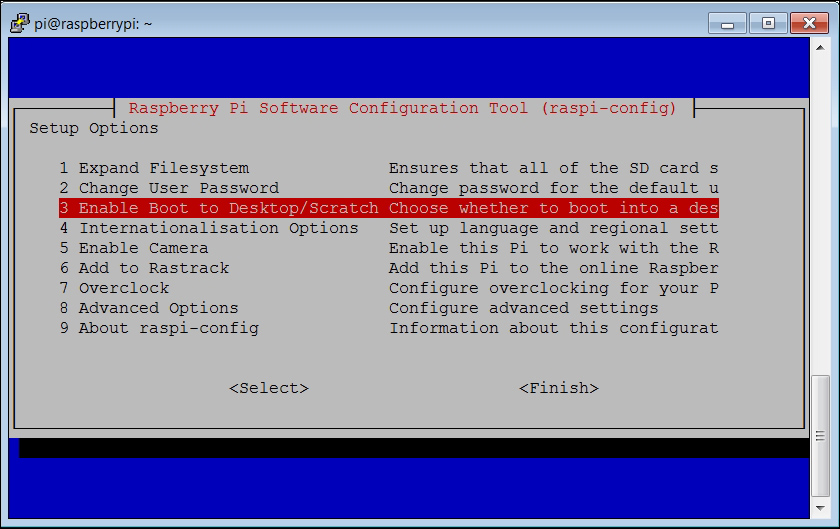
After your log in, you should get a screen that looks like the following:
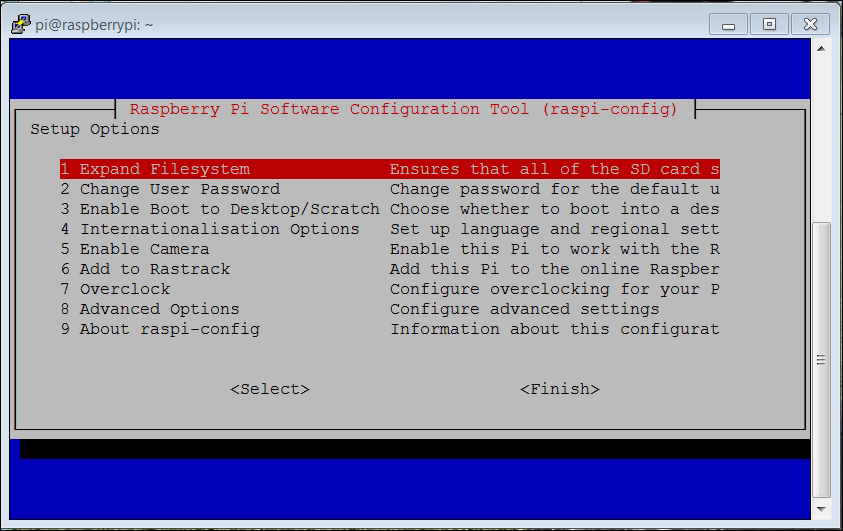
First, you'll want to expand the file system to take up the entire card. So, hit the Enter key, and you'll see the following screen:
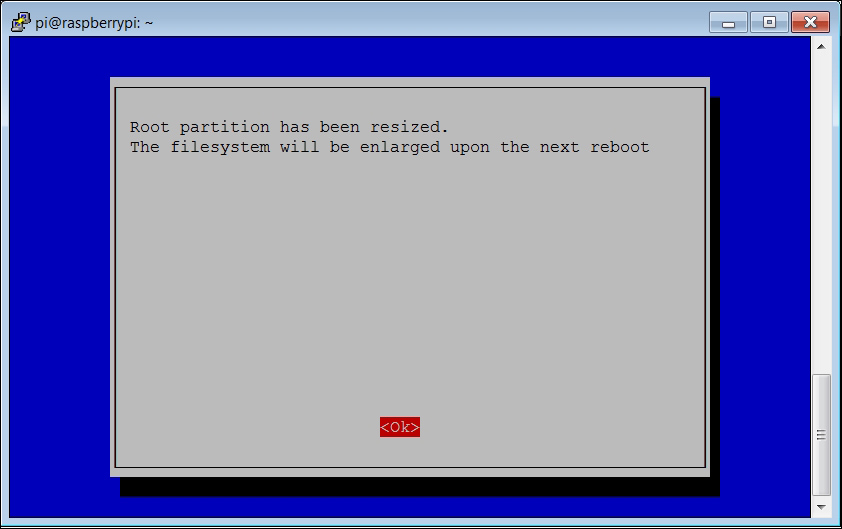
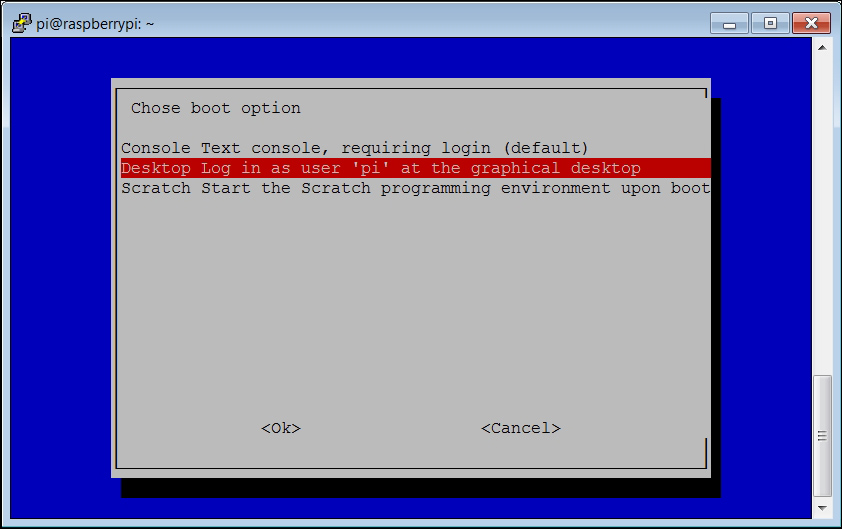
Hit Enter once again and you'll go back to the main configuration screen. Now, select the Enable Boot to Desktop/Scratch option.
When you hit Enter, you'll see the following screen:
You can also choose to overclock your device. This is a way for you to get higher performance from your system. However, there is a risk that you can end up with a system that has reliability problems.
Once you are done and are back at the main configuration menu, hit the Tab key until you are positioned over the <Finish> selection, then hit Enter. Then, hit Enter again so that you can reboot your Raspberry Pi. This time, when you log in, you will not see any configuration selections. However, if you ever want to change your configuration choices, you can run the configuration tool by typing in raspi-config at the command prompt.