
This recipe describes the tasks needed to create an APEX 4.0 application. You should have APEX 4.0 installed or have an account on Oracle's online APEX environment at http://apex.oracle.com and your web browser should be a modern browser like Microsoft Internet Explorer 7 or higher or Mozilla Firefox 1.0 or later. The starting point is the Oracle Application Express home page:
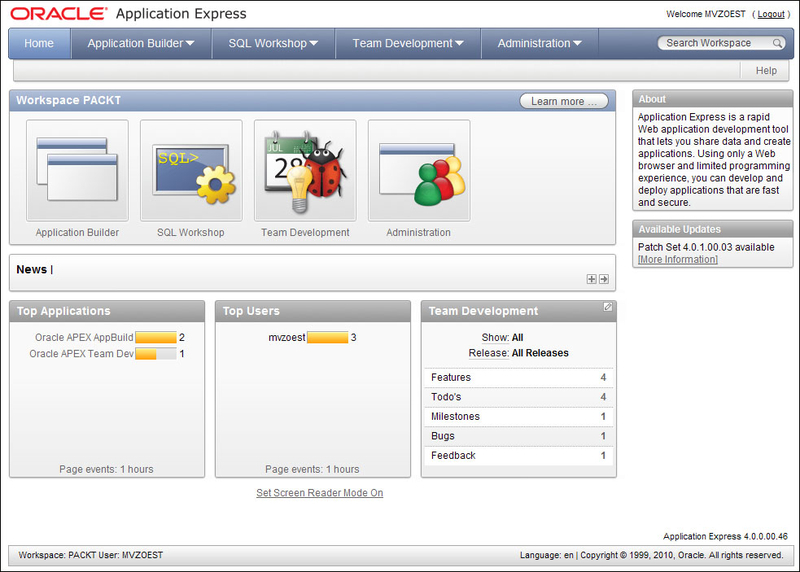
Click on the Application Builder icon on the left-hand side of the screen.
You will see a page where you can choose between database applications or websheet applications. Furthermore, you see already created applications.
Click on the Create button on the right-hand side of the screen. Two options are shown. You can now choose between a database application and a websheet application. We select the database application.
In APEX you have two ways of selecting and proceeding to the next step most of the time. Usually, there is an icon accompanied by a radio button. When you check the radio button, you must then click on the Next button to proceed. When you click on the icon, you automatically go to the next step. In this book, when there is the situation that you have to select one of the shown options, we will only tell which one of the options you should select. You can decide for yourself which way to select and proceed:

Select Database.
In the next step we can now choose between From Scratch, From Spreadsheet, and Demonstration Application. When you choose Demonstration Application, Oracle APEX creates an application which shows the possibilities of APEX. However, we want to create an application by ourselves, and we can install this demonstration application at a later time. For now, we select "From Scratch".
Enter a name and an application ID . Preferably choose a name which covers the goal of the application. In our case, we call the application
Intranet.Application ID is a generated and unique identification number, but you can also use some other number for your convenience.
At the Create Application radio group, leave this option to From Scratch.
Finally, select the schema where the tables that you want to use for your application will reside and click on Next.
The next step in the wizard is selecting pages. You can start with a blank page and, from that starting point, extend your APEX application. You can also choose to add reports and forms beforehand. At this point you don't actually define the content of the pages, you just create the "skeleton" of them.
We choose to add one blank page and proceed to the next step.
Now you can choose to include tabs in your application. Tabs are components that help you navigate through the application. For now, we are not going to use tabs, so select No Tabs.
The next step is the option to copy shared components from another application. Shared components are objects that can be used throughout the application, for example, a list of values or images. Because we create a simple application from scratch, we don't want to copy shared components from another application. Select No.
An authentication scheme is a means of allowing users access to our application. APEX offers different methods for this. More will be explained in another recipe. The scheme for this application will be selected in the next step.
Select the standard Application Express authentication scheme.
You can select the language used in your application, as well as where the user language should be derived from.
The last option in this step is the date format mask. Click on the LOV button next to the text item to get a list with possible date format masks and select one.
The last step in the wizard is the theme. Theme 1 and Theme 2 are basic themes. If you don't like all those colors, just select something like Theme 18. That is quite a simple theme.
We select Theme 1 and that completes the Create Page wizard.
Now that we have completed the wizard, we can click on the Create button to confirm. The application will be created and we will see a number of pages, depending on how many pages we already created in step 6.
Tip
Downloading the example code
You can download the example code files for all Packt books you have purchased from your account at http://www.packtpub.com. If you purchased this book elsewhere, you can visit http://www.packtpub.com/support and register to have the files e-mailed directly to you
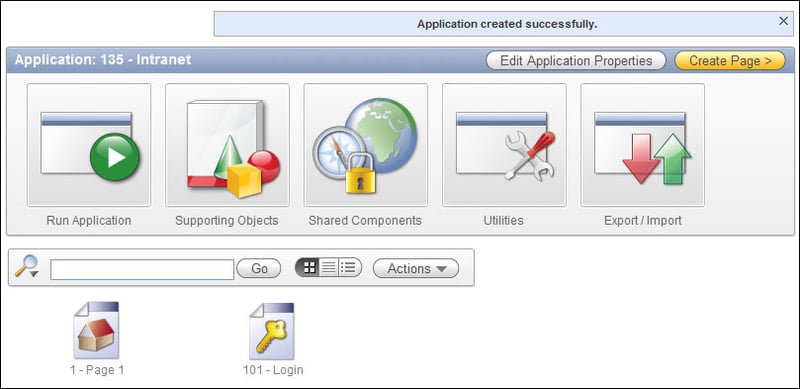
Depending on the type of authentication, we will also see page 101—Login. This is the default page APEX navigates to when you run an application using authentication. It is generated automatically with all functionalities to allow users to log in to our application.
Click on the large Run Application button to go to the login page.

We can log in on this page with the same credentials we use to gain access to the APEX development environment. So enter this username and password and click on the Login button.
Well, that's it! We've created and run our first Oracle APEX 4.0 application. We can now click on the pages to define them, or we can add new pages to extend our application. We can also click on the Run Application icon to see what has actually been created. Since we only included an empty page, we will see something like this—an empty application except for a single, also empty page:
