Sign In Start Free Trial
Account

Add to playlist

Create a Playlist

Modal Close icon
You need to login to use this feature.
  • Book Overview & Buying React Material-UI Cookbook
  • Table Of Contents Toc
React Material-UI Cookbook

React Material-UI Cookbook

By : Adam Boduch
3.5 (6)
close
close
React Material-UI Cookbook

React Material-UI Cookbook

3.5 (6)
By: Adam Boduch

Overview of this book

Material-UI is a component library for rendering UI elements, using modern best practices from React and Material Design. This book will show you how you can create impressive and captivating modern-day web apps by implementing Material Design considerations. The book is designed to help you use a variety of Material-UI components to enhance UI functionality, along with guiding you through React best practices, and using state, context, and other new React 16.8 features. You will start with layout and navigation, exploring the Grid component and understanding how it’s used to build layouts for your Material-UI apps. Using Material-UI components, you’ll then explore the technique of effectively presenting information. In later sections, you will also learn about the different components for user interactions such as the text input component and buttons. Finally, the book will get you up to speed with customizing the look and feel of your app, right from creating a Material-UI theme through to styling icons and text. By the end of this book, you will have developed the skills you need to improve the look and feel of your applications using Material-UI components.
Table of Contents (22 chapters)
close
close

Changing column direction

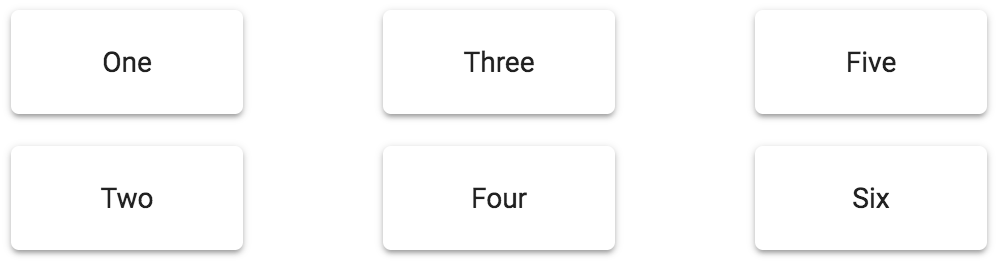
When using a fixed number of columns for your layout, content flows from left to right. The first grid item goes in the first column, the second item in the second column, and so on. There could be times when you need better control over which grid items go into which columns.

How to do it...

Let's say that you have a four-column layout, but you want the first and second items to go in the first column, the third and fourth items in the second, and so on. This involves using nested Grid containers, and changing the direction property, as follows:

import React from 'react';

import { withStyles } from '@material-ui/core/styles';
import Paper from '@material-ui/core/Paper';
import Grid from '@material-ui/core/Grid';
import Hidden from '@material-ui/core/Hidden';
import Typography from '@material-ui/core/Typography';

const styles = theme => ({
root: {
flexGrow: 1
},
paper: {
padding: theme.spacing(2),
textAlign: 'center',
color: theme.palette.text.secondary
}
});

const ColumnDirection = withStyles(styles)(({ classes }) => (
<div className={classes.root}>
<Grid container justify="space-around" spacing={4}>
<Grid item xs={3}>
<Grid container direction="column" spacing={2}>
<Grid item>
<Paper className={classes.paper}>
<Typography>One</Typography>
</Paper>
</Grid>
<Grid item>
<Paper className={classes.paper}>
<Typography>Two</Typography>
</Paper>
</Grid>
</Grid>
</Grid>
<Grid item xs={3}>
<Grid container direction="column" spacing={2}>
<Grid item>
<Paper className={classes.paper}>
<Typography>Three</Typography>
</Paper>
</Grid>
<Grid item>
<Paper className={classes.paper}>
<Typography>Four</Typography>
</Paper>
</Grid>
</Grid>
</Grid>
<Grid item xs={3}>
<Grid container direction="column" spacing={2}>
<Grid item>
<Paper className={classes.paper}>
<Typography>Five</Typography>
</Paper>
</Grid>
<Grid item>
<Paper className={classes.paper}>
<Typography>Six</Typography>
</Paper>
</Grid>
</Grid>
</Grid>
<Grid item xs={3}>
<Grid container direction="column" spacing={2}>
<Grid item>
<Paper className={classes.paper}>
<Typography>Seven</Typography>
</Paper>
</Grid>
<Grid item>
<Paper className={classes.paper}>
<Typography>Eight</Typography>
</Paper>
</Grid>
</Grid>
</Grid>
</Grid>
</div>
));

export default ColumnDirection;

Here's what the result looks like at a pixel width of 725:

Instead of values flowing from left to right, you have complete control over which column the item is placed in.

You might have noticed that the font looks different, compared to other examples in this chapter. This is because of the Typography component used to style the text and apply Material-UI theme styles. Most Material-UI components that display text don't require you to use Typography, but Paper does.

How it works...

There's a lot going on with this example, so let's start by taking a look at just the first item in the Grid code:

<Grid item xs={3}>
<Grid container direction="column" spacing={2}>
<Grid item>
<Paper className={classes.paper}>
<Typography>One</Typography>
</Paper>
</Grid>
<Grid item>
<Paper className={classes.paper}>
<Typography>Two</Typography>
</Paper>
</Grid>
</Grid>
</Grid>

The Grid item is using an xs value of 4, to create the four-column layout. Essentially, these items are columns. Next, you have a nested Grid container. This container has a direction property value of column. This is where you can place the Grid items that belong in this column, and they'll flow from top to bottom, instead of from left to right. Each column in this grid follows this pattern.

There's more...

There might be times when hiding the rightmost column makes more sense than trying to accommodate it with the screen width. You can use the Hidden component for this. It's already imported in the example, as follows:

import Hidden from '@material-ui/core/Hidden';

To use it, you wrap the last column with it. For example, here's what the last column looks like now:

<Grid item xs={3}>
<Grid container direction="column" spacing={2}>
<Grid item>
<Paper className={classes.paper}>
<Typography>Seven</Typography>
</Paper>
</Grid>
<Grid item>
<Paper className={classes.paper}>
<Typography>Eight</Typography>
</Paper>
</Grid>
</Grid>
</Grid>

If you want to hide this column at a certain breakpoint, you can wrap the column with Hidden, like this:

<Hidden smDown>
<Grid item xs={3}>
<Grid container direction="column" spacing={2}>
<Grid item>
<Paper className={classes.paper}>
<Typography>Seven</Typography>
</Paper>
</Grid>
<Grid item>
<Paper className={classes.paper}>
<Typography>Eight</Typography>
</Paper>
</Grid>
</Grid>
</Grid>
</Hidden>

The smDown property tells the Hidden component to hide its children when the sm breakpoint or lower is reached. Here's what the result looks like at a pixel width of 1000:

The last column is displayed because the sm breakpoint is smaller than the screen size. Here's the result at a pixel screen width of 550, without the last column displayed:

See also

CONTINUE READING
83
Tech Concepts
36
Programming languages
73
Tech Tools
Icon Unlimited access to the largest independent learning library in tech of over 8,000 expert-authored tech books and videos.
Icon Innovative learning tools, including AI book assistants, code context explainers, and text-to-speech.
Icon 50+ new titles added per month and exclusive early access to books as they are being written.
React Material-UI Cookbook
notes
bookmark Notes and Bookmarks search Search in title playlist Add to playlist download Download options font-size Font size

Change the font size

margin-width Margin width

Change margin width

day-mode Day/Sepia/Night Modes

Change background colour

Close icon Search
Country selected

Close icon Your notes and bookmarks

Confirmation

Modal Close icon
claim successful

Buy this book with your credits?

Modal Close icon
Are you sure you want to buy this book with one of your credits?
Close
YES, BUY

Submit Your Feedback

Modal Close icon
Modal Close icon
Modal Close icon