
Installing the demo site
Now that the local environment is ready, we can clone the repository of the demo site.
Cloning and building
The repository has two branches, one with the final website (the same one that you will have at the end of this book) and one with just the CMS configured. We’ll start with the latter, but if you want to see the final result you can switch to the first one.
Start by cloning the repository in a local folder. Remember that Docker Desktop limits the folder that can be mounted in a container, so choose one that is included (usually a subfolder of your home directory is the safer choice):
git clone https://github.com/PacktPublishing/Modernizing-Drupal-10-Theme-Development
Then, cd to that folder and start the DDEV stack:
ddev start
This command starts the stack but doesn’t build the website; to do that, you must run this command:
ddev build
build is a custom command, not part of the original DDEV installation, and it’s available because it has been defined in the .ddev/commands/web folder of the repository you’ve cloned. In the .ddev/commands folder, you will find some other custom commands that we have added to DDEV, and you can add your own too. Commands are bash scripts that run on your host shell or in one of the running containers, depending on which folder contains it:
.ddev/commands/host: The host computer.ddev/commands/web: The web container (where the web server and the PHP interpreter run).ddev/commands/db: The container that runs MySQL
Note
The folder that contains the website is mounted into the web container. The files are exactly the same, but they can be accessed from your local computer and from the web container. Bear in mind that the absolute path may be different between the two systems. On your local computer, it will be something such as /Users/lussoluca/Sites/modern_drupal_themes, but on the web container, it will always be /var/www/html. You can connect to a shell that runs in the web container using the ddev ssh command. To close the web container shell and return to the host shell, just type exit and hit Return.
Internally, the build command uses a set of tools to download all the required dependencies and install the website.
Every time you want to reinstall the demo website from scratch, you can execute the build command again.
DDEV provides some other useful commands, as follows:
stop: Stop and remove the containers of a project. Does not lose or harm anything.describe: Get a detailed description of a running DDEV project.delete: Remove all project information (including the database) for an existing project.
And there are many more—just type ddev and hit Enter to see them all.
Note
During the start process, DDEV may print a message such as “ssh-agent container is running: If you want to add authentication to the ssh-agent container, run 'ddev auth ssh' to enable your keys.” You can safely ignore this warning in our context.
Composer
All the external PHP dependencies needed to run the website (such as contrib modules and development tools) are not versioned in the Git repository. Instead, they’re downloaded from the internet using a tool called Composer. Composer manages packages using a Semantic Versioning approach, where every package has a version in the form of major.minor.patch (more information at https://semver.org). The application and its dependencies are described in a file called composer.json, usually located in the root folder of the project. Composer has a lot of commands, but the three most used are shown next.
Here’s the first one:
composer update –prefer-dist
This updates all the packages to the latest version (always respecting the Semantic Versioning rules). This command also updates (or creates) a composer.lock file that stores the exact version that has been installed for each package. The composer.lock file must be added to the Git repository and is mandatory to allow every developer on the team, the CI/CD pipelines, and remote environments to have the same version of every dependency.
The second most used Composer command is this one:
composer install –prefer-dist
This reads from a composer.lock file and downloads the exact version of every package.
Finally, when you need a new package (for example, the WebProfiler contributed module) you can run the following command:
composer require drupal/webprofiler
The ddev build command already executes composer install for you, and you can see the list of required packages in the composer.json file in the root folder of the project.
Configuration management
Starting from Drupal 8, the system exports all the configuration needed to recreate the site into a folder, where each configuration is stored as a YAML file. A complex website can have hundreds of such files. Drupal doesn’t use those files directly; they must be imported into the database (this means that if you change one of those files manually, it needs to be imported again to be seen by Drupal). A way to package configurations is to create an installation profile. Drupal core has some ready-to-use installation profiles, such as Standard, Minimal, and Umami (you can see the full list by installing Drupal using the web interface or by looking in the core/profiles folder). In our demo website, we have defined a new installation profile, called AlpsTrips, in the web/profiles folder.
Just about everything in Drupal has a double name—one for humans (such as the profile name, AlpsTrips) and one for machines (that has more restrictive rules, such as no spaces, only some special characters allowed, and so on). The machine name for the AlpsTrips profile is alps_trips_profile.
Drush
One of the packages downloaded by Composer is Drush (https://www.drush.org/latest/). Drush is not a Drupal module and it isn’t used by the website itself; it’s used to automate operations on a Drupal website from the command line. Tasks such as installing Drupal, managing content or users, installing modules, and so on can all be done without even opening a browser instance. To see all the available Drush commands, you can run the following:
ddev drush
DDEV will forward the call to the Drush instance present in the web container.
Default Content
The content of a Drupal website stored in the same database that is used for configurations, but unlike configurations, the core of Drupal doesn’t have any tools for exporting them. To style the website, we need some content to work on (but also for showing the work in progress to the customer, or for writing end-to-end tests). This can be done in a lot of different ways; the community has not yet agreed on the tool to be used by default.
One solution is to use the Default Content contributed module (https://www.drupal.org/project/default_content).
On the demo website repository, we've used Default Content to export a set of dummy contents to a custom module (located on the web/modules/custom/demo folder). When this module is enabled, the contents are automatically imported into Drupal.
Yarn
The latest tool that is used to build our website is Yarn. Yarn is a package manager for Node.js, and we need it for the same reason we need Composer for PHP packages: we don’t want to save the dependencies in our repository. Similar to Composer, Yarn uses two files—package.json and yarn.lock—to describe which packages to download and at which exact version. Yarn can also be used to define and run custom scripts, such as building CSS and JavaScript assets.
All of those tools are used by our build command to go from a set of files in a repository up to a fully functional Drupal website. The tasks that are executed are set out here:
- Use Composer to download all the required PHP dependencies:
composerinstall –prefer-dist. - Use Drush to install Drupal from a set of configurations.
- Use the Default Content module to import dummy content.
- Use Yarn to download all the required JavaScript dependencies and to build the theme assets.
After the build command ends, you can open a browser and start navigating. The website URL is printed at the end of the ddev start command. At any time, you can use the ddev describe command to print a list of details about the project. The URL you’re looking for is the one for the web service:
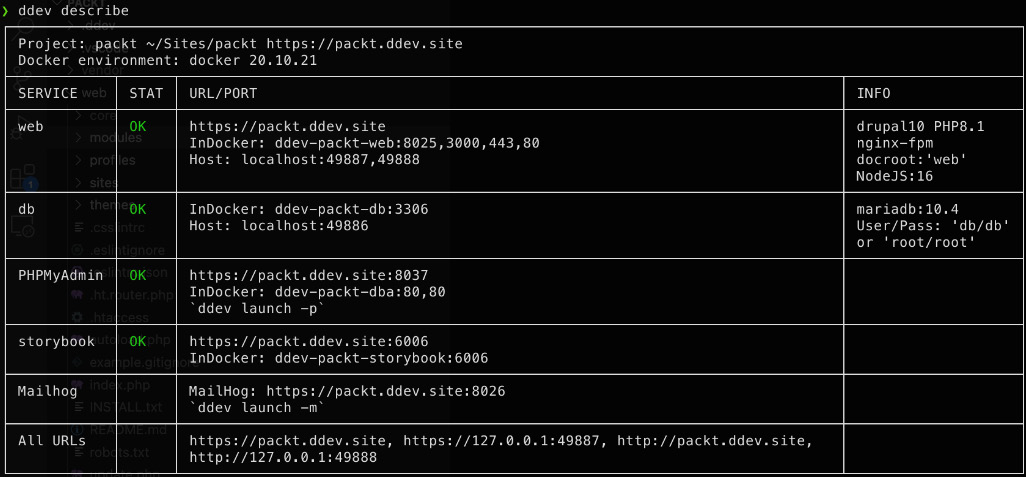
Figure 1.5 – Using ddev describe to list all the available services for a project
In this case (and probably also for you), the URL is https://packt.ddev.site, and the website should look like this:
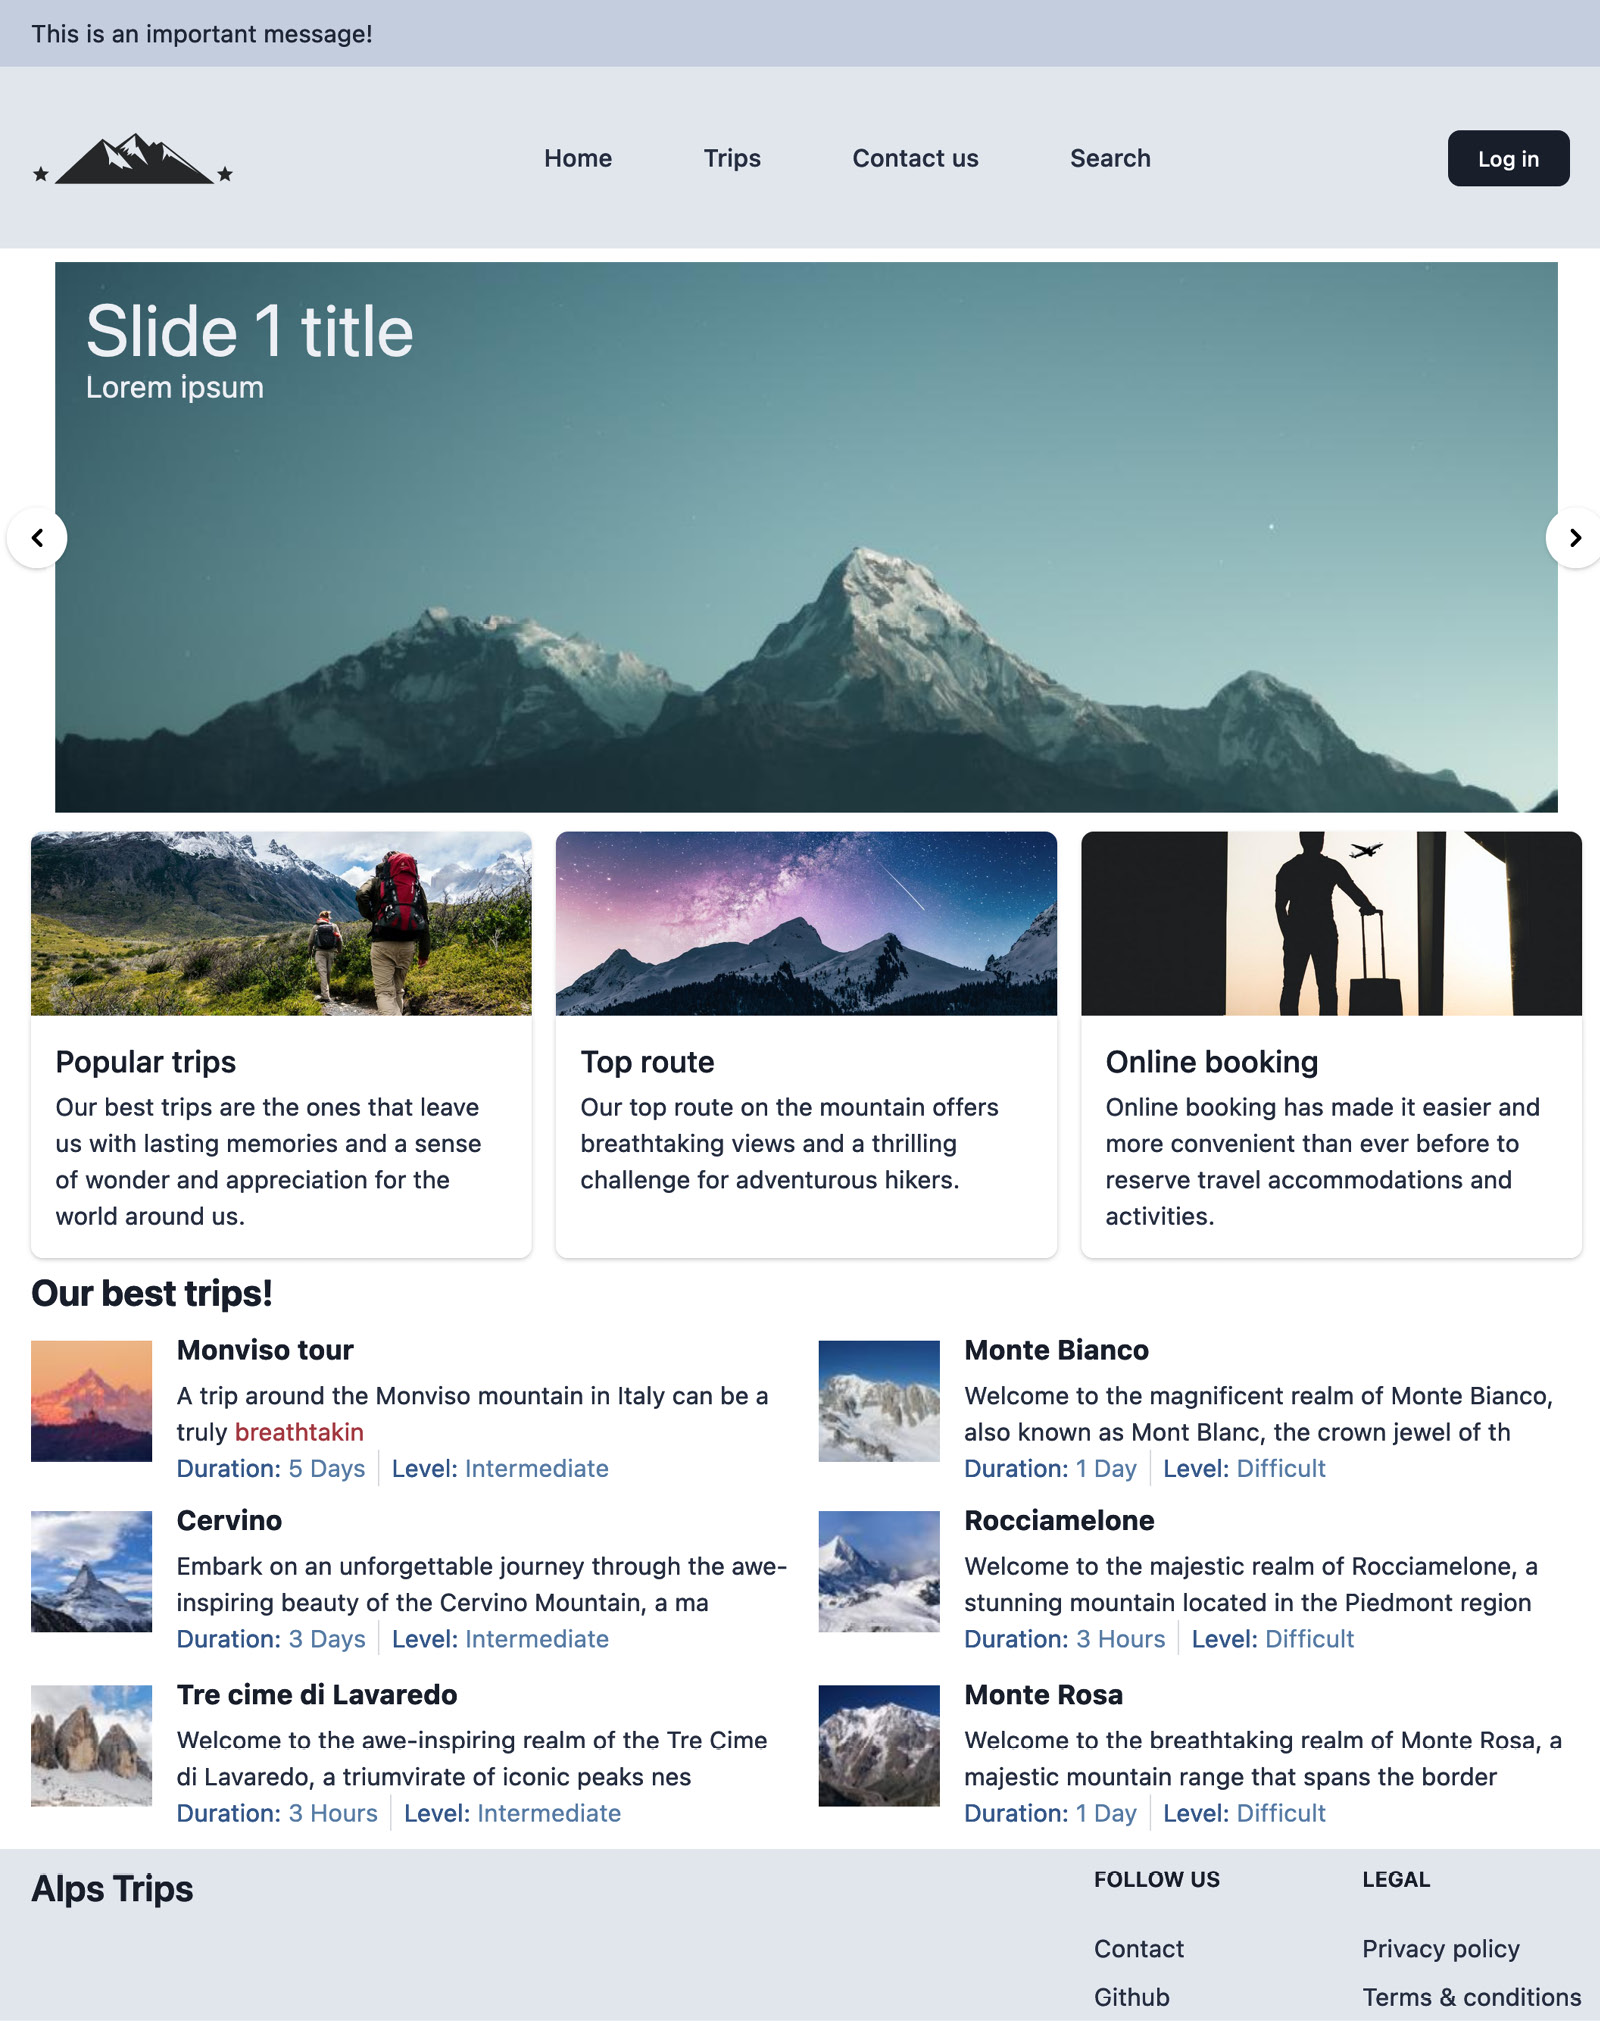
Figure 1.6 – The home page of the AlpsTrips website
You’re navigating as an anonymous user; if you want to administer the site, you must log in as a user with some administrative privileges. During the build, one such user has been created for you, with admin as username and admin as password. To log in, you can do the following:
- Click on the Log in menu item
- Navigate to https://packt.ddev.site/user/login
After submitting the credentials, you should see some more elements, such as a dark toolbar at the top of every page. From there, you can access every configuration page of Drupal.
Note
The admin user created during the installation phase of Drupal has too much power. The permissions enforcement and the access checks don’t run for that user. In a real project, we suggest you create a new user, with only the permissions required.
The demo website is packed with everything you will encounter in a standard Drupal website, so let’s explore it and review all the concepts we’ll need to style it.