If you want to learn the entire process of developing professional web applications with Python and Django, then this book is for you. In the process of building four professional Django projects, you will learn about Django 3 features, how to solve common web development problems, how to implement best practices, and how to successfully deploy your applications.
In this book, you will build a blog application, a social image bookmarking website, an online shop, and an e-learning platform. Step-by-step guidance will teach you how to integrate popular technologies, enhance your applications with AJAX, create RESTful APIs, and set up a production environment for your Django projects.
By the end of this book, you will have mastered Django 3 by building advanced web applications.
First, let's allow users to share posts by sending them via email. Take a minute to think about how you could use views, URLs, and templates to create this functionality using what you learned in the preceding chapter. In order to allow your users to share posts via email, you will need to do the following things:
Create a form for users to fill in their name, their email, the email recipient, and optional comments
Create a view in the views.py file that handles the posted data and sends the email
Add a URL pattern for the new view in the urls.py file of the blog application
Create a template to display the form
Creating forms with Django
Let's start by building the form to share posts. Django has a built-in forms framework that allows you to create forms in an easy manner. The forms framework makes it simple to define the fields of your form, specify how they have to be displayed, and indicate how they have to validate input data. The Django forms framework offers a flexible way to render forms and handle data.
Django comes with two base classes to build forms:
Form: Allows you to build standard forms
ModelForm: Allows you to build forms tied to model instances
First, create a forms.py file inside the directory of your blog application and make it look like this:
from django import forms
classEmailPostForm(forms.Form):
name = forms.CharField(max_length=25)
email = forms.EmailField()
to = forms.EmailField()
comments = forms.CharField(required=False,
widget=forms.Textarea)
This is your first Django form. Take a look at the code. You have created a form by inheriting the base Form class. You use different field types for Django to validate fields accordingly.
Forms can reside anywhere in your Django project. The convention is to place them inside a forms.py file for each application.
The name field is CharField. This type of field is rendered as an <input type="text"> HTML element. Each field type has a default widget that determines how the field is rendered in HTML. The default widget can be overridden with the widget attribute. In the comments field, you use a Textarea widget to display it as a <textarea> HTML element instead of the default <input> element.
Field validation also depends on the field type. For example, the email and to fields are EmailField fields. Both fields require a valid email address; the field validation will otherwise raise a forms.ValidationError exception and the form will not validate. Other parameters are also taken into account for form validation: you define a maximum length of 25 characters for the name field and make the comments field optional with required=False. All of this is also taken into account for field validation. The field types used in this form are only a part of Django form fields. For a list of all form fields available, you can visit https://docs.djangoproject.com/en/3.0/ref/forms/fields/.
Handling forms in views
You need to create a new view that handles the form and sends an email when it's successfully submitted. Edit the views.py file of your blog application and add the following code to it:
from .forms import EmailPostForm
def post_share(request, post_id):
# Retrieve postby id
post = get_object_or_404(Post, id=post_id, status='published')
if request.method == 'POST':
    # Form was submitted
    form = EmailPostForm(request.POST)
ifform.is_valid():
# Form fields passed validation
cd = form.cleaned_data
# ... send email
else:
form = EmailPostForm()
return render(request, 'blog/post/share.html', {'post': post,
'form': form})
This view works as follows:
You define the post_share view that takes the request object and the post_id variable as parameters.
You use the get_object_or_404() shortcut to retrieve the post by ID and make sure that the retrieved post has a published status.
You use the same view for both displaying the initial form and processing the submitted data. You differentiate whether the form was submitted or not based on the request method and submit the form using POST. You assume that if you get a GET request, an empty form has to be displayed, and if you get a POST request, the form is submitted and needs to be processed. Therefore, you use request.method == 'POST' to distinguish between the two scenarios.
The following is the process to display and handle the form:
When the view is loaded initially with a GET request, you create a new form instance that will be used to display the empty form in the template:
form = EmailPostForm()
The user fills in the form and submits it via POST. Then, you create a form instance using the submitted data that is contained in request.POST:
if request.method == 'POST':
# Form was submitted
form = EmailPostForm(request.POST)
After this, you validate the submitted data using the form's is_valid() method. This method validates the data introduced in the form and returns True if all fields contain valid data. If any field contains invalid data, then is_valid() returns False. You can see a list of validation errors by accessing form.errors.
If the form is not valid, you render the form in the template again with the submitted data. You will display validation errors in the template.
If the form is valid, you retrieve the validated data by accessing form.cleaned_data. This attribute is a dictionary of form fields and their values.
If your form data does not validate, cleaned_data will contain only the valid fields.
Now, let's explore how to send emails using Django to put everything together.
Sending emails with Django
Sending emails with Django is pretty straightforward. First, you need to have a local Simple Mail Transfer Protocol (SMTP) server, or you need to define the configuration of an external SMTP server by adding the following settings to the settings.py file of your project:
EMAIL_HOST: The SMTP server host; the default is localhost
EMAIL_PORT: The SMTP port; the default is 25
EMAIL_HOST_USER: The username for the SMTP server
EMAIL_HOST_PASSWORD: The password for the SMTP server
EMAIL_USE_TLS: Whether to use a Transport Layer Security (TLS) secure connection
EMAIL_USE_SSL: Whether to use an implicit TLS secure connection
If you can't use an SMTP server, you can tell Django to write emails to the console by adding the following setting to the settings.py file:
By using this setting, Django will output all emails to the shell. This is very useful for testing your application without an SMTP server.
If you want to send emails but you don't have a local SMTP server, you can probably use the SMTP server of your email service provider. The following sample configuration is valid for sending emails via Gmail servers using a Google account:
The send_mail() function takes the subject, message, sender, and list of recipients as required arguments. By setting the optional argument fail_silently=False, you are telling it to raise an exception if the email couldn't be sent correctly. If the output you see is 1, then your email was successfully sent.
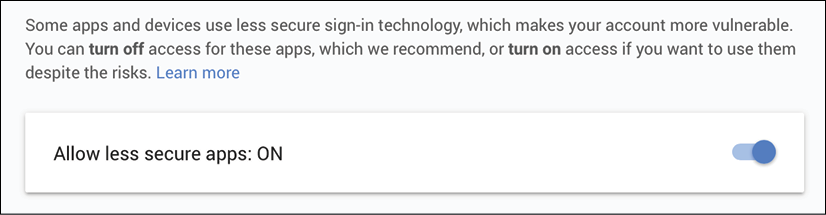
If you are sending emails using Gmail with the preceding configuration, you will have to enable access for less secure applications at https://myaccount.google.com/lesssecureapps, as follows:
Figure 2.1: The Google less secure application access screen
Edit the post_share view in the views.py file of the blog application, as follows:
from django.core.mail import send_maildefpost_share(request, post_id):# Retrieve post by id
post = get_object_or_404(Post, id=post_id, status='published')
sent = Falseif request.method == 'POST':
# Form was submitted
form = EmailPostForm(request.POST)
if form.is_valid():
# Form fields passed validation
cd = form.cleaned_data
post_url = request.build_absolute_uri(post.get_absolute_url())subject = f"{cd['name']} recommends you read " \f"{post.title}"message = f"Read {post.title} at {post_url}\n\n" \f"{cd['name']}\'s comments: {cd['comments']}"send_mail(subject, message, '[email protected]',[cd['to']])sent = Trueelse:
form = EmailPostForm()
return render(request, 'blog/post/share.html', {'post': post,
'form': form,
'sent': sent})
Replace [email protected] with your real email account if you are using an SMTP server instead of the console EmailBackend.
In the code above you declare a sent variable and set it to True when the post was sent. You will use that variable later in the template to display a success message when the form is successfully submitted.
Since you have to include a link to the post in the email, you retrieve the absolute path of the post using its get_absolute_url() method. You use this path as an input for request.build_absolute_uri() to build a complete URL, including the HTTP schema and hostname. You build the subject and the message body of the email using the cleaned data of the validated form and, finally, send the email to the email address contained in the to field of the form.
Now that your view is complete, remember to add a new URL pattern for it. Open the urls.py file of your blog application and add the post_share URL pattern, as follows:
After creating the form, programming the view, and adding the URL pattern, you are only missing the template for this view. Create a new file in the blog/templates/blog/post/ directory and name it share.html. Add the following code to it:
{% extends "blog/base.html" %}{% block title %}Share a post{% endblock %}{% block content %}{% if sent %}<h1>E-mail successfully sent</h1><p>
"{{ post.title }}" was successfully sent to {{ form.cleaned_data.to }}.
</p>{% else %}<h1>Share "{{ post.title }}" by e-mail</h1><formmethod="post">{{ form.as_p }}{% csrf_token %}<inputtype="submit"value="Send e-mail"></form>{% endif %}{% endblock %}
This is the template to display the form or a success message when it's sent. As you will notice, you create the HTML form element, indicating that it has to be submitted by the POST method:
<form method="post">
Then, you include the actual form instance. You tell Django to render its fields in HTML paragraph <p> elements with the as_p method. You can also render the form as an unordered list with as_ul or as an HTML table with as_table. If you want to render each field, you can iterate through the fields, instead of using {{ form.as_p }} as in the following example:
{% for field in form %}<div>{{ field.errors }}{{ field.label_tag }}{{ field }}</div>{% endfor %}
The {% csrf_token %} template tag introduces a hidden field with an autogenerated token to avoid cross-site request forgery (CSRF) attacks. These attacks consist of a malicious website or program performing an unwanted action for a user on your site. You can find more information about this at https://owasp.org/www-community/attacks/csrf.
The preceding tag generates a hidden field that looks like this:
By default, Django checks for the CSRF token in all POST requests. Remember to include the csrf_token tag in all forms that are submitted via POST.
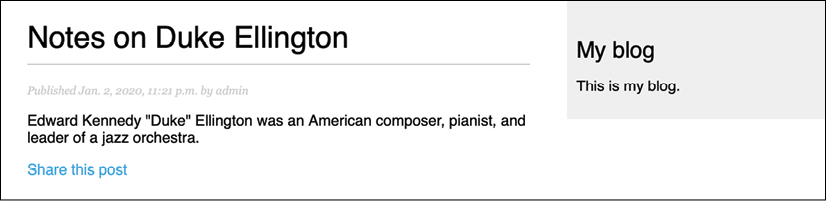
Edit the blog/post/detail.html template and add the following link to the share post URL after the {{ post.body|linebreaks }} variable:
<p><ahref="{% url "blog:post_share" post.id %}">
Share this post
</a></p>
Remember that you are building the URL dynamically using the {% url %} template tag provided by Django. You are using the namespace called blog and the URL named post_share, and you are passing the post ID as a parameter to build the absolute URL.
Now, start the development server with the python manage.py runserver command and open http://127.0.0.1:8000/blog/ in your browser. Click on any post title to view its detail page. Under the post body, you should see the link that you just added, as shown in the following screenshot:
Figure 2.2: The post detail page, including a link to share the post
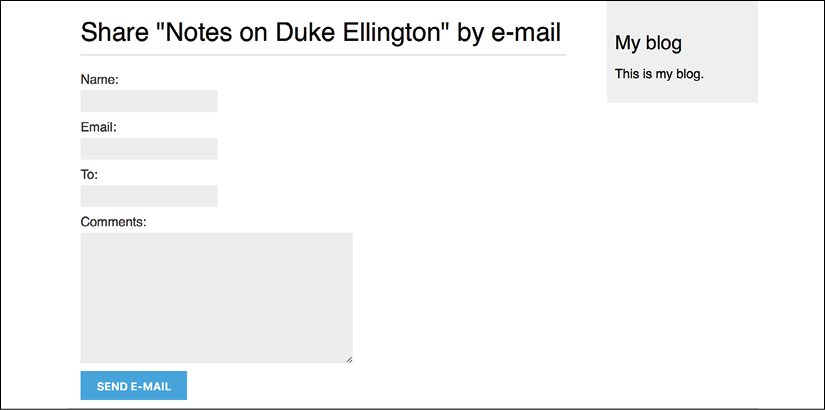
Click on Share this post, and you should see the page, including the form to share this post by email, as follows:
Figure 2.3: The page to share a post via email
CSS styles for the form are included in the example code in the static/css/blog.css file. When you click on the SEND E-MAIL button, the form is submitted and validated. If all fields contain valid data, you get a success message, as follows:
Figure 2.4: A success message for a post shared via email
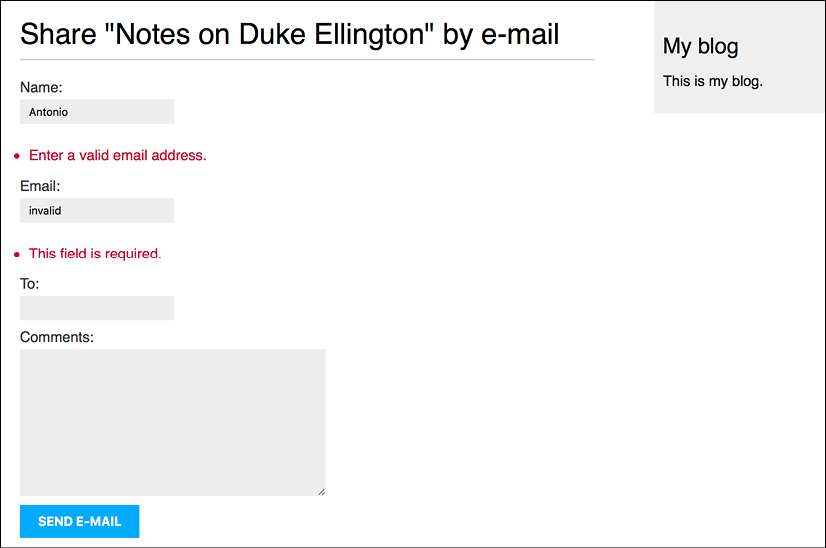
If you input invalid data, the form is rendered again, including all validation errors:
Figure 2.5: The share post form displaying invalid data errors
Note that some modern browsers will prevent you from submitting a form with empty or erroneous fields. This is because of form validation done by the browser based on field types and restrictions per field. In this case, the form won't be submitted and the browser will display an error message for the fields that are wrong.
Your form for sharing posts by email is now complete. Let's now create a comment system for your blog.
Read this chapter and the full book FREE of cost - No Credit card required!
Plus access over 8,000 other expert tech books and videos just by signing up - No commitment!
CONTINUE READING
83
Tech Concepts
36
Programming languages
73
Tech Tools
Unlimited access to the largest independent learning library in tech of over 8,000 expert-authored tech books and videos.
Innovative learning tools, including AI book assistants, code context explainers, and text-to-speech.
50+ new titles added per month and exclusive early access to books as they are being written.


 Free Chapter