We're going to upgrade the Drupal core code first. Here are the steps:
2. You should have your local
drupal-6.13folder on your local FTP side (left side) and your Drupal site on your right side in the FTP window.3. Open up
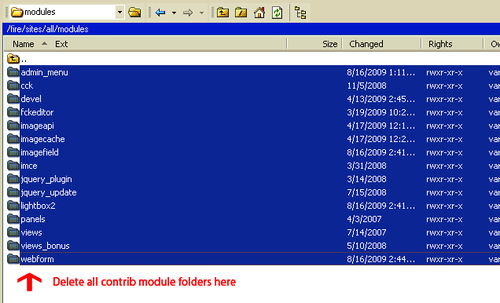
/sites/all/modulesand delete your entire contributed module list—you can safely delete all the contributed module code as you'll be adding the new Drupal 6.x versions during the upgrade process. It's a good idea to remove the legacy module folders first.
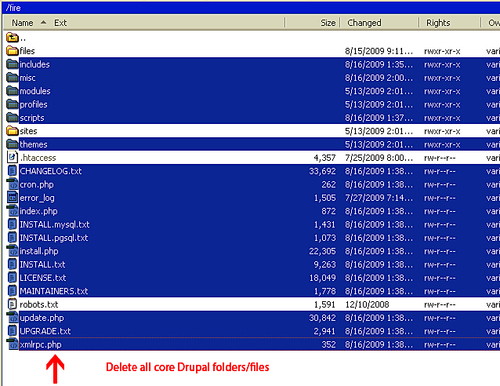
5. Delete all of your core Drupal files taking care not to delete the
/sitesor/filesfolders. Do not delete your.htaccess, robots.txtfiles, or any other files you may have added custom code to either. This includesphp.ini. These files can remain in your Drupal directory.
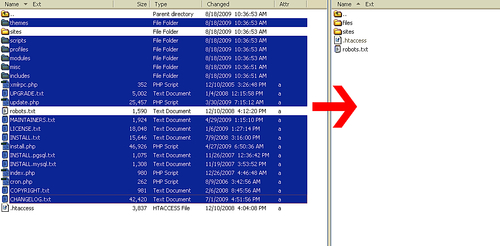
6. Move your Drupal 6.13 files from your local side to your remote server—this will add all of the Drupal 6.13 core folders and files to your Drupal site/server. You do not need to move over the
/sitesfolder,.htaccess, orrobots.txtfiles. If you accidentally do move over the/sitesfolder, you will not replace yoursettings.phpfile because Drupal 6.x names this file with a different file name, so you cannot accidentally overwrite the file during an upgrade.
7. Refresh your Drupal site (on whatever admin page you are currently on). If you receive immediate parse errors or a white screen (the infamous white screen of death, though it's really nothing to be afraid of), make sure to carry out the following steps and run your
update.phpto update the database schema. You should see a screen with a bunch of parse errors at this point:
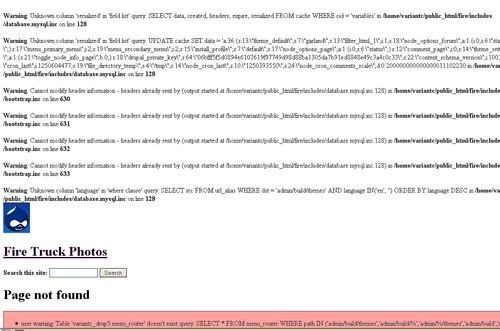
Immediately after moving your new Drupal 6.x core files over to your server and refreshing your site page, you'll see a bunch of parse errors. Don't panic! Follow these steps to run your update.php script in order to update your Drupal database schema, so it updates to the latest Drupal 6.x configuration:
1. Type in
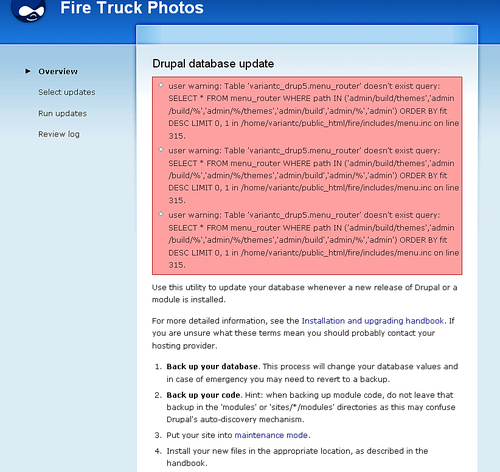
update.phpat the root level of your site URL. So, for this site we'll have the following URL to run our script: http://variantcube.com/fire/update.php2. Click the Return button on your keyboard to load the
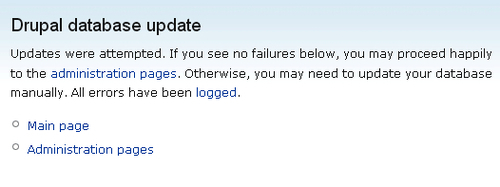
update.phpscript.3. You will see the following Drupal database update page (along with more parse errors):
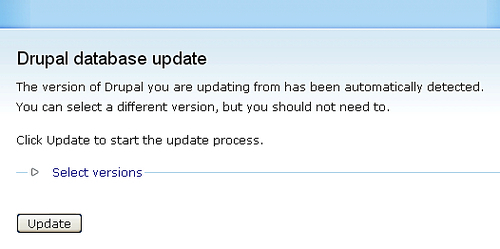
6. The updates will run. You will see a progress bar and each core module will be updated in the database schema. Allow all the database updates to complete. Do not click your mouse during this process.
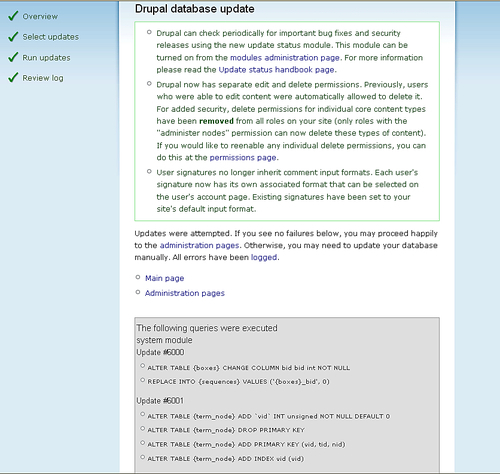
7. Once completed, you should see a final Drupal database update page load. A series of messages will be visible telling you the database update is complete. For example, on our site Drupal tells us that it now has separate edit and delete permissions. This is good information to read, as you know exactly what Drupal did during the upgrade process. You'll also see a long list of executed database queries. This list will tell you exactly what updates the Drupal
update.phpscript performed in your database tables. For example, if the update script altered or replaced tables.8. At this point your update page should show all green messages and gray query executed updates. You should also see green checks next to your upgrade list at the top left corner of the page—Overview, Select Updates, Run updates, and Review log.
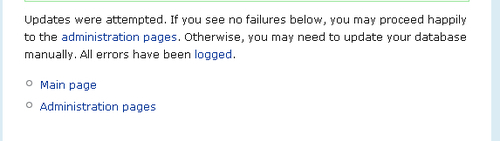
11. Once you click on the Administration pages link, you can then go to your Status report page through the Reports | Status report link.
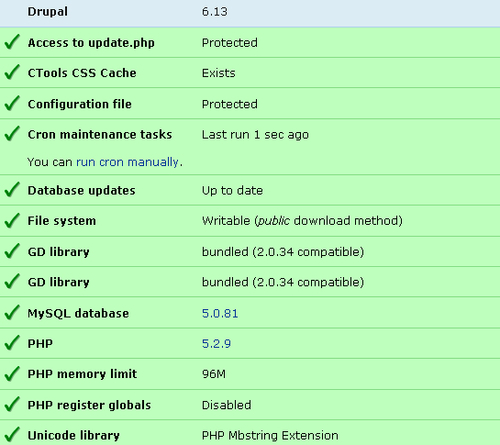
12. The Status report should now show you the new version of Drupal 6.13 listed. It should also show you green checks next to the rest of your configuration. This shows you that you have successfully upgraded your core code to Drupal 6.13. Congratulations!
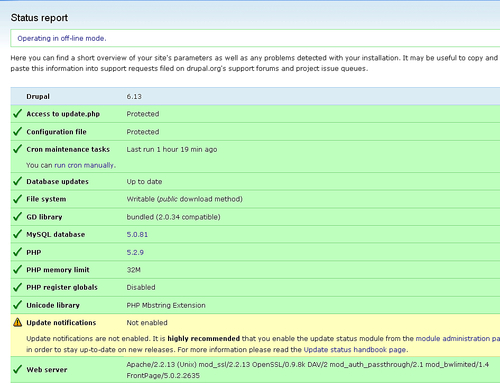
13. Run
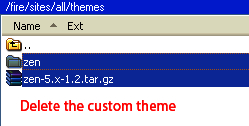
cronmanually to make sure the Status report loads again without any errors.cronshould run successfully.14. We're now ready to complete the entire upgrade process by installing the new 6.x versions of our contributed modules, and our Zen theme and corresponding custom theme files.
15. We will then enable the update status module (that now comes packaged with Drupal 6.x) and that will complete the entire upgrade.
We're now ready to update our contributed modules to their 6.x versions. Follow these steps:
1. Download all of the contributed module
tar.gzfiles corresponding to the latest 6.x stable releases to a folder on your desktop. You may want to create a folder calledcontrib._module_upgradesto put the new releases in.2. Once you have downloaded all the
tar.gzfiles, extract them into your contributed modules folder. This will create all of your module folders (one for each module).
Note
If you are using CCK and Imagefield, you'll also need to download the Filefield module—this is a dependency of Imagefield in Drupal 6.x.
3. Also, make sure you download and extract the Advanced Help module, so you can add advanced help documentation to your Drupal site (this is a large scale Drupal 6.x enhancement). The project page is here: http://drupal.org/project/advanced_help
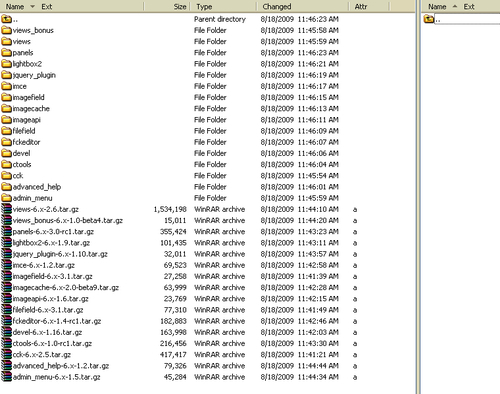
4. You should by now have extracted all of your modules ready to upload via FTP:
5. Move your new contributed modules using FTP to your
/sites/all/modulesdirectory.6. Go to your Modules admin list and re-enable the 6.x versions of the modules you just installed through their respective groups. For example, re-enable all of the Views modules and then run your
update.phpscript. Then come back to the modules admin list and re-enable your Panels modules. Doing it in this way by enabling the modules as groups will help you to identify problems with your module upgrades and more easily diagnose problems than if you just re-enable all your contributed modules at the same time.7. The only module you do not need to enable at this time is the Devel module. We're going to look at that module in detail in Chapter 3, so leave it disabled for now. Be sure to enable the Advanced Help module as well. Click on Save configuration.
8. You may receive a Fatal Error warning about your
memory_limitsize (in your PHP settings). If you receive this, go ahead to the next step and run yourupdate.phpscript. We'll address our memory issue immediately after runningupdate.php.9. If you receive parse errors, immediately run
update.phpagain. This time the script will update all of your contributed modules database schemas.10. You will see your Drupal database update page again (at
update.php). Click on the Continue button.11. Click on Update on the next screen (the same as our
update.phpduring core upgrade above).12. When I run
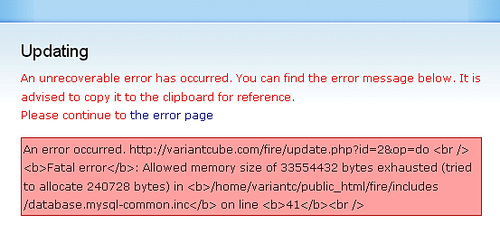
update.php, Drupal informs that there is not enough memory to run the upgrade. This is a performance issue due to the amount of modules we've added to our site and the resources these modules require. Before continuing ourupdate.phpwe'll need to upgrade ourmemory_limit. We can do this by editing our site'ssettings.phpfile. These are screenshots of the two types of errors which may arise at this stage of the process:

We're getting errors related to PHP memory, so we need to increase our memory_limit in our PHP settings. There are a number of methods of doing this. You can set a higher memory limit in your .htaccess, php.ini or settings.php files. We'll try doing this by adding a memory limit increase to our Drupal site's settings.php file first. There's more about tweaking Drupal PHP memory limits here: http://drupal.org/node/207036
1. Either login to your cPanel File Manager utility or to your site through FTP to edit the
settings.phpfile that is in your/sites/defaultfolder. If you do this via FTP, you will need to edit the file's permissions first in order to add or edit the file. It needs to have write permissions for editing purposes.2. I've logged into my cPanel File Manager utility and I've browsed to my
/sites/defaultdirectory.3. I check the box next to my
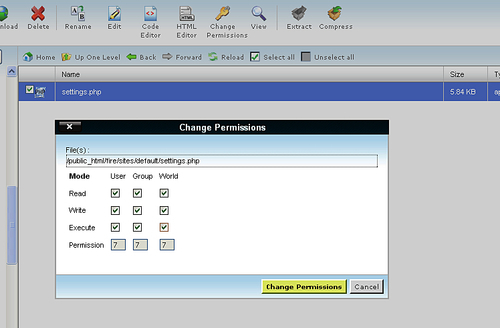
settings.phpfile and then click on the Change Permissions button in the File Manager admin screen. I add full write and execute permissions. I click on the Change Permissions button.
4. I then click on the Edit button in the File Manager utility.
5. This launches the
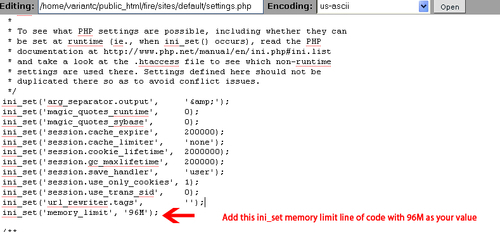
settings.phpfile in edit mode. I look for the PHP settings section of the file and the array ofini_setsettings. I add the following line of code to my file:ini_set('memory_limit', '96M');6. I specify
96Mas my newmemory_limitvalue.
7. Save the changes to your file.
8. Refresh your site admin screen to see if the changes worked.
9. If you refresh your
update.phpscreen, the updates should automatically begin because your memory limit is now working. If you receive any remaining parse errors, run theupdate.phpscript again until you see no errors.10. Drupal will give you the following note/info when you run
update.phpto upgrade your modules.
Note
Please note that the Panels upgrade from Drupal 5 to Drupal 6 is far from perfect, especially where Views and CCK are involved. Please check all your panels carefully and compare them against the originals. You may need to do some rework to regain your original functionality.
This is why we took the time earlier to make notes about the home page panel we're using on the site, in case we need to rebuild it.
11. You should now see a final Drupal database update screen with links back to your Administration pages (just like at the end of the core upgrade process). Click on the Administration pages link.
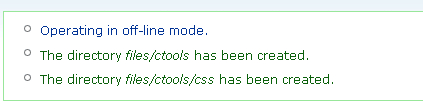
12. If you have installed the CTools module (to allow Panels to work) you'll see two messages appear at the top of the Administer page: The directory files/ctools has been created and The directory files/ctools/css has been created.