

FL Studio’s Mixer and plugins
The FL Studio Mixer is the equivalent of your Solid State Logic (SSL) board in the classic studio setup – this is where you will load all of your sound kits and VSTs to start mixing and mastering sounds. In addition, this is where you can get creative with stacking mixing plugins, such as reverb and delays, to create unique sounding tracks and sound designs. Let’s walk through getting your mixer template set up.
Setting up a mixing template
First, look in the top-right corner of the software toolbar, as shown here:
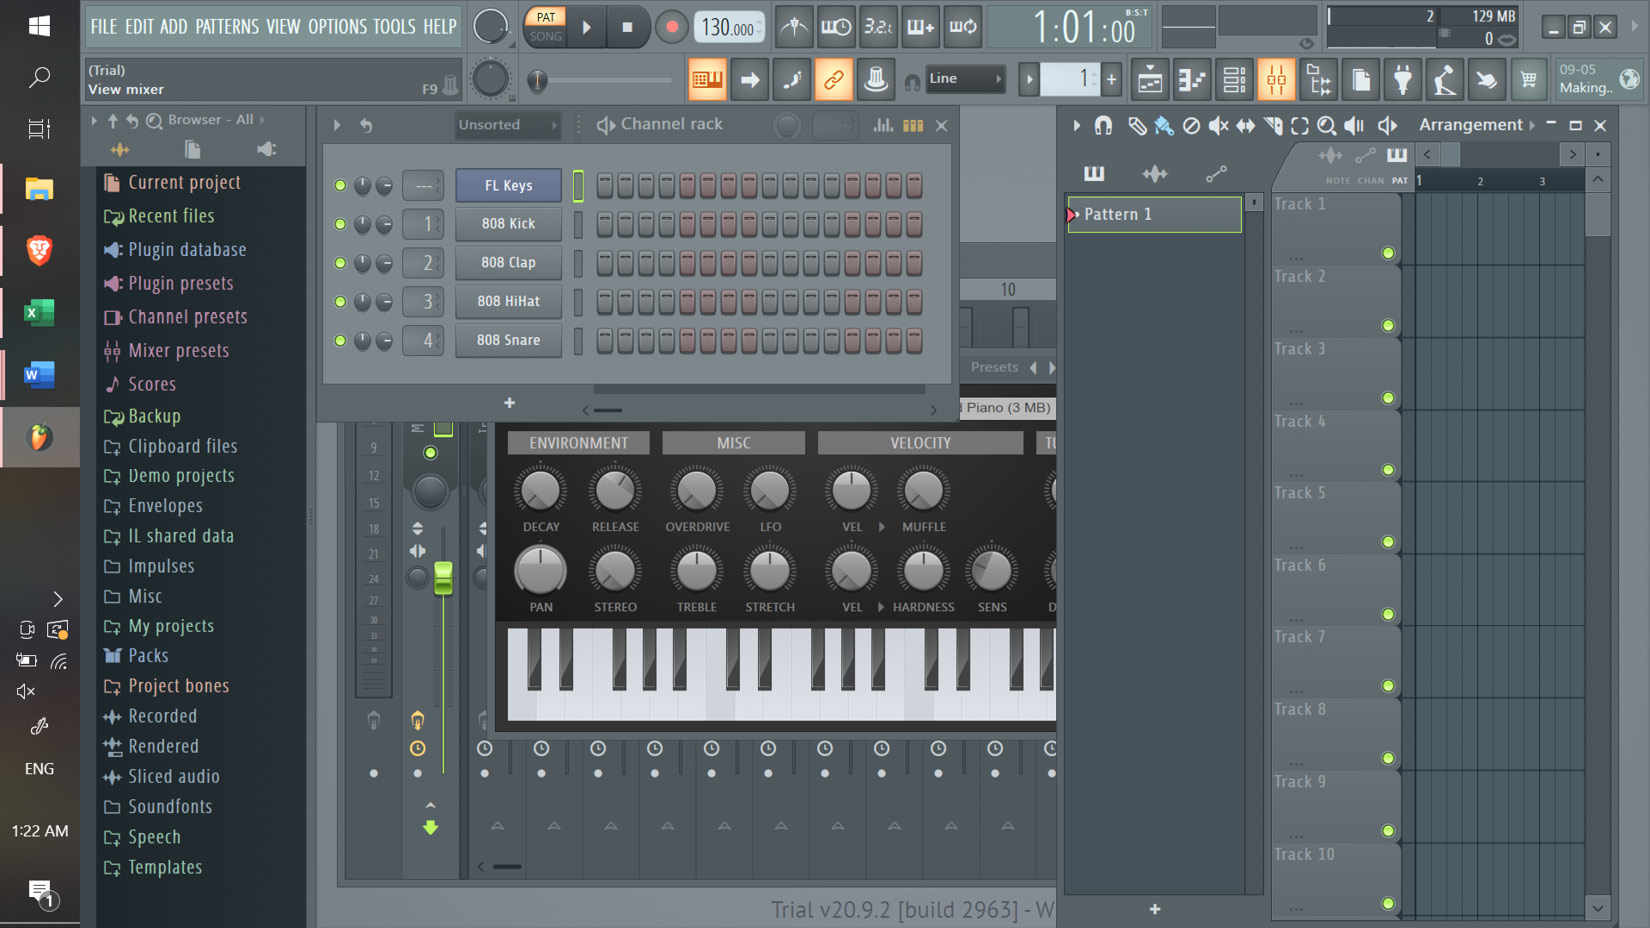
Figure 1.16: Software toolbar | Mixer tool in yellow
Click the highlighted button on the toolbar to open the mixer:
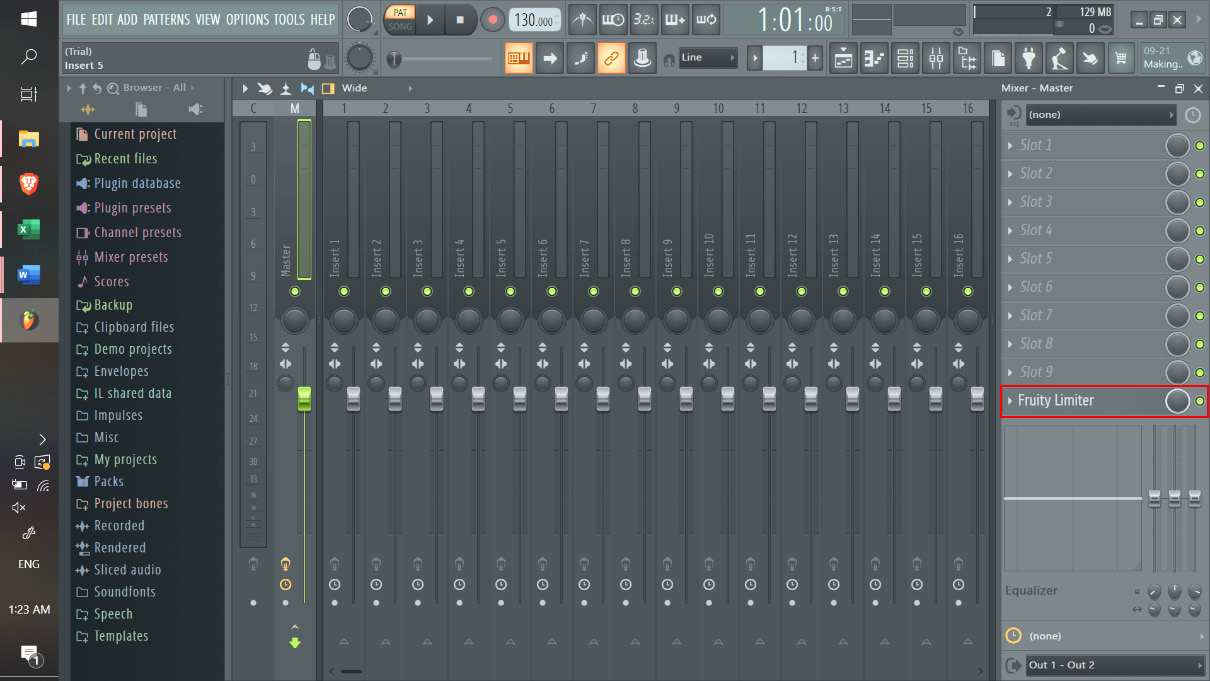
Figure 1.17: The mixer
Now that we have the mixer open, I’m going to share the first hack, and it’s a hack because it goes against conventional wisdom. In the Master channel, you will see (in Figure 1.17) that FL Studio automatically loads up the Fruity Limiter plugin (highlighted in red in Figure 1.17). This plugin limits the volume of the overall Master track. Although you may end up experimenting in your mixing with this as an overall mastering plugin, when crafting ideas, it’s a good idea to turn it off or delete it totally. The reason is when you are sound designing your draft production, you may want the kick and snare to go above 0 in the volume mixer to get that heavy feel, as it can get in the way of letting those sounds really shine. Just click the circle button next to the plugin, and it will turn it off.
Let’s click the input button off, as seen in Figure 1.18 in the highlighted red circle:
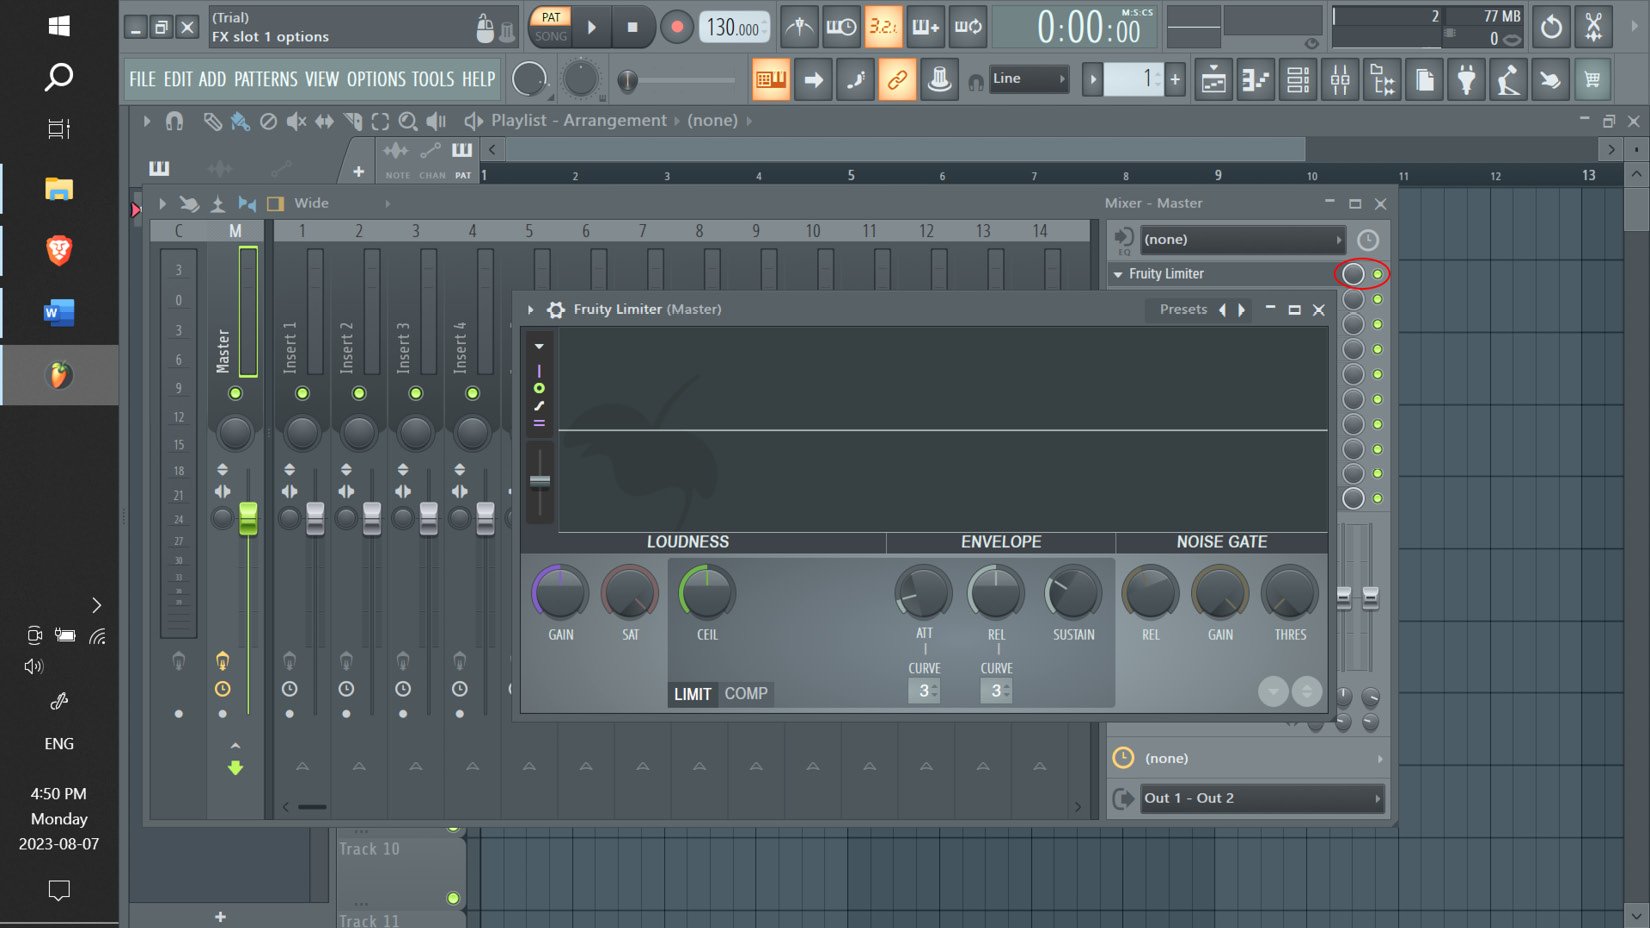
Figure 1.18: The mixer’s Fruity Limiter plugin
Now that we have a “clean” mixer, let’s walk through the mixer settings from a basic view:
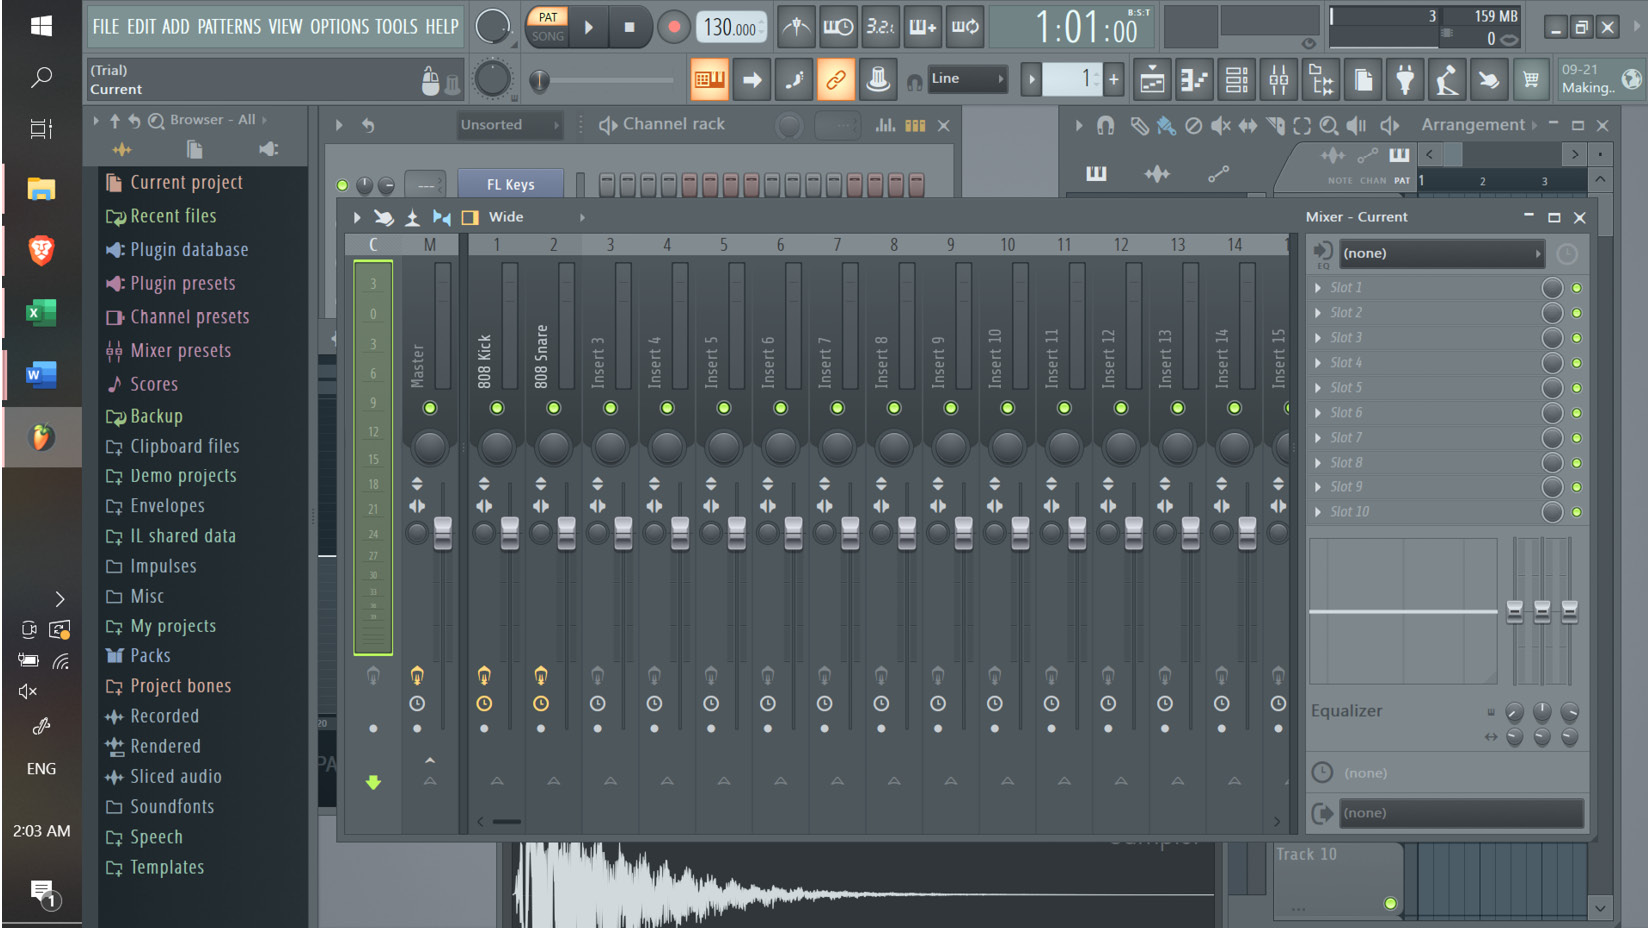
Figure 1.19: The mixer’s current channel selection
Let’s walk through each of the Mixer applications as seen in Figure 1.19. These are all of the tools contained within the mixer and how they function:
- Current channel: This is the highlighted section in Figure 1.19, which allows you to add and insert specific plugins into the section you have selected.
- Master channel: The Master channel is where you will add plugins to affect the entire track. This is used for mastering the finished product and adds the desired plugin to all tracks in the mixer. I don’t recommend adding plugins to this when you are simply drafting productions for the purposes of creativity.
- Inserts: Inserting plugins into a channel on the mixer will add the desired plugin to the selected sample sound. For example, the Reverb or Delay plugin will be added to the sample.
- Mute and Solo feature: When you add plugins to a specific channel, you can mute and unmute the effect by clicking this button.
- Panning feature: As suggested, this allows you to pan the inserted sample sound left or right.
- Reverse polarity: This can be used to change the frequency of the selected sample sound. Reversing polarity is a technique that lets us flip the phase of an audio signal. It’s like turning the waveform upside down, and a cool way to experiment with your sound and create interesting effects.
- Swap left and right channels: This will allow you to swap sample channels left and right.
- Stereo separation: Select Mono or Stereo for the selected sample sound.
- Volume: This is used for adjusting the sample sound volume up or down.
Now that we have gone over each of the high-level functions of the Mixer, it’s important to recognize that these will come in handy when we are practicing the mixing techniques discussed in Chapter 7. For now, get familiar with them inside FL Studio, and feel free to experiment with how they work.
Next, let’s discuss adding sounds to the Mixer so we can start to craft the sonics of each individual sound layer using the FL Studio plugins and tools.
Adding sounds to the mixer
Let’s talk about how we can start adding sounds to the mixer. First, click on the desired sound you want to load into the mixer. For this example, I have chosen to use an 808 Kick sample. Now, right-click on the selected channel you want to load into the mixer and right-click the channel to bring up the drop-down menu. Then, click Route selected channels to this track:
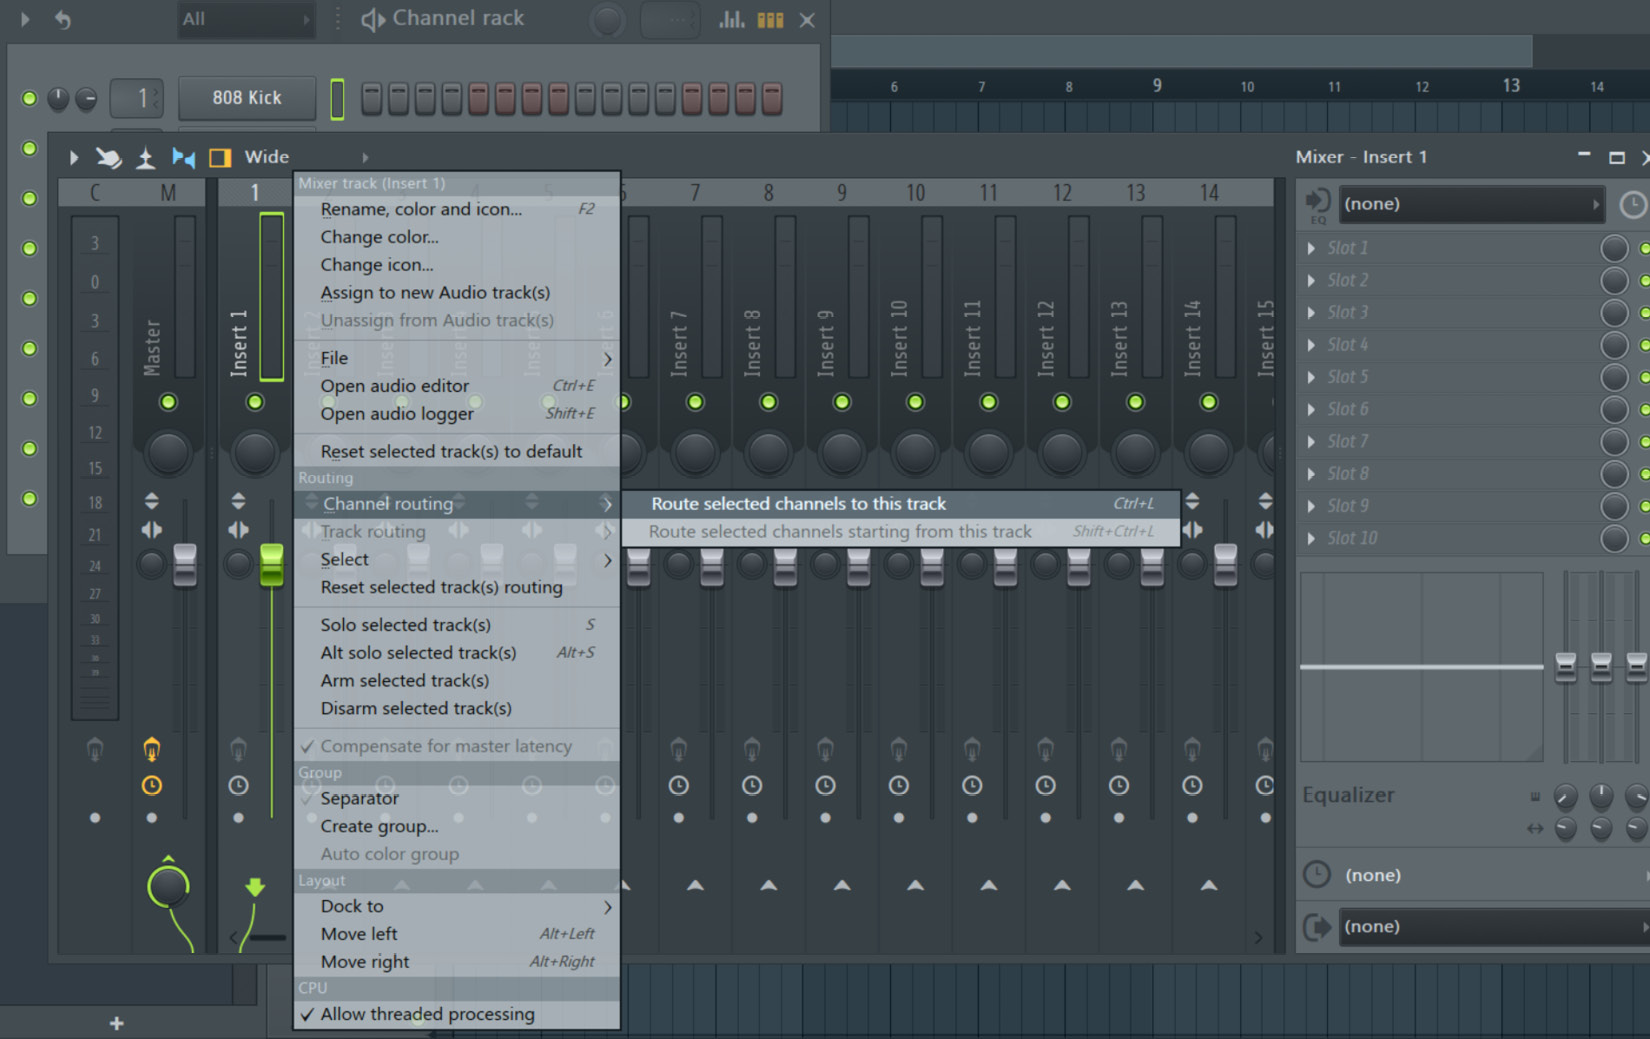
Figure 1.20: Mixer, channel selection, 808 Kick
Once we have loaded the kick sample into the mixer, let’s explore how to add plugins to it to start getting our mixing template ready for sound design and overall mixing. This drop-down menu will show you a selection of preinstalled FL Studio mixer plugins:
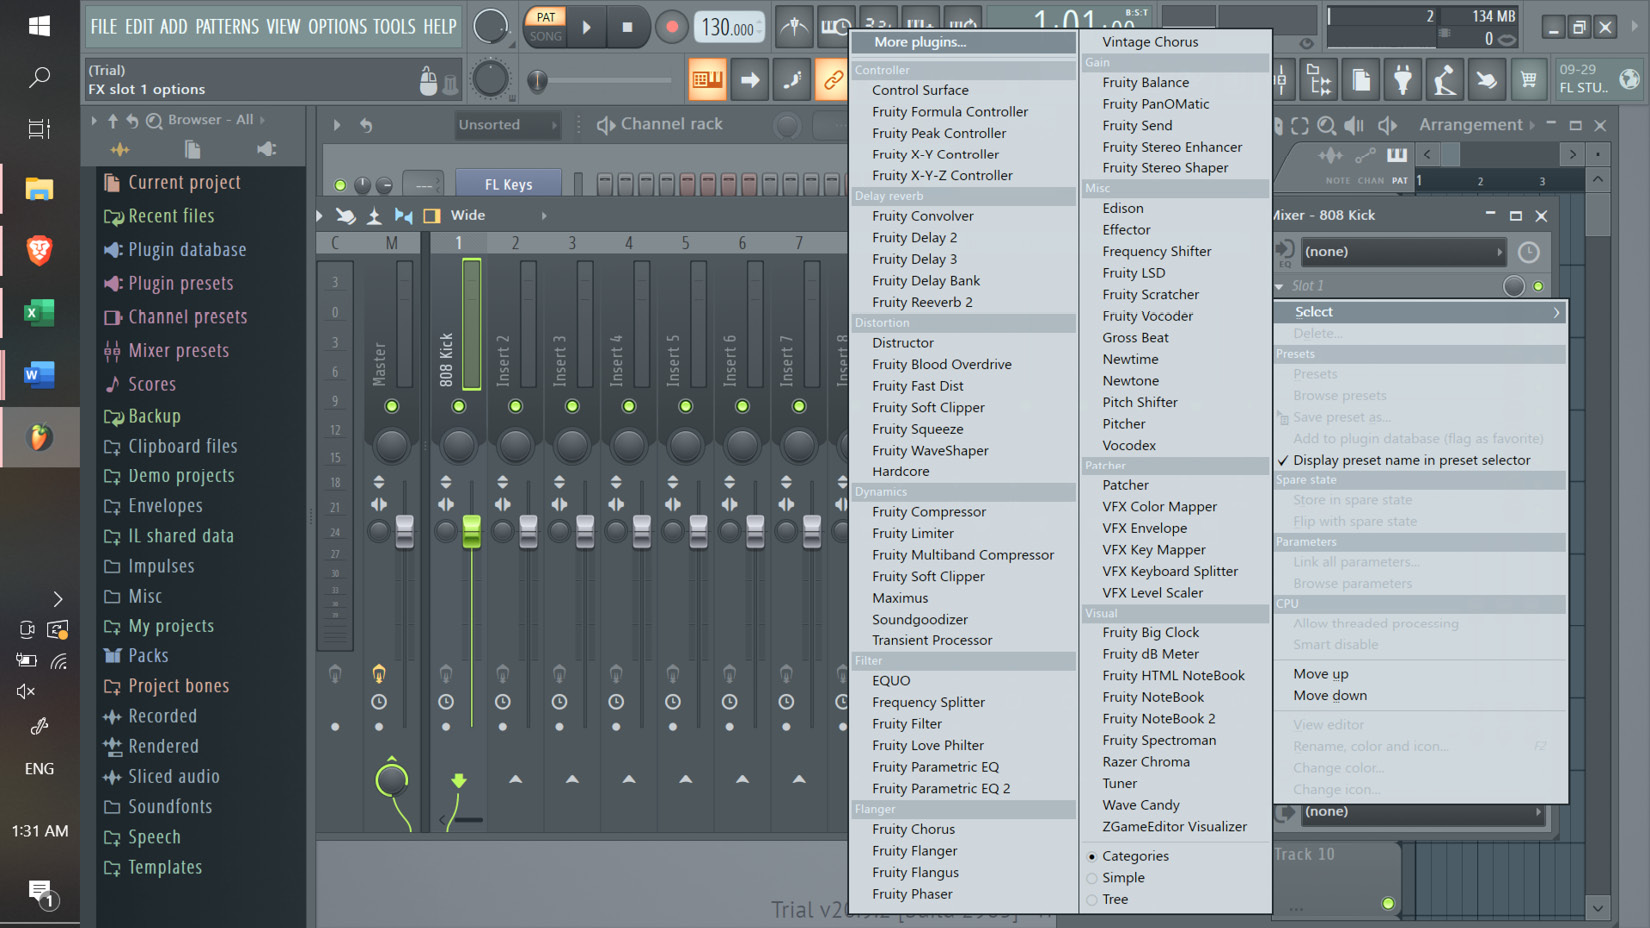
Figure 1.21: The mixer, channel selection, 808 Kick, plugin input
There are a few key mixer plugins we are going to add to our workflow template; these are referenced in the FL Studio key plugins section.
For kick samples, the main plugin we want to load is Fruity parametric EQ 2. This will allow us to stretch the kick sound to give it the heavy feel we are looking for when making pop or rap records:
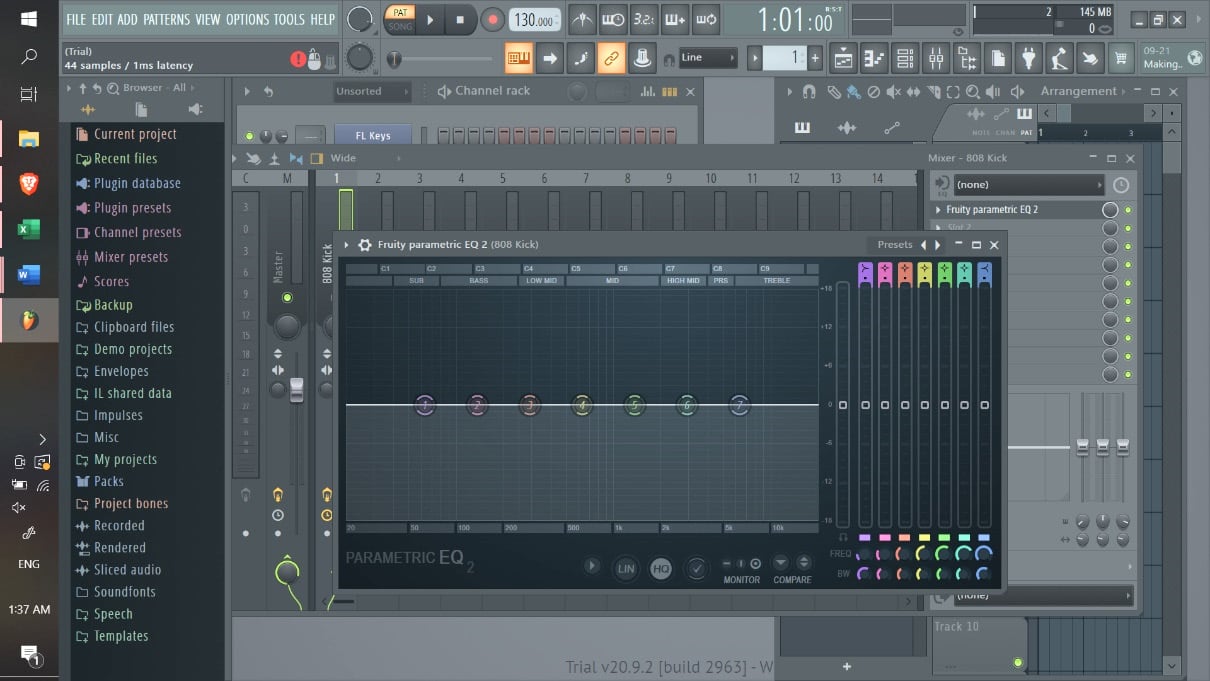
Figure 1.22: EQ 2 plugin as loaded in the mixer
When it comes to kick samples, don’t overcomplicate their mixer plugins. The key is that the kick is simply the driving sound in the track that keeps the rhythm section intact. As a general hack, making kicks “heavy” with the EQ 2 plugin is as simple as moving the number 2 filter slider to 74 Hertz (Hz) in a general direction. Each kick sample sound you use will have a different natural feel to it, and you will want to slide it around to find the punchiest spot for it to fit in the overall track, but as a point of general direction, this is where it should be:
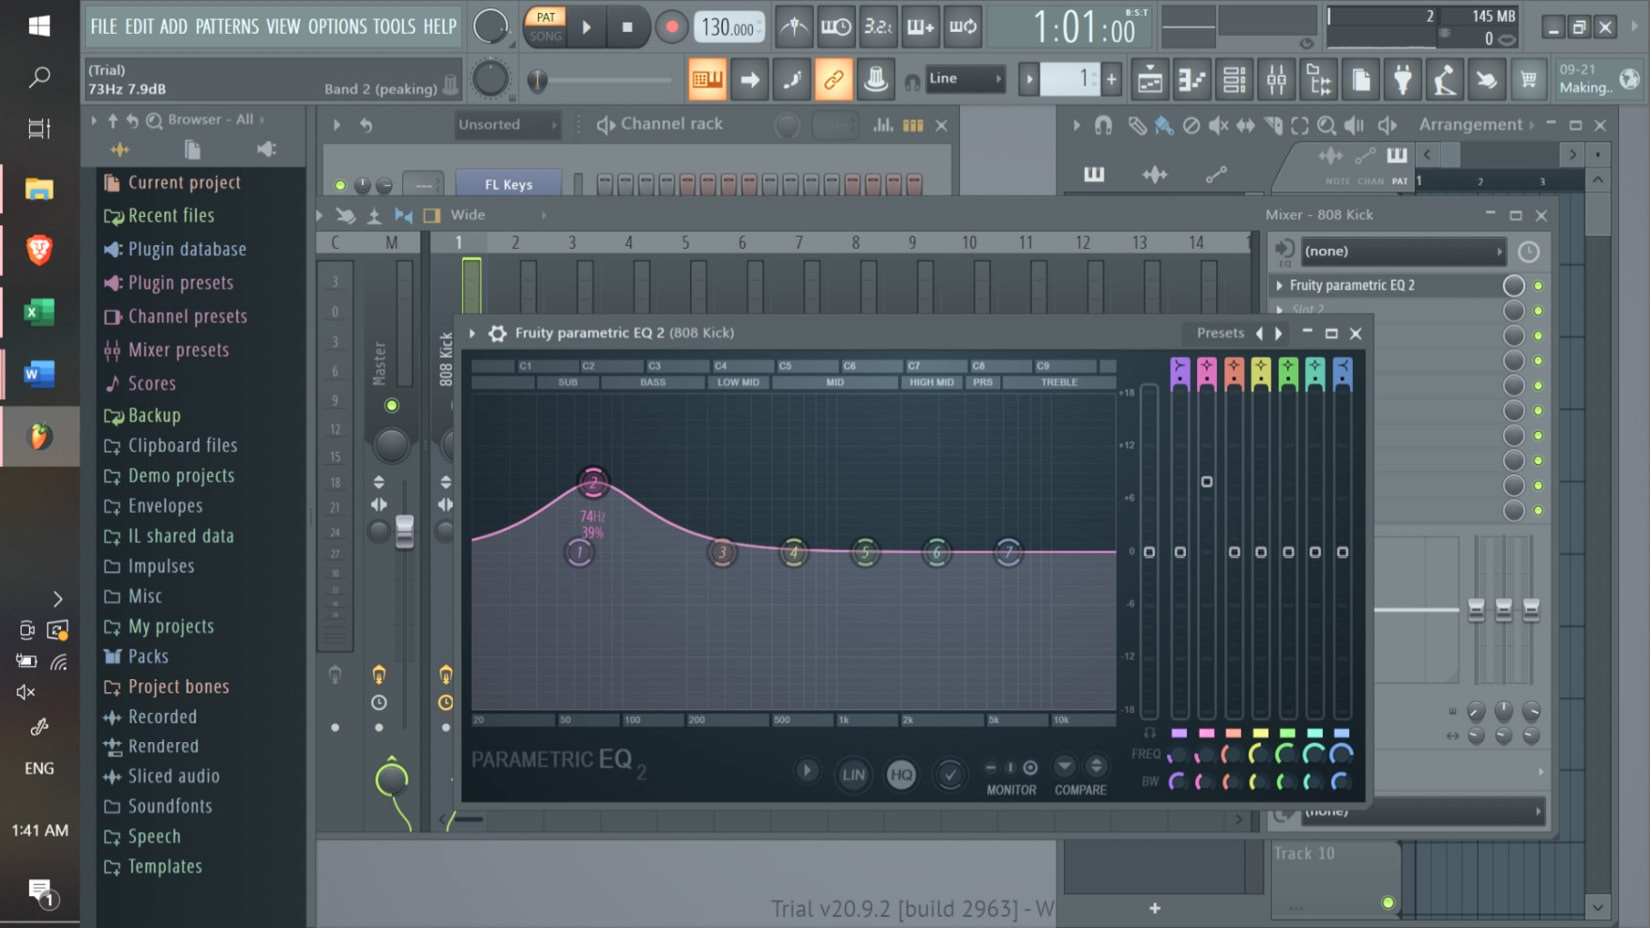
Figure 1.23: EQ 2 plugin
Now, let’s load up our snare sample into the mixer. Once we have loaded it into the mixer channel, the two key plugins we want to add to its mixer stack are Fruity parametric EQ 2 and Fruity Reeverb 2:
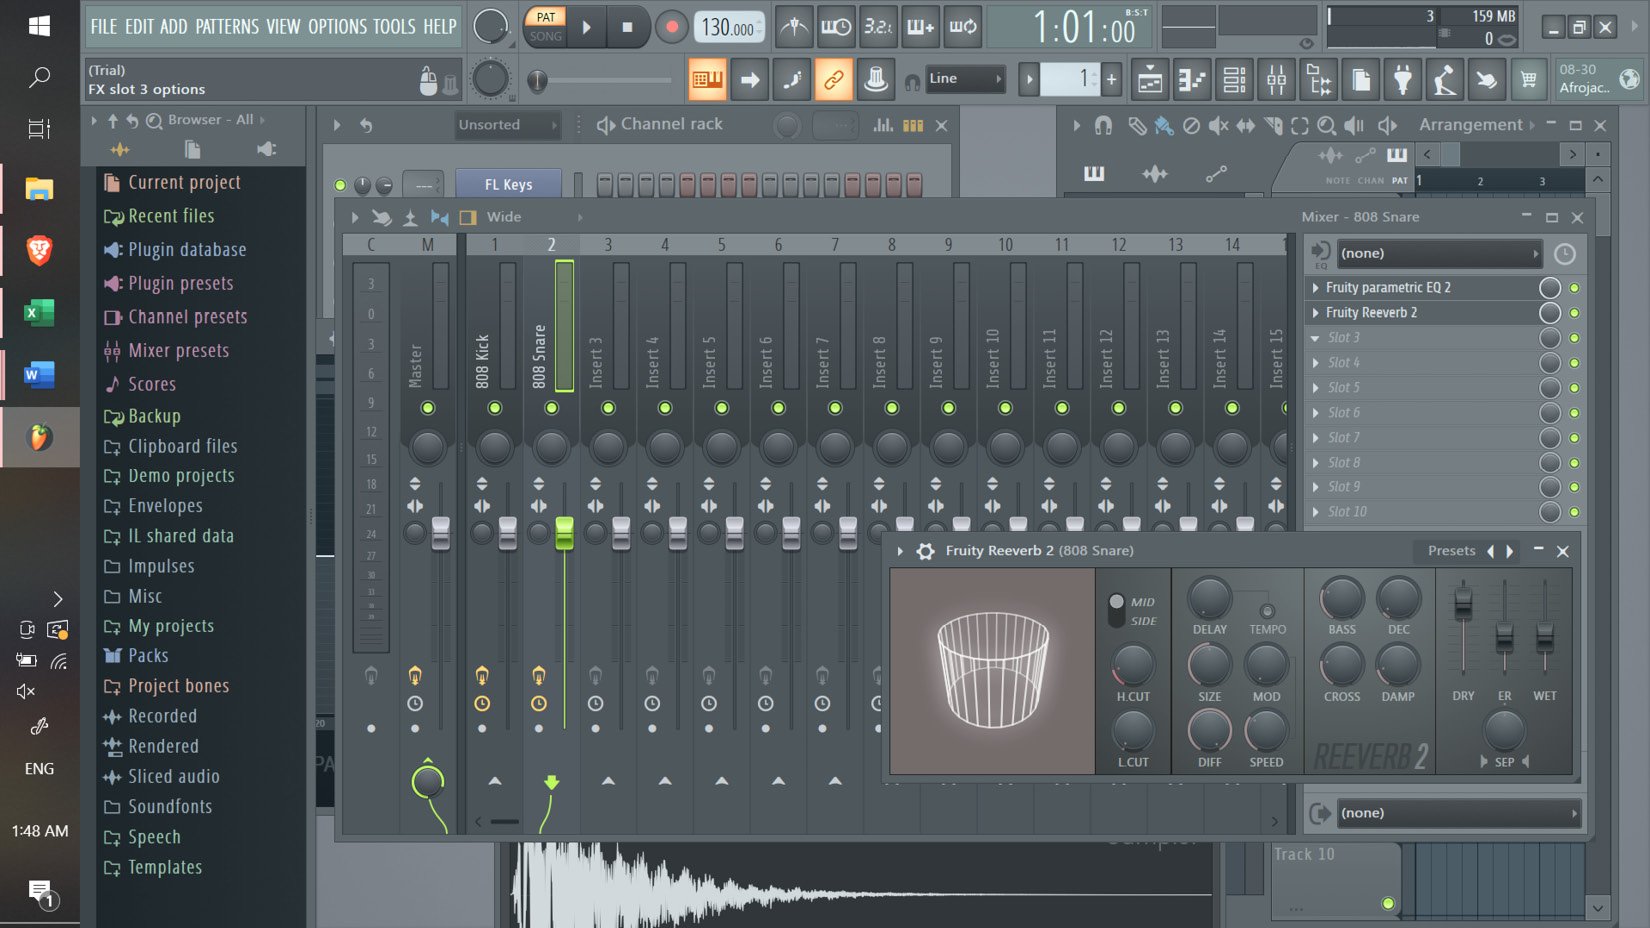
Figure 1.24: Mixer, slot channel input for plugin tools
I will walk you through more on specific plugins in the sound design and creating a signature sound in Chapter 4 – for now, let’s get familiar with the amazing stock plugins that FL Studio gives you from the outset.
FL Studio key plugins
FL Studio has a lot of base plugins. These are the plugins you should learn, experiment with, and get familiar with. The truth, and the overall high-level knowledge of my framework, is to keep things simple. Even today, I have an onslaught of third-party software plugins, but I still use these FL Studio stock plugins in every one of my productions. These seven plugins are the keystone in my stack.
Each one of these can be used to get creative with chords, melodies, and drum sounds – each of these is the base for sound designing in FL Studio:
- Gross Beat – This is used primarily in rap and hip hop productions to augment chords, melodies, and leads to create unique sound design and rhythmic outputs. Used by almost all of the most successful producers who use FL Studio, it’s a great tool for accessing sidechaining, slowing samples to half-time, gating, and more.
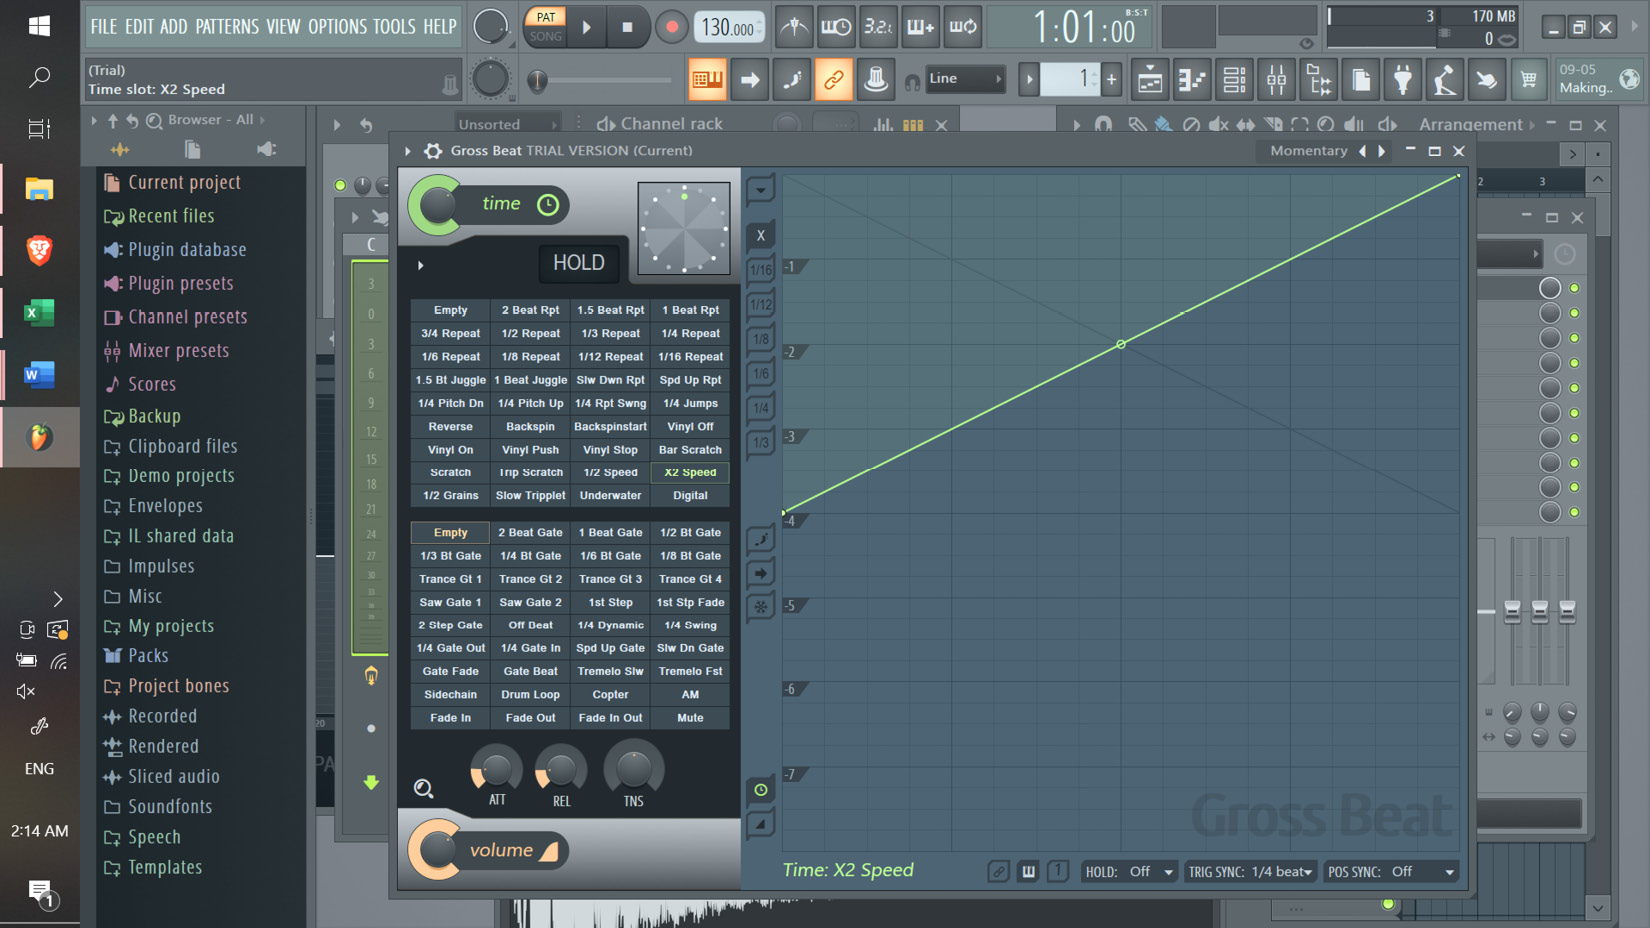
Figure 1.25: Gross Beat VST
- Fruity Delay 3 – FL Studio has a few different Delay plugins. This is by far the best and most flexible plugin they have for delay effects.
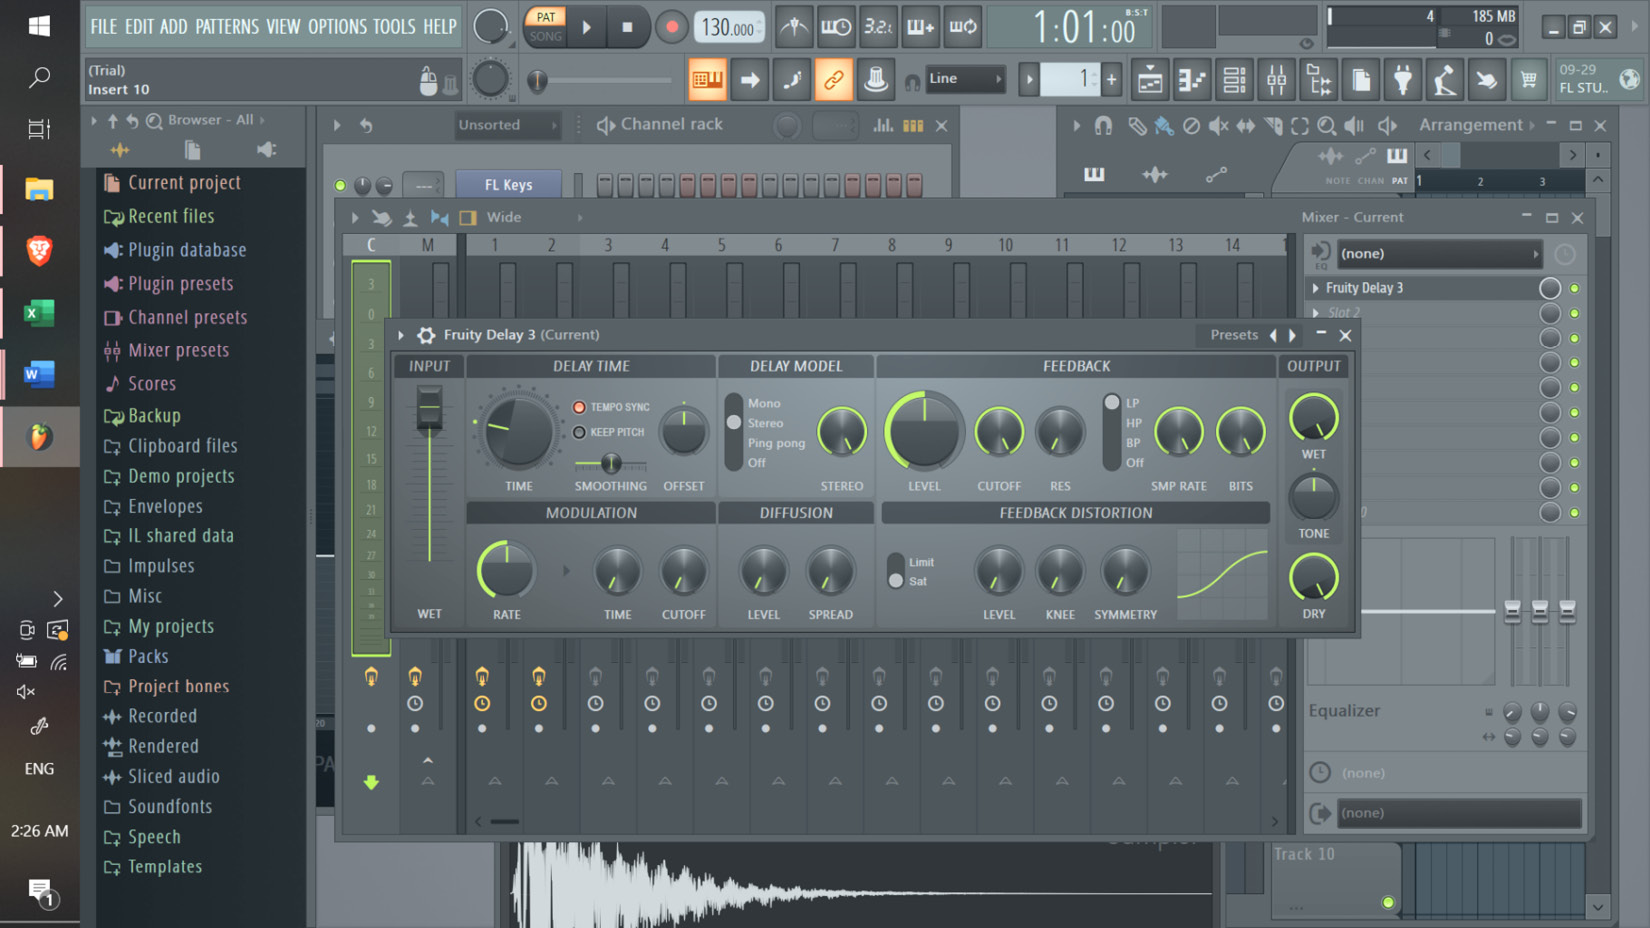
Figure 1.26: Fruity Delay 3 VST
- Fruity Reeverb 2 – This is the better, more flexible, and more advanced version of its sister, Fruity Reeverb. This will allow you to add reverb on your samples loaded into the Channel Rack, and I use it all the time to this day.
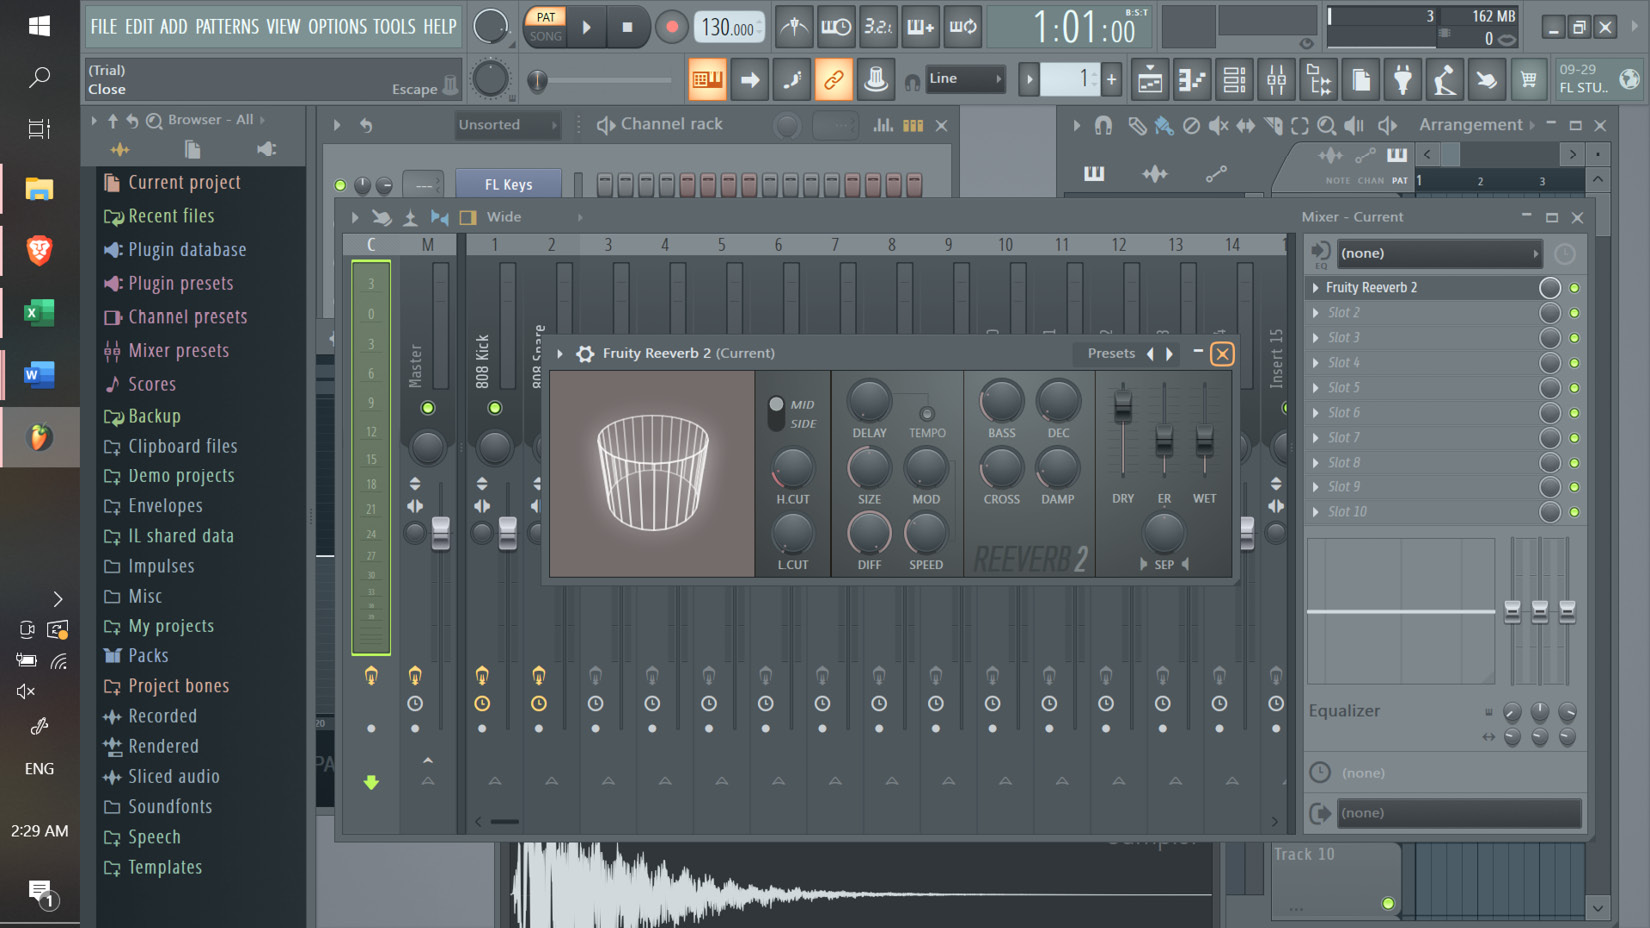
Figure 1.27: Fruity Reeverb 2 VST
- Maximus – This is an interesting plugin that acts as a limiter but can be used in a non-conventional way to add bass to 808s, guitars, and drum sounds.

c
Figure 1.28: Maximus VST
- Fruity Love Philter – This is by far the best and most versatile filter plugin in FL Studio. This allows you to get creative with filter effects and augmenting samples.
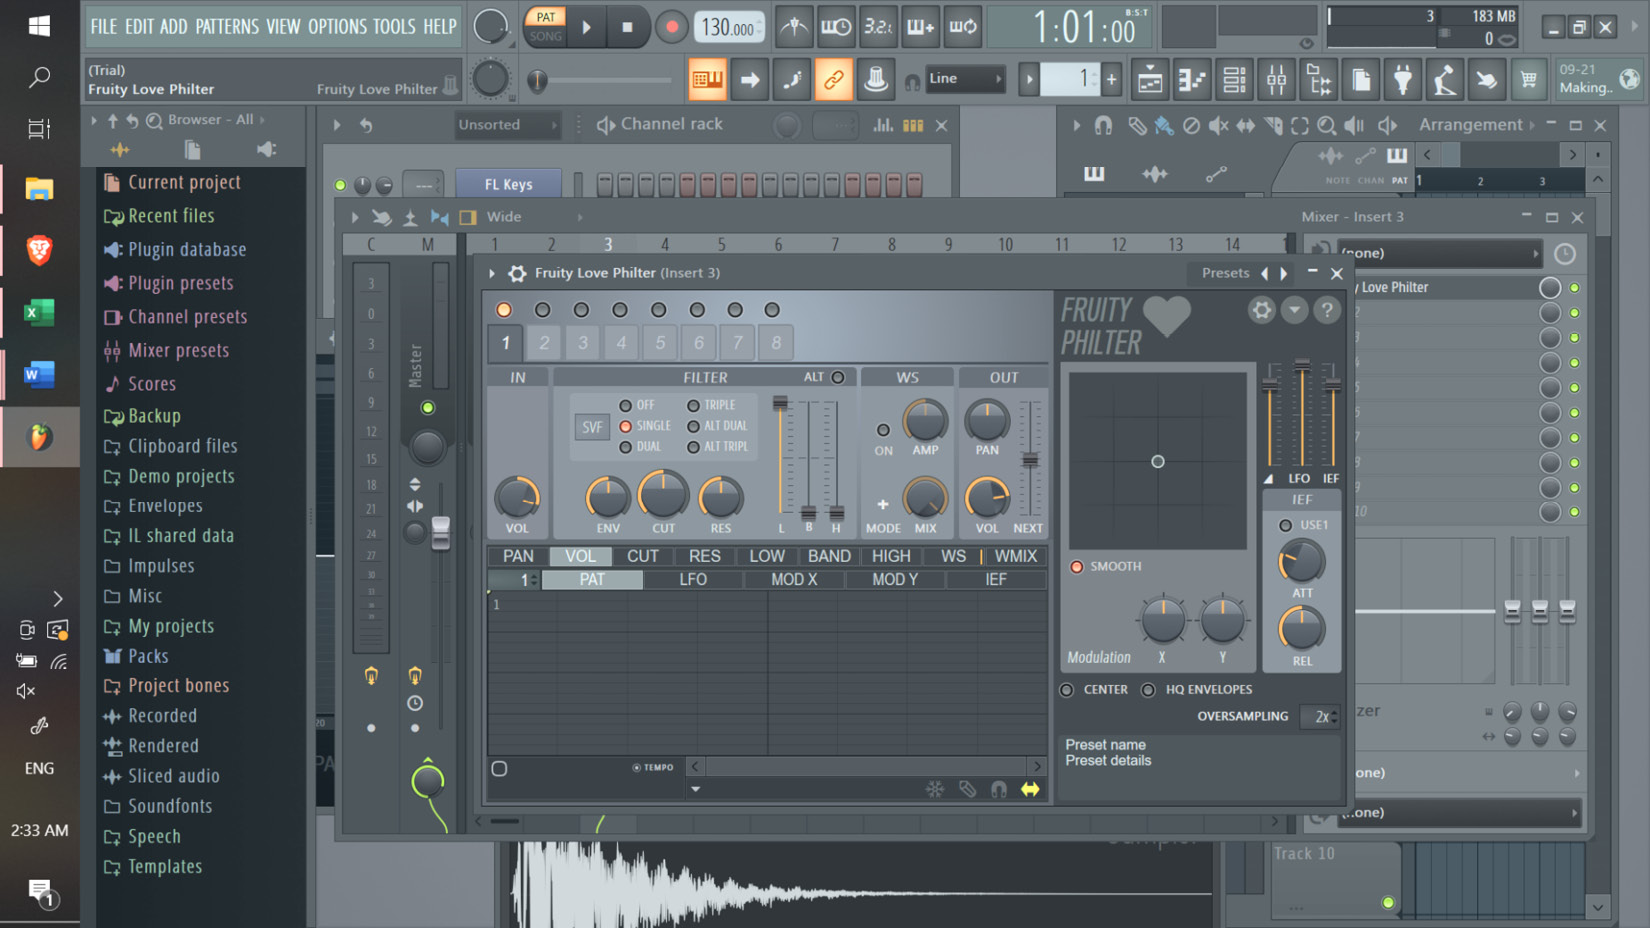
Figure 1.29: Fruity Love Philter VST
- Fruity Parametric EQ 2 – This is the only EQ I use today, and I have used it since I started producing back in the mid-2000s. Other third-party EQ software exists that other producers may prefer, but I really like this plugin for its simple UI and straightforward mixing usability. For example, each frequency range can be easily mixed and augmented using the visualizer, whereas using hardware-based EQ tools requires a greater sensitivity to ear and pitch.
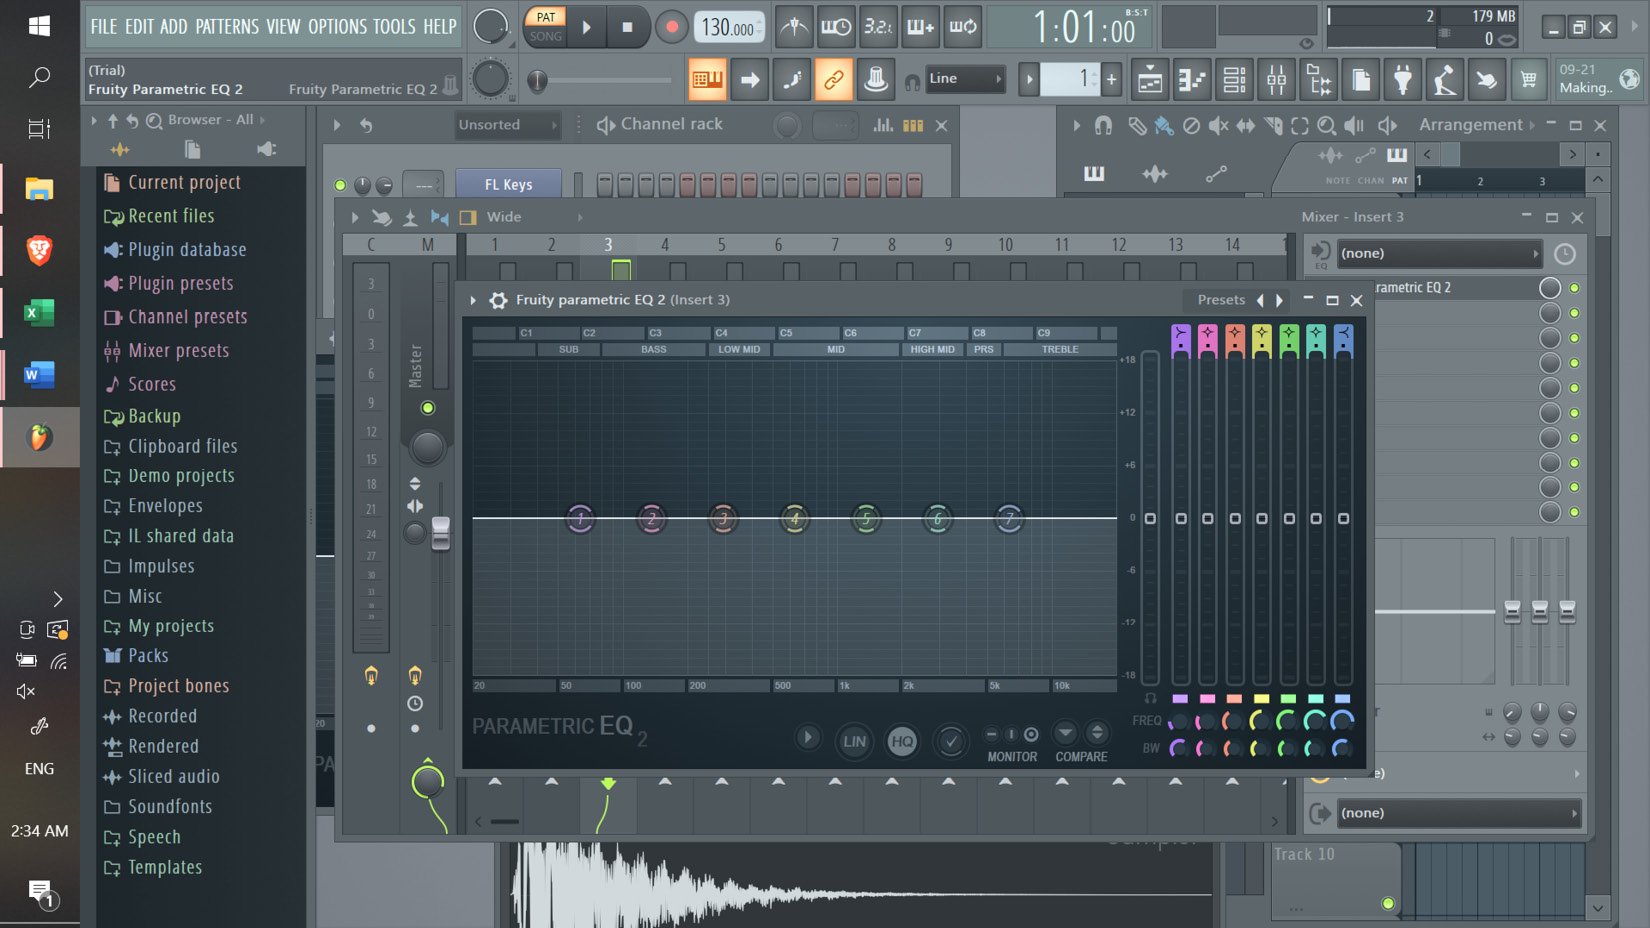
Figure 1.30: Fruity Parametric EQ 2 VST
- Fruity Flangus – This is a Flanger plugin that allows you to add a flanger effect to your samples and VSTs. I use this on chords, snares, hi hats, and bass sounds for added effect.
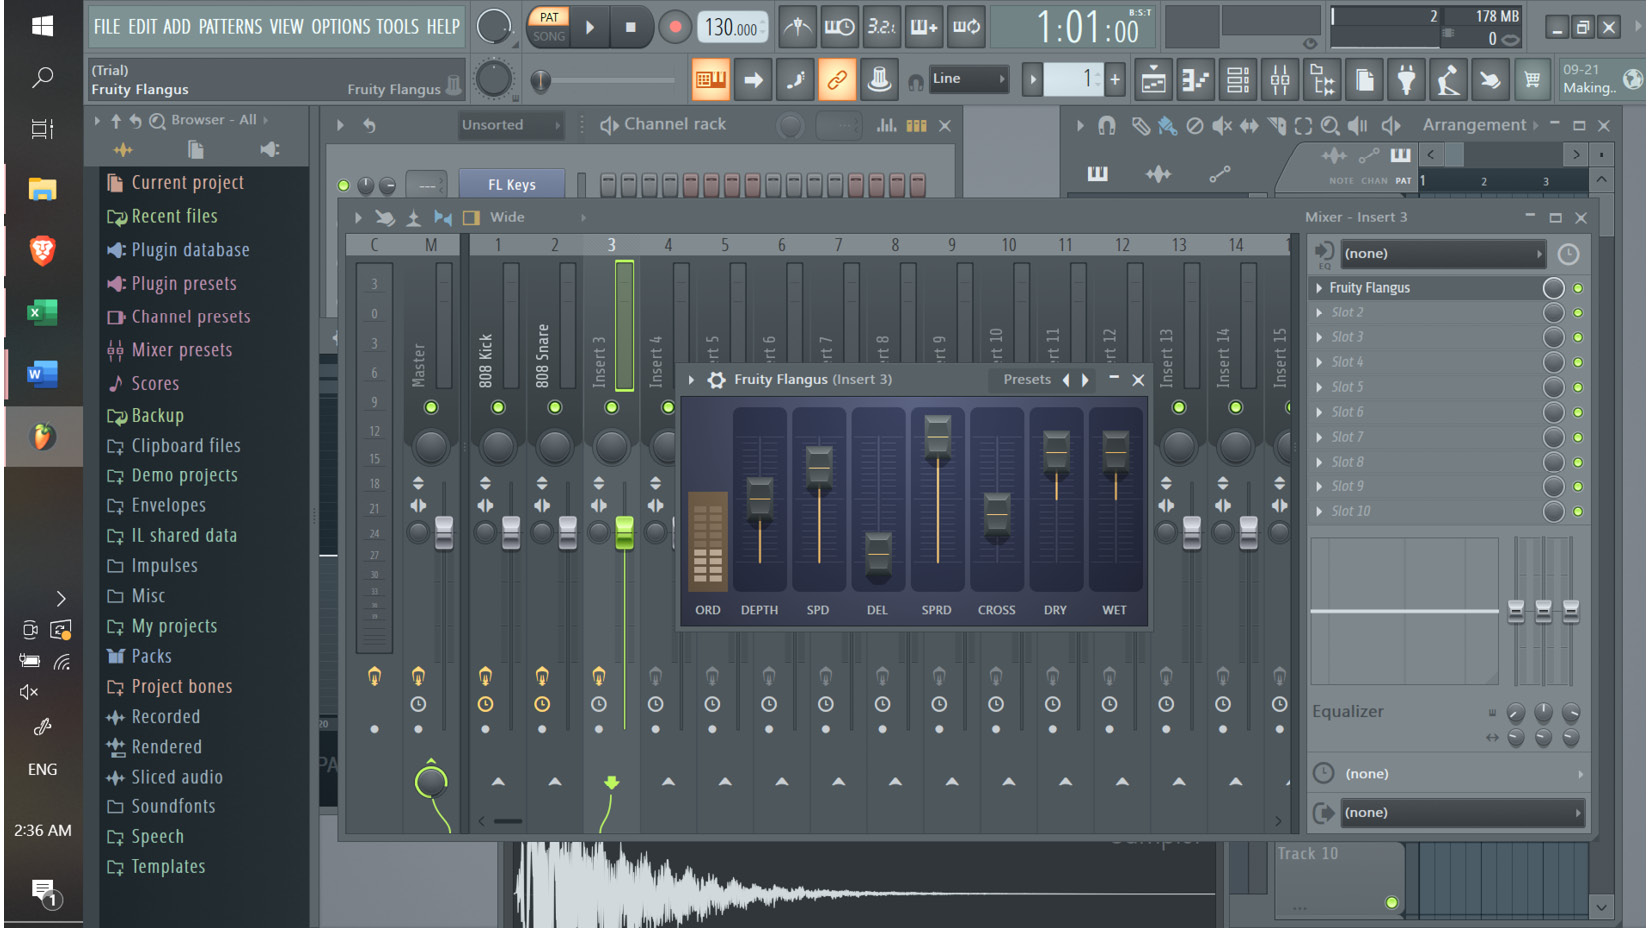
Figure 1.31: Fruity Flangus VST
FL Studio offers a plethora of plugins and mixing tools you may want to explore further as you become more proficient in using the software system. But as I have said before, keep your production workflow simple – most of the modern-day pop music that is created stems from really cool and hypnotic scoring and mixing that creates the feel of a record. Mastering these specific plugins will give you all you really need to start creating records that will work in the marketplace and lead you on your journey to becoming a true power user of FL Studio.