Book Image

NetSuite for Consultants - Second Edition

By : Peter Ries
Book Image

NetSuite for Consultants - Second Edition

By: Peter Ries

Overview of this book

ERP and CRM consultants can effectively implement NetSuite for a client organization with the aid of NetSuite for Consultants, revised with the latest features and best practices for NetSuite 2023. After reading this book, you’ll have a thorough understanding of how to configure the NetSuite ecosystem for any business. You’ll learn how to apply new features such as the Manufacturing Mobile application, NetSuite budgeting features, and tools for handling rebates and trade promotions. This edition also includes expanded coverage of technical topics such as SuiteQL and the SuiteTalk REST API. Understanding what a business requires is a crucial first step toward completing any software product deployment, and this NetSuite guide will teach you how to ask meaningful questions that ascertain which features, basic and new, you will need to configure for your client. Most importantly, you’ll not only learn how to perform a NetSuite implementation; you'll also learn how to prepare clients to use the software confidently, which is the true test of a great consultant.
Table of Contents (28 chapters)
1
Section I: The NetSuite Ecosystem, including the Main Modules, Platform, and Related Features
5
Section II: Understanding the Client’s Organization
11
Section III: Implementing an Organization in NetSuite
21
Section IV: Managing Gaps and Integrations
25
Other Books You May Enjoy
26
Index
Appendix: My Answers to Self-Assessments

Defining the item forms and fields

We will start the defining process by reviewing the forms for each of your client’s critical item types – Inventory, Non-Inventory, Service, and Discount – and making sure they are set up to work as per the client’s requirements. (This can be done by going to Customization | Forms | Entry Forms.)

Here is what the default form screen looks like for Inventory Part items:

Figure 11.1 – The default Inventory Item form with the fields list

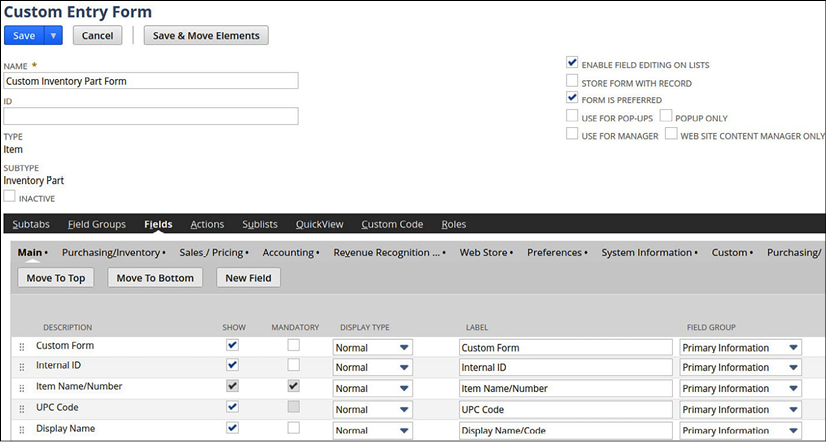
Figure 11.2 – The default inventory item form with the fields list

As I have mentioned in prior chapters, take this time to remove anything the users do not need to see while you are doing this. Create a copy of each of the standard forms with a name, including the client’s initials, and save each item type form. Some clients will need multiple forms for one type, such as for Inventory or Assembly Items. We always try to stick to just one form per item type, but special circumstances drive us to solutions like this sometimes...