

The first time that you access UPK, you will be prompted to specify some additional information. The exact information that you need to provide will vary depending on whether you are accessing a stand-alone version of UPK, or logging onto a UPK client. These options are discussed separately below; refer to the one section that applies to your environment.
To access UPK for the first time in a stand-alone installation, carry out the following steps:
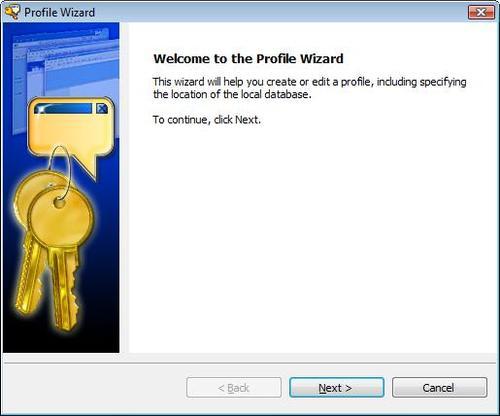
1. Start UPK, either by clicking on the shortcut on your Windows Desktop, or by selecting it from your Windows Start menu. The Profile Wizard is started, as shown in the following screenshot:
2. Click on Next. The Profile name dialog box is displayed.
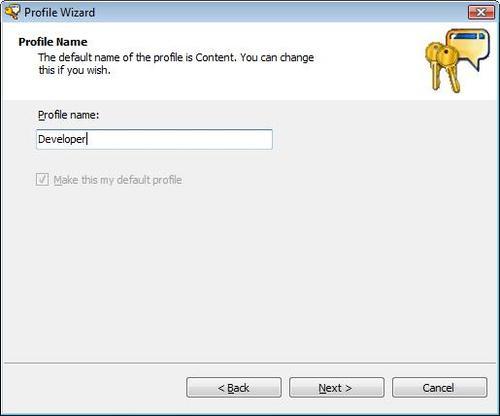
3. Enter a name for your profile. This is not particularly significant in a stand-alone installation.
4. Click on Next. The Data Storage Location dialog box is displayed:

5. Confirm (or enter, or navigate to and select) the folder in which you want your UPK data to be stored. It is important that you choose a location that will not be accidentally modified, and that can easily be backed up.
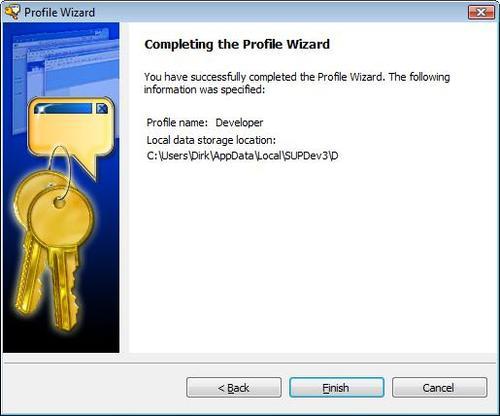
6. Click on Next. The Completing the Profile Wizard dialog box is displayed, as shown in the following screenshot:
7. Click on Finish. The Primary Authoring Language dialog box is displayed, as shown in the following screenshot:

8. In the Language field, select the language in which you will be developing your content. This affects your default spellchecker, and the default templates that will be used. You can change all of these things for individual objects, if required.
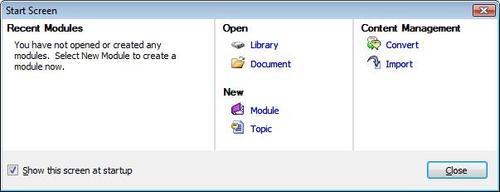
9. Click on OK. The Start Screen is displayed, as shown in the following screenshot:

You have now set up your UPK profile, and successfully accessed UPK. Most of the steps above are a one-time setup; every subsequent time that you access UPK, you will start from the Start Screen shown above (unless you deselect the Show this screen at startup option).
To access UPK in a client/server environment, carry out the steps described below:
1. Start UPK, either by clicking on the shortcut on your Windows Desktop, or by selecting it from your Windows Start menu. The Profile Wizard is started, as shown in the following screenshot:
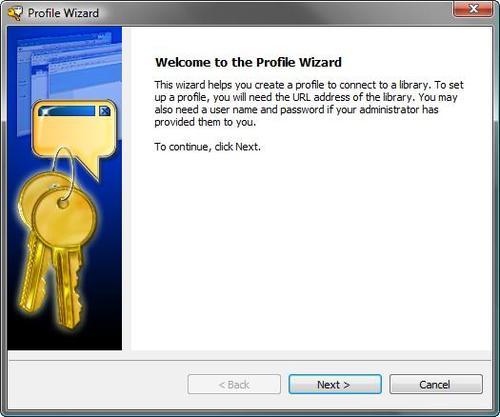
2. Click on Next. The Library Location dialog box is displayed:
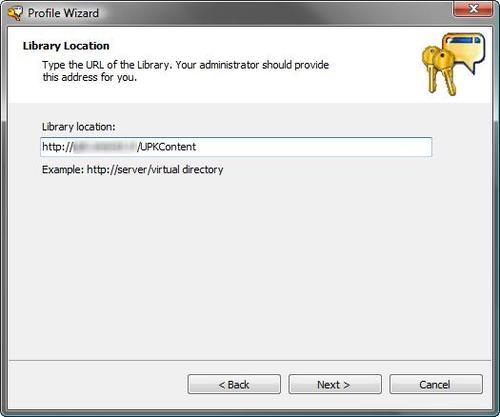
3. In the Library Location field, enter the URL of the UPK library to which you want to log on to (this is the "server side" of the client/server environment).
4. Click Next. UPK will attempt to connect to the server, during which time the following dialog box is displayed:

Once UPK has connected to the server, the above message disappears, and is replaced by the Credentials dialog box:
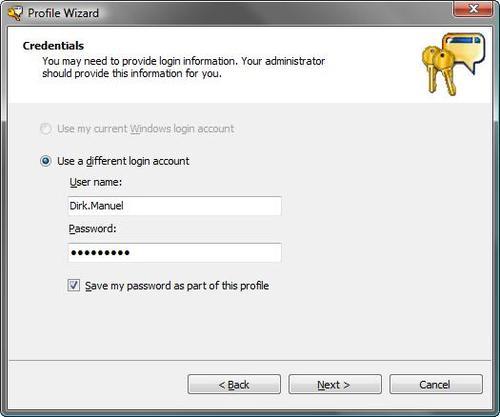
5. In the above screen, you need to select the type of authorization that is being used. UPK can either authenticate using your Windows credentials, or using its own internal user access tables. Which method is used is determined by the Administrator when the server side of UPK is installed.
Select either Use my current Windows login account, or Use a different login account and specify your user name and password, as necessary.
6. Click Next. The Profile Name dialog box is displayed:
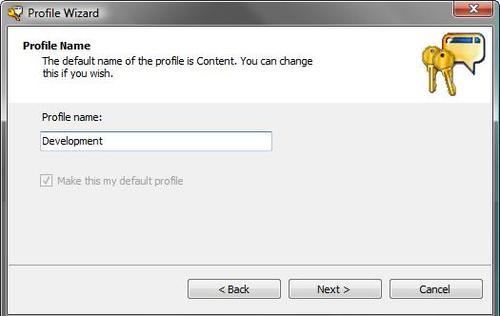
7. Enter a name for your profile. This is only really significant if you have access to multiple Libraries, in which case you may want to specify an appropriate name for each Library.
8. Click on Next. The Data Storage Location dialog box is displayed:
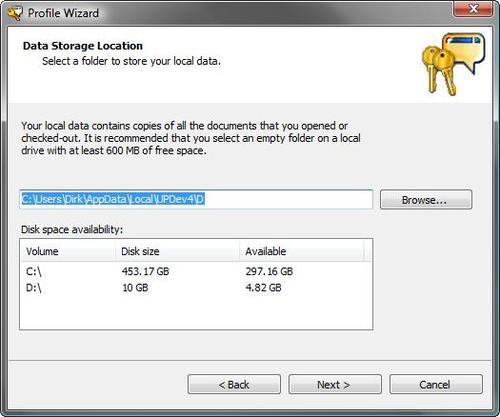
9. Confirm (or enter, or navigate to and select) the folder in which you want your local repository to be stored. It is important that you choose a location that will not be accidentally modified, and that can easily be backed up.
10. Click on Next. The Completing the Profile Wizard dialog box is displayed, as shown in the following screenshot:
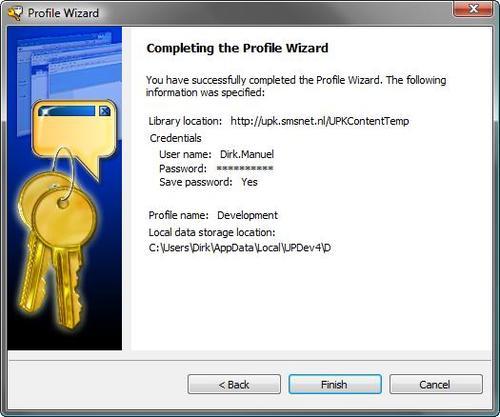
11. Click on Finish. The Primary Authoring Language dialog box is displayed, as shown in the following screenshot:

12. In the Language field, select the language in which you will be developing your content. This affects your default spellchecker, and the default templates that will be used. You can change all of these things for individual objects, if required.
13. Click on OK. The Start Screen is displayed, as shown in the following screenshot:
Note
If you have access to multiple Libraries, then you will initially be logged on to your default Library. You can change the Library that you are logged on to via menu option Tools|Profile.
You have now set up your UPK profile, and successfully accessed UPK. Most of the steps above are a one-time setup; every subsequent time that you access UPK, you will start from the Start screen shown above (unless you deselect the Show this screen at startup option).