
In this section, we shall be creating a VPC and a subnet using wizard to get started quickly.
Creating a VPC and a subnet with IPv6
Getting ready
We need an AWS account and a user with the proper permissions for creating a VPC and a subnet.
How to do it...
- Log in to your AWS account. Select VPC in AWS services as shown in the following figure:

Select VPC from AWS console
- Click on Start VPC Wizard.

VPC dashboard
- VPC wizard will appear with four options. Now, we shall choose the first one to create our first VPC and subnet. Click on the Select button.
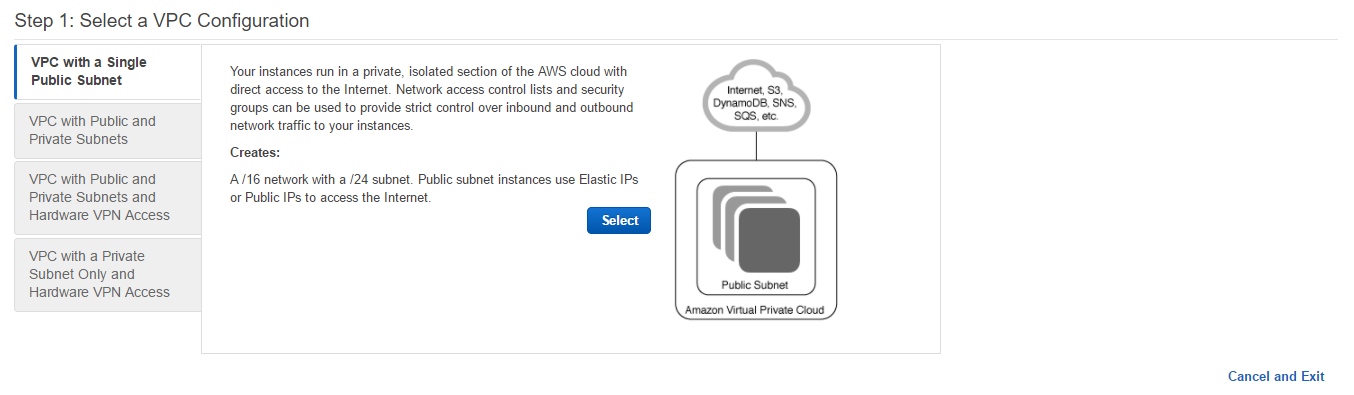
VPC Wizard
- We need to choose Amazon provided IPv6 CIDR block to enable IPv6 for VPC. For a subnet in a drop-down menu Public subnet's IPv6 CIDR: we need to select Specify a custom IPv6 CIDR. Key in the VPC and subnet names. Keep other options unchanged. Click on th Create VPC button.
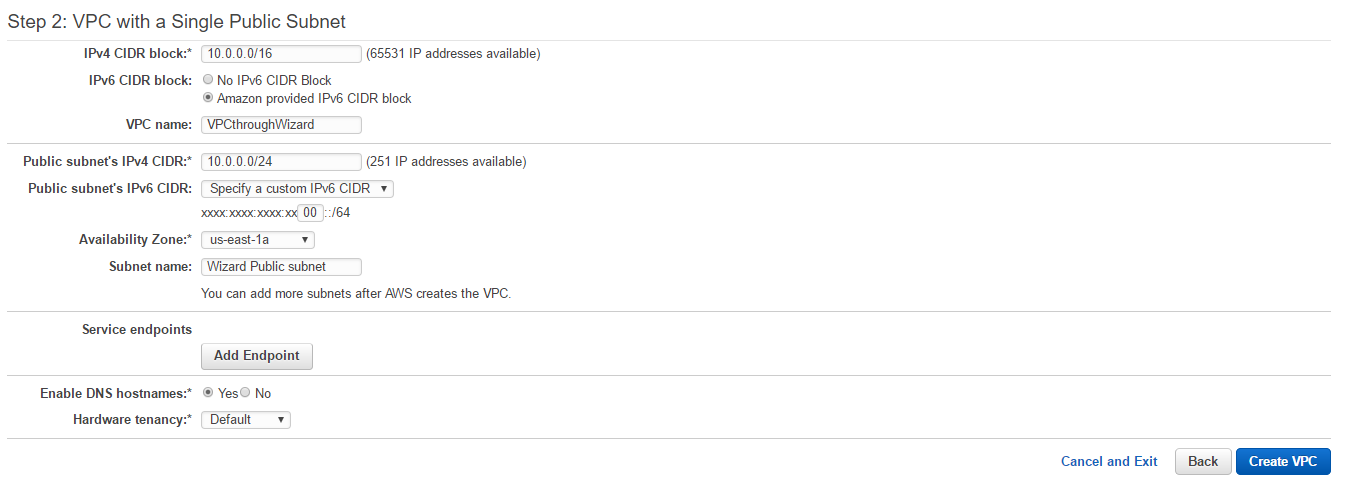
Create VPC and subnet with IPv6
- A success message will be displayed as following:

VPC and subnet creation success message
- Click on Your VPCs in the left menu. The VPC will be displayed. If you choose to see details, you can see that a Network ACL and Route table has been automatically created.
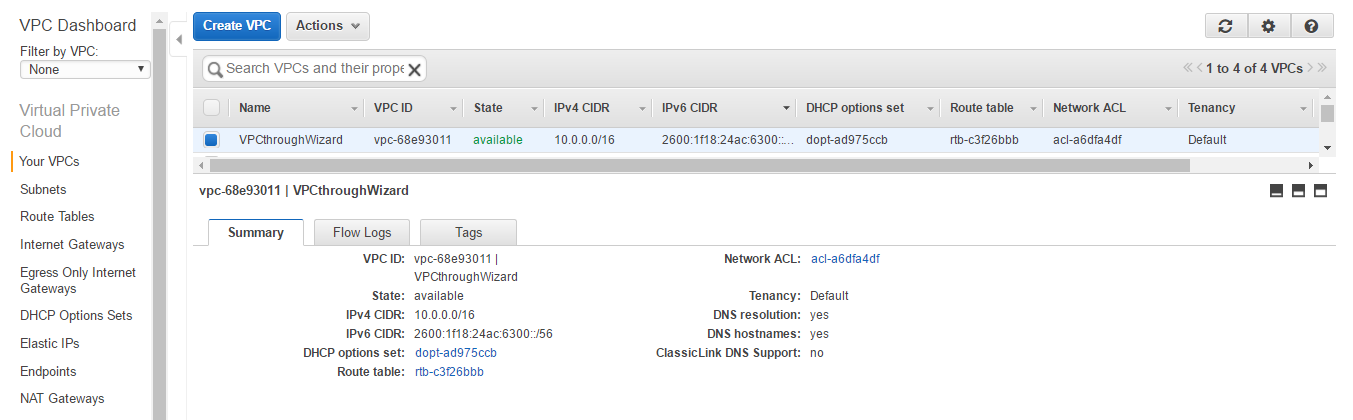
Summary of VPC created
- Click on Subnets on the left menu bar. You will be able to see the subnet that was just created. If you choose to see details, you can see that a Network ACL and Route table that is automatically created.
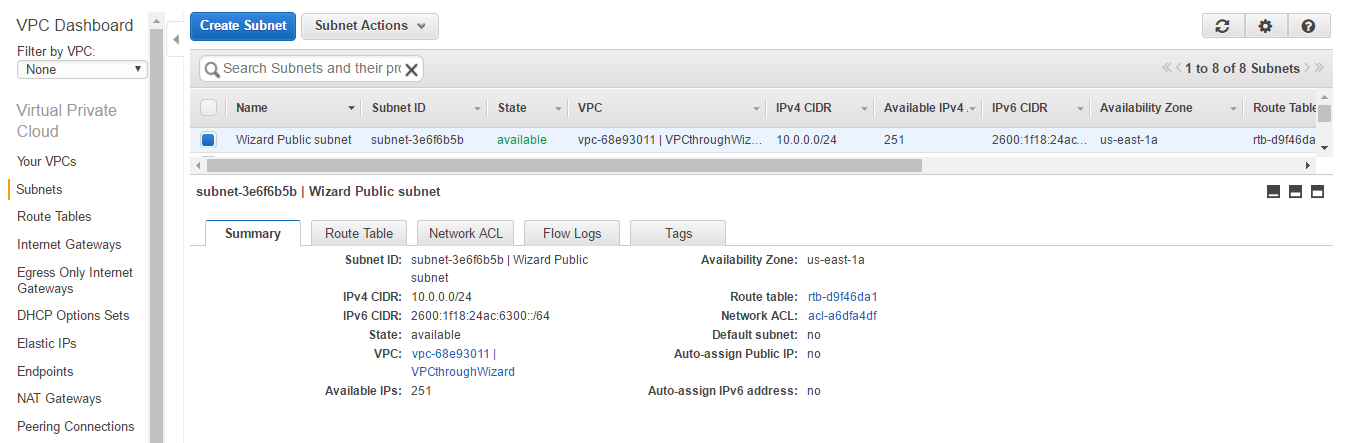
Summary of subnet created
- Click on the Route Table tab. You can see that the Route Table includes four entries. Two for internal IPv4 and IPv6 communication and two internet gateways (starting with igw) for communication with the outside world for IPv4 and IPv6.

Route Table of subnet created
- Click on the Network ACL tab. You can see that all traffic for both IPv4 and IPv6 has been allowed. We shall learn how to configure the rules in the later section of the book.
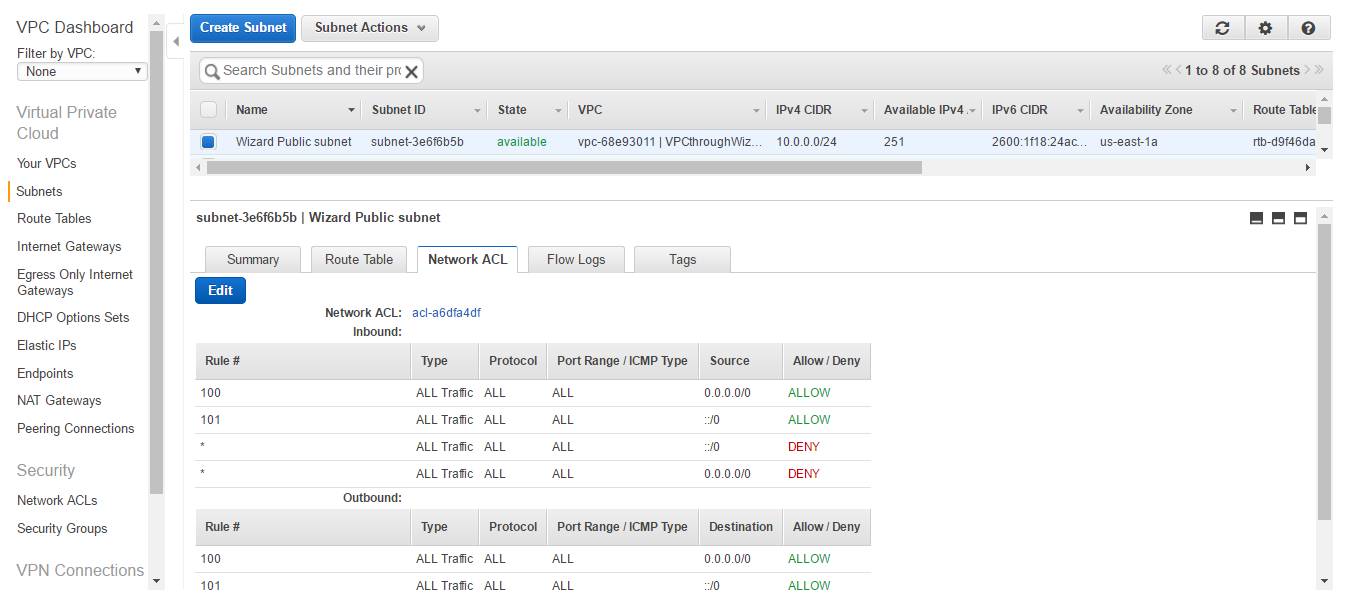
Network ACL of subnet created