

In this section, we shall be creating an EC2 instance with an IPv6 address in the VPC and subnet that we created using the wizard. EC2 is a virtual machine in AWS that comes as an IaaS offering. You can choose different virtual machine images called Amazon Machine Image (AMI) or create your own custom AMI for creating an EC2 instance. We shall also install a web server to test if our steps are correct.
Creating an EC2 with an IPv6 address
Getting ready
We need an AWS account and user with proper permissions for creating an EC2 instance.
How to do it...
- Log in to your AWS account. Select EC2 services as shown in the following figure:

Select EC2 service
- The EC2 dashboard will appear. Click on Launch Instance in the EC2 dashboard.

EC2 dashboard
- Select Amazon Linux AMI, which is available on the top of the list
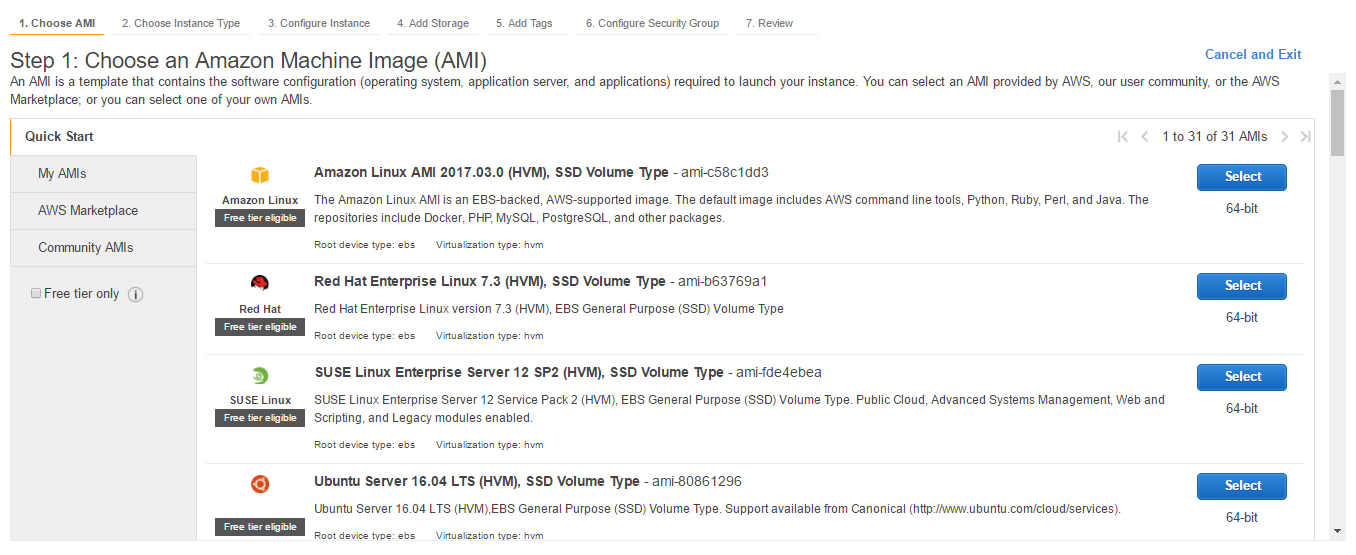
Choose AMI
- There are many instance types available with different vCPU and memory options. We shall choose t2.micro and then click on Next: Configure Instance Details.

Choose instance type
- In Network, choose the VPC we just created. In Subnet, select the subnet we created. In Auto-assign Public IP, choose Enable. In Auto-assign IPv6 IP, choose Enable. Click on Next: Add Storage.
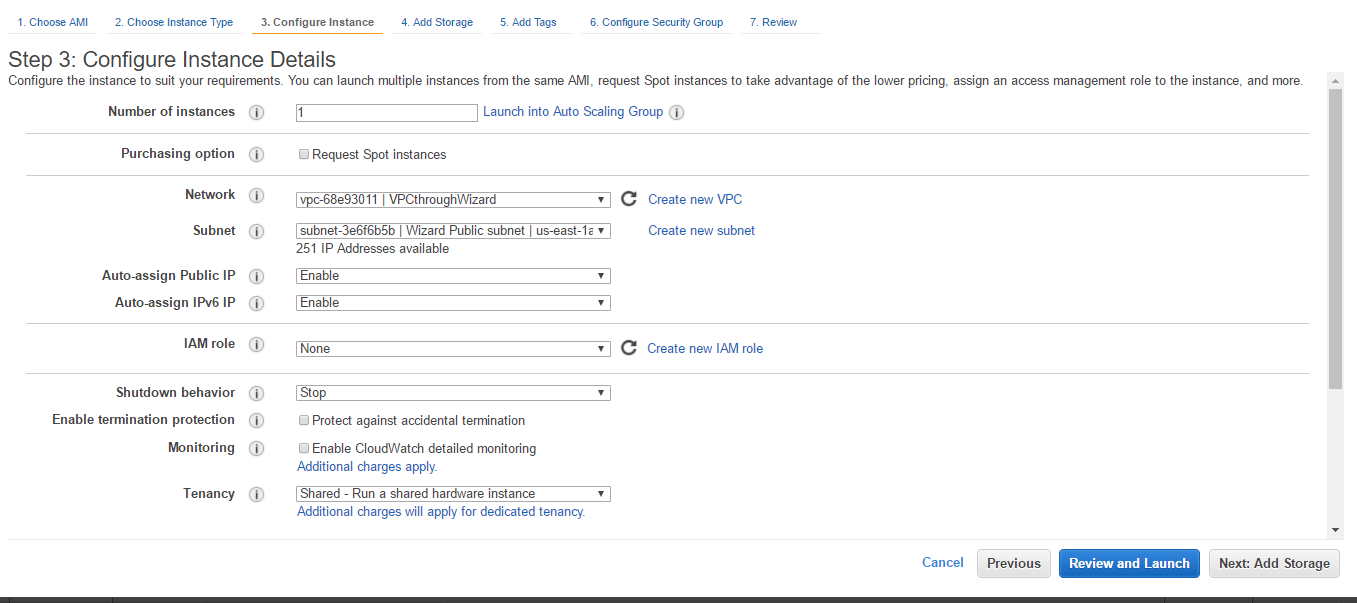
Choose network
- Click on the Advanced Details and put the following lines in the text box. This is user data. This may vary with the OS of EC2. The script is executed when the instance is first created. Here is a script that can execute on Linux. It will install Apache, PHP, and MySQL in the server. It will also start the Apache server once the EC2 is running.
#!/bin/bash
yum update -y
yum install -y httpd24 php56 mysql55-server php56-mysqlnd
service httpd start
chkconfig httpd on
groupadd www
usermod -a -G www ec2-user
chown -R root:www /var/www
chmod 2775 /var/www
find /var/www -type d -exec chmod 2775 {} +
find /var/www -type f -exec chmod 0664 {} +
echo "<?php phpinfo(); ?>" > /var/www/html/phpinfo.php
- Accept the default option and click Next: Add Tags.

Add Storage
- Click on Add Tags. In Key, put Name and in Value, put MyFirstEC2. Click on Next: Configure Security Group.
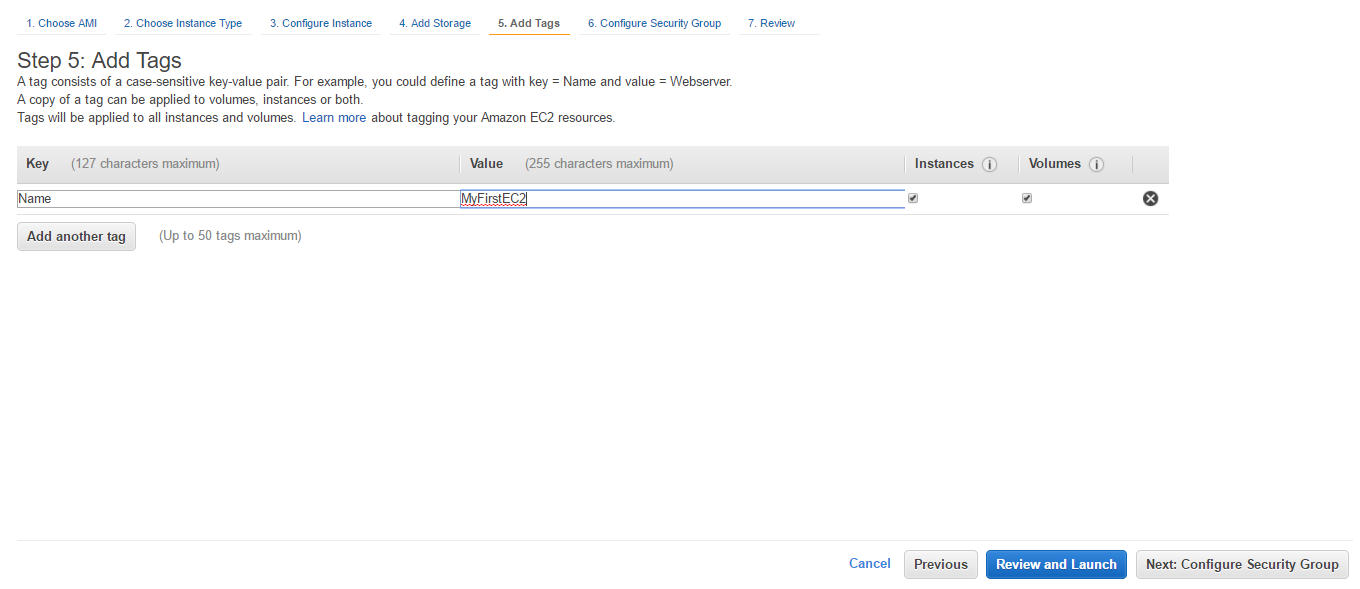
Add Tags
- Provide a Security group name and Description. By default, SSH is open to all IP addresses. In Source, we have two CIDR ranges, 0.0.0.0/0 to allow all IPv4 addresses and ::/0 to allow all IPv6 addresses. Click on Add Rule and allow HTTP traffic to all source. We should not be opening our servers to all like this, however for simplicity, let's do this for now. Click on Review and Launch.
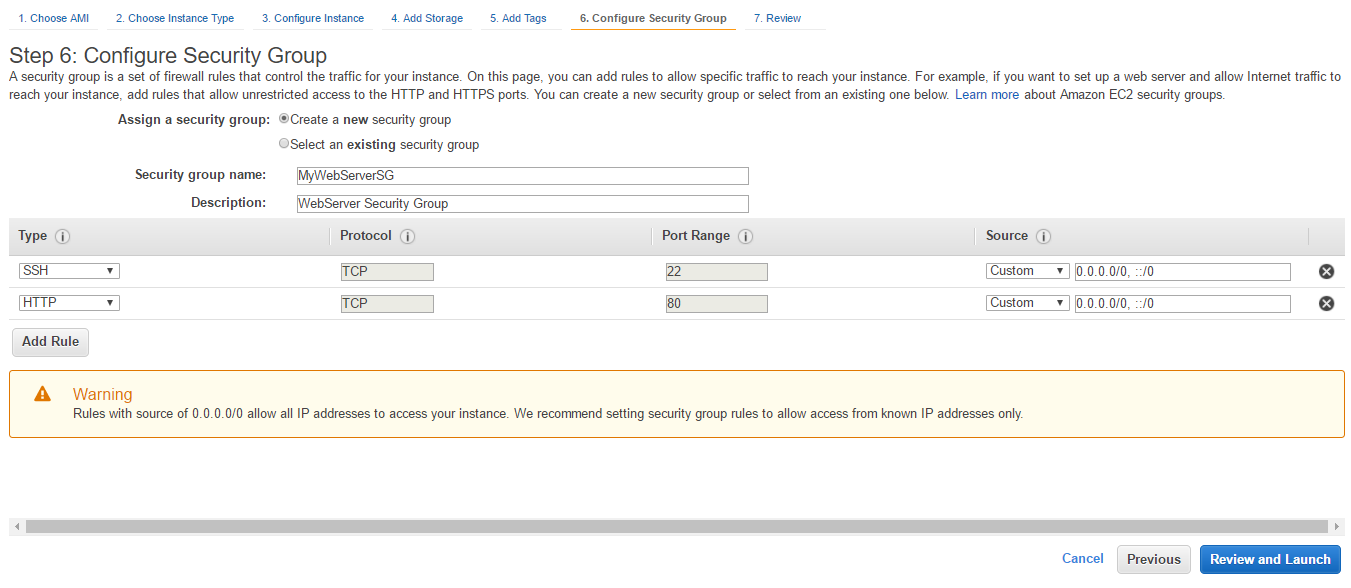
Configure Security Group
- Review the details and click Launch.
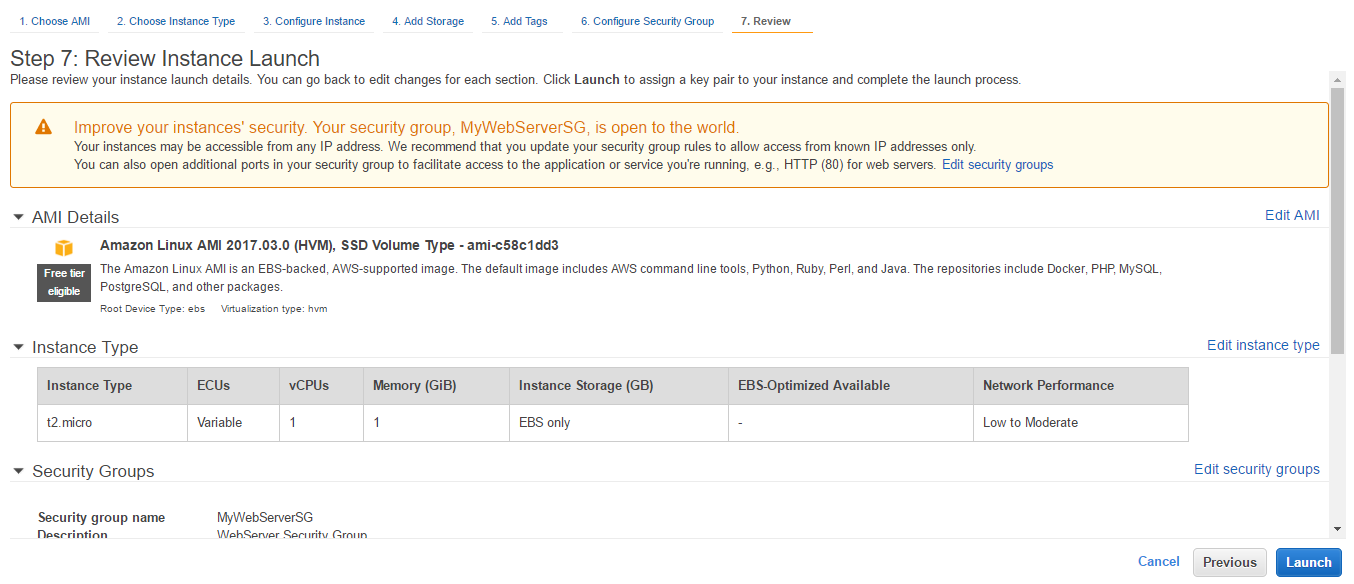
Review instance launch
- We can optionally create a key pair. Key information is required if we want to log into EC2. Download Key Pair and store it in a safe place. Click on Launch Instances.
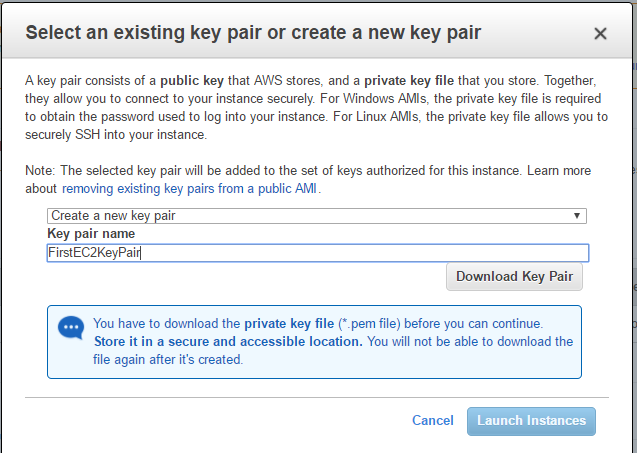
Create Key Pair
- You can see a success message with the EC2 instance ID. Click on the ID. It will take us to the EC2 console. The instance will be in running condition in some time.

EC2 launch status
- We can see both Public DNS (IPv4) and IPv6 IPs. We can create URL to access page running on EC2: http:// DNS(IPv4)/phpinfo.php. Replace the DNS (IPv4) in the URL with the one you see in the console. Open a browser and paste the URL.
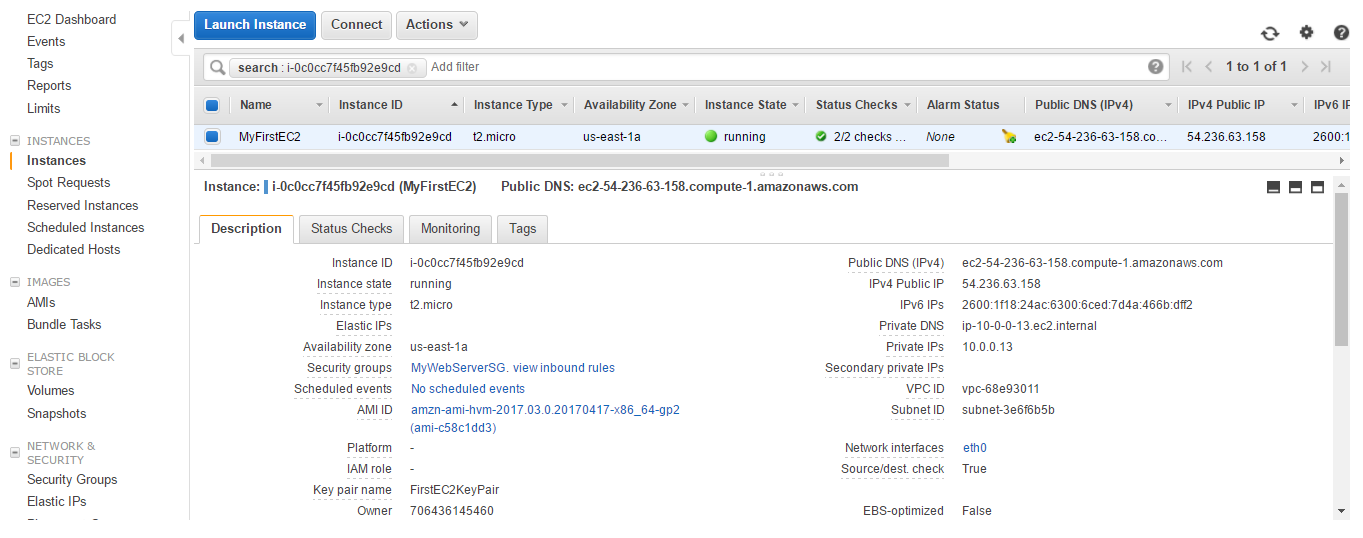
EC2 instance detail
- We can see the page of the server we created on the EC2 instance.

Sample web page on EC2
How it works...
We have seen that the Network ACL with VPC and subnet allows all traffic. In the security group of the instance, we have opened HTTP protocol on port 80 for all incoming traffic. Internet Gateway is attached to the subnet in which we created the instance. During instance creation we have installed Apache, PHP and MySQL to host a website with page phpinfo.php. As we have enabled IPv4 and IPv6 in VPC, subnet and EC2, the EC2 instance has assigned those. So, after EC2 creation, we can access the website using the URL. The DNS name is resolved by AWS Route 53.