Book Image

Mobile DevOps

By : Rohin Tak, Jhalak Modi
Book Image

Mobile DevOps

By: Rohin Tak, Jhalak Modi

Overview of this book

Today's world is all about perfection, and there are hundreds of applications that are released each day out of which only a few succeed. Making sure that the app looks, performs, and behaves as expected is one of the biggest challenge developers face today. The main goal of this book is to teach developers to implement DevOps to build, test, and deliver. This book will teach you to implement Mobile DevOps at every stage of your application's lifecycle with Visual Studio and Xamarin Mobile Lifecycle solutions. Later, it will also show you how to leverage Mobile Center's continuous integration and automated testing to develop a high-quality applications. Next, you’ll see how to mobilize your on-premises data to the cloud and increase your productivity with code reuse. Finally, you’ll discover how to find and fix bugs beforehand, improving the efficiency of your application while it is being developed. By the end of this book, you will be well-versed with Mobile DevOps techniques, delivering high quality and high performance mobile apps.
Table of Contents (13 chapters)

Adding permissions to Android Manifest

Our application needs only one permission as of now, and that is to place a call. To modify or add permissions for the application, we need to edit Android Manifest.

  1. To edit Android Manifest and give the permission, follow these steps:
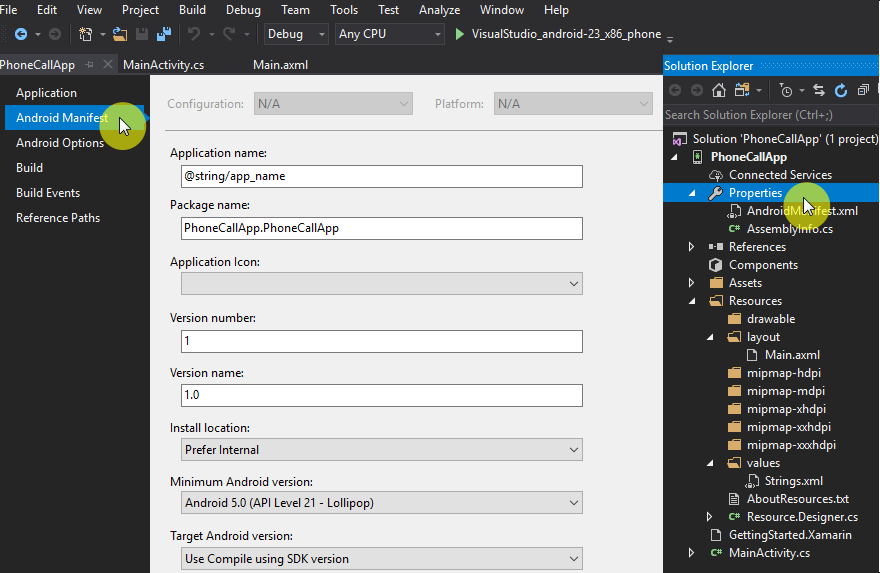
    1. Open Solution Explorer.
    2. Double-click on Properties under the project.
    3. This should open a UI to edit project properties.
    4. Now, from the left-hand menu, click on Android Manifest to open it:
  1. In the Required permissions section, scroll down, find the CALL_PHONE permissions, and select this option:
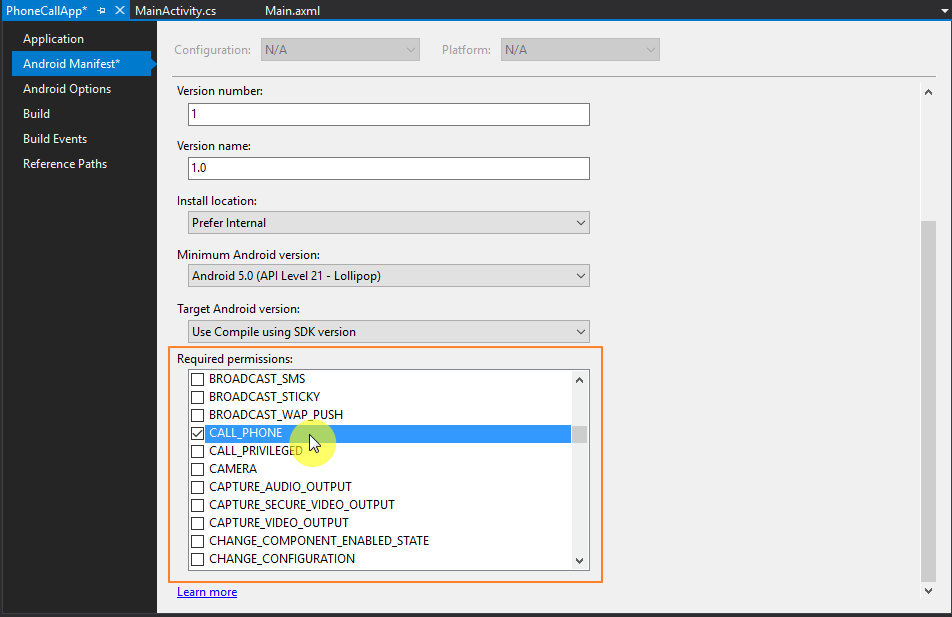
    1. Press Ctrl + Shift + S to save all the changes to the project.
    2. Close the Properties window.
    3. We are done adding permissions to the application.
    4. We need to build the solution now, so the resulting installation file has all the changes we made.
  1. Rebuild the project; right-click on Solution | Rebuild Solution...