Book Image

Google Cloud Platform Administration

By : Ranjit Singh Thakurratan
Book Image

Google Cloud Platform Administration

By: Ranjit Singh Thakurratan

Overview of this book

On-premise data centers are costly to manage. If you need a data center but don’t want to deal with a physical one, Google Cloud Platform (GCP) is the solution. With GCP, you can build, test, and deploy applications on Google’s infrastructure. Google Cloud Platform Administration begins with GCP fundamentals, with the help of which you will deploy your first app and gain an understanding of Google Cloud architecture and services. Furthermore, you will learn how to manage Compute, networking, and storage resources. As you make your way through the book, you will learn how to track and manage GCP’s usage, monitoring, and billing access control. You will also be able to manage your GCP's access and permissions. In the concluding chapters, you will explore a list of different developer tools for managing and interacting with the GCP platform. By the end of this book, you will have learned how to effectively deploy workloads on GCP.
Table of Contents (11 chapters)

Relating AWS and Azure to GCP

If you are familiar with Amazon's AWS or Microsoft's Azure, then this table will help you relate their associated services to what GCP has to offer. Only a few services are shown in the table:

Amazon Web Services

Microsoft Azure

Google Cloud Platform

Amazon EC2

Azure Virtual Machines

Google Compute Engine

AWS Elastic Beanstalk

Azure App Services

Google App Engine

Amazon EC2 Container Service

Azure Container Service

Google Kubernetes Engine

Amazon DynamoDB

Azure Cosmos DB

Google Cloud Bigtable

Amazon Redshift

Microsoft Azure SQL Data warehouse

Google BigQuery

Amazon Lambda

Azure Functions

Google Cloud Functions

Amazon S3

Azure Blob Storage

Google Storage

AWS Direct Connect

Azure ExpressRoute

Google Cloud Interconnect

AWS SNS

Azure Service Bus

Google Cloud Pub/Sub

AWS Cloudwatch

Application Insights

Stackdriver Monitoring

Exploring GCP

Let's dive a little deeper into GCP by creating an account and getting familiar with the console and command-line interface. There are three ways to access GCP—via console, via a command-line interface using the gcloud command-line tool, and Google Cloud SDK client libraries. But before that, we need to understand the concept of projects.

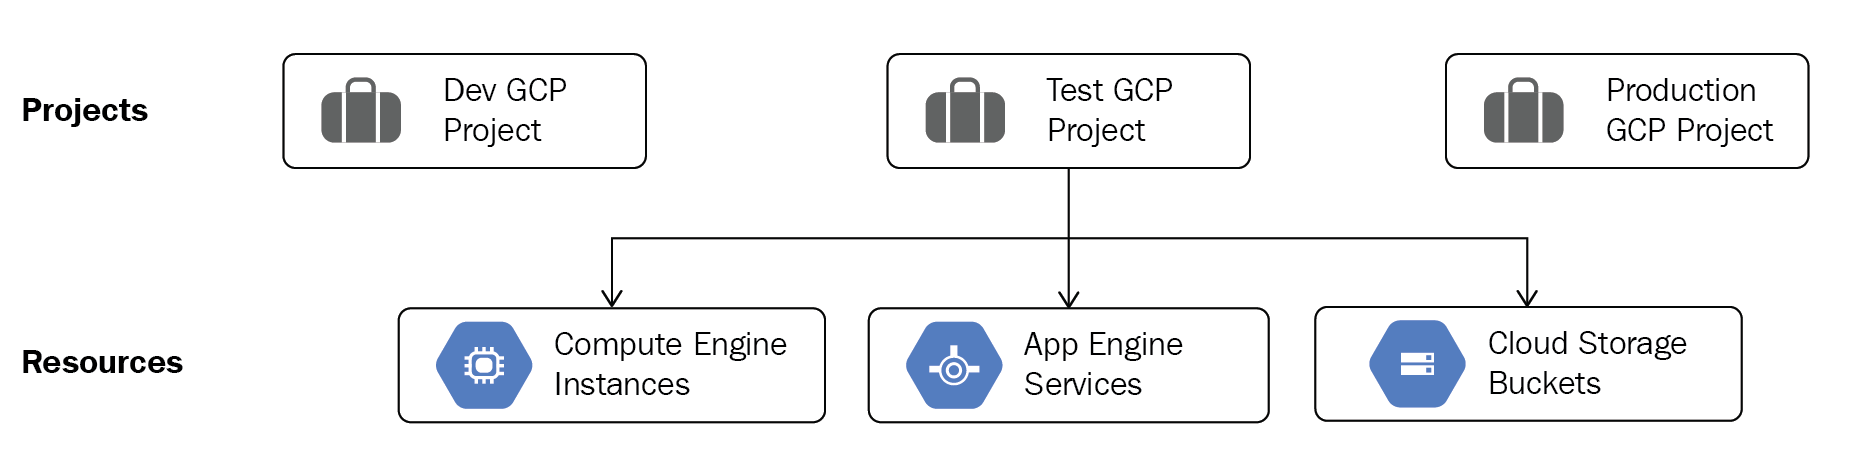
In GCP, all resources must belong to a project. If you work for a large organization, don't be surprised to see tens of hundreds of projects. Projects can be tied down to a business unit or an internal or external organization.

In GCP, any cloud resources that you create must belong to a project. A project is basically an organizing entity for any cloud resource that you wish to deploy. All resources deployed within a single project can communicate easily with each other, for example two compute engine virtual machines can easily communicate with each other within a project without having to go through a gateway. This, however, is subject to region and zone limitations. It is important to note that resources in one project can talk to resources in another project only through an external network connection.

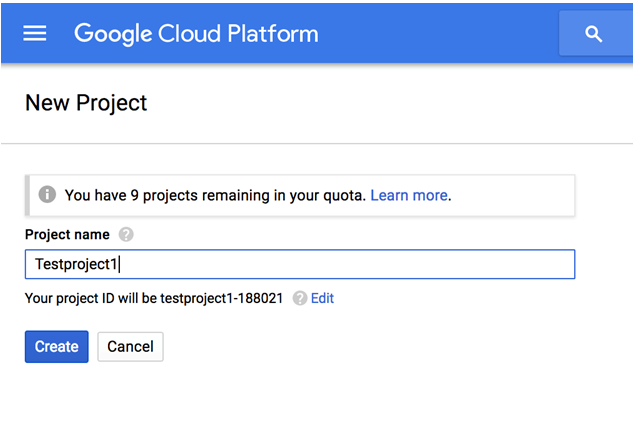
Each project has a project name, a project ID, and a project number. The project ID has to be a unique name across the cloud platform (or Google can generate an ID for you). Remember that even if the project has been deleted, its ID cannot be reused again:

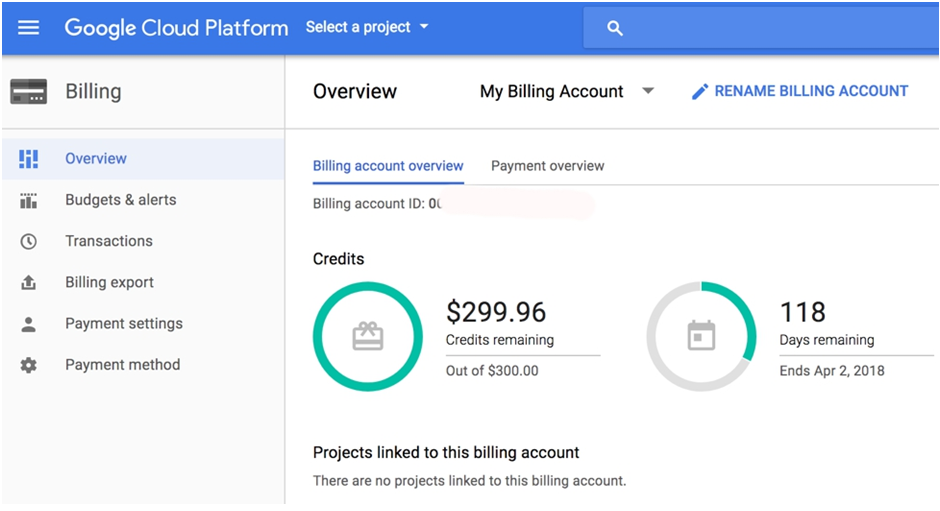
GCP allows you a free trail that provides you with $300 of credit towards any Google product. Your trial lasts for 12 months and expires automatically after that. If you exceed your free $300 credit, your services will be turned off but you will not be charged or billed, making this a safe way to explore and learn more about GCP.

To get started:

  1. Go to https://cloud.google.com and click on TRY IT FREE:
Remember that you will need to have a Google registered ID to be able to register to use GCP services. We will discuss accounts and access in greater detail in cloud identity and access management.
  1. Once you create an account and log in, agree to the terms and conditions and fill out your details along with a valid credit card number.
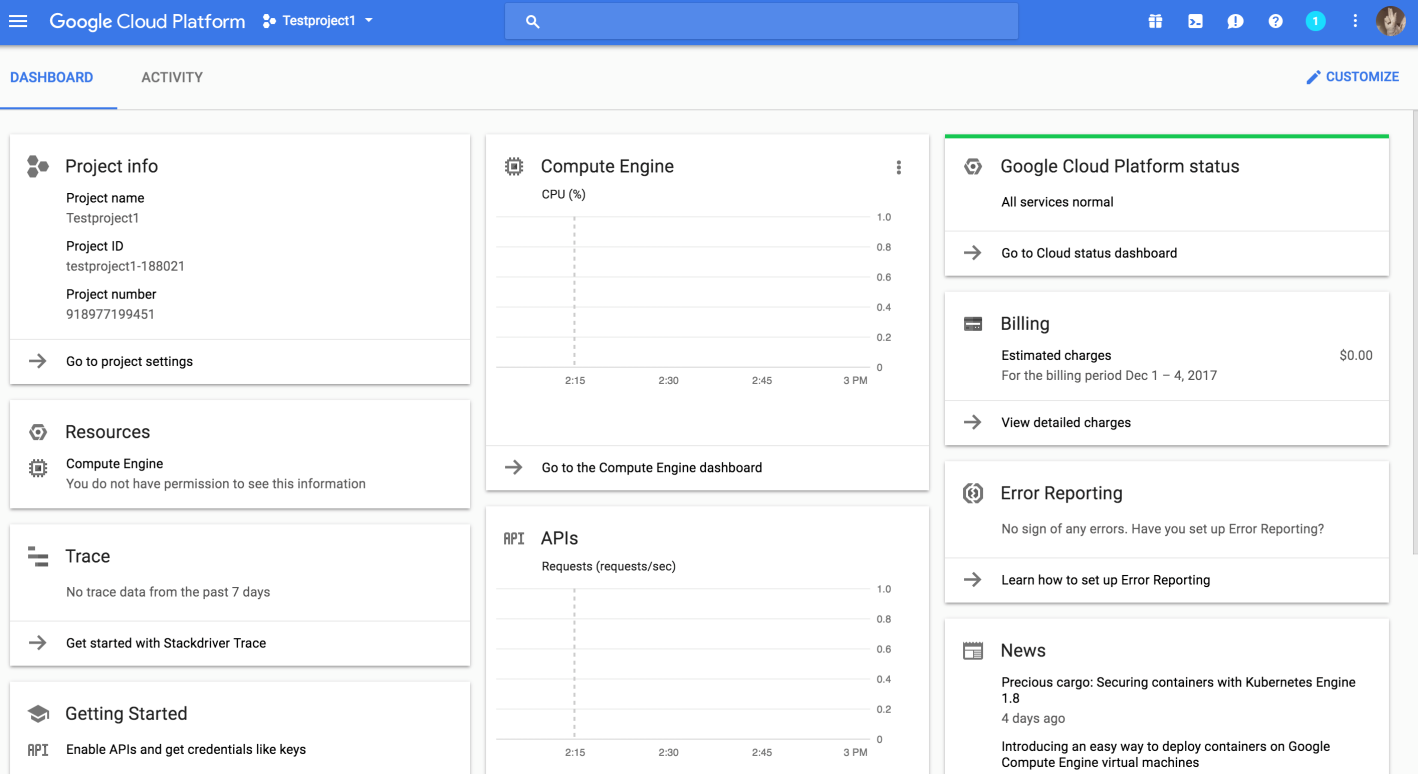
  1. Once logged in you will see a Billing Overview:

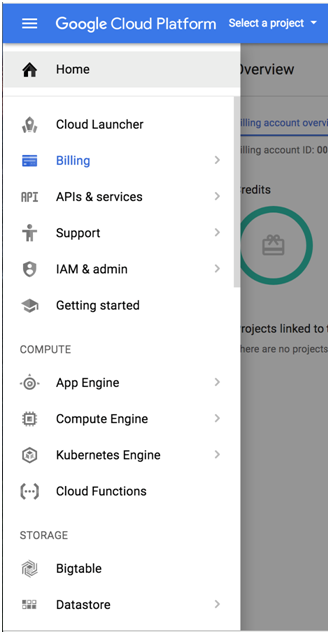
Let's look at how to access different GCP services using the console:

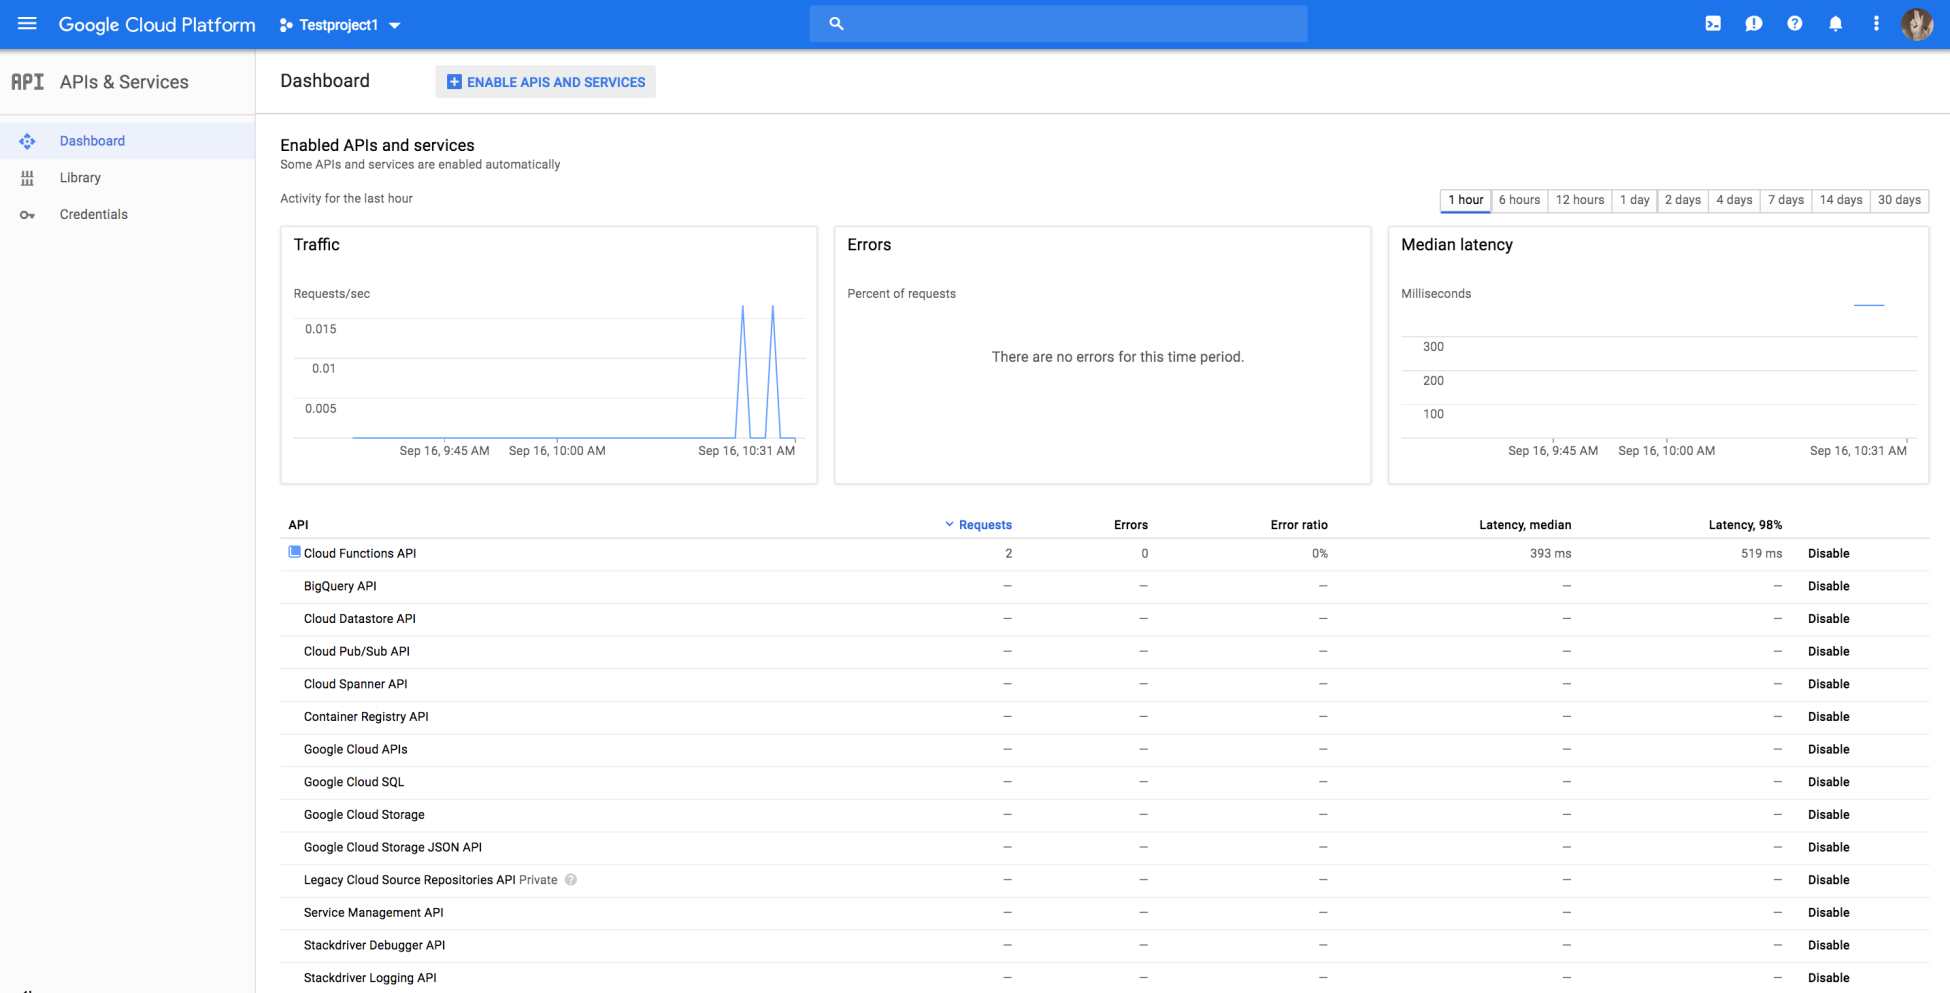
  1. Click on the menu on the left to drop down the list of services. Feel free to scroll down this list to explore:
  1. On the right, let's look at another way of accessing your GCP instance using the cloud shell tool that allows you to manage your resources from the command line in any browser. The on the top right activates your Google cloud shell. This opens a new frame at the bottom of the browser and displays a prompt. It may take a few seconds for the shell session to be established:

Creating your first project

Alternatively, if you prefer using your terminal, you can download and install the SDK to use gcloud on your terminal. It is important to remember that gcloud is part of the Google Cloud SDK.

We can get started at deploying services by first creating a project:

  1. In the preceding illustration, click Create to create your first project:
  1. You can pick any project name and GCP auto-generates a project ID for you. If you need to customize the project ID in accordance with your organization's standards, click Edit. Remember that this project ID needs to be unique.
  2. Click Create when done.
  1. Once the project is created, your DASHBOARD will show you all info related to your project and its associated resources:
Project IDs are auto-generated but can be customized. It is best to leave the default project IDs in place to avoid management issues.
  1. On the left, note the Project name, Project ID, and the Project number.
  1. Click on Project settings. You will see that you are able to change the Project name but cannot change the Project ID or the Project number. Project settings can also be accessed by going to IAM & admin | Settings:

You can even shut down a project by clicking on the Shut Down option. This will cause all traffic and billing to stop on the project and shut down all resources within a project. You will have 30 days to restore such a project before its deleted. You also have an option to migrate a project. This comes in handy if you are part of an organization and want to move a project over to the organization unit. You will be able to do this if you are a G suite or a cloud premium customer with a support package. Ideally, this is something that keeps projects and permissions at an organization level, rather than at an individual level.

Let's look at enabling APIs as services for your project to allow us to use API access to services. APIs are automatically enabled whenever you try to launch a service using the console. For example, if you attempt to deploy a Google Compute Engine virtual machine, the initialization of that service will enable the Google Cloud Compute API:

  1. Go to Menu | API's and Services | Dashboard:

All APIs associated with services are disabled by default and you can enable specific ones as required by your application.

  1. Click on ENABLE APIS AND SERVICES and search for the Google Cloud Compute API. Click Enable. You can also click on Try this API to test the API through the browser console.

Once the API is enabled, you will see all the info related to this API in the dashboard. You can even choose to disable the API if needed:

API in the dashboard