

Smart contract
A contract is a legal document that binds two or more parties who agree to execute a transaction immediately or in the future. Since contracts are legal documents, they are enforced and implemented by law.
Examples of contracts are an individual entering into a contract with an insurance company for covering their health insurance, an individual buying a piece of land from another individual, or a company selling its shares to another company.
A smart contract is a custom logic and code deployed and executed within an Ethereum virtual environment. Smart contracts are digitized and codified rules of the transaction between accounts. Smart contracts help in transferring digital assets between accounts as an atomic transaction. Smart contracts can store data. The data stored can be used to record information, facts, associations, balances, and any other information needed to implement the logic for real-world contracts. Smart contracts are very similar to object-oriented classes. A smart contract can call another smart contract just as an object-oriented object can create and use objects of another class. Think of smart contracts as a small program consisting of functions. You can create an instance of the contract and invoke functions to view and update contact data along with the execution of some logic.
Writing smart contracts
There are multiple smart contract authoring tools, including Visual Studio. However, the easiest and fastest way to develop smart contracts is to use a browser-based tool known as Remix. This is available at http://remix.ethereum.org. Remix is a new name and was earlier known as browser-solidity.
Remix provides a rich integrated development environment in a browser for authoring, developing, deploying, and troubleshooting contracts written using the Solidity language. All contract management-related activities such as authoring, deploying, and troubleshooting can be performed from the same environment without using other tools and utilities.
Not everyone is comfortable using the online version of Remix to author their smart contracts. Remix is an open source tool that can be downloaded from https://github.com/ethereum/browser-Solidity and compiled to run a private version on a local computer.
Another advantage of running Remix locally is that it can connect to local private chain networks directly; otherwise, users will first have to author the contract online and then copy it to a file, compile it, and deploy it manually to a private network. Let's explore Remix by performing the following steps:
- Navigate to remix.ethereum.org. The site will open in a browser with a default contract, as shown in the following screenshot. If you do not need this contract, it can be deleted:
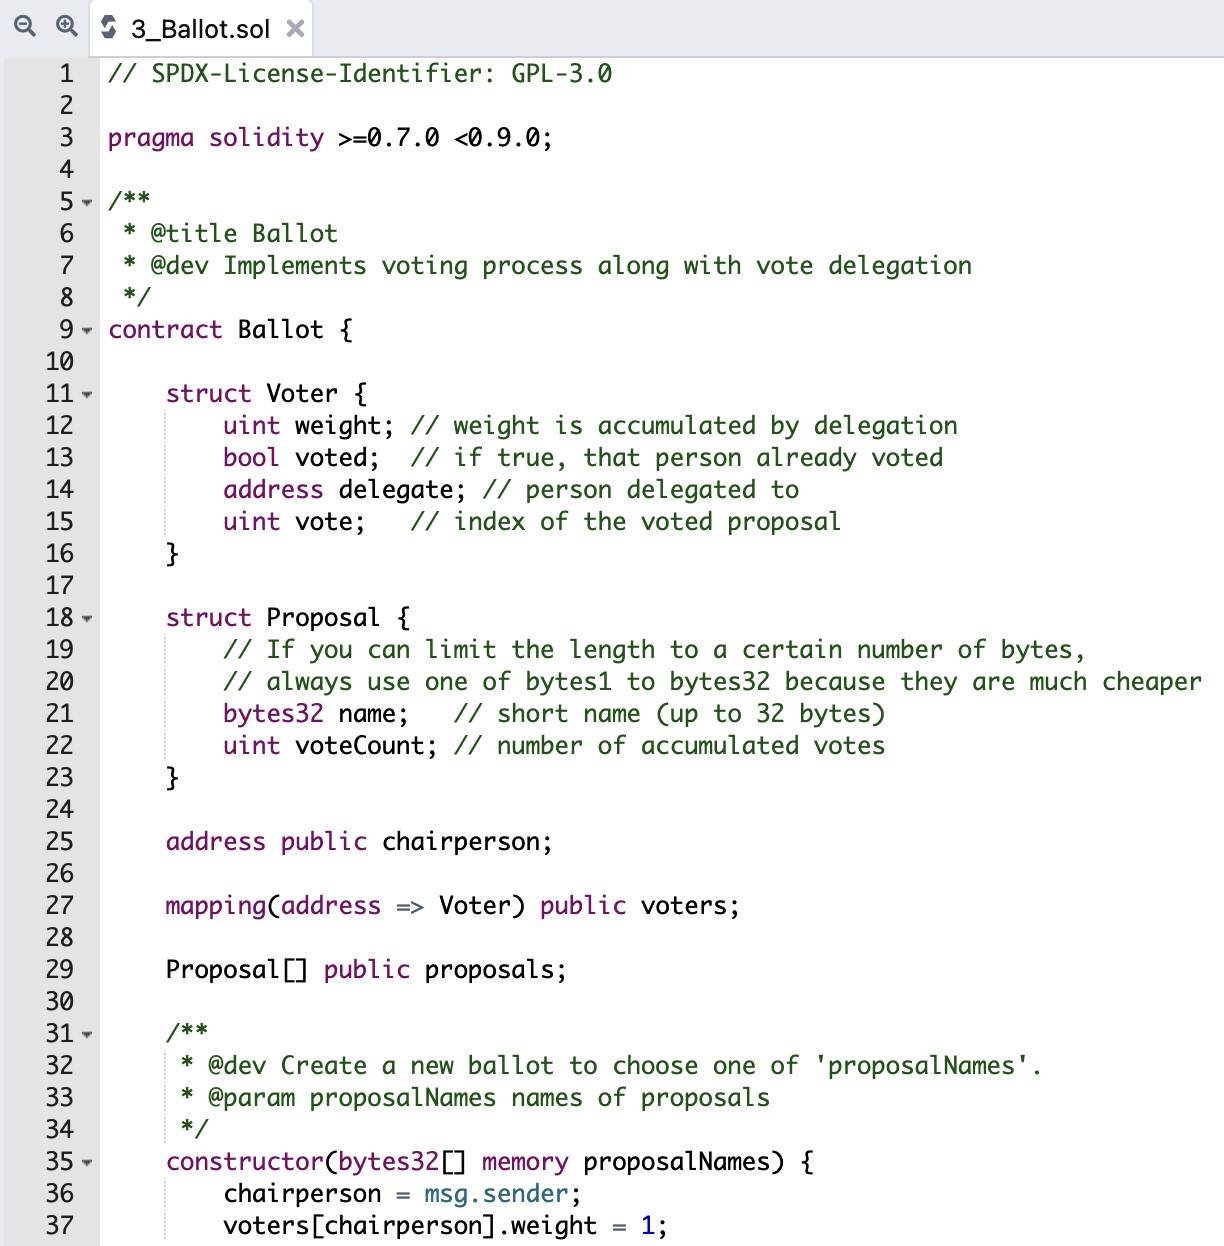
Figure 1.14 – The default Ballot contract in Remix
- The first thing we need to do is to create a new contract by selecting + from Remix's left menu bar.
- Then, provide a name for a new Solidity file that has a
.solextension. Name the contractHelloWorldand hit Enter on the keyboard to create a new Solidity file, as shown in the following screenshot. This will create a blank file:

Figure 1.15 – The HelloWorld.sol file in Remix
- Type the following code in the empty authoring pane to create your first contract. This contract will be explained in detail in Chapter 3, Solidity Development. For now, it is sufficient to understand that the contract is created using the
contractkeyword. You can declare global state variables and functions, and contracts are saved with the.solfile extension. In the following code snippet, theHelloWorldcontract returns theHello Worldliteral value when theGetHelloWorldfunction is executed:pragma solidity >=0.7.0 <0.9.0; contract HelloWorld { string private stateVariable = "Hello World"; function GetHelloWorld() public view returns ( string memory) { return stateVariable; } }
The extreme left of Remix has a wunderbar comprising multiple tabs. The FILE EXPLORERS tab helps in managing workspace along with project folder hierarchy and organization. Contract files are also managed using this tab. It has good integration with GitHub and helps in pushing changes to repositories.
The next is the SOLIDITY COMPILER tab. This tab helps in choosing an appropriate compiler version that helps in compiling the contracts. The SOLIDITY R COMPILER tab compiles the contract into bytecode – code that is understood by Ethereum. It displays warnings and errors as you author and edit the contract. These warnings and errors should be taken seriously, and they really help in creating robust contracts.
The third tab, DEPLOY AND RUN TRANSACTIONS, helps in deploying and executing the smart contracts to an environment. There are out-of-the-box JavaScript VMs (London and Berlin) in-built within the Remix page, and each represents a unique environment. This tab helps in connecting to any of the available VMs. It is also possible to connect to a custom Ethereum network using the injected web3 and web3 provider environment options. Remix comes bundled with the Ethereum runtime within the browser. This tab allows you to deploy the contract to this runtime using the JavaScript VM environment in the Environment option. The Injected Web3 environment is used along with tools such as Mist and MetaMask, which will be covered in the next chapter. Web3 provider can be used when using Remix in a local environment connecting to a private network. In our case for this chapter, the default, JavaScript VM, is sufficient. The rest of the options will be discussed later in Chapter 3, Introducing Solidity.
The Solidity static analysis tab helps in providing alerts related to implementing best practices within smart contracts. It provides a set of rules that are evaluated during compile time, and the user is notified of any rule not getting satisfied. There is also a Solidity unit testing tab that helps in executing unit tests against the smart contracts.
The previously mentioned tabs are available by default with Remix. They can be removed, and more features can be added using PLUGIN MANAGER, which is the last tab available with Remix.
- Once a smart contract like the one shown in the next screenshot is authored using Remix, it can be deployed directed to the target environment (JavaScript VMs) using the DEPLOY & RUN TRANSACTIONS tab. This tab provides a Deploy button that will deploy the contract. It is always better to compile the contract before deploying, as it helps in identifying any issues with the contract. Deploying a contract will internally first compile it:
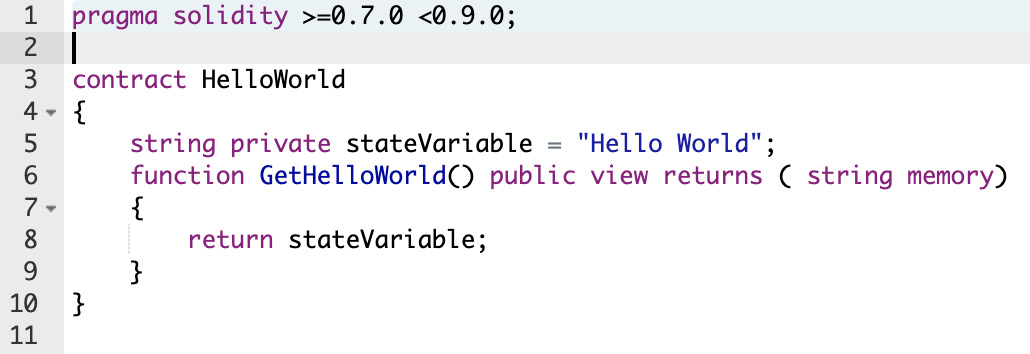
Figure 1.16 – The HelloWorld Smart contract
- Click on the Deploy button (after selecting an appropriate contract) to deploy the contract to Ethereum JavaScript VM (either London or Berlin), and this will display the deployed contract along with its associated functions. Since we only had a single function,
GetHelloWorld, the same function is displayed, as shown in the following screenshot:
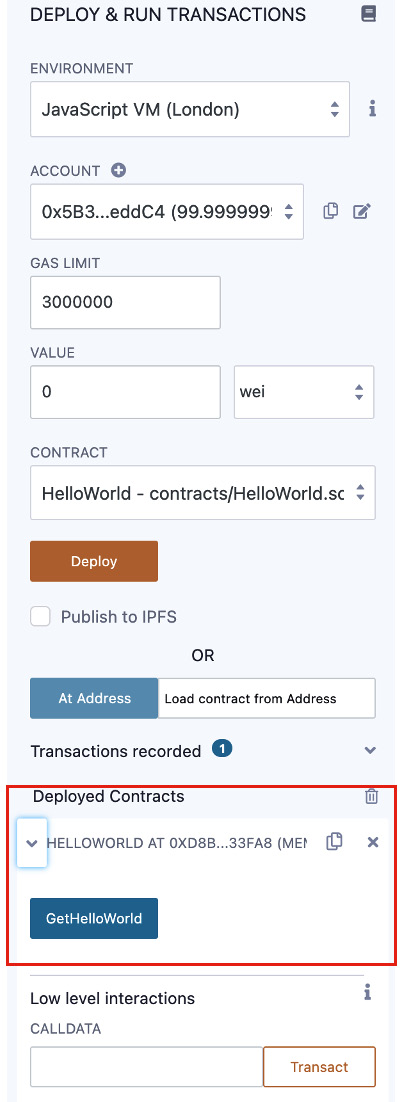
Figure 1.17 – Deploying the HelloWorld smart contract in Remix
- Click on the GetHelloWorld button to invoke and execute the function. The results of execution are shown in the following screenshot:
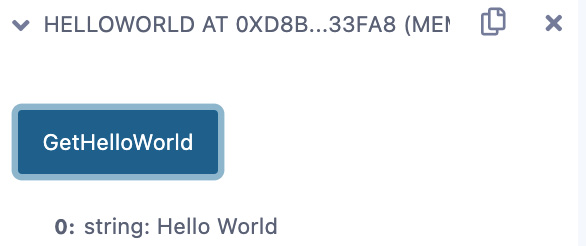
Figure 1.18 – Executing the GetHelloWorld function in Remix
Congratulations! You have created, deployed, and also executed a function on your first contract. The code for the HelloWorld contract is found in this chapter's GitHub repository and can be used in Remix if you are not interested in typing the contract.