
Do you have Xcode installed? Let's cut to the chase and see some game code in action in the simulator!
We will need to create a new project. Launch Xcode and navigate to File | New | Project. You will see a screen asking you to select a template for your new project. Select iOS | Application in the left pane, and Game in the right pane. It should look like this:

Once you select Game, click Next. The following screen asks us to enter some basic information about our project. Do not worry; we are almost at the fun bit. For our demo game, we will create a side-scrolling endless flyer featuring an astonishing flying penguin named Pierre. I am going to name this game
Pierre Penguin Escapes the Antarctic, but feel free to name your project whatever you like. For now, the names are not important. You will want to pick a meaningful Product Name and Organization Identifier when you create your own game for publication. By convention, your Organization Identifier should follow a reverse domain name style. I will usecom.ThinkingSwiftly, as shown in the following screenshot.After you fill out the name fields, make sure to select Swift for the Language, SpriteKit for Game Technology, and Universal for Devices. Here are my settings:

Click Next and you will see the final dialog box. Save your new project. Pick a location on your computer and click Next. And we are in! Xcode has prepopulated our project with a basic SpriteKit template.
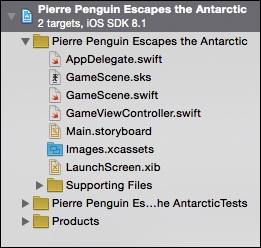
Now that we have created our project, you will see the project navigator on the left-hand side of Xcode. You will use the project navigator to add, remove, and rename files and generally organize your project. You might notice that Xcode has created quite a few files in our new project. We will take it slow; do not feel pressure to know what each file does yet, but feel free to explore them if you are curious:
Use the project navigator to open up the file named GameScene.swift. Xcode created GameScene.swift to store the default scene of our new game.
What is a scene? SpriteKit uses the concept of scenes to encapsulate each unique area of a game. Think of the scenes in a movie; we will create a scene for the main menu, a scene for the game over screen, a scene for each level in our game, and so on. If you are on the main menu of a game and you tap "play", you move from the menu scene to the level 1 scene.
Tip
SpriteKit prepends its class names with the letters "SK"; consequently, the scene class is SKScene.
You will see there is already some code in this scene. The SpriteKit project template comes with a very small demo. Let's take a quick look at this demo code and use it to test the iOS simulator.
Note
Please do not be concerned with understanding the demo code at this point. Your focus should be on learning the development environment.
Look for the run toolbar at the top of the Xcode window. It should look something like this:

Select the iOS device of your preference to simulate using the dropdown on the far right. Which iOS device should you simulate? You are free to use the device of your choice. I will be using an iPhone 6 for the screenshots in this book, so choose iPhone 6 if you want your results to match my images perfectly.
Note
Unfortunately, expect your game to play poorly in the simulator. SpriteKit suffers poor FPS in the iOS simulator. Once our game becomes relatively complex, we will see our FPS drop, even on high-end computers. The simulator will get you through, but it is best if you can plug in a physical device to test.
It is time for our first glimpse of SpriteKit in action! Press the gray play arrow (handy run keyboard shortcut: command + r). Xcode will build the project and launch the simulator. The simulator starts in a new window, so make sure you bring it to the front. You should see a gray background with chalky white text: Hello, World. Click around on the gray background.
You will see spinning fighter jets spawning wherever you click:
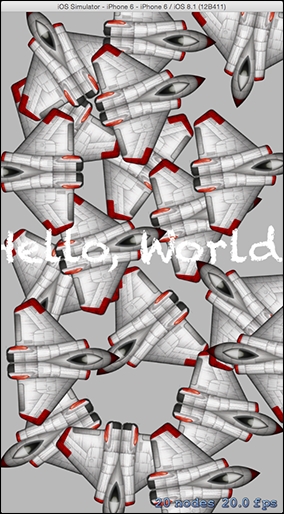
I may have gone slightly overboard with the jets . . .
If you have made it this far, congratulations! You have successfully installed and configured everything you need to make your first Swift game.
Once you have spawned a sufficient number of jets, you can close the simulator down and return to Xcode. Note: you can use the keyboard command command + q to exit the simulator or press the stop button inside Xcode. If you use the stop button, the simulator will remain open and launch your next build faster.
Let's quickly explore the demo code. Do not worry about understanding everything just yet; we will cover each element in depth later. At this point, I am hoping you will acclimatize to the development environment and pick up a few things along the way. If you are stuck, keep going! Things will actually get simpler in the next chapter, after we clear away the SpriteKit demo and start on our own game.
Make sure you have GameScene.swift open in Xcode.
The GameScene class implements three functions. Let's examine these functions. Feel free to read the code inside each function, but I do not expect you to understand the specific code just yet.
The game invokes the
didMoveToViewfunction whenever it switches to theGameScene. You can think of it a bit like an initialize, or main, function for the scene. The SpriteKit demo uses it to draw the Hello World text to the screen.The
touchesBeganfunction handles the user's touch input to the iOS device screen. The SpriteKit demo uses this function to spawn the fighter jet graphic and set it spinning wherever we touch the screen.The
updatefunction runs once for every frame drawn to the screen. The SpriteKit demo does not use this function, but we may have reason to implement it later.
I hope that you have absorbed some Swift syntax and gained an overview of Swift and SpriteKit. It is time to make room for our own game; let us clear all of that demo code out! We want to keep a little bit of the boilerplate, but we can delete most of what is inside the functions. To be clear, I do not expect you to understand this code yet. This is simply a necessary step towards the start of our journey! Please remove lines from your GameScene.swift file until it looks like the following code:
import SpriteKit

class GameScene: SKScene {
  override func didMoveToView(view: SKView) {
  }
}
Once your GameScene.swift looks like the preceding code, you are ready to move on to Chapter 2, Sprites, Camera, Actions! Now the real fun begins!