

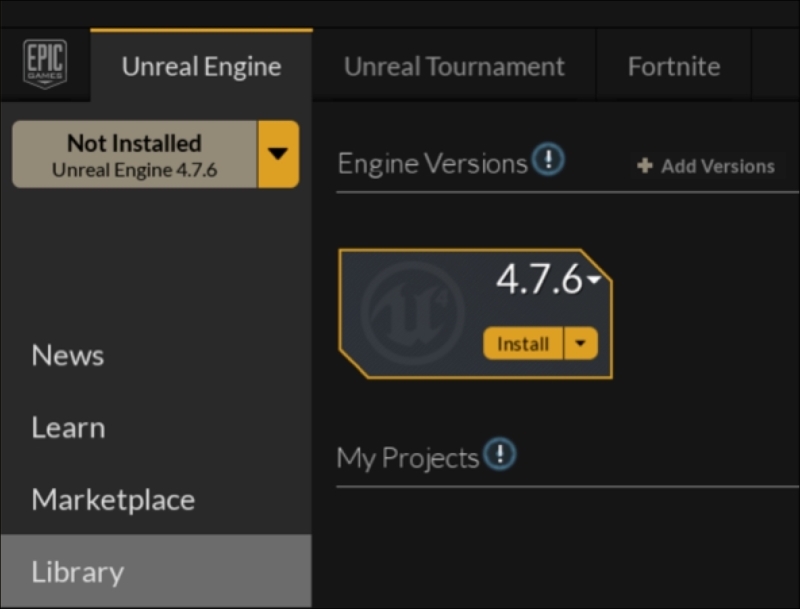
Before we can begin setting up gameplay elements, we need to create a project that will contain the content of our game. To access Unreal Engine 4 and begin setting up our project, we must first open the Epic Games Launcher, which can be downloaded from the Unreal Engine 4 website (https://www.unrealengine.com/). From the Epic Games Launcher, click on the tab labeled Unreal Engine. If you are using Unreal Engine on your computer for the first time, you will see a grayed out-button labeled Not Installed. Along the left-hand side of the launcher, you will see options.
The Library tab is the location where you will be able to access the versions of the engine you have installed and the projects you have built. Now click on the Library tab, find the yellow Install button (as seen in the following screenshot), and click on it:
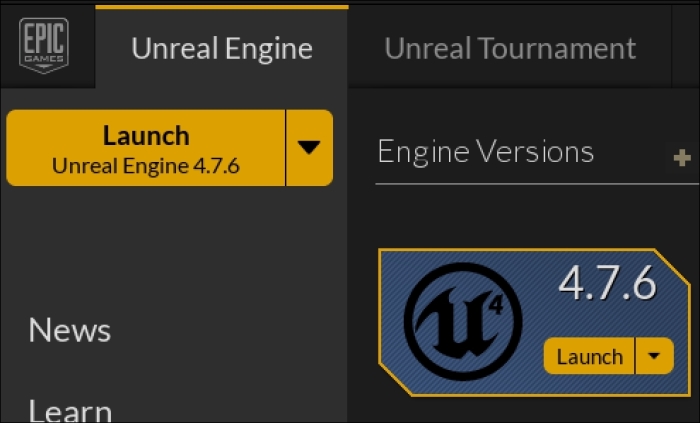
When the engine has finished installing, the Install buttons will change to Launch buttons, as shown in the following screenshot. Click on any of the Launch buttons to open the engine.
Once you click on Launch, you will be presented with the Unreal Project Browser. This will by default take you to the Projects tab, which will show you a thumbnail view of all the projects you have created, as well as any sample projects you might choose to install. For our purposes, we want to start a new project, so click on the tab labeled New Project.
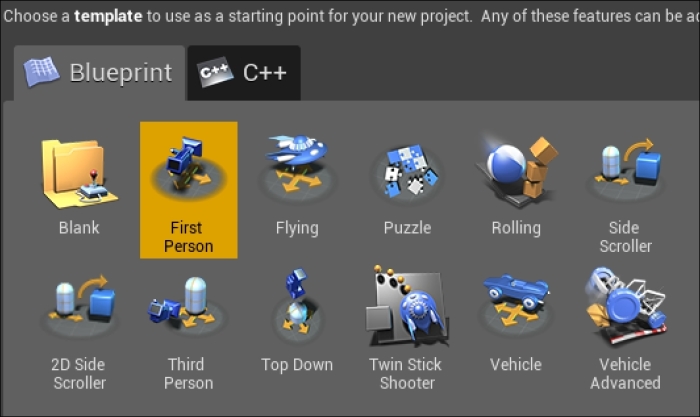
From the New Project tab, you can select a template that will give you the initial assets to use for your game; or you can choose to start a blank project. You will see two subtabs under the New Project tab, labeled Blueprint and C++. Creating a project from the content within the Blueprint tab will start your project with a basic set of behavior built using Blueprints. The C++ tab is used to create projects where at least some of the core types of behavior of the game are going to be built using the C++ programming language. Since we quickly want to get a prototype first-person shooter up and running without having to build the basic controls from scratch, we should ensure that we have the tab labeled Blueprint selected. Then we choose the First Person template, as shown here:
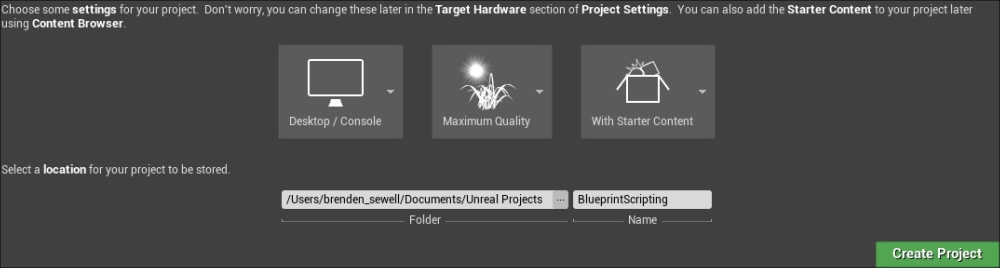
The next step is to adjust the project settings to our liking. The three gray boxes below the template selector allow us to select the class of hardware we are targeting (desktop/console or mobile/tablet), the graphics scalability, and whether we want to create our project with or without starter content. Leave these settings at their default values (Desktop/Console, Maximum Quality, and With Starter Content). Below these, you will see a folder path field used to designate where you would like to store your project on your hard drive, and a name field to input the name by which your project will be known. I named the project BlueprintScripting and stored it in the default Unreal Projects folder for OS X, as shown in this screenshot:
Now that we have a template selected and the project settings set up the way we like, we can create the project. To do so, click on the green Create Project button. After the engine is done with initializing the assets and setting up your project, Unreal Editor will open Level Editor, where you can create and view levels, place and modify objects, and test your game as you modify it.
Pressing the Play button, as shown in the following screenshot, along the top of the toolbar, will allow you to try the default gameplay that comes built into the First Person template. This includes player movement, shooting a simple projectile, and using projectiles to apply force to primitive box objects. In play mode, the Play button will be replaced with a Pause button and a Stop button. You can press the Pause button to temporarily halt the play session, which can be useful when you want to explore the properties of an interaction or actor that you just encountered during gameplay. Pressing the Stop button will end the play session and take you back to editing mode. Go ahead and try playing the game before we continue.
