

Creating realistic-looking shadows without sacrificing a huge amount of memory or processing power remains one of the great challenges in computer graphics. While I may not be able to offer a perfect solution for every shadow-related problem you have in your games, I can at least get you started in the world of shadow creation through the demonstration of one of the more well-known techniques, shadow mapping, seen in the following illustration.
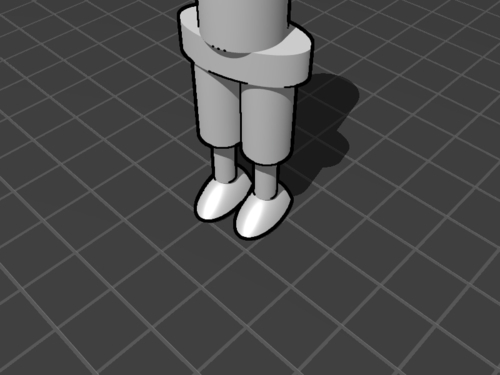
For this recipe, it's best to start with a simple existing scene containing a floor and at least one mesh floating or standing above it, as shown in the previous illustration.
To create a disc programmatically:
1. Add a new effect file to your game content project named
Shadows.fx.2. Define the input parameters of the new shader:
float4x4 World;
float4x4 View;
float4x4 Projection;
float4x4 LightViewProj;
float3 LightDirection;
float4 AmbientColor = float4(0.15, 0.15, 0.15, 0);
float DepthBias = 0.001f;
texture Texture;
sampler TextureSampler = sampler_state
{
Texture = (Texture);
};
texture ShadowMap;
sampler ShadowMapSampler = sampler_state
{
Texture = <ShadowMap>;
};
3. Define the structures used to pass data between the pixel and vertex shaders:
struct DrawWithShadowMap_VSIn
{
float4 Position : POSITION0;
float3 Normal : NORMAL0;
float2 TexCoord : TEXCOORD0;
};
struct DrawWithShadowMap_VSOut
{
float4 Position : POSITION0;
float3 Normal : TEXCOORD0;
float2 TexCoord : TEXCOORD1;
float4 WorldPos : TEXCOORD2;
};
struct CreateShadowMap_VSOut
{
float4 Position : POSITION;
float Depth : TEXCOORD0;
};
4. Next, create a vertex shader for rendering a depth map:
CreateShadowMap_VSOut CreateShadowMap_VertexShader(
float4 Position: POSITION)
{
CreateShadowMap_VSOut Out;
Out.Position = mul(Position, mul(World, LightViewProj));
Out.Depth = Out.Position.z / Out.Position.w;
return Out;
}
5. Create the vertex shader's partner-in-crime, the pixel shader, to render a depth map:
float4 CreateShadowMap_PixelShader(
CreateShadowMap_VSOut input) : COLOR
{
return float4(input.Depth, 0, 0, 0);
}
6. Next, make the vertex shader render the shadows:
DrawWithShadowMap_VSOut DrawWithShadowMap_VertexShader(DrawWithShadowMap_VSIn input)
{
float4x4 WorldViewProj = mul(mul(World, View), Projection);
DrawWithShadowMap_VSOut Output;
Output.Position = mul(input.Position, WorldViewProj);
Output.Normal = normalize(mul(input.Normal, World));
Output.TexCoord = input.TexCoord;
Output.WorldPos = mul(input.Position, World);
return Output;
}
7. Create the matching pixel shader, which will, for every pixel, compare the depth of the scene from the player's perspective to that of the previously captured shadow depth map:
float4 DrawWithShadowMap_PixelShader(
DrawWithShadowMap_VSOut input) : COLOR
{
float4 diffuseColor = tex2D(
TextureSampler, input.TexCoord);
float diffuseIntensity = saturate(
dot(LightDirection, input.Normal));
float4 diffuse = diffuseIntensity *
diffuseColor + AmbientColor;
float4 lightingPosition = mul(
input.WorldPos, LightViewProj);
float2 ShadowTexCoord = 0.5 * lightingPosition.xy /
lightingPosition.w +
float2( 0.5, 0.5 );
ShadowTexCoord.y = 1.0f - ShadowTexCoord.y;
float shadowdepth = tex2D(ShadowMapSampler,
ShadowTexCoord).r;
float ourdepth = (lightingPosition.z / lightingPosition.w) - DepthBias;
if (shadowdepth < ourdepth)
{
diffuse *= float4(0.5,0.5,0.5,0);
};
return diffuse;
}
8. Add some technique definitions to specify which shader to use in which circumstance:
technique CreateShadowMap
{
pass Pass1
{
VertexShader = compile vs_2_0
CreateShadowMap_VertexShader();
PixelShader = compile ps_2_0
CreateShadowMap_PixelShader();
}
}
technique DrawWithShadowMap
{
pass Pass1
{
VertexShader = compile vs_2_0
DrawWithShadowMap_VertexShader();
PixelShader = compile ps_2_0
DrawWithShadowMap_PixelShader();
}
}
9. In your game class, add some instance variables to hold details about the virtual camera:
Matrix view;
Matrix projection;
Matrix world;
BoundingFrustum cameraFrustum = new BoundingFrustum(Matrix.Identity);
10. Then, add some details about the lighting:
Vector3 lightDirection;
Matrix lightViewProjection = Matrix.Identity;
11. Now, add some variables to hold the various effects that are going to be used to render the scene:
BasicEffect basicEffect;
Effect hiDefShadowEffect;
RenderTarget2D shadowRenderTarget;
12. In the
LoadContent()method, start by setting up the lighting and camera positions:lightDirection = Vector3.Normalize( (Vector3.Backward * 2) + (Vector3.Up * 2) + (Vector3.Left * 2)); view = Matrix.CreateLookAt( (Vector3.Backward * 4) + (Vector3.Up * 3) + (Vector3.Right), Vector3.Zero, Vector3.Up); projection = Matrix.CreatePerspectiveFieldOfView( MathHelper.ToRadians(60f), GraphicsDevice.Viewport.AspectRatio, 0.002f, 100f); world = Matrix.CreateTranslation(Vector3.Zero); cameraFrustum.Matrix = view * projection;
13. Continue by creating a render target to hold the shadow map:
var shadowMapWidthHeight = 2048;
var pp = GraphicsDevice.PresentationParameters;
shadowRenderTarget = new
RenderTarget2D(graphics.GraphicsDevice,
shadowMapWidthHeight,
shadowMapWidthHeight,
false,
pp.BackBufferFormat,
DepthFormat.Depth24);
14. Then, set up the effects used to render the objects within the scene, and the shadows cast by them:
basicEffect = new BasicEffect(GraphicsDevice)
{
View = view,
Projection = projection,
World = world,
};
basicEffect.EnableDefaultLighting();
hiDefShadowEffect = Content.Load<Effect>("Shadows");
15. Add a new method to calculate the position and size of the virtual camera used to record a depth map from the point of view of the light source:
Matrix CreateLightViewProjectionMatrix()
{
16. Insert a matrix into the new method to rotate things towards the direction of the light:
Matrix lightRotation = Matrix.CreateLookAt(
Vector3.Zero,
-lightDirection,
Vector3.Up);
17. Calculate the corners of the visible area for the "light" camera:
Vector3[] frustumCorners = cameraFrustum.GetCorners();
for (int i = 0; i < frustumCorners.Length; i++)
{
frustumCorners[i] = Vector3.Transform(frustumCorners[i], lightRotation);
}
18. Work out the smallest box that could fit the corners of the visible area:
BoundingBox lightBox = BoundingBox.CreateFromPoints(frustumCorners);
Vector3 boxSize = lightBox.Max - lightBox.Min;
Vector3 halfBoxSize = boxSize * 0.5f;
19. From the previously calculated box dimensions, derive the position of the light camera:
Vector3 lightPosition = lightBox.Min + halfBoxSize;
lightPosition.Z = lightBox.Min.Z;
lightPosition = Vector3.Transform(
lightPosition, Matrix.Invert(lightRotation));
20. Calculate the associated view projection matrix:
Matrix lightView = Matrix.CreateLookAt(
lightPosition,
lightPosition - lightDirection,
Vector3.Up);
Matrix lightProjection = Matrix.CreateOrthographic(
boxSize.X, boxSize.Y,
-boxSize.Z, boxSize.Z);
return lightView * lightProjection;
21. Create a new method to set up the shadow effect:
private void PopulateShadowEffect(bool createShadowMap)
{
string techniqueName = createShadowMap ?
"CreateShadowMap" : "DrawWithShadowMap";
hiDefShadowEffect.CurrentTechnique = hiDefShadowEffect.Techniques[techniqueName];
hiDefShadowEffect.Parameters["World"].SetValue(world);
hiDefShadowEffect.Parameters["View"].SetValue(view);
hiDefShadowEffect.Parameters["Projection"].SetValue(
projection);
hiDefShadowEffect.Parameters["LightDirection"].SetValue(
lightDirection);
hiDefShadowEffect.Parameters["LightViewProj"].SetValue(
CreateLightViewProjectionMatrix());
if (!createShadowMap)
hiDefShadowEffect.Parameters["ShadowMap"].SetValue(
shadowRenderTarget);
}
22. In your game's
Draw()method, start by setting theGraphicsDeviceto render to theshadowRenderTarget:GraphicsDevice.SetRenderTarget(shadowRenderTarget); GraphicsDevice.Clear(Color.White); PopulateShadowEffect(true);
23. Next, render any shadow casting objects using the
hiDefShadowEffect:sphere.Draw(hiDefShadowEffect);
24. Switch the rendering from the
shadowRenderTarget, back to the screen:GraphicsDevice.SetRenderTarget(null); GraphicsDevice.BlendState = BlendState.Opaque; GraphicsDevice.DepthStencilState = DepthStencilState.Default; PopulateShadowEffect(false);
25. Set the texture of the
hiDefShadowEffectto the corresponding scene object, and render it in a similar fashion to this (wherefloorTexturehas already been loaded with the texture for the floor):hiDefShadowEffect.Parameters["Texture"].SetValue(floorTexture); floor.Draw(hiDefShadowEffect);
26. For any scene objects you don't want shadows to be cast upon, use a shader such as the
BasicEffectshader you created earlier which will do the job nicely:basicEffect.Texture = texture; basicEffect.TextureEnabled = true; sphere.Draw(basicEffect);
Shadow mapping, for all the code and math involved, really comes down to the relatively simple idea of identifying all the spots in a scene where a player can see something but a light cannot, due to an obstruction blocking the light's view.
A depth map is generated from the light's view of the scene, and another from the player's perspective. The shader darkens any pixels that correspond to the player's view being "deeper" than the light's.
In the example given in this recipe, we've set up a 2048 x 2048 24-bit texture to hold our shadow map. Depending on the scene, you may find this is either a waste, or not nearly enough.
In the cases where it's an overkill, don't be afraid to drop the resolution to reclaim some memory for better use elsewhere.
On the other hand, if you find yourself unable to create a large enough shadow map to produce a sufficiently detailed shadow, the addition of blur to a shadow can be a useful tool to diminish or completely eliminate such issues.